ECOWITT WN51E User manual

1
Soil Moisture Sensor
Model: WN51E
Contents
1. Introduction..................................................2
2. Getting Started............................................. 3
2.1 Parts List............................................ 3
3. Overview......................................................3
3.1 Features..............................................4
4. Setup Guide..................................................7
4.1 Install batteries...................................7
5. Wi-Fi Configure with gateway.................... 9
5.1 Pair with Gateway..............................9
5.2 Wi-Fi Connection for the Gateway..11
6. View Online Data on WS View................. 11
7. Custom mode............................................. 14
8. Specification.............................................. 24
9. Warranty Information.................................25

2
1. Introduction
Thanks for purchasing this WN51E soil
moisture sensor. This device measures soil
moisture. The data can be streamed by
GW1000 Wi-Fi Gateway (sold separately) and
can be viewed on our WS View mobile
application after the Wi-Fi configuration done.
Or a receiver console can be used to display
the received sensor value.
The sensor is equipped with a ceramic cap
which acts like a breathing filter for
exchanging soil moisture to its internal sensing
media. This filter has the soil type isolated so
that sensor is not sensitive to type of soil( clay,
sand or fertilization condition etc.).
To ensure the best product performance, please
read this manual and retain it for future
reference.

3
2. Getting Started
2.1 Parts List
One Soil Moisture Sensor
One User Manual
3. Overview
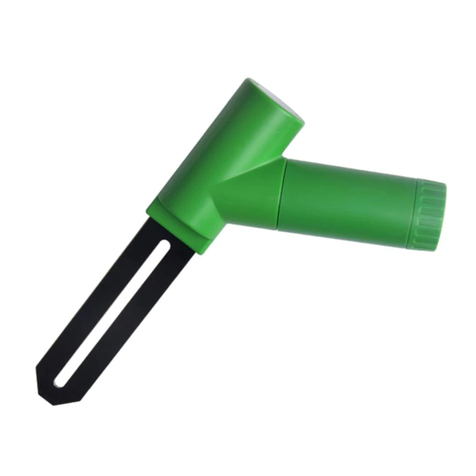
1
LED Indicator (RF transmission)
2
Battery Cap
3
Soil Moisture Sensor cap

4
3.1 Features
Soil Moisture Sensor
Measures soil moisture content every
71 seconds.
Sensor covered with ceramics for
more accurate measurement.
Custom Mode: with 0%AD and
100%AD custom mode to manually
calibrate the low/high moisture value
so that you can get more accurate
result for different soil types. This
mode can only be activated through
WS View app and in live data display
mode.
Long wireless range, up to 300 feet
(100 meters) in open areas

5
When paired with a GW1000 Wi-Fi
Gateway:
Monitor live sensor data on the Live
Data page of the WS View app
(requires the gateway and your phone
is using the same Wi-Fi network)
Up to 8 channels supported. Channel
names can be edited on the app.
When paired with a Weather Station
Console (HP2551/HP3500/HP3501):
View soil moisture data in real-time
on the Display
Up to 8 channels supported. Channel
names can be edited on the Display
(for HP2551 only).

6
When uploaded to Ecowitt Weather Server:
View current soil moisture data &
history records & graph on the
website
Set and receive email alerts from the
server
Channel names can be edited on the
website
Remote monitoring with smart phone,
laptop, or computer by visiting the
website
Note: The WH51 and WN51E will be
recognized as the same sensor type by the
software. If you purchased both, they will
share the eight channels together and the total
quantity of the two sensors could not exceed
eight.

7
4. Setup Guide
4.1 Install batteries
1.Open the battery cap of the soil moisture
sensor
2.Insert one AA battery and close battery door.
3.After inserting the battery, the remote sensor

8
LED indicator will light for 4 seconds, and
then flash once per 71 second thereafter.
Each time it flashes, the sensor is
transmitting data. You may go to Section 5
now to complete the GW1000 gateway
configuration first to make its data displayed
and resume the steps followed below.
4. Before install the sensor into its permanent
location, we would suggest test the sensor in
air, and see if moisture reading is 0. And
then put the sensor into a cup of water, the
sensor should have its reading increased to
90% or above. Once sensor detected a
significant data change, sensor will transmit
every 10s. Once sensor has been confirmed
working correctly, then you can go to next
step.
5. Use a tool to dig a hole and put the sensor in
soil. The hole depth should be same as the

9
sensing cap size, and bury the sensor
completely in the soil. Please do not use
excessive force to push the sensor into the
soil and this might have the ceramic cap
broken.
5. Wi-Fi Configure with gateway
To view the soil moisture data on your mobile
application and receive email alerts on our
weather server, you need to pair this device
with our GW1000 Wi-Fi Gateway or
HP2551/HP3500/HP3501 Weather Station
(sold separately).
5.1 Pair with Gateway
If GW1000 has been in operation, and you
have never had any WN51E soil moisture
sensor setup before, just power up the sensor
and GW1000 will pick soil moisture data
automatically. Please make sure your setup on

10
GW1000 has this sensor enabled on sensor ID
setup page.
Note: The gateway can support max 8 soil
moisture sensors. Each new sensor will be
recognized as a new channel according to the
Power-on sequence. You may attach a label of
the channel on each sensor for distinction. The
channel name can be edited both on the app
and Ecowitt Weather server (will not sync).
If you want to use a new WN51E sensor to
replace the old one (already configured on
certain channel), please try the following:
1. Open the Sensor ID page on the WS View
app, and find your old sensor ID.
2. Power off the old sensor and power on the
new sensor.

11
3. Click Re-register on the Sensor ID page.
Then the new sensor will be learned and the
old sensor will be erased.
5.2 Wi-Fi Connection for the Gateway
For this part, please refer to the manual of the
GW1000 Wi-Fi gateway.
Any question, please contact the customer
service.
6. View Online Data on WS View
When the Wi-Fi configuration is done, you can
view the live data of your soil moisture sensor
on the WS View application.

12

13
Note: It requires your phone and the gateway
using the same network to view your sensor
data on the WS View app.
To remote monitor the sensor data, please
upload the data to our free Ecowitt Weather
Server: https://www.ecowitt.net.
Detailed operation instructions can be found
on the GW1000 manual.
Any question, please feel free to contact our

14
7. Custom mode
When in LIVE DATA display mode, you can
calibrate the soil moisture sensor by enable the
Custom mode. (Click More – Choose
Calibration – Choose Soil Calibration – Tick
the box on the left side of the Customize).

15

16

17

18
Custom OFF:
Moisture level is calculated based on default
dry and wet definition:
Dry (0%AD) AD: 70
Wet (100% AD) AD: 500
Soil Moisture = (moisture AD – 0%AD) *
100% / (100% AD – 0%AD )
Example: when sensor moisture AD is 310,
calculated moisture is:
(310 – 70)*100% / (500-70) = 56%.
This is a fixed slope rate linear system.
Custom ON:
When pot soil at dry or wet condition is not
giving the moisture sensor output value that is
close to its default assumption, it will give
inaccurate moisture level results. It is
commonly happening with different soil type

19
that gives very different output value at same
moisture level condition. We introduced this
custom mode to make this slope flexible so
that it can match your soil type.
This becomes a variable slope rate linear
system.
Adjusting principle:
0%AD is used to adjust for dry condition
reading inconsistency.
When the displayed moisture readings are too
high at dry soil condition, you could lower the
slope rate by increasing the 0%AD value.
100%AD is used to adapt for wet condition
reading inconsistency.
When the displayed moisture readings are too
low at extremely wet soil condition, you could

20
decrease the 100%AD value to fix it.
Please refer to the below example for better
understanding.
For example:
When you use this product at the first time,
you may turn off the custom mode and test the
product at the following two situations:
Situation One:
Place the sensor into a glass of fresh water,
and the displayed moisture readings is much
lower than 95%(e.g.70%).
Solution:
Enable custom mode, and adjust the 100%AD
value.
Calculate the 100%AD value with the formula:
Table of contents
Other ECOWITT Accessories manuals
