manuals.online logo
Brands
  1. Home
  2. •
  3. Brands
  4. •
  5. Eddylight
  6. •
  7. Lighting Equipment
  8. •
  9. Eddylight Economy User manual

Eddylight Economy User manual

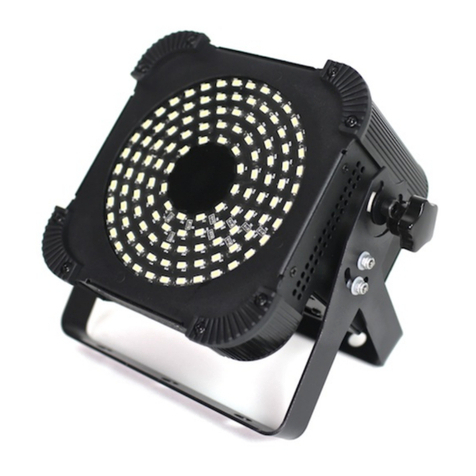
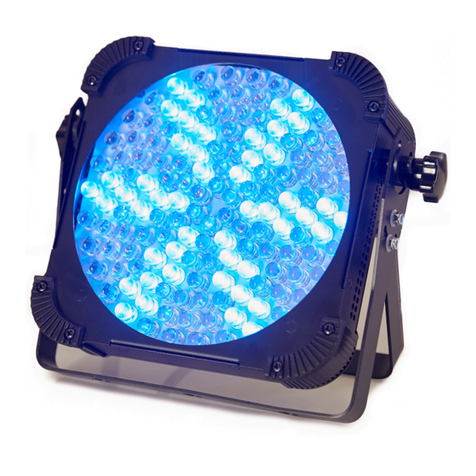
Economy 5 in 1 Flat LED Par
USER MANUAL
Tap the MENU button and UP button or DOWN button until "Addr" is displayed, press
ENTER.
“Axxx” will now be displayed, “x” represents the displayed address. Press the UP or
DOWN buttons to find your desired address.
1
2
WARNING
•To prevent or reduce the risk of electrical shock or fire, do not expose this unit to rain or moisture.
•This may cause severe eye damage. Avoid looking directly into the light source at all times
Unpacking: Thank you for purchasing the 7k5in1.Every 7k5in1 has been thoroughly tested and has been shipped in
perfect operating condition. Carefully check the shipping carton for damage that may have occurred during shipping. If
the carton appears to be damaged, carefully inspect your fixture for any damage and be sure all equipment necessary
to operate the unit has arrived intact. In the event damage has been found or parts are missing, please contact our toll
free customer support number for further instructions.
The 7k5in1 has one, five, seven or eight channel. The fixture can operate in three different operating modes; DMX
contorl,RF contorl sound-active, or in a Master/Slave configuration. The 7k5in1 comes with several built in programs
that can be used, while operating as a dimmer unit or when used in multiples linked in a master/slave configuration.
For best results use fog or special effects smoke to enhance the beams projections.
•RGBWA Color Mixing
•Color Strobe Effect
•Color Mix Effect
•LED Chases (Adjustable Speeds)
•Electronic Dimming 0-100%
•Built in Microphone
•DMX-512 protocol and RF control
•1/5/7/8 DMX Modes
•Voltage:100V~240V/50~60Hz
•LEDs: 7×5W 5in1 LEDs(Red, Green,Blue, White
,Amber)
•Power Consumption:40W
•Fuse: 1 Amp
•Colors: RGBWA Color Mixing
•Maximum Ambient Temperature: 40°C
•Weight: 0.9Kg
INTRODUCTION
FEATURES
Addr-DMX Address Setting via control board
MODES
Please do not return this unit to your dealer without
contacting customer support first.
Tap the MENU button and UP button or DOWN button until "CHND" is displayed, press
ENTER.
“1CH”, “5CH”, “7CH” or “8CH”, will now be displayed, Press the UP or DOWN buttons to
find your desired dmx mode.
3
4
Chnd-DMX MODE Setting Channel Mode
Tap the MENU button until "SLav" is displayed, press ENTER.
"SLav" will now be displayed, Slave mode is confirmed. It will be slaved by auto mode sound
mode and chase mode.
1
2
SLav - This menu will let you select your desired Master/slave mode
Tap the MENU button until "Soun" is displayed, press ENTER.
"Soux" will now be displayed, you can confirm three modes by UP or DOWN for sound mode.
”Se x” will now be displayed by press ENTER, and you can confirm sensitivity by UP or
DOWN for sound mode.
1
2
3
Soun - This menu will let you select your desired sound mode
Tap the MENU button and UP button or DOWN button until "Auto" is displayed, press
ENTER.
"Autx" will now be displayed. You can confirm nine modes by press UP or DOWN for auto
mode.
”SP x” will now be displayed by press ENTER, and you can set speed by UP or DOWN for
Auto mode.
1
2
3
Auto-This menu will let you select your desired auto mode
Tap the MENU button and UP button or DOWN button until "CoLo" is displayed, press
ENTER.
Either "C-X", "X" representing a number between 1 - 51 will be displayed. Press the UP or
DOWN buttons to select either a static color mode. If you select a static color press ENTER
and it will be confirmed.
1
2
Colo - This menu will let you select your desired colour mode
Tap the MENU button and UP button or DOWN button until "STAT" is displayed, press
ENTER.
"rxxx", "Gxxx", "bxxx", "vxx" or "Axxx", "sp xx" will be displayed. then you can adjust it
between 1 - 255 by press press UP or DOWN button and you can select other color by ENTER
to adjust it.
1
2
Stat - This menu will let you select your desired Stat mode
Tap the MENU button until "reno" is displayed, press ENTER.
“on” or ”off” will now be displayed,you can select to close or open the infrared, by the UP or
DOWN buttons.
1
2
Reno - This menu will let you select your desired sound mode
Tap the UP and DOWN button until “rest” is displayed.
“Yes” or “no” will be now displayed, then tap “ENTER” button to rest to original state when
displayed “yes”.
1
2
Rest - Rest to the original state
5CH 7CH 8CH
ch1
ch2
ch3
ch4
ch5
ch6
ch7
ch8
0 - 255
0 - 255
0 - 255
0 - 255
0 - 255
0 - 255
0 - 255
0 - 255
R (0-100%)
G(0-100%)
B(0-100%)
W(0-100%)
A (0-100%)
Dimming (0-100%)
R (0-100%)
G(0-100%)
B(0-100%)
W(0-100%)
A (0-100%)
Strobe speed (Slow-Fast)
Dimming (0-100%
R (0-100%)
G(0-100%)
B(0-100%)
W(0-100%)
A (0-100%)
Functional Channel
Strobe/Programm Speed (Slow-Fast)
0-15 blank, 15-31 auto mode 1,32-47 auto mode 2,****,
208-213 auto mode, 13,230-255 sound mode 2
1 CH
ch 1
0 - 4
5-9
...
250-254
255
LED Off
Colo 1
Colo 50
Colo 51
Tap the UP and DOWN button until “ver” or “temp” is displayed.
“ver” will be now displayed, tap “ENTER” button that soft version number is displayed.
“temp” will be now displayed, tap “ENTER” button that lights temperature is displayed.
1
2
3
Info-Display system information
DMX Channel Function.
1 Channel mode
Factory setting mode is general mode that means this product remote can use remote control.
Before using the individual control mode, setting rolling code mode that means let it learn code.
The learn code is set to “reno-on-fr.s” then tap the “ENTER” button into learn code
condition that display “......” At the same time, tap the “1” and “3” button, it is successful when
display “----” At the moment, this product is only controlled by the learned remote control.
Rest to factory setting, if all the product need to operate by remote control. Way is that “rest” -
“Yes” and “ENTER” button.
1
2
3
FR Controller
FR Remote control Setting Instruction
DMX
AUTO
1
AUTO
2
SOUND
1
0
1 2 3
4
P5
W6
A
7
R8
G9
B
SOUND
2
STROBE
SPEED
UP
DOWN
SLAVE
Power On/Off button
DMX button, to control DMX address when press
this button. It is channel mode when double click.
Master - Slave mode button.
Automatic mode buttons
Sound mode buttons
Speed adjustive button
Up and Down button, you
can choose the program
that you need or numerical.
Color choosing buttons
Strobe button

Other Eddylight Lighting Equipment manuals

Eddylight DSY-LED252-IP65-RGB User manual

Eddylight

Eddylight DSY-LED252-IP65-RGB User manual

Eddylight EDD-VP-S120 User manual

Eddylight

Eddylight EDD-VP-S120 User manual

Eddylight EDD-GL-183 User manual

Eddylight

Eddylight EDD-GL-183 User manual

Eddylight DSY-LED252-IP65-RGB User manual

Eddylight

Eddylight DSY-LED252-IP65-RGB User manual

Eddylight 4 in 1 RGBW SlimPar LED Q18 User manual

Eddylight

Eddylight 4 in 1 RGBW SlimPar LED Q18 User manual

Eddylight EDD-RP-WBIF1006 User manual

Eddylight

Eddylight EDD-RP-WBIF1006 User manual

Eddylight DSY-LED252-IP65-RGB User manual

Eddylight

Eddylight DSY-LED252-IP65-RGB User manual

Eddylight LED GOBO User manual

Eddylight

Eddylight LED GOBO User manual

Eddylight DS-1404A User manual

Eddylight

Eddylight DS-1404A User manual

Eddylight LED PAR 64 User manual

Eddylight

Eddylight LED PAR 64 User manual

Popular Lighting Equipment manuals by other brands

EuroLite LED PMB-8 COB user manual

EuroLite

EuroLite LED PMB-8 COB user manual

Minuit Une IVL Square Service manual

Minuit Une

Minuit Une IVL Square Service manual

Kessel Linearis Super 60 manual

Kessel

Kessel Linearis Super 60 manual

Xtralite omni XL20719 instruction manual

Xtralite

Xtralite omni XL20719 instruction manual

Sygonix SY-4722036 operating instructions

Sygonix

Sygonix SY-4722036 operating instructions

Wheelock AC-MAX-A installation instructions

Wheelock

Wheelock AC-MAX-A installation instructions

Jegs 555-41810 quick start guide

Jegs

Jegs 555-41810 quick start guide

Inspire Poria instruction manual

Inspire

Inspire Poria instruction manual

Anolis ArcSource Outdoor 48 MC User instructions

Anolis

Anolis ArcSource Outdoor 48 MC User instructions

Anslut 422-435 User instructions

Anslut

Anslut 422-435 User instructions

Hubbell NXP2 Series quick start guide

Hubbell

Hubbell NXP2 Series quick start guide

Astera NYX BULB FP5-E27 user manual

Astera

Astera NYX BULB FP5-E27 user manual

Kogan SMARTERHOME KA2MWPLTSPA user guide

Kogan

Kogan SMARTERHOME KA2MWPLTSPA user guide

MG PATLABOR IT60SA3 instruction manual

MG

MG PATLABOR IT60SA3 instruction manual

Prolux LED FOLLOW 350 user manual

Prolux

Prolux LED FOLLOW 350 user manual

Image Engineering lightSTUDIO user manual

Image Engineering

Image Engineering lightSTUDIO user manual

Heitronic 39888 installation instructions

Heitronic

Heitronic 39888 installation instructions

TKH 921 Installation and maintenance instructions

TKH

TKH 921 Installation and maintenance instructions

manuals.online logo
manuals.online logoBrands
  • About & Mission
  • Contact us
  • Privacy Policy
  • Terms and Conditions

Copyright 2025 Manuals.Online. All Rights Reserved.