Quick Start Guide
– 2 –
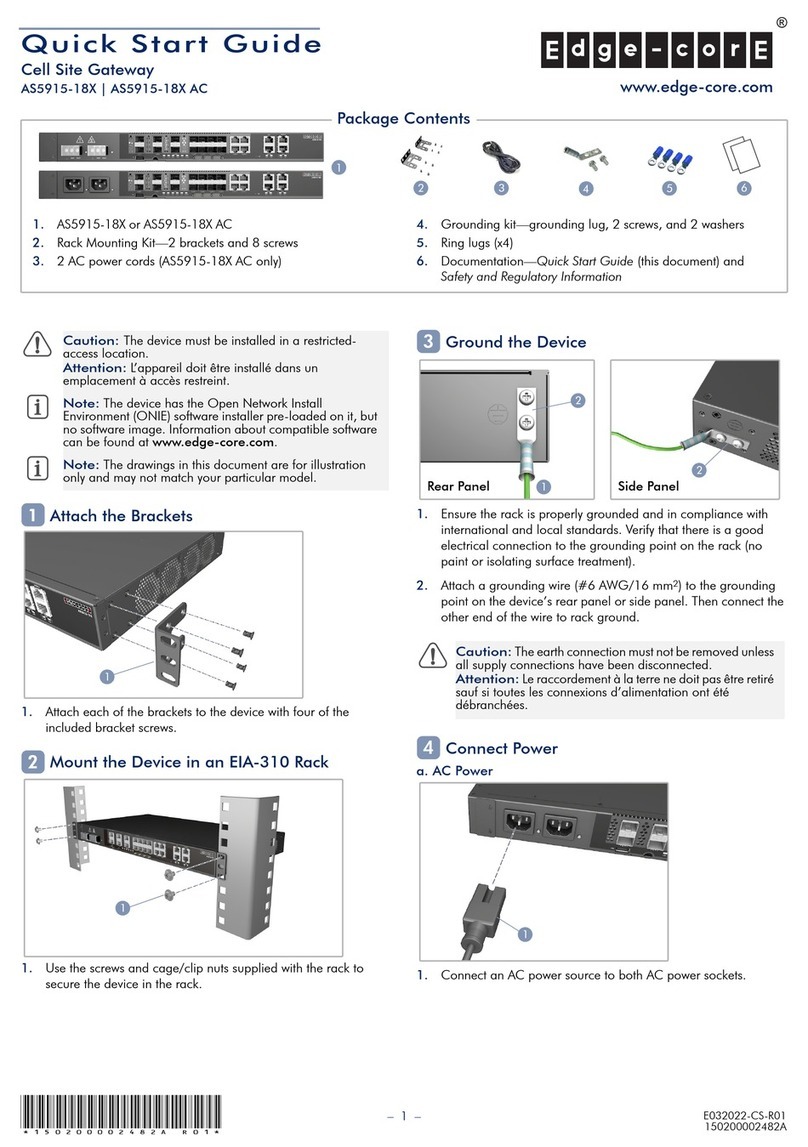
b. DC Power
1. Install one or two DC PSUs (part number CRXT-T0T12B only) in
the device, if they are not already installed in the factory.
2. Connect an external DC power source to the PSUs. Or, connect
to a no-tolerance DC mains supply with a UL/CSA-approved
circuit breaker rated at 16 A.
1. Connect the ground wire / protective earth.
2. Connect the 36 – 72 VDC wire.
3. Connect the DC return wire.
Verify Power Status
1. Verify the device is receiving power by checking the system LEDs.
After power on, the PSU1/PSU2, DIAG, ALRM, and FAN LEDs
should all be on green.
Connect Network Cables
1. For the RJ-45 Management port, connect 100-ohm Category 5,
5e or better twisted-pair cable.
2. Connect DAC cables to the SFP+/SFP28/QSFP28 slots. Or first
install SFP+/SFP28/QSFP28 transceivers in the slots and then
connect fiber optic cabling to the transceiver ports.
3. As connections are made, check the port status LEDs to be sure
the links are valid.
Connect Timing Ports and GNSS Antenna
1. Use a shielded cable to connect the Building-Integrated Timing
Supply (BITS) port to other devices that use BITS synchronization
signals.
2. Use a shielded cable to connect the Pulse-Per-Second (PPS) /
Time-of-Day (ToD) port to other devices that use these
synchronization signals.
3. Attach an external GNSS antenna to the GNSS Antenna port for
clock synchronization with GPS time.
Perform Initial System Boot
1. If the network operating system (NOS) installer is located on a
network server, first connect the RJ-45 Management (Mgmt) port
to the network using 100-ohm Category 5, 5e or better twisted-
pair cable. (Not required if the NOS installer is located on
attached storage.)
2. Boot the device. Wait for the ONIE software to locate and
execute the NOS installer, and then wait for the installer to load
the NOS software image.
Subsequent device boots will bypass ONIE and directly run the
NOS software.
Caution:
Before connecting power supply cables to the
device, ensure that power to the feed lines is turned off at the
supply circuit breaker or disconnected from the power bus.
Attention:
Avant de connecter les câbles d’alimentation à
l’appareil, assurez-vous que l’alimentation des lignes
d’alimentation est coupée au niveau du disjoncteur
d’alimentation ou déconnectée du bus d’alimentation.
Caution:
Use a UL/IEC/EN 60950-1 certified power
supply to connect to a DC converter, and a #14 AWG/
1.5 mm2(for 36 VDC to 72 VDC PSU) wire to connect to a
DC PSU.
Attention:
Utilisez une alimentation certifiée UL/IEC/EN
60950-1 pour le connecter à un convertisseur CC et un
câble AWG #14/1.5 mm2 (pour 36 VDC à 72 VDC) pour
vous connecter à une alimentation CC.
2
1
321
5
1
Note:
Refer to the network operating system (NOS) installer
and NOS documentation for details on software options
and set up for ONIE.
6
2
3
1
7
2
3
1
8
