Edwards & Co Ed & Co multi-fix PA0101 User manual

Instruction
manual
Ed & Co™ multi-fix™
capsule base series 2
Model PA0101
Keep for future reference.
To reduce the risk of serious injury or death, read this owner’s
manual prior to installing and using this product.
The multi-fix base and capsule are suitable for infants up to 13 kg.
Conforms to European ECE R44/04 in Group 0+ as approved by
Land Transport NZ.
designed in NZ

Hey there!
Firstly, thanks for choosing Edwards & Co - it truly means a lot to us
that you have chosen our capsule and base to keep your family safe.
We have put a great deal of eort into ensuring that your base is the
safest it can be. Our bases are rigorously crash tested and certified to
the latest European safety standards in the Netherlands. To get the
maximum safety from your base, it is very important that you read
this instruction manual carefully. In particular, pay attention to the
warnings included as well as the correct installation methods provid-
ed. Subtle dierences can make a huge dierence when it comes to
safety.
We believe in long lasting relationships with our customers and we’d
love you to keep in touch. You can sign up for our website
newsletter or follow us on Facebook. Please remember that if you
need anything we’re a simple phone call or email away.
Enjoy your product, and remember to read this manual carefully!
Regards
Mark Edwards Warwick Edwards
WEB - edwardsandcobaby.com
FB - facebook.com/edwardsandcobaby
Introduction
designed in NZ

GENERAL WARNINGS
To reduce the risk of SERIOUS INJURY or DEATH, read this owner’s
manual and your vehicle owner’s manual before installing and using
this base. By properly using this base and following these instructions,
you will greatly reduce the risk of serious injury or death to your child
from a collision.
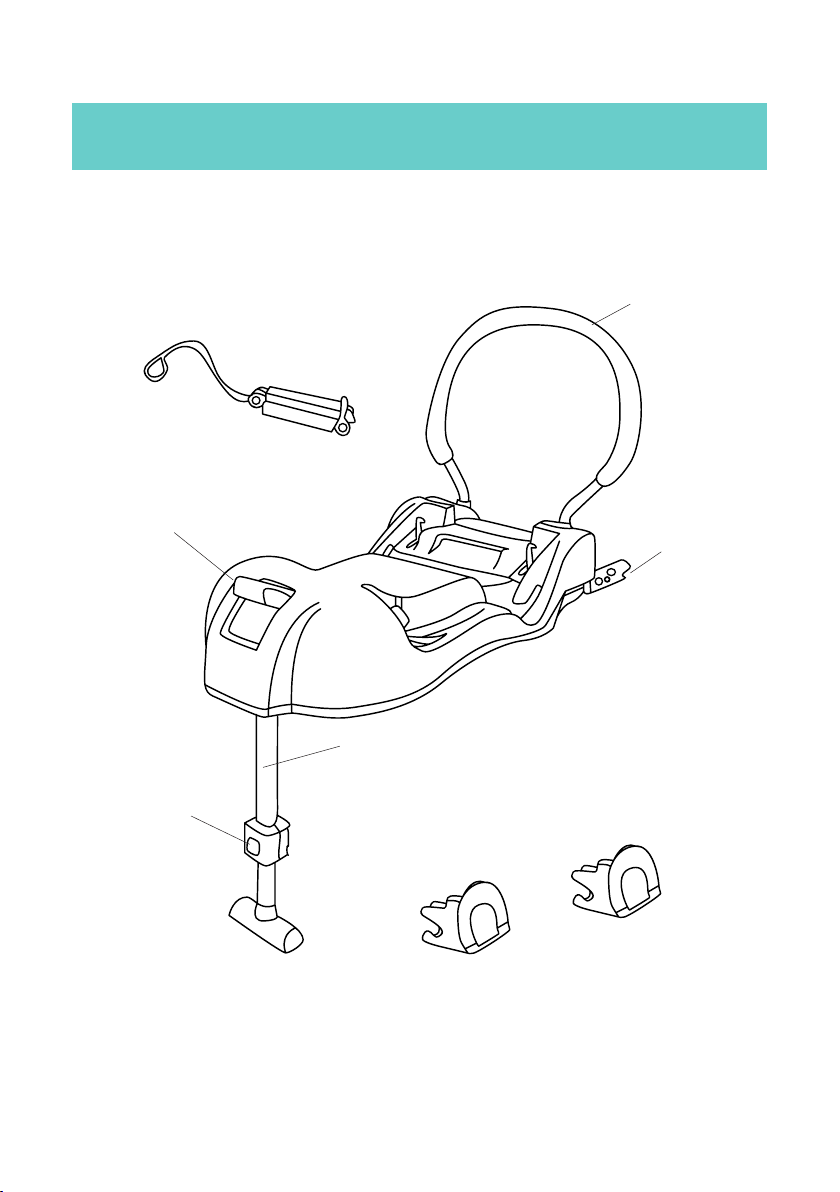
• This product is designed to be used with ISOFIX OR Belt Fix.
NEVER use the device with both ISOFIX and Belt Fix anchors
together as this may negatively impact its performance in a crash.
• The multi-fix base is an approved ISOFIX CHILD RESTRAINT
SYSTEM. It is approved to regulation No.44/04.
• The base can fit vehicles with positions approved with ISOFIX
anchors, depending on the category of the child seat and of the
fixture. ALWAYS refer to your vehicle’s handbook before using
base. The mass group and the ISOFIX size class for which this
device is intended is: Group 0+, E – ISO/R1.
• When the device is used with a car seat 3-point seat belt, it is only
suitable for use in the listed vehicles fitted 3 point, approved to
ECE Regulation No.16 or equivalent standards.
• This base can only be used with the Ed & Co Car Seat Capsule.
NEVER use this product with another capsule shell.
• NEVER LEAVE YOUR CHILD UNATTENDED IN THE CAR SEAT.
• NEVER USE THE BASE IN A PASSENGER SEAT FITTED
WITH AIRBAGS. ONLY FIT to a forward-facing passenger seat.
• NEVER use the product without fastening it into your vehicle.
• NEVER alter or modify the product in any way as this may aect
its performance in the event of a collision.
• The base is suitable from birth up to 13kg (approximately 12-15
months old).
• DISCARD the base if it is involved in a serious collision EVEN if no
damage is visible.
• NEVER place heavy items on top of the base as this may distort
the plastic.
• Do not store in areas that may get particularly hot in summer, like
roof space, car boots or beside shed walls.
• Do not to use this base if it is older than 7 years from the
manufacture date (the manufacture date is stamped on it’s
underside) as it’s performance in an accident may be reduced. 3
designed in NZ

Features of your car seat base
4
designed in NZ
ISOFIX Installation Guides
Stabiliser Guard
Seat Belt Lock-o
ISOFIX Fixing
Lock
Stand
Stand Release
Button
Car Seat Release Button

Where to install your base
IMPORTANT - This multi-fix base is only suitable for approved vehicles
fitted with ISOFIX or 3 point seat static or retractable seat belt.
IMPORTANT - Only install the seat in a forward-facing passenger seat
as indicated in Figure (1) above. A forward-facing seat is one that
faces in the direction of the car’s movement. Do not install into a rear-
facing or side-facing passenger seat as pictured in Figure (2) above.
IMPORTANT - Do not install the car seat in a passenger seat fitted
with airbags.
5
1. 2.
designed in NZ
ISOFIX Fixing
Lock

Important information
This multi-fix base may be installed to your car using the ISOFIX
system (if fitted) OR the 3-point seat belt system.
Refer to the section “Where to install your base” for the locations
suitable for installation.
ISOFIX
The ISOFIX system consists of two anchors
at the bottom corner of your vehicle’s
passenger seats.
Always refer to your vehicle’s handbook
before using the ISOFIX system.
The ISOFIX installation guides are not
necessary if not using the ISOFIX system.
Always check the ISOFIX fixing locks are
correctly installed following the guides as
shown in Figure (1), (2) and (3).
Check the installation by pulling the base.
6
designed in NZ
YES
NO

Assembling the base
This section shows how to assemble the base when opened from the
box.
Tools required - small “Phillips” screwdriver
Put the tubes on the stabiliser guards into the
socket.
Press the tube down firmly until they reach
the bottom of the socket.
Using a Phillips screwdriver, fasten the
included screws into the stabiliser tubing.
Pull the stabiliser guard to check it’s secured.
When using the ISOFIX installation system,
extend the fixing lock by lifting the latch
and turning the lock in the direction of the
arrow.
Using the ISOFIX arms
The fixing locks can be stowed when not in
use.
IMPORTANT - always stow the ISOFIX fixing
lock as pictured in Figure (3) if installing
your base using the 3-point seat belt
method.
7
1
2
3

Installing the base using ISOFIX
Insert the ISOFIX installation guides in
between the seat fabric as shown in
Figure (1).
These guides make installing the base
easier by uncovering the location of
your vehicle’s ISOFIX anchors. They
aren’t always helpful depending on your
vehicle. Don’t use them if not required.
Insert the ISOFIX fixing lock through the installation guides (if you are
using them) and connect them to the ISOFIX anchor in your vehicle as
shown in Figure (3) and (4).
You should hear a distinct CLICK! when the lock connects to the
ISOFIX anchor.
Figure (5) pictures the correct setting displayed on the fixing lock
upon a correct installation. A green indicator will be shown once
installed as indicated.
WARNING - always check the indicator matches Figure (5) before use.
Double check the connection by pulling the base against the anchor.
There should be a very strong, tight, connection.
8
Open the base stand by pressing the
stand release button and moving the
locking clip from position 2 to 1 as
shown in Figure (2).
NO
YES
345
21
1
2
designed in NZ

Installing the base using ISOFIX
Press the stand release button and extend
the stand feet to lightly touch the floor of
your vehicle.
WARNING - always check that the base sits level or slightly sloped
towards the bottom of your vehicle’s passenger seat. You can use
the level indicator found on the car seat capsule for guidance (see the
instructions provided for your capsule).
An incorrectly installed car seat may cause death or injury. If you
are unsure, please contact us or talk to your local Child Restraint
Technician, found via the New Zealand Transport Agency website -
www.nzta.govt.nz
9
Removing the base using ISOFIX
Remove the ISOFIX fixing lock by pressing the release button as
shown in Figure (1).
Retract the stand by pressing the stand release button and pushing it
back into its housing as shown in Figure (2).
Retract the ISOFIX fixing lock into its housing as shown in Figure (3).
Retract the stand into its housing as shown in Figure (4).
1 2
12 3 4
designed in NZ

Installing the base using seat belts
Open the base stand by pressing the stand release button and moving
the locking clip from position 2 to 1 as shown in Figure (2) on page 8.
1. Thread the lap belt and
shoulder belt of your vehicle’s
3-point seat belt through
the seat belt guide stickers
found on the base (as shown
in Figure (1) and connect the
buckle as shown in Figure (2).
2. Put your weight down onto the
base and pull the seat belts
as tight as you physically can,
then attach the belt-lock as
shown in Figure (2). The belt-
lock should always be on the
same side of the base as the
car buckle. Note - if you find
the seat belt buckle is too long,
you can twist it up to three
times to shorten it.
3. If you car is fitted with an
Automatic Locking Retractor
(ALR), pull the shoulder belt
all the way out, then slowly
release it until you hear a
clicking/racheting sound.
Release it until the belt is tight.
10
designed in NZ
IMPORTANT - make sure the lap belt and shoulder belt are tightly
wrapped around the seat before use. We suggest a few attempts to
get it as tight as possible.
IMPORTANT - for vehicles with leather seats we recommend the use
of a rubber mat to reduce movement of the base.
WARNING - the belt should be flat against the frame of the base. If
belt is crimped or twisted, reinstall the base.
1
2

Press the stand release button and extend the
stand feet to lightly touch the floor of your
vehicle.
Installing the base using seat belts
The completed installation should
resemble the figure on the left.
WARNING - when installing the base with seat belts, it is only suitable
for 3-point static or retractable versions.
WARNING - always check that the base sits level or slightly sloped
towards the bottom of your vehicle’s passenger seat. You can use
the level indicator found on the car seat capsule for guidance (see the
instructions provided for your capsule).
An incorrectly installed car seat can cause death or injury. If you’re
unsure about the installation, please contact us or talk to your local
Child Restraint Technician via the New Zealand Transport Agency
website - www.nzta.govt.nz
11
designed in NZ

Installing and removing capsule
Installing:
Place the car seat capsule onto the base
until you hear a distinct CLICK! The
capsule should be firmly secured. You
can check this by firmly pulling the seat
upwards.
IMPORTANT - The handle must be
positioned in B when driving.
Removing:
With the handle in position A, press the
red lever downwards and lift the car seat
up at the same time.
12
designed in NZ
A
B
Caring for your base
Cleaning the base:
• Wipe with a mild solution of soap and water.
• NEVER use household detergents as they can weaken the plastic.
Important information:
• NEVER lubricate or oil any part of the base.
• NEVER use solvents, harsh detergents or washing up liquids.
• Dry thoroughly before storage.
• Store in a well-ventilated area, away from direct sunlight.
• Store in a safe place when it is not being used. Avoid placing
heavy objects on top of it.
• NEVER allow the seat to come into contact with corrosive sub-
stances such as battery acid or petroleum products.

Warranty information
All Edwards & Co products are guaranteed for two years from the
date of purchase against defects in material and workmanship.
If we determine that the product has a manufacturing fault, we will
repair or replace it free of charge to you. The decision to repair
or replace is solely at the discretion of Edwards & Co. Proof of
purchase must be provided.
The warranty is “return to base” and not a free in-home service. This
means the customer is responsible for any inwards freight charge to
return the product to an Edwards & Co representative for warranty
or service.
Our warranty excludes claims resulting from misuse, abnormal use,
overloading, general wear and tear, child outgrowing the product,
not following instructions, transportation damage (including airline
or freight damage), poorly maintained product, dropped goods,
negligence, second-hand product, modified product, colour fading,
mould, damage to inner foam in use or fabric cuts and tears.
The warranty excludes repairs to car seats that have been involved
in a car accident.
Any replacement will not give the right for the warranty period to be
extended.
Edwards & Co does not cover warranty if the product has been pur-
chased second hand or from an unauthorised reseller.
For the complete terms and conditions of our warranty, please visit
our website - www.edwardsandcobaby.com/warranty
13
designed in NZ

edwardsandcobaby.com
Other manuals for Ed & Co multi-fix PA0101
1
Table of contents
Other Edwards & Co Car Seat manuals

Edwards & Co
Edwards & Co Ed & Co FA005 User manual

Edwards & Co
Edwards & Co PA0100 User manual

Edwards & Co
Edwards & Co Ed & Co multi-fix PA0101 User manual

Edwards & Co
Edwards & Co sicuro ISOFIX User manual

Edwards & Co
Edwards & Co AVERY FA0062 User manual

Edwards & Co
Edwards & Co Capsule 2 Series User manual

Edwards & Co
Edwards & Co Avery Base Unit User manual