Efficient Networks SpeedStream 3000 Series User manual

Part No. 007-3005-001, Rev B
6SHHG6WUHDP
$'6/,QWHUQDO0RGHP
,QVWDOODWLRQ*XLGH
6HULHV


Efficient Networks, Inc. 1
Copyright 1999, Efficient Networks, Inc.
All rights reserved. Printed in the U.S.A.
Product names mentioned herein may be trademarks and/or registered trademarks of their respective companies. Ef-
ficient Networks, Inc. shall not be liable for technical or editorial errors or omissions in this document; nor for inci-
dental or consequential damages resulting from the furnishing, performance, or use of this material.
Efficient Networks, Inc. – Single-use Software License and Warranty
This documentation and the accompanying computer programs (collectively, the Software) are licensed, not sold, to
the End User by EFFICIENT NETWORKS, INC. (“ENI”) for use only under the following terms. ENI reserves any
right not expressly granted to the End User. The End User owns the media on which the Software is recorded but ENI
retains ownership of all copies of the Software itself. The End User assumes sole responsibility for the installation,
use, and results obtained from use of the Software. If the product that you acquired is an upgrade, then the terms and
conditions ofthis agreement apply equally to the upgraded product.
1. License. This License allows the End User, together with its authorized employees, to do only the following:
(a) Install and archive the Software on one (and only one) Remote Access Unit, IBM PC, Sun Workstation, or
compatible equivalent personal computer or workstation for electronic transfer to, and use and execution on
and with one (and only one) module or product of ENI equipment for use only by the End User.
(b) Make one (and only one) copy in machine-readable form solely for backup or archival purposes for the com-
puter on which the Software is installed. The Software is protected by copyright law. As an express condition
of this license, the End User must reproduce on the copy the ENI copyright notice and any other proprietary
legends on the original copy supplied by ENI. This restriction on copying the Software expires upon the expi-
ration of all underlying copyrights.
2. Restrictions. The End User may NOT sublicense, assign, or distribute copies of the Software to others. The Soft-
ware contains trade secrets and to protect them, the End User may NOT decompile, reverse engineer, disassemble,
or otherwise reduce the Software to a human perceivable form. The End User may not modify, adapt, translate,
rent, lease, loan, resell for profit, distribute, or otherwise assign or transfer the software, or create derivative
works based upon the software or any part thereof.
3. Protection and Security. The End User agrees not to deliver or otherwise make available the Software, including
without limitation the object code of the Software, to any party other than its authorized employees, except for pur-
poses specifically related to the End User’s authorized use of the Software on ENI Products, without the prior written
consent of ENI. The End User agrees to use its best efforts and to take all reasonable steps to safeguard the Software
to ensure that no unauthorized person shall have access thereto and that no unauthorized copy, publication, disclosure
or distribution in whole or in part, in any form, shall be made. The End User acknowledges that the Software contains
valuable confidential information and trade secrets and that unauthorized use and/or copying are harmful to ENI.
4. Termination. This License is effective until terminated. This License will terminate immediately without notice
from ENI if the End User fails to comply with any of its provisions. Upon termination, the End User must destroy the
Software and all copies thereof, and the End User may terminate this License at any time by doing so.
5. Export Law Assurances. The End User agrees that neither the Software nor any direct product thereof will be
transferred or exported, directly or indirectly, into any country prohibited by the U.S. Export Administration Act and
the regulations thereunder or will be used for any purpose prohibited by that Act.
6. Limited Warranty. ENI warrants that, for ninety (90) days from the date of shipment, the Software shall operate
substantially in accordance with the published functional specifications current at the time of shipment. If a defect
appears, during the warranty period, ENI will use its best efforts to correct the defect within a reasonable time after
notification. The End User agrees that the foregoing constitutes the End User’s sole and exclusive remedy for breach
by ENI under any warranties made under this Agreement. This warranty does not cover any Software that has been
altered or changed in any way by anyone other than ENI. ENI is not responsible for changes made after ordering the
Software to computer hardware, operating systems or test equipment, or for problems in the interaction of the Soft-
ware with software not furnished by ENI.
The Warranty and remedy provided above are exclusive and in lieu of all other warranties, express or implied, includ-
ing but not limited to the implied warranties of merchantability and fitness for a particular purpose. The End User
assumes all risk as to the suitability, quality, and performance of the software. In no event will ENI, or its directors,
officers, employees or affiliates, be liable to the End User for any consequential, incidental, indirect, special or ex-
emplary damages (including damages for loss of business profits, business interruption, loss of data or business in-
formation, and the like) arising out of the use of or inability to use the software or accompanying written materials,
even if ENI or an authorized ENI representative has been advised of the possibility of such damages. ENI’s liability
to the End User (if any) for actual direct damages for any cause whatsoever, and regardless of the form of the action,
will be limited to, and shall not exceed, the amount paid for the License of the Software that caused the damages.
No oral or written information or advice given by ENI or its dealers, distributors, employees or agents shall in any
way extend, modify or add to the foregoing warranty.
7. No Other Rights Granted. Other than the limited license expressly granted herein, no license, whether express or
implied, by estoppel or otherwise, is granted to any copyright, patent, trademark, trade secret, or other proprietary
rights of ENI.

2Efficient Networks, Inc.
8. Licensee Responsibilty And Indemnification. The End User understands and acknowledges that it is solely re-
sponsible for the use it makes of the Software. Accordingly, the End User agrees to indemnify and hold ENI harmless
from any demands, claims or suits by a third party for loss, damages or expenses (including attorney’s fees) arising
out of or related to use of the Software by the End User.
9.Enhancements. From time to time ENI may, in its sole discretion, advise the End User of updates, upgrades, en-
hancements or improvements to the Software and/or new releases of the Software (collectively, Enhancements), and
may license the End User to use such Enhancements to the Software upon payment of such prices therefore as may
then be established by ENI and in effect. All such Enhancements to the Software provided to the End User shall also
be governed by the terms of this License.
10.General. This License will be covered by and construed in accordance with the laws of the State of Texas, and
shall inure to the benefit of ENI and its successor, assignees and legal representatives. If any provision of this license
is held by a court of competent jurisdiction to be invalid or unenforceable to any extent under applicable law, that
provision will be enforced to the maximum extent permissible, and the remaining provisions of this License will re-
main in full force and effect. Any notices or other communications to be sent to ENI must be mailed by certified mail
to the following address:
Efficient Networks, Inc.
4201 Spring Valley Road, Suite 1200
Dallas, Texas 75244
This Agreement constitutes the entire agreement between the parties with respect to the subject matter hereof, and all
prior proposals, agreements, representations, statements and undertakings are hereby expressly canceled and super-
seded. This Agreement may not be changed or amended except by a written instrument executed by a duly authorized
officer of ENI.
11.Acknowledgment. By opening this package, you acknowledge that you have read this License, understand it, and
agree to be bound by its terms and conditions. Should you have any questions concerning this License, contact ENI
at the address shown above.
Efficient Networks, Inc. Hardware Warranty
Efficient Networks, Inc. (ENI) warrants SpeedStream 3000 series Network Interface Controller (NIC), SpeedStream
4000 series Universal Serial Bus (USB), and SpeedStream 5000 series Remote Access Unit (RAU) for a period of 5
years against defects in material or workmanship from the date of purchase. SpeedStream 5010 Remote Access Unit
(RAU) is warranted for 13 months against defects in material or workmanship from the date of purchase. These
warranties extend only to the original consumer of this product. If the NIC, USB or RAU does not function as
warranted during the warranty period, Efficient Networks, Inc. will either repair the defective product or replace it
with a new or remanufactured functionally equivalent product of equal value.

Efficient Networks, Inc. Product Overview 3
Introduction
Product Overview
The SpeedStream driver software provides high-speed connectivity using
Asynchronous Transfer Mode (ATM) over an Asymmetric Digital
Subscriber Line (ADSL). This software is designed to be installed on a
3000 series ADSL Internal Modem. Once it is installed, a modem icon is
added to the taskbar and the status of the internal modem can be seen by
clicking on the modem icon.
Before You Begin
The following sections contain information that is essential for you to
know before you install the hardware and software for your 3000 series
modem. Please read these sections carefully.
Checking the Operating System
Before beginning the installation, you must determine what operating
system is installed on your machine:
1From the Start menu, point to Settings and click Control Panel; then
double-click the System icon.
2In the System applet, click the General tab.
3Note the type of Windows operating system (95, 95A, 95B, 98, or
NT) and the version number.
Refer to Table 1 for installation requirements that are specific to your
machine’s operating system.
Table 1 System Requirements
Windows 95/95A/95B • Minimum of 16 Mbytes RAM, 32 Mbytes
recommended
• Pentium-class processor required
• The PCI bus must support bus mastering.

4Product Overview Efficient Networks, Inc.
NOTE: You may need the Windows (95, 98 or NT) operating system
CD during installation. If you do not have this CD, contact your PC
vendor for details on where the Windows files are stored on your
machine.
Tools Needed for Hardware Installation
In order to properly install the modem hardware, you will need a few
items:
•A Phillips-head screw driver and any other screw-drivers needed for
your PC
•A cable with RJ11 (or RJ45 for 3010 only) connectors on each end
•An anti-static discharge protection device such as a wrist strap or a heel
strap. The anti-static discharge protection device is required when
handling the modem and prevents damage to the electronic components.
Do not leave this to chance! Not using anti-static protection may result
in serious damage to the hardware.
Windows 98 • Minimum of 32 Mbytes recommended
• Pentium-class processor required
• The PCI bus must support bus mastering.
• At least one Virtual Private Networking (VPN)
Adapter must be installed.
Windows NT • Minimum of 32 Mbytes recommended
• Pentium-class processor required
• The PCI bus must support bus mastering.
• Service Pack 3 or greater must be installed.
Table 1 System Requirements

Efficient Networks, Inc. Unpacking and Inspection 5
Hardware
Installation
Unpacking and Inspection
The SpeedStream internal modem should arrive in good condition. Before
unpacking the modem, check for any obvious damage to the packaging
and notify your carrier immediately upon receipt.
WARNING!
To avoid possible damage to modem components or your
system, use an anti-static grounding device when handling the
modem.
1When handling the internal modem, if you do not have an anti-static
wrist-strap or other device on, you can hold onto the metal chassis of
the PC to provide anti-static grounding.
2Remove the modem from the anti-static bag and check for any
damage.
3If there are any visible signs of damage, contact Efficient Networks
Customer support for a Return Materials Authorization number. Please
return the modem in the original anti-static bag and the original
shipping container.
NOTE:
1A suitable Electrical and Fire enclosure shall be provided in the end
product.
2This product is a modem card intended for installation in SELV
circuits of personal computers or similar equipment.
3After installation of this modem card in the end product, the end
product should be in compliance with the enclosure, mounting,
creepages and clearances, markings and segregation requirements of
the end user application. Notably, the end products should provide
installation instructions detailing how to install/remove card cage
accessories.

6Installing the Modem Efficient Networks, Inc.
Installing the Modem
1Shut down the system and turn it off.
2Unplug the system from the power source.
3Remove the cover of the system chassis.
4Touch the system chassis or connect the copper end of the anti–static
wrist strap to a metal component of the chassis to provide grounding.
5Insert the modem into an empty PCI slot after removing the slot
cover, as shown in Figure 2. (The “slot cover” is the metal strip that
covers the opening in the back of the computer chassis into which the
host modem’s external connector fits.)
6Press the modem firmly into the slot to ensure that it is properly
seated. Secure the modem’s end bracket to the chassis with the
bracket screw.
7Replace the chassis cover and apply power to the machine.
Figure 2 Inserting the modem into the PCI Slot

Efficient Networks, Inc. Installing the Modem 7
Modem LEDs
The modem is equipped with an LED that indicates proper cable
connection. This LED is helpful when connecting cabling because it
indicates when the cables have been hooked up correctly. The LED is
illuminated when the modem is trained and is passing ATM data properly.
NOTE: The LED will be lit or will flash when the modem is in
diagnostic loopback mode regardless of what is connected to it.
3010 Connector Information
The pinout of the modem’s Category 3 and 5
UTP jack is different than a standard Ethernet
UTP jack.
Ethernet loopback connectors will not work
on the port and vice versa.
Once the connector is
plugged into a board that is installed in a chassis,
the removal lever on the connector may be hard to
reach. Do not try to pull the connector out of the
port without pushing up on the removal lever.
3020 and 3060 Connector
Information
The modem comes with an RJ11 jack that uses pins
3 and 4. Optionally, the modem may be configured
to use pins 2 and 5. If so, the modem markings will
indicate this.
12345678
Transmit +
Transmit –
Receive –
Receive +
RJ45 Connector
removal
lever
RJ11 Jack
1 2 5 6
3 4
Pinout

8Software Installation Overview Efficient Networks, Inc.
Software Installation
Software Installation Overview
Two types of software drivers are provided on the installation CD: PPP
and CIP/1483. Your service provider will tell you which of these two types
of drivers you need to install.
Furthermore, the first chapter provides a procedure for determining which
Windows operating system is installed on your computer to know which
version of these drivers to install.
Follow the links below to guide you to the correct procedure for installing
your 3000 series modem driver.
To install the PPP Software…
in Windows 95 or 95A go to page 10
in Windows 95B ..........go to page 12
in Windows 98.............go to page 16
in Windows NT ............go to page 19
To install the CIP/1483 Software…
in Windows 95 or 95A go to page 23
in Windows 95B ..........go to page 24
in Windows 98.............go to page 28
in Windows NT ............go to page 31

Efficient Networks, Inc. Installing PPP Software 9
Installing PPP Software
The PPP driver uses Microsoft’s Dial-Up Networking to create a
connection. You must have Dial-Up Networking v1.2 or greater installed
to properly install the PPP driver. Refer to the Introduction section of this
manual for more detail.
Installation Requirements for
PPP in Windows 95/98
Dial-Up Networking (DUN)
If you will be installing in Windows 95 or Windows 98, you will need the
Microsoft Dial-Up Networking application installed. This applet is usually
installed with Windows 98, but the person installing the OS may have
chosen not to install it. Windows 95 operating systems will have to be
upgraded to the correct version of DUN.
To determine if you have the DUN application installed, select Start >
Settings > Control Panel and Add/Remove Programs to ensure that
there is at least one Dial-Up Adapter installed. If there is not, before
installing the internal modem hardware, refer to the procedures below to
install DUN on your system:
1Double-click the My Computer icon on your desktop.
2Double-click:
•Your CD-ROM drive letter.
•Msdun13.exe
3When you are asked “Install MSDUN1.3, continue?”, click Next.
4When you are prompted to restart, click Yes.
Virtual Private Networking
The Microsoft Virtual Private Networking (VPN) adapter is required by
the PPP driver. The VPN adapter is normally provided in Windows 98

10 Installing PPP Software Efficient Networks, Inc.
installation. If it has not been installed or was removed, it must be
re-installed.
To check whether VPN is installed:
1Select My Computer > Control Panel > Network.
2On the Configuration list, there should be a Microsoft Virtual Private
Networking Adapter listed.
3If not, select the Add button and double-click on Adapter.
4Scroll down in the Manufacturers list and select Microsoft.
5Under Network Adapters, double-click on Microsoft Virtual Private
Networking Adapter.
Installation in Windows 95 or
Windows 95A
1After installing the modem hardware, power on the system. When
Windows comes up, insert the software installation CD in the
CD-ROM drive.
2Windows will bring up the New Hardware Found dialog box. Be sure
that Driver from disk is selected before you click OK.

Efficient Networks, Inc. Installing PPP Software 11
3Next, the Install From Disk dialog box will appear. Click Browse and
select the CD-ROM drive from the Drives list.
4Double-click W95-98 and Ppp then click OK.
5Click OK or Next on the Install From Disk dialog box.
6Windows will then begin copying the driver files. After the files are
copied, the installation is complete and Windows will be restarted.
During this process you may be prompted for the Windows 95 OS
installation CD-ROM. If so, insert the CD and enter the path to the
requested files. Click OK.
7At this point, if Dial-Up Networking (DUN) is not installed, a
message is presented saying:
An incorrect version of Dial-Up Networking is installed.
Speedstream PPP requires Dial-Up Networking version 1.2 or
better to run. Please consult the release notes regarding
Dial-Up Networking 1.2 installation before you continue.
If this message appears, click OK and refer to the DUN installation
instructions on page 9.
8When the system comes back up, one or more configuration dialog
boxes may or may not be presented, depending on your service
provider. Configure the settings as directed by your network service
provider. When configuration is complete, if prompted to restart
Windows, click Yes.
9When the system comes back up, you will need to set up your PPP
dial-up connection as described on page 22.
\PPP

12 Installing PPP Software Efficient Networks, Inc.
Installation in Windows 95B
1After installing the modem hardware, power on the system. When
Windows comes up, insert the software installation CD in the
CD-ROM drive.
2The Update Device Driver Wizard dialog (shown on the next page)
will appear. Click Next.

Efficient Networks, Inc. Installing PPP Software 13
3On the next dialog box, click the Other Locations button.
3-a On the Select Other Locations dialog, select Browse.
3-b Click on the CD-ROM drive in the list, select W95-98 and Ppp
then click OK. On the Select Other Location dialog, click OK.

14 Installing PPP Software Efficient Networks, Inc.
4On the Update Device Driver Wizard, click Finish.
5Next, the Insert Disk dialog may appear. Click OK.
Windows will then begin copying the driver files. During this process
you may be prompted for the Windows 95 OS installation CD-ROM.
If so, insert the CD and enter the path to the requested files. Click OK.
6At this point, if Dial-Up Networking (DUN) is required (for PPP
drivers only) but it is not installed, a message is presented saying:
An incorrect version of Dial-Up Networking is installed.
Speedstream PPP requires Dial-Up Networking version 1.2 or
better to run. Please consult the release notes regarding
Dial-Up Networking 1.2 installation before you continue.
If this message appears, click OK and refer to the DUN installation
instructions on page 9.

Efficient Networks, Inc. Installing PPP Software 15
7When the system comes back up, one or more configuration dialog
boxes may or may not be presented, depending on your service
provider. Configure the settings as directed by your network service
provider. When configuration is complete, if prompted to restart
Windows, click Yes.
8When the system comes back up, you will need to set up your PPP
dial-up connection as described on page 22.
Troubleshooting Windows 95
Installation
Recovery from Canceling Installation
An incomplete installation may occur if:
•In Windows 95 or 95A, if you select Do not install a driver on the New
Hardware Found dialog box
•In Windows 95B, if you click Finish on the Update Device Driver
Wizard dialog box without inserting the SpeedStream installation CD
Use the following procedure to clear the partial install from the system.
1Click Start and point to Settings; then click Control Panel.
Double-click System and click the Device Manager tab. Select the
ENI card under “* Other devices”.
2Click Remove. Exit the Device Manager and reboot the machine.
3Shut down and restart the system; then perform the software
installation procedure again.
PPP Driver Installation without Dial-Up Networking
If the drivers are installed on a system that does not have the latest version
of DUN installed, the installation procedure describes what will occur. If
the system is not restarted as required during DUN installation, the
installation software will not be able to create address book entries. To
recover from this situation, use the following procedure to update the
service profile:

16 Installing PPP Software Efficient Networks, Inc.
1Click Start > Settings > Control Panel > Network and click the
Adapters tab (if not already selected). Select the Efficient client and
click the Properties button.
2Click Update.
3Find the profile (.acf file) on the SpeedStream installation CD using
the standard Open dialog box provided.
4SpeedStream configuration dialog boxes will be presented and the
necessary address book entries will be created. Restart Windows.
Installation in Windows 98
1After installing the modem hardware, power on the system.
2When the system comes up, the Add New Hardware Wizard will
appear indicating that the modem was discovered.
3Insert the installation CD-ROM and click Next.

Efficient Networks, Inc. Installing PPP Software 17
4On the next dialog, the first option Search for the best driver for
your device (Recommended) should be selected.
5On the next dialog, select only the checkbox labeled Specify a
location. Then click the Browse button.

18 Installing PPP Software Efficient Networks, Inc.
5-a In the browse list, locate your CD-ROM drive letter and
highlight it, then select the W95-98 folder and Ppp then click
OK.
5-b Click Next on the Add New Hardware Wizard dialog box.
6The Add New Hardware Wizard states that “Windows is now ready to
install the best driver for this device.” Click Next. Windows will then
copy the driver files from your CD-ROM.
As the files are being copied, you may be prompted for the Windows
98 CD. If so, insert the CD and click OK.
7Next you may see the Insert Disk dialog box. Click OK.
8On the Copying Files dialog box, pull down the “Copy files from:”
list and select <drive>: W95-98\Ppp. Click OK.
9Click Finish on the Add New Hardware Wizard.
10 When the driver installation is complete, you will be prompted to
restart Windows. Click Yes.
11 When the system comes back up, one or more configuration dialog
boxes may or may not be presented, depending on your service
provider. Configure the settings as directed by your network service
provider.
12 Click the Finish button to complete the configuration.
13 When the driver installation is complete, set up your dial-up
connection as described on page 22.
Table of contents
Other Efficient Networks Modem manuals
Efficient Networks
Efficient Networks Macintosh Efficient Networks 5260 Manual
Efficient Networks
Efficient Networks Macintosh Efficient Networks 5260 User manual
Efficient Networks
Efficient Networks 5100-a User manual
Efficient Networks
Efficient Networks SpeedStream 5667 User manual
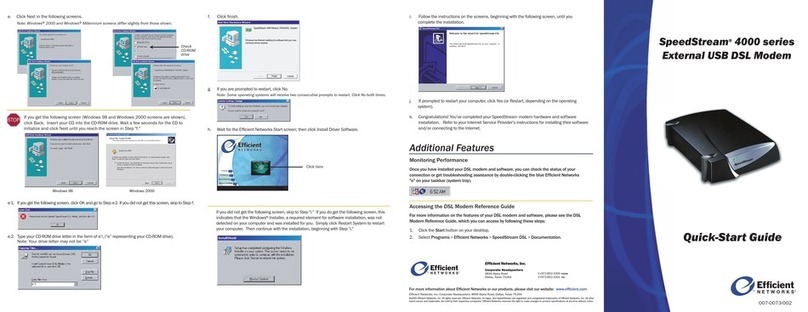
Efficient Networks
Efficient Networks SpeedStream 4000 Series User manual
Efficient Networks
Efficient Networks SpeedStream 5100 Series User manual
Efficient Networks
Efficient Networks 52609x02 User manual
Efficient Networks
Efficient Networks SpeedStream 4000 User manual
Efficient Networks
Efficient Networks SpeedStream 5260 User manual
Efficient Networks
Efficient Networks 5260MC02A User manual
