manuals.online logo
Brands
  1. Home
  2. •
  3. Brands
  4. •
  5. ElectrIQ
  6. •
  7. Air Cleaner
  8. •
  9. ElectrIQ EAP125 User manual

ElectrIQ EAP125 User manual

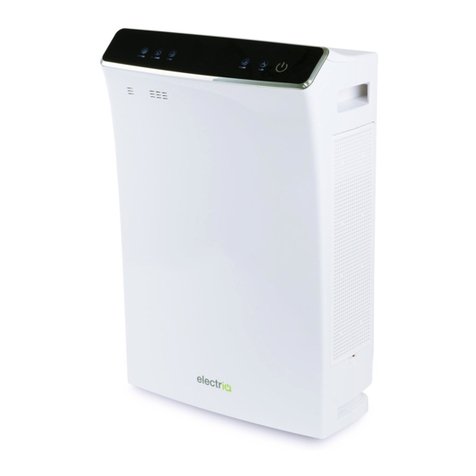
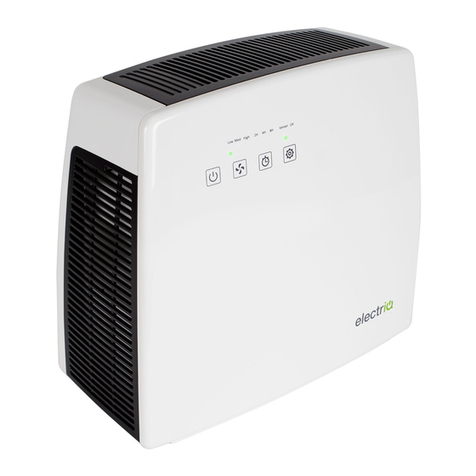
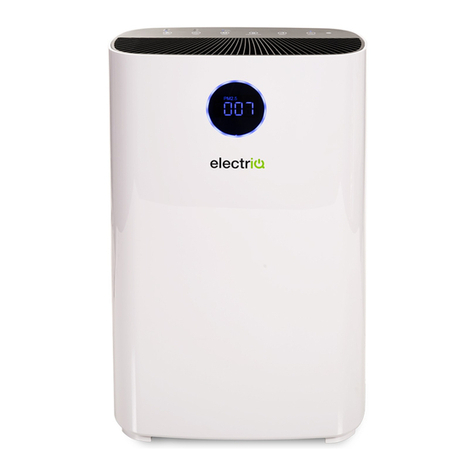
EAP125 Multistage Air Purifier
True HEPA, VOC filter, UV lamp, TiO
2
photo catalysis PCO),
plasma ioniser, advanced activated carbon
USER MANUAL
Thank you for choosing this innovative ElectriQ Air Purifier.
Please read this user manual before using the product and
keep it safe for future reference.
Visit our page www.electriQ.co.uk for our entire range of Intelligent Electricals
All manuals and user guides at all-guides.com
all-guides.com
2
CONTENTS
1.
..
.SAFETY INSTRUCTIONS 3
2.
..
.INDOOR POLUANTS 4
4.
..
.FILTER INSTALLATION 5
5.
..
.DIAGRAM 6
6.
..
.CONTROL AND SETTINGS 7
7. CARE AND MAINTENANCE 7
8.
..
.TROUBLESHOOTING 9
All manuals and user guides at all-guides.com
3
SAFETY INSTRUCTIONS
Important!
•Carefully read the instructions before operating the unit
•his appliance is for indoor use only.
•Rating: his unit must be only connected to a 220-240 V / 50 Hz earthed outlet.
•Installation must be in accordance with regulations of the country where the unit is used.
•If you are in any doubt about the suitability of your electrical supply have it checked and, if necessary,
modified by a qualified electrician.
•Only use with the power cable provided by the manufacturer
•his air purifier has been tested and is safe to use. However, as with any electrical appliance - use it with
care.
•Disconnect the air purifier from socket when changing the filters or cleaning the unit
•Avoid touching any moving parts of the appliance.
•Never insert fingers, pencils or any other objects though the guard
•his device is not intended for use by persons (including children) with reduced physical, sensory or mental
capabilities. It is also not intended for use by those with a lack of experience and knowledge, unless they
have been given supervision or instruction concerning the use of the appliance by a person responsible for
their safety.
•Do not leave children unsupervised with this device.
•Do not clean the unit by spraying it or immersing it in water. Use a damp cloth only
•Do not clean with strong chemical agents or other abrasive materials.
•Never connect the unit to an electrical outlet using an extension cord. If a power outlet is not available, one
should be installed by a qualified electrician.
•Never operate this appliance if the power cord is damaged. Ensure the power cord is not stretched or
exposed to sharp object/edges.
•A damaged power supply should be replaced by the manufacturer. Never extend or attempt to change the
power cord or plug.
•Any service other than regular cleaning or filter replacement should be performed by an authorized service
representative. Failure to comply could result in a voided warranty.
•Do not use the appliance for any other purposes than its intended use.
•Avoid removing the power adapter from socket while unit is still in operation. his could cause electrical
damage.
•Never use the power supply as a switch to start and turn off the air purifier unit. Use the provided ON/OFF
switch located on the control panel.
•Always place the unit on a dry and stable surface.
•he use of accessory attachments that have not been approved by the appliance manufacturer is not
recommended, as this may result in fire, cause an electric shock and/or cause personal injury.
•Ensure hands are fully dried before plugging or unplugging the appliance.
•he appliance should not be installed in laundry or wet rooms.
Energy Saving and Unit Safety Protection Tips
•Do not cover or restrict the airflow from the outlet or inlet grills.
•For maximum performance and safety the minimum distance from a wall or objects should be 20cm. Keep
away from other electrical appliances.
•Keep the filters clean. Under normal conditions, filters should only need cleaning once every two weeks
(approximately). Since the filters remove airborne particles, more frequent cleaning maybe necessary,
depending on the air quality. Replace the filters regularly as instructed.
All manuals and user guides at all-guides.com
4
EAP125HUVC provides 6 stages air purification using professional air filtration and sterilisation.
-Advanced activated carbon filter - removes unpleasant odours and absorbs harmful substances as formaldehydes and
benzenes
-Antibacterial rue HEPA filter - to remove 99.97 % of airborne particles of 0.25 micrometres or larger
-VOC filter - to remove toxic volatile organic compounds and unpleasant smells
-Ultra-violet light - UV light treatment to kill airborne bacteria, germs and viruses
-iO2 filter - itanium Dioxide screen to maximise UV effectiveness to kill 99.97% of germs
-Plasma Ioniser - sterilizes even further and removes mould spores and allergens from the air
Also EAP125HUVC features air quality indicator that will help in monitoring the quality of the air.
Applications:
-Personal use in domestic and office space to improve air quality
-Helps smokers to minimise the effects of smoking
-Helps asthma and pollen sufferers
-Schools, hospitals, hotels, pubs and other public spaces to enhance clean standards
Notes:
his air purifier is not a substitute for proper ventilation, regular vacuum cleaning or for the use of a cooker hood
while cooking.
If the humidity is over 60% Relative Humidity we recommend using a dehumidifier to reduce the humidity.
Information on Indoor Pollutants:
VOC Volatile Organic Compound) – VOC’s come from motor vehicle exhausts, gasoline vapour, pollutants such as
formaldehyde, ammonia and many other common and chemical solvents - like paints and glues or can be a by-
product of mould growth. VOC’s cause irritation to the eyes and or nose as well as causing headaches, nausea, and
even potential damage to the central nervous system. Pressed wood furniture, newly decorated rooms, paint and
cleaning solvents are common sources of VOC’s.
MOLD / FUNGUS – hese can affect our respiratory system and cause allergic reactions, like a runny nose, eye and
throat irritation, headaches, fatigue and aggravation of asthma. Other indoor pollutants include - bacteria, viruses,
dust mites and pollen, etc.
Emissions from electronic office equipment – Many studies, including those from EPA and the University of
California Berkeley, have reported that emissions from office equipment like, computers and printers etc. include
VOC’s, ultra-fine particles and ozone.
hese emissions have been proven to have a negative effect on the health of many people.
Using HEPA and Carbon Activated filters, Plasma Ionization, VOC Filter, TIO2 photocatalyst and UV light.
An effective HEPA filter is absolutely necessary to remove particles, even at a microscopic level; it ensures that
the particles are not spread. Plasma Ioniser will sterilise the air and reduce bacterial growth.
UV light dramatically improve Indoor Air Quality by destroying airborne bio-contaminants such as viruses and
bacteria which may be a leading cause infections and discomfort. Ultraviolet air treatment systems have been
used for more than 50 years in hospitals and various other healthcare industries but with the advent of small
high-efficiency UV Lamps now the technology finds place in the domestic environment.
Photocatalytic oxidation (PCO) is achieved when you combine UV light rays with a TiO2 (titanium oxide)
coated filter. Your ElectriQ air purifier features an advanced VOC Filter coated with iO2 filter. his process of
photo catalytic oxidation creates hydroxyl radicals and super-oxide ions, which are highly reactive electrons
which will react with other elements in the air such as bacteria and especially VOCs. Once bound together, the
chemical reaction takes place between the super-charged particle and the pollutant, effectively burning
("oxidizing") the pollutant. his breaks the pollutant down into harmless carbon dioxide and water molecules,
making the air even cleaner.
he antibacterial activated carbon is a natural material biosynthesized from walnut shell, the adsorption area
of activated carbon is very large up to 900,000 square meters. he activated carbon filter will absorb
unpleasant odours and will help decomposing VOCs when combined with the IO2 filter and UV light.
All manuals and user guides at all-guides.com
5
Operation
Before first use
Installing or replacing the Filters
Note: for convenience the pre-filter HEPA and activated carbon filter are combined in one easy
replaceable filter cartridge.
High performance filters are not washable, keep them dry at all times
and vacuum regularly.)
Installing and replacing filters
1.
Unplug the unit from the socket.
2.
Facing the unit open the front cover from top to bottom.
3.
Remove the filter by pulling the two strings.
4.
Insert new filter pack into the unit. Guide using the strings position on the filter for correct
installation direction.
5.
Reattach the extra pre-filter to the combination Filter.
6.
Reattach the front cover of the unit and push it back securely it into place.
7.
Press and hold POWER/UV-C button for 5 seconds to reset Filter Change Indicator.
8.
Remove the protective plastic wrap before inserting the filter in.
9.
he device should not be turned on until the filter compartment cover is pushed back into
place and secured
Clean or replace the filter cartridge.
1. If necessary wipe the inside of the filter holder with a dry cloth.
2. After maintaining or replacing the filters reverse the above disassembly procedure and return the unit
to original operation mode.
3. Do not connect the unit to a socket before is fully assembled and never operate it without a filter
inside.
FILTER REPLACEMENT INDICATOR
he POWER light blinking continuously indicates that it is time to replace the filter. Replace the filter
according to the directions above then press the POWER/UV-C button and hold it for 5 seconds to
reset the filter sensor. he light will stop blinking.
*Combination Filter will last approximately 9-12 months if unit is correctly maintained.
All manuals and user guides at all-guides.com
6
Diagram of the air purifier
PRE-FILTER: Captures initial dust and allergen particles
ACTIVATED CARBON: Absorb formaldehyde, benzene and other noxious gases.
HEPA: Captures dust, smoke, pollen and other allergens.
UV-C LIGHT: Destroys micro-organisms such as germs, viruses, bacteria and fungi (such as mold).
PCO: When photocatalyst titanium dioxide ( iO2) absorbs Ultraviolet (UV) radiation, it will produce a
chemical reaction that help remove oxidise VOCs, Odors and kill the germs.
Note: for maximum efficiency UV lamp cover is coated with iO2
Ion: Negative ion improves the air quality by combining with dust or reacting with odor molecules
attached on the wall. Plenty of negative ions exist in natural surroundings such as waterfalls or
forests. In this mode, negative ions bring the room air close to this natural environment.
Unit body
UV
& PCO
-
3
in 1 filter
(Pre
-
filte
r &
Activated
-
Carbon filter, HEPA filter)
Front
Panel
ouch panel
Air outlet
All manuals and user guides at all-guides.com
all-guides.com
7
Controls and Settings
“POWER/UV-C” BU ON:
Press this button to turn on or switch off the
unit.
First touch, power is on, UV is off and Ioniser
is off.
Second touch, power is on, UV is on and
Ioniser is on.
hird touch, power is on, UV is off and Ioniser
is off.
Fourth touch, power is off.
“SPEED” BU ON:
Pressing the fan control key you can cycle
between maximum air purification on high
speed to lower air flow but quieter operation
mode with medium fan speed. he fan speed
of the unit can be adjusted when the unit is in
operation (Lo I Medium II High III). Each time
that you press on the (SPEED) button, the
speed is adjusted from L (low) to M (medium)
to H (high).
“TIMER” BU ON:
By pressing this button, the purifier can
be timed to operate for intervals of 2
hours, 4 hours and 8 hours, stopping
automatically when the selected
operating time has elapsed.
1)
Press this button ( imer) to select the
required operating time. A led light
automatically indicates the remaining
operating time.
2)
o select the continuous operating
mode, cycle through until there are no
more indicator lights lit up.
Care and Maintenance
Always shut off the unit and unplug from the mains before cleaning or performing any
maintenance. When it is not in use for long periods it is advisable to remove the plug from the
power socket. Do not use chemical solvents (such as benzene, alcohol or gasoline) as they may cause
irreversible damage to the unit.
Clean the external case
Only use tepid water and a mild detergent on soft cloth. Do not use bleach or abrasives. Do not splash water
directly onto the main unit. Avoid wetting the power connection port. Doing so may cause an electrical shock
and can lead to the insulation to deteriorate, or cause the unit to rust.
Clean the filter and the filter holding area
Hoover the filter with a gentle brush every 2-3 weeks or more often if used in a dustier environment.
All manuals and user guides at all-guides.com
8
Please make sure the filter is not damaged during the process and replace in such occurrence. Wipe
with a dry cloth the filter holding area if necessary.
Front Pre-filter & Carbon filter) Back HEPA filter)
NOTE: Only the extra pre-filter is washable. Make sure the pre-filter is dry when fix back the pre-
filter to the combination filter.
Clean the filter cover and clean air outlet Use water and a mild detergent. Do not use bleach or abrasives. Do
not spray water inside the unit. If the clean air outlet grilles get soiled easily, use a vacuum attachment or soft
brush to clean. If the filter cover is dirty hoover it, if it is heavily soiled wash it with warm soapy water and dry
thoroughly before reinserting it in the unit.
Note: do not assemble the unit and power it before all the parts are completely dry. Any other maintenance
than what is described in this user manual must be only performed by the service centre.
UV LAMP REPLACEMENT
1.
urn of the unit and remove it from the power socket
2.
Open the UV lamp cover by a screw driver.
3.
ake off the UV lamp from the holder carefully and unplug the connector.
4.
Connect the new UV lamp to the connector and fix back the lamp to the holder carefully.
Note: Do not look at the operating UV lamp directly.
All manuals and user guides at all-guides.com
9
Technical Data
Model
EAP1
25
D
Fan Speed
Low
Medium
High
Airflow (m
3
/hr)
1
80
2
10
2
3
6
Noise level (db)
30
4
0
50
Power rating
55
Watts
/
220
-
240 V, 50 hz
Ions
5x10
6
ions/cm
3
Power cord
length
1.5
meters
Net Size
(wxdxh)
32
x16
x
41
cm
Net Weight
4
.2
kgs
Efficiency
Particle Size
Life ime
99.9
7
%
≤0.0003
mm
about 1 year
Carbon Activated Filter
Material
Active Filter
Absorption
Surface
Life ime
Walnut Shell
300,000 m
2
about 1 year
Troubleshooting
he Air purifier does
not seem to work
Is the power plug disconnected
from the wall socket
?
Is the socket switched on? he filter cover panel may not be properly installed,
please re-install.
No
clean air is
delivered or
performance is poor
Please ensure filters are cleaned and the pack
ing was removed
before
installing the filter cartridge
Ensure unit is only operating with a filter cartridge
Set the unit to high fan speed
Investigate if the air purifier is used in a room matching its size and enough
operation time is allowed for larger rooms
Abnormal noise
during operation
Check if the filter cartridge packing was removed during the filter change
Unit may not be on a hard / flat surface. Correct and retry
Air inlet or outlets may be blocked. Remove obstruction and try again. If this
fails contact ElectrIQ support centre
APPENDIX
Disposal: Do not dispose this product as unsorted waste. Collection of such waste must be handled
separately as special treatment is necessary.
Recycling facilities are now available for all customers at which you can deposit your old electrical
products. Customers will be able to take any old electrical equipment to participating civic amenity
sites run by their local councils. Please remember that this equipment will be further handled during the recycling
process, so please be considerate when depositing your equipment. Please contact the local council for details
of your local household waste recycling centres.
All manuals and user guides at all-guides.com
10
UK PRODUCT SUPPORT
www.electriQ.co.uk
Please, for your own convenience, make these simple checks before calling the service
line.
If the unit still fails to operate call: 0871 620 1057 or complete the online form
1. Is the unit plugged into the mains?
2. Is the power supply working?
3. Have you followed the troubleshooting suggestions?
4. Have you cleaned or changed the filters if the unit lost efficiency?
5. Switch the unit off and wait three minutes to see if the issue is resolved. Restart the
unit.
Office hours: 9AM - 5PM Monday to Friday
www.electriQ.co.uk
pUnit 2, The Nursery
Berristow Lane
South Normanton
Derbyshire, DE55 2FX
All manuals and user guides at all-guides.com

Other manuals for EAP125

1

Other ElectrIQ Air Cleaner manuals

ElectrIQ EAPDC150HCST User manual

ElectrIQ

ElectrIQ EAPDC150HCST User manual

ElectrIQ EAP500-WIFI User manual

ElectrIQ

ElectrIQ EAP500-WIFI User manual

ElectrIQ EAP145H User manual

ElectrIQ

ElectrIQ EAP145H User manual

ElectrIQ EAP400M User manual

ElectrIQ

ElectrIQ EAP400M User manual

ElectrIQ EAP400M User manual

ElectrIQ

ElectrIQ EAP400M User manual

ElectrIQ STORM100E User manual

ElectrIQ

ElectrIQ STORM100E User manual

ElectrIQ EAP400D User manual

ElectrIQ

ElectrIQ EAP400D User manual

ElectrIQ ECOCOOL12i User manual

ElectrIQ

ElectrIQ ECOCOOL12i User manual

ElectrIQ ARCTIC User manual

ElectrIQ

ElectrIQ ARCTIC User manual

ElectrIQ IQ-PURECOOLB User manual

ElectrIQ

ElectrIQ IQ-PURECOOLB User manual

ElectrIQ STORM80E User manual

ElectrIQ

ElectrIQ STORM80E User manual

ElectrIQ EAP500HC User manual

ElectrIQ

ElectrIQ EAP500HC User manual

ElectrIQ EAP600HCUV-WIFI User manual

ElectrIQ

ElectrIQ EAP600HCUV-WIFI User manual

ElectrIQ EAP260HC-PM 2.5 User manual

ElectrIQ

ElectrIQ EAP260HC-PM 2.5 User manual

ElectrIQ EAP100D User manual

ElectrIQ

ElectrIQ EAP100D User manual

ElectrIQ EAP500HCUV-WIFI User manual

ElectrIQ

ElectrIQ EAP500HCUV-WIFI User manual

ElectrIQ 1349546 User manual

ElectrIQ

ElectrIQ 1349546 User manual

ElectrIQ EAP400D User manual

ElectrIQ

ElectrIQ EAP400D User manual

ElectrIQ EAP160HUVC User manual

ElectrIQ

ElectrIQ EAP160HUVC User manual

ElectrIQ EAP300PM2.5HC User manual

ElectrIQ

ElectrIQ EAP300PM2.5HC User manual

ElectrIQ ECOCOOL30i User manual

ElectrIQ

ElectrIQ ECOCOOL30i User manual

ElectrIQ EAP300HUVC User manual

ElectrIQ

ElectrIQ EAP300HUVC User manual

ElectrIQ EAP120HC-WIFI User manual

ElectrIQ

ElectrIQ EAP120HC-WIFI User manual

ElectrIQ EAP145H User manual

ElectrIQ

ElectrIQ EAP145H User manual

Popular Air Cleaner manuals by other brands

activTek DUCTWORX owner's manual

activTek

activTek DUCTWORX owner's manual

Crystal air PRO 420 Cleaning instructions

Crystal air

Crystal air PRO 420 Cleaning instructions

NuWave OXYPURE ZERO E1000 owner's manual

NuWave

NuWave OXYPURE ZERO E1000 owner's manual

Alen T500 user manual

Alen

Alen T500 user manual

Membrane Solutions MSA3S manual

Membrane Solutions

Membrane Solutions MSA3S manual

Sharp KC-G60Y Operation manual

Sharp

Sharp KC-G60Y Operation manual

Solaris SLX-AAL-PCO Installation and owner's manual

Solaris

Solaris SLX-AAL-PCO Installation and owner's manual

celios G200 user guide

celios

celios G200 user guide

Transforming Technologies BFN 8412 instruction manual

Transforming Technologies

Transforming Technologies BFN 8412 instruction manual

Infiniton AP-260 user manual

Infiniton

Infiniton AP-260 user manual

U.S. Products OASIS-S-PLUS Information & operating instructions

U.S. Products

U.S. Products OASIS-S-PLUS Information & operating instructions

Mars GENERATION Y user manual

Mars

Mars GENERATION Y user manual

Osmofilter O3 Series user manual

Osmofilter

Osmofilter O3 Series user manual

GeneralAire GUV-2000 Installation & maintenance instructions

GeneralAire

GeneralAire GUV-2000 Installation & maintenance instructions

Hilti AIC 1000-E manual

Hilti

Hilti AIC 1000-E manual

Ideal Warehouse VK-250 Installation and maintenance manual

Ideal Warehouse

Ideal Warehouse VK-250 Installation and maintenance manual

Bioxigen BXMISC2G manual installation, use and maintenance

Bioxigen

Bioxigen BXMISC2G manual installation, use and maintenance

Sharp FP-G50Y Operation manual

Sharp

Sharp FP-G50Y Operation manual

manuals.online logo
manuals.online logoBrands
  • About & Mission
  • Contact us
  • Privacy Policy
  • Terms and Conditions

Copyright 2025 Manuals.Online. All Rights Reserved.