manuals.online logo
Brands
  1. Home
  2. •
  3. Brands
  4. •
  5. Electro-Harmonix
  6. •
  7. Music Pedal
  8. •
  9. Electro-Harmonix TONE TATTOO User manual

Electro-Harmonix TONE TATTOO User manual

1
TONE TATTOO
ANALOG MULTI-EFFECT PEDAL featuring
METAL MUFF, NEO CLONE & MEMORY TOY
Congratulations on your purchase of the fully analog Electro-Harmonix
TONE TATTOO, the first true multi-effect from Electro-Harmonix! The
TONE TATTOO combines three of the most popular guitar effects:
istortion, chorus an elay, into one small an convenient package.
Each section in the TONE TATTOO is taken irectly from some of EHX’s
best selling effects: Metal Muff for istortion, Neo Clone for analog
chorus an analog elay from the Memory Toy.
The effects in the TONE TATTOO are completely in epen ent from each
other. Three separate footswitches, one for each section, allow for
in ivi ual control over which effect is on or off. Each effect has its own
e icate knobs an switches all of which are tweakable at any moment;
there are no menus to scroll through or ual function knobs.
The chain of effects in the TONE TATTOO is fixe as the following:
IN  METAL MUFF  NEO CLONE  MEMORY TOY  OUT
Using the TONE TATTOO is like having three separate effects pedals on
your pedalboard but without the need for the additional cables or separate
power supplies and all in the footprint of one medium sized pedal. The
TONE TATTOO’s footprint is 5.75” x 4.75”.
WARNING: Your Tone Tattoo comes equippe with an Electro-Harmonix
9.6DC-200BI power supply (same as use by Boss
®
& Ibanez
®
: 9.6 Volts
DC 200mA). The Tone Tattoo requires 75mA at 9VDC with a center
negative plug. The Tone Tattoo oes not take batteries. Using the wrong
a apter may amage your unit an voi the warranty.
2
- CONTROL , INDICATOR & I/O -
METAL MUFF ECTION
DRIVE Knob – Controls the amount of input gain. As the DRIVE knob
is turne clockwise, the input gain of the Metal Muff increases an the
soun gets more istorte : getting crunchier, thicker an increasing in
saturation.
BA Knob – Is an EQ control for the bass or low frequency response
of the Metal Muff. At its full clockwise position, the BASS knob provi es
+18.5 B of boost at a center frequency of 105Hz. At its full counter-
clockwise position, this knob provi es -18.5 B of attenuation at the same
center frequency of 105Hz. In the mi le, center- etent position, the
bass frequencies are not altere .
TREBLE Knob – Is an EQ control for the treble or high frequency
response of the Metal Muff. At its full clockwise position, the TREBLE
knob provi es up to +20 B of upper frequency boost starting at 700Hz.
At its full counter-clockwise position, this knob provi es up to -20 B of
upper frequency attenuation starting at the same 700Hz frequency. In
the mi le, center- etent position, the treble frequencies are not altere .
COOP witch – Provi es two settings of attenuation in the mi le
frequency range. The mi le position of the SCOOP switch, labele LO,
provi es a low/me ium amount of scoop, attenuating by -7.5 B,
centere at a frequency of 1.2kHz. The upper position of the SCOOP
switch, labele HI, provi es for a bigger scoop with an increase mi
frequency attenuation of -11 B centere at 1.2kHz. In the own
position, labele OFF, there is no mi frequency attenuation.
GATE Button – When pushe own, the GATE button enables the gate
function of the METAL MUFF. When the GATE button is enable , the
METAL MUFF LED is green. In the up position, the GATE button isables
the gate function an the METAL MUFF LED is RED.
Gate THRE HOLD Knob – Controls the input amplitu e nee e to
open the GATE. As you turn the THRESHOLD knob clockwise, the
amount of gating increases, requiring a lou er signal to open the gate
an allow your instrument to pass through. Turning the THRESHOLD
knob own all the way is equivalent to isabling the GATE function.
Please see Page 4 for more information on how to use the gate function.
3
VOLUME Knob – Controls the overall output volume of the METAL
MUFF section of the TONE TATTOO.
NEO CLONE ECTION
RATE Knob – Controls the Neo Clone’s spee of mo ulation. As you
turn the RATE knob clockwise, the mo ulation spee of the chorus gets
faster. The spee of mo ulation varies from 0.4 Hz to 9 Hz.
DEPTH Button – Changes the intensity, or epth, of the chorus effect
choosing between high an low epth. In the up position, the Neo Clone
chorus is set to low epth, giving a subtle chorus effect. The Neo Clone
LED lights up re in the lower epth position. When the button is pushe
in, the chorus’ epth is set to high for a more intense chorus effect. The
Neo Clone LED lights up green when the button is pushe in.
MEMORY TOY ECTION
DELAY Knob – Controls the elay time of the Memory Toy section of
the Tone Tattoo. As you turn the DELAY knob clockwise, the elay time
increases. The range of elay time is 30mS to 550mS.
FEEDBACK Knob – Controls the number of echo repeats each note
pro uces. As you turn FEEDBACK clockwise, the number of repeats
increases. When you turn FEEDBACK all the way own, you will only
hear one echo for each note you play. If you turn FEEDBACK up to its
maximum clockwise position, the Memory
Toy’s echoes will buil on top of each other for a “run-away” effect after
you play a note. A fairly high fee back setting with short elay settings
pro uces a reverb type of effect.
BLEND Knob – Allows you to vary the mix of the ry signal coming into
the Memory Toy section with the elaye signal pro uce within the
Memory Toy effect. BLEND varies from 100% ry, when set to full
counter-clockwise, to 100% wet at full clockwise.
GAIN Knob – Controls the input gain into the Memory Toy. As you turn
the GAIN knob clockwise the gain increases, making for a lou er overall
effect. The GAIN knob increases the volume of both the ry an elaye
signal. Use the GAIN knob in conjunction with the BLEND knob to set the
Memory Toy to your preferre volume. Please Note: the elay signal will
saturate before the ry signal. The range of the GAIN knob is 0 B to
+23 B.
4
FOOT WITCHE & LEDs
Each effect section of the Tone Tattoo has its own in epen ent
footswitch to toggle the associate effect in an out of bypass. Bypass
through the Tone Tattoo is buffered bypass.
METAL MUFF Footswitch and TATU LED - The footswitch locate
nearest to the IN jack toggles the Metal Muff effect on or off. When the
LED in the Metal Muff
section is lit (either re or green), the Metal Muff effect is active. When
the Metal Muff LED is off, the Metal Muff section is bypasse . A re LED
in the Metal Muff section in icates that the GATE function if off. A green
LED in the Metal Muff section in icates that the GATE is enable .
NEO CLONE Footswitch and TATU LED - The footswitch locate in
the mi le of the Tone Tattoo toggles the Neo Clone effect on or off.
When the LED in the Neo Clone section is lit (either re or green), the
Neo Clone effect is active. When the Neo Clone’s LED is off, the Neo
Clone section is bypasse . A re LED in the Neo Clone section in icates
that the chorus is on its low epth setting. A green LED in the Neo Clone
section in icates that the chorus is set to the high epth setting.
MEMORY TOY Footswitch and TATU LED - The footswitch locate
nearest the OUT jack of the Tone Tattoo toggles the Memory Toy effect
on or off. When the LED in the Memory Toy section is lit, the Memory
Toy effect is active. When the Memory Toy’s LED is off, the Memory Toy
section is bypasse .
I/O & POWER JACK
IN Jack – Connect the output of your instrument or other effects pe al
to the ¼ inch IN jack. The impe ance presente at the IN jack is 1 MΩ.
OUT Jack – Connect the output of the Tone Tattoo to the input of an
amplifier or another effects pe al. The output impe ance varies from
200 Ω to 2.5 kΩ epen ing on which effects are enable an the setting
of the BLEND knob in the Memory Toy.
9V PWR JACK – Connect the output plug of the supplie AC A aptor
into the 9V power jack at the top of the Tone
Tattoo. The Tone Tattoo raws 75mA at 9VDC. The polarity of the power
jack is center negative.
5
- MORE ON THE METAL MUFF’ GATE FUNCTION -
PURPO E - The gate in the Metal Muff section has two main purposes:
1) to re uce the hum when the Metal Muff is set to higher DRIVE
settings an 2) to make the echoes from the Memory Toy more istinct
when using the Metal Muff an Memory Toy together.
HOW IT WORK – The Metal Muff’s gate mutes or un-mutes the
output of the Metal Muff. When the gate is close , the output of the
Metal Muff is mute . When the gate is open, the output of the Metal
Muff comes through at its full volume. The gate opens an closes base
on the level of your instrument before it hits the Metal Muff’s istortion
circuitry. When the volume of the input signal goes above the threshol
level set by the THRESHOLD knob, the gate opens allowing the Metal
Muff to output its signal. When the volume of the instrument goes below
the threshol , the gate closes to mute the Metal Muff output.
HOW TO ET IT – Activate the gate by pushing the GATE button, the
Metal Muff’s LED
shoul turn green. Turn THRESHOLD own to full counter-clockwise, you
shoul hear hum coming through the amp. Turn THRESHOLD clockwise
until the hum is mute . You can leave it there for a light gate setting.
For a more intense gate setting continue to increase THRESHOLD in the
clockwise irection. It is important to know that when you use the gate,
you will lose some sustain. The gate will chop off the en of your notes.
The higher you set the THRESHOLD knob, the quicker it will chop off the
en of your notes. Set the THRESHOLD level too low though, an the
gate will remain open, never muting the output of the Metal Muff.
6
- WARRANTY INFORMATION -
Please register online at http://www.ehx.com/pro uct-registration or
complete an return the enclose warranty car within 10 ays of
purchase. Electro-Harmonix will repair or replace, at its iscretion, a
pro uct that fails to operate ue to efects in materials or workmanship
for a perio of one year from ate of purchase. This applies only to
original purchasers who have bought their pro uct from an authorize
Electro-Harmonix retailer. Repaire or replace units will then be
warrante for the unexpire portion of the original warranty term.
If you shoul nee to return your unit for service within the warranty
perio , please contact the appropriate office liste below. Customers
outsi e the regions liste below, please contact EHX Customer Service
for information on warranty repairs at [email protected] or +1-718-937-
8300. USA an Cana ian customers: please obtain a Return
Authorization Number (RA#) from EHX Customer Service before
returning your pro uct. Inclu e with your returne unit: a written
escription of the problem as well as your name, a ress, telephone
number, e-mail a ress, an RA#; an a copy of your receipt clearly
showing the purchase ate.
United tates & Canada
EHX CUSTOMER SERVICE
ELECTRO-HARMONIX
c/o NEW SENSOR CORP.
55-01 2ND STREET
LONG ISLAND CITY, NY 11101
Tel: 718-937-8300
Email: [email protected]
Europe
JOHN WILLIAMS
ELECTRO-HARMONIX UK
13 CWMDONKIN TERRACE
SWANSEA SA2 0RQ
UNITED KINGDOM
Tel: +44 179 247 3258
Email: electroharmonixuk@virginme ia.com
7
This warranty gives a purchaser specific legal rights. A purchaser may
have even greater rights epen ing upon the laws of the juris iction
within which the pro uct was purchase .
To hear emos on all EHX pe als visit us on the web at www.ehx.com
Email us at [email protected]m
FCC COMPLIANCE
Note:
This equipment has been teste an foun to comply with the
limits for a Class B igital evice, pursuant to part 15 of the FCC Rules.
These limits are esigne to provi e reasonable protection against
harmful interference in a resi ential installation. This equipment
generates, uses an can ra iate ra io frequency energy an , if not
installe an use in accor ance with the instructions, may cause
harmful interference to ra io communications. However, there is no
guarantee that interference will not occur in a particular installation. If
this equipment oes cause harmful interference to ra io or television
reception, which can be etermine by turning the equipment off an
on, the user is encourage to try to correct the interference by one or
more of the following measures:
•
Reorient or relocate the receiving antenna.
•
Increase the separation between the equipment an receiver.
•
Connect the equipment into an outlet on a circuit ifferent from
that to which the receiver is connecte .
•
Consult the ealer or an experience ra io/TV technician for
help.
Mo ifications not expressly approve by the manufacturer coul voi the
user's authority to operate the equipment un er FCC rules.
8
Adorn yourself with the EHX tattoo in this box! Then share your
photos with us on Facebook.

Other Electro-Harmonix Music Pedal manuals

Electro-Harmonix B9 User manual

Electro-Harmonix

Electro-Harmonix B9 User manual

Electro-Harmonix nano SOUL PREACHER User manual

Electro-Harmonix

Electro-Harmonix nano SOUL PREACHER User manual

Electro-Harmonix DELUXE MEMORY MAN 550-TT User manual

Electro-Harmonix

Electro-Harmonix DELUXE MEMORY MAN 550-TT User manual

Electro-Harmonix XO GERMANIUM OD User manual

Electro-Harmonix

Electro-Harmonix XO GERMANIUM OD User manual

Electro-Harmonix CLOCKWORKS User manual

Electro-Harmonix

Electro-Harmonix CLOCKWORKS User manual

Electro-Harmonix Grand Canyon User manual

Electro-Harmonix

Electro-Harmonix Grand Canyon User manual

Electro-Harmonix Cock Fight Plus User manual

Electro-Harmonix

Electro-Harmonix Cock Fight Plus User manual

Electro-Harmonix Stereo Polychorus XO User manual

Electro-Harmonix

Electro-Harmonix Stereo Polychorus XO User manual

Electro-Harmonix LESTER G User manual

Electro-Harmonix

Electro-Harmonix LESTER G User manual

Electro-Harmonix Deluxe Bass Big Muff Pi User manual

Electro-Harmonix

Electro-Harmonix Deluxe Bass Big Muff Pi User manual

Electro-Harmonix EDDY User manual

Electro-Harmonix

Electro-Harmonix EDDY User manual

Electro-Harmonix DELUXE MEMORY MAN 1100-TT User manual

Electro-Harmonix

Electro-Harmonix DELUXE MEMORY MAN 1100-TT User manual

Electro-Harmonix PLATFORM User manual

Electro-Harmonix

Electro-Harmonix PLATFORM User manual

Electro-Harmonix XO WHITE FINGER User manual

Electro-Harmonix

Electro-Harmonix XO WHITE FINGER User manual

Electro-Harmonix Deluxe Memory Man User manual

Electro-Harmonix

Electro-Harmonix Deluxe Memory Man User manual

Electro-Harmonix CRAYON User manual

Electro-Harmonix

Electro-Harmonix CRAYON User manual

Electro-Harmonix Octavix User manual

Electro-Harmonix

Electro-Harmonix Octavix User manual

Electro-Harmonix Pitch Fork User manual

Electro-Harmonix

Electro-Harmonix Pitch Fork User manual

Electro-Harmonix NANO BASS BIG MUFF PI User manual

Electro-Harmonix

Electro-Harmonix NANO BASS BIG MUFF PI User manual

Electro-Harmonix EHX B9 User manual

Electro-Harmonix

Electro-Harmonix EHX B9 User manual

Electro-Harmonix Attack Decay User manual

Electro-Harmonix

Electro-Harmonix Attack Decay User manual

Electro-Harmonix BIG MUFF User manual

Electro-Harmonix

Electro-Harmonix BIG MUFF User manual

Electro-Harmonix BASS CLONE User manual

Electro-Harmonix

Electro-Harmonix BASS CLONE User manual

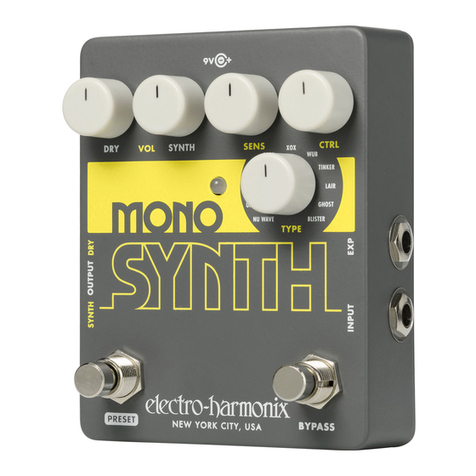
Electro-Harmonix Mono Synth User manual

Electro-Harmonix

Electro-Harmonix Mono Synth User manual

Popular Music Pedal manuals by other brands

Strymon Lex-rotary user manual

Strymon

Strymon Lex-rotary user manual

Lexicon MX200 user guide

Lexicon

Lexicon MX200 user guide

Amptweaker tightboost user manual

Amptweaker

Amptweaker tightboost user manual

BBE ORANGE SQUASH user manual

BBE

BBE ORANGE SQUASH user manual

Tube Works 310 manual

Tube Works

Tube Works 310 manual

Fender MIRROR IMAGE DELAY manual

Fender

Fender MIRROR IMAGE DELAY manual

MORLEY SLWVES manual

MORLEY

MORLEY SLWVES manual

Darkglass Electronics ALPHA OMEGA PHOTON owner's manual

Darkglass Electronics

Darkglass Electronics ALPHA OMEGA PHOTON owner's manual

Vox Lil Looper owner's manual

Vox

Vox Lil Looper owner's manual

nux Chorus Core user manual

nux

nux Chorus Core user manual

TC Electronic DITTO+ quick start guide

TC Electronic

TC Electronic DITTO+ quick start guide

Strymon Zuma quick start guide

Strymon

Strymon Zuma quick start guide

Zoom Multistomp MS-70CDR Operation manual

Zoom

Zoom Multistomp MS-70CDR Operation manual

TC Electronic Ditto manual

TC Electronic

TC Electronic Ditto manual

flight of harmony Famine 500 manual

flight of harmony

flight of harmony Famine 500 manual

TC Electronic corona user manual

TC Electronic

TC Electronic corona user manual

Free The Tone FT-2Y/FLIGHT TIME owner's manual

Free The Tone

Free The Tone FT-2Y/FLIGHT TIME owner's manual

PedalPCB Thumb Sucker Wiring diagram

PedalPCB

PedalPCB Thumb Sucker Wiring diagram

manuals.online logo
manuals.online logoBrands
  • About & Mission
  • Contact us
  • Privacy Policy
  • Terms and Conditions

Copyright 2025 Manuals.Online. All Rights Reserved.