Elenberg MC-4080 User manual

USER MANUAL
DVD MINI
Model: MC-4080

2
Features ............................................................................................. 3
For your Attention ............................................................................... 4
Accessories ....................................................................................... 5
Panel ................................................................................................. 6
Connection ........................................................................................ 7
System Setup ..................................................................................... 9
Play ................................................................................................ 12
Troubleshooting ............................................................................... 18
Specification .................................................................................... 19
Contens

3
Thank you for purchasing our product. Please go through this manual
carefully before connection and operation. Please keep this manual for
future reference.
DVD player is a new generation home player which can produce high
quality video and audio. Its performance is much better than that of any
previous home video playing equipment. As the best signal source of
home theatre system, It will give you the uppermost enjoyment!
•Built in Dolby AC-3 DTS, LPCM, MPEG etc. digital audio output
•Hi-fi, 96kHz/24bit audio digital processor.
•Software intelligent upgrade * High-resolution picture, support the future
video equipment
•Professional digital Karaoke function
•Optical, Coaxial digital audio output
•Super compatible with DVD/VCD/CD/MP3/KODAK PICTURE CD
•Latest the forth generation servo, decoding single-wafer technology,
reliable stability and super error correction.
•Full function remote controller
•AM/FM stereo radio tuner
Features

4
IMPORTANT NOTES
•Please read through the manual carefully before connection and operation.
•Do not open the cover or touch any internal components for non-
professional
•Turn off the power when the unit is not being used. (Unplug the power
cord if the unit is not used for a long time).
•Don't expose this unit to direct sunlight. Keep away the heating sources
or equipments
•Don't expose this unit to the rain or moisture.
•Place the unit on a horizontal level. Keep the unit ventilated. Don't block
the heat hole.
Overheat may cause malfunction.
•Clean the cabinet with soft cloth. Detergent or alcohol is forbidden.
•This book is only a guide for user`s operation, not a criterion for
configuration.
The lightning flash is intended to alert the user to the presence
of dangerous voltage within the product's enclosure, and
touching the inner parts may result in a risk of electric shock to
persons.
The exclamatory mark is intended to alert the user to the
presence of important operating instructions.
To reduce the risk of electric shock or fire, do not open the
cover. Refer servicing to qualified service personnel.
This mark indicates this unit belongs to class 1 laser product.
The laser beam may produce radiation harm to the directly
touching human body.
For Your Attention
5
REMOTE CONTROLLER OPERATION
•Insert the batteries into the cell box.The remote control points at remote
sensor within 8 metres and within 30 degree at left or right side.
•Take the battery out of the controller if it is not used for a long time
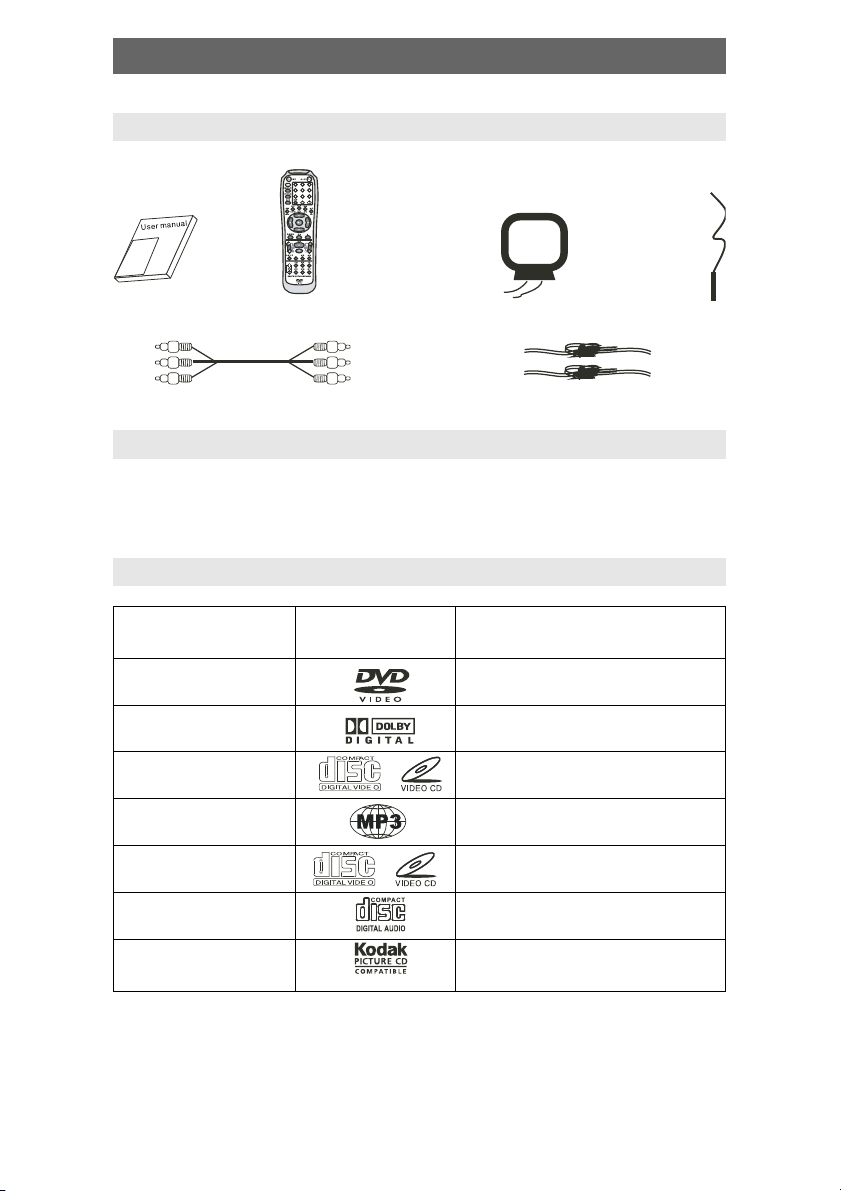
THIS UNIT CAN PLAY THE FOLLOWING TYPES OF DISCS
Accessories
User manual
Remote
controller
A/V cable
AM antenna
FM
antenna
Speaker connect cable
ACCESSORIES
Disctypes Symbol Contents
DVD Audio + Video
AC–3 Dolby Digital Audio
SVCD Audio
ÌÐ3 Audio
Video–CD (VCD) Audio + Video
CD–DA Audio
Kodak Picture CD Electronic Photo

6
Replace the same fuse after pulling out the power pulg
Panel
FRONT PANEL:
w
1. POWER
2. AM/FM/V-MODE
3. AUTO/A-MODE
4. MEMORY/AUDIO
5. MO/ST/SUBTITLE
6. RADIO/SKIP
7. TUNING/SEARCH
8. OPEN/CLOSE
9. PLAY/PAUSE
10. STOP
11. SOURCE SELECT
12.MICROPHONE
13. MIC VOL
14. ECHO
15. VOLUME
REAR PANEL:
1. VIDEO
2. S-VIDEO
3. L-CHANLE
4. R-CHANLE
5. COAXIAL OUT
6. OPTICAL OUT
7. COMPONENT V/Pr, U/Pb, Y
8. VGA
9. AM/FM ANTENNA
10. LINE1, 2 INPUT
11. FUSE
12.SCART
NOTES NO VGA terminad for some types of machine

7
Component
input
VGA Input SCART Input
Component video
output
Video and
S-Video
VGA Output SCART Output
Connection
VIDEO SYSTEM CONNECTION
The following video output available for this unit.
COMPOSITE VIDEO
Use the AV cable (yellow terminal) to connect
composite video output of this unit to the TV/monitor
video input
S-VIDEO
Use the S-video cable to connect the s-video output
of this unit to the TV/monitor S-video input
COMPONENT VIDEO (YUV)
Use 3 -core AV cable to connect the component
output terminals of this unit to the corresponding
TV/monitor input
VGA
Use a VGA cable to connect the VGA output to the
TV/monitor VGA input terminal.
SCART
Use a 21_pin SCART cable to connect the SCART
output to the TV/monitor SCART input terminal.
NOTES:
•Which connection depends on the TV/monitor
input terminal.
•Don't use the all connections at one time,
otherwise the picture will be affected.
•Only the physical connection conforms to the
video setting can produce the normal picture
(reference to the Video Setup in System
Setup).

8
Connection
2CH Audio Intput
Digital Audio Input
2CH Audio Output
Optic/ Coaxial Output
AUDIO CONNECTION SYSTEM
Two types of audio output systems: analog audio and
digital audio. Analog audio includes 2-channel stereo
. Digital audio includes coaxial output. The digital audio
output is better than the analog.
STEREO AUDIO
Use a pair of AV cable (red for right /white for left) to
connect the stereo audio output of this unit to the TV
or a stereo input of power amplifier.
COAXIAL DIGITAL AUDIO
Use the special coaxial cable to connect the coaxial
output of this unit to the coaxial input of power
amplifier.
OPTICAL DIGITAL AUDIO (OPTION)
Use the special coaxial cable to connect the optical
audio output of this unit to the optical input of power
amplifier.
NOTES:
•The physical connection should accord with audio
output setup of this unit. Please refer to Audio
Setup in System Setup.

9
System Setup
MENU OPERATION:
Press SETUP key, screen show setup page. In setup mode, press SETUP
key again to quit the setup page. Press direction key to the desired item,
press ENTER to confirm.
(1) Some setup items are concerning the present modes. The items in gray
can't be set up.
(2) The setup is memorized and kept after power off.
GENERAL SETUP PAGE:
• TV Display
Normal/PS: When the unit connects to the normal TV set, the wide-
screen image shows on the full screen, but some part is cut off.
Normal/LB: When the unit connects to the normal TV set, the wide-
screen image shows and black bars appear on the top and bottom of
screen.
Wide-screen: Use this item when the unit is connected to the wide-
screen TV set.
• ANGLE MARK
It will show the ANGLE mark when playing DVD disc with multi-angle view
if selecting ON
• OSD LANG
Select on-screen display language
• SPDIF OUTPUT
SPDIF OFF: no digital signal out (optical or coaxial output off ), only
analog audio output.
SPDIF/RAW: digital signal output in the original format recorded in the
disc.
SPDIF/PCM: digital signal output in the decoded PCM form.
• CAPTIONS
This function doesn't work when the disc without caption. If the caption is
OFF, press SUBTITLE key on the remote controller to make caption on.
The default setup is CAPTION ON.
• SCREEN SAVER
If the SCREEN SAVER is set ON and the unit is switched on without a disc
playing for several minutes, a moving picture appears on the screen, and
the unit will go to standby mode after 20 minutes. You can press STANDBY
key on the remote controller to wake it up.

10
System Setup
SPEAKER SETUP:
• DOWNMIX
LT/RT: The audio out is Left and Right channels format even if the original
sound is 5.1CH format.
STEREO: The audio out format is stereo even if the original sound is
5.1CH format.
DOLBY DIGITAL SETUP:
• Dual mono
Stereo: set audio output to the stereo output
L-mono:set audio output to the mono -left channel
R-mono:set audio output to the mono-right channel
Mix-mono:set audio output to the Mix mono channel
• DYNAMIC
If watching large dynamic scope movie program at night, to select this
mode you can reduce the volume to a very low level, at the same time, to
keep the fine details sounds. In this case, this doesn't disturb the family
and keep the quality sounds.
VIDEO SETUP PAGE:
• COMPONENT V IDE
OFF: set video output to the composite
YUV: set video output in analog component video format when connecting
to Y/U/V terminals
P-YUV: set progressive YUV signals. Connection same as YUV
RGB: set video output in Red/Green/Blue format when connecting to
SCART terminals
P-RGB: progressive RGB signals. Connection same as RGB
VGA: set to this item when connecting to VGA terminals.
• Notes:
If the video setting differs with the physical connection, the TV set
may be without picture. In case of no picture, you can RESET the
machine, then keep pressing key [V_MODE] until the picture is OK
again. For the 2CH player, the [V-MODE]has no function.
The machine without VGA or SCART has no progressive out. The P-
YUV and P-RGB should not be selected.
• QUALITY:
You can set the sharpness brightness, contrast, etc. according to your
preference.

11
PREFERENCE SETUP
• TV system
This unit is suitable for all kinds of TV systems. You can select one of the
PAL, NTSC or ATUO.
AUTO: the TV system is auto switched according to the disc system.
NTSC: this system is used in USA, TAIWAN, JAPAN etc.
PAL: this system is used in CHINA, EUROPE, HONGKONG etc.
• AUDIO, SUBTITLE, DISC MENU LANGUAGE SETUP
These are the initial settings by your preference. If a setting is supported
by disc content, it will work. Otherwise the disc default value works. And
these settings can be changed respectively by press key [AUDIO],
[SUBTITLE] when playing.
• PARENTAL CONTROL:
The control level is for parental to control playing content and protect your
children from violence and erotism. The disc, the level of which is higher
than the setting level cannot be played.
• DEFAULT SETUP
Reset to the initial factory setups.
• PASSWORD SETUP:
Change the password. The initial factory password is 136900. You can set
your own password. If you forget your own password, you can use 136900
as general password.
System Setup
12
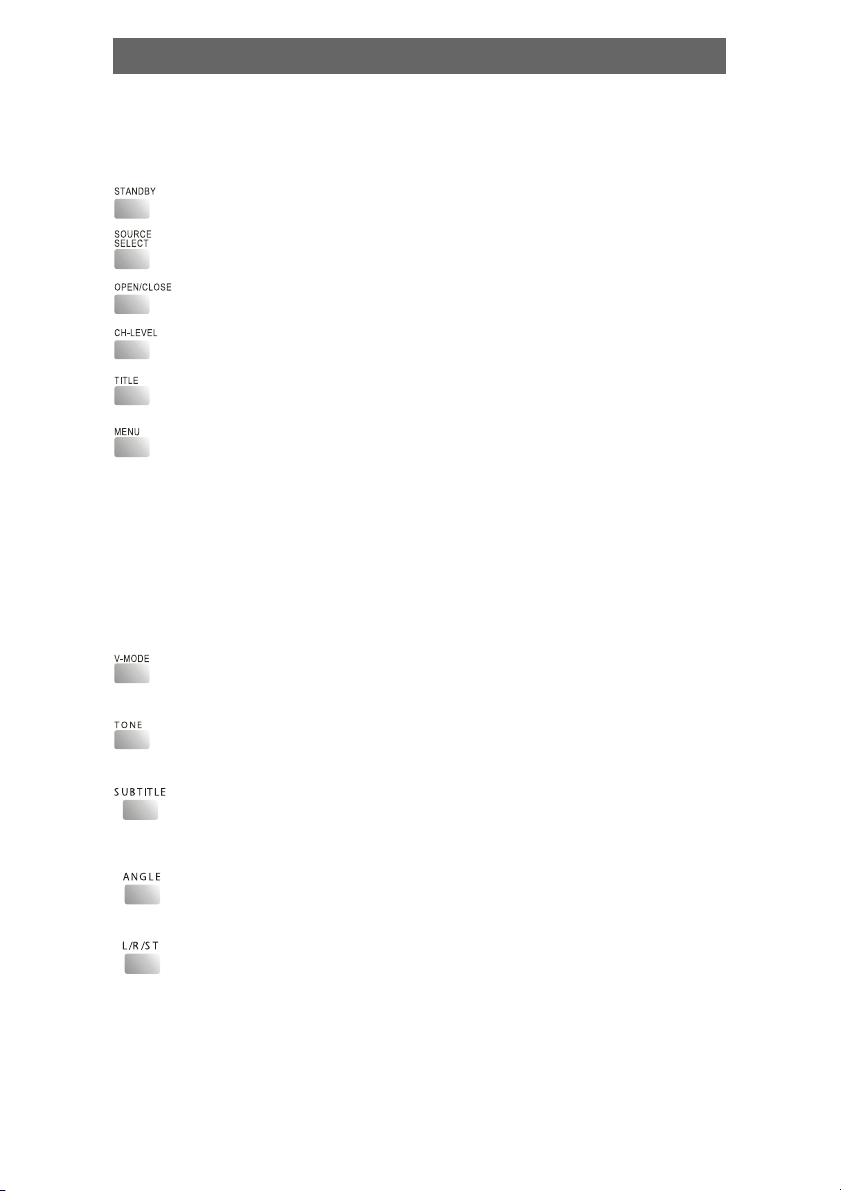
Attention: Some keys on the remote controller may not be
workable for this model.
•Standby/working mode switch
•A/V Source switch among disc/tune, line1, line2
•Eject or load the disc tray in Disc mode.
•Balance control.
•Return to the top menu when playing DVD disc.
•Return to the previous menu when playing DVD disc.
When playing SVCD, VCD2.0 disc, press MENU the disc
menu will show.You can select a program in the menu. After
loading the disc, the unit will enter PBC ON play
automatically.
Press MENU button, the TV screen shows PBC OFF. In this
mode, the menu will not appear, press digit key to select
the track directly. VCD1.1, CD-DA and Mp3 have no PBC
menu.
•Video output mode switch (if losing pictures or picture is
abnormal, keep switching until getting clear picture)
•Press [TONE], then press [VOLUME+] or [VOLUME-] to control
bass and treble
•When playing the disc with multi-subtitle, press SUBTITLE
continually, the subtitle changes in a circle, you can select
one.
•When playing the disc with multi-angle, it's convenient to
change the view angle.
•When playing super VCD, VCD, CD disc with multi-channel,
press L/R/ST button to select left channel/right channel/
stereo/mix audio output.
Play
13
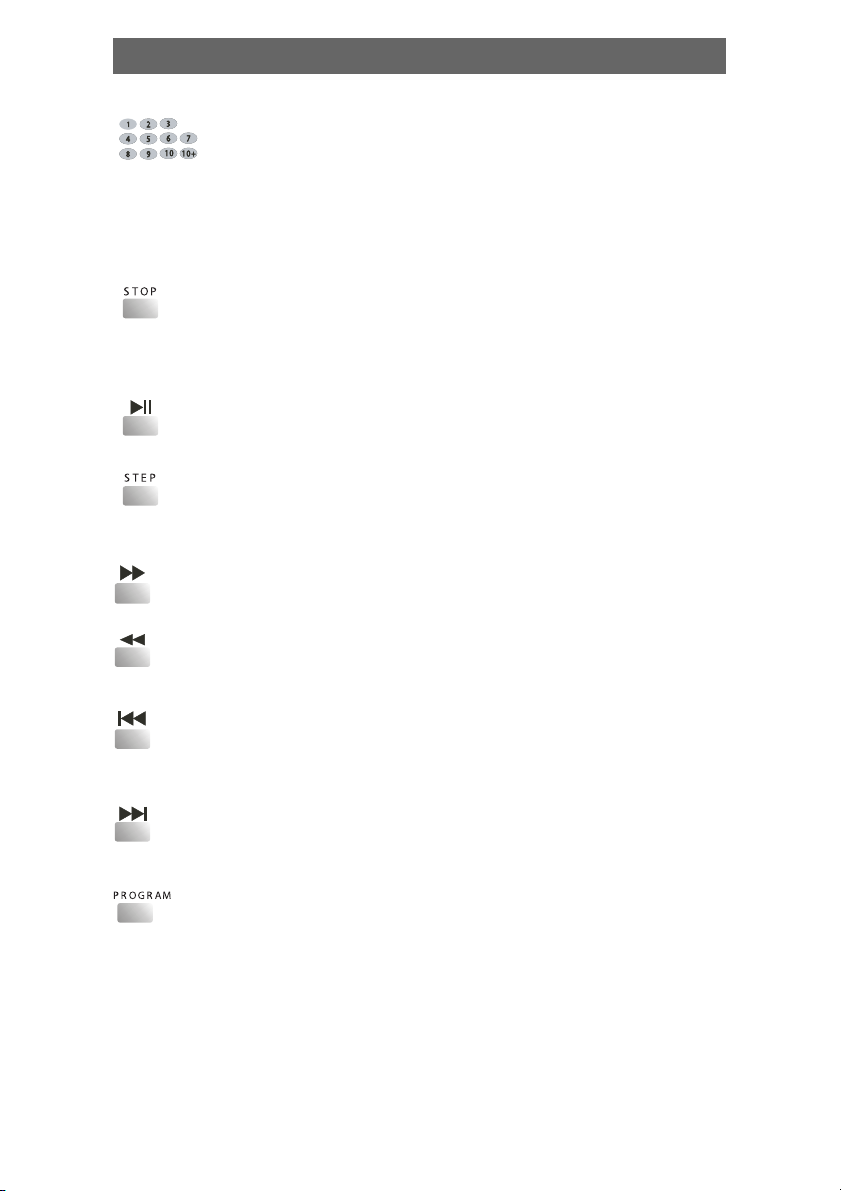
•When playing VCD1.1, CD, MP3 disc, after loading the disc,
use the digit key to select the desired track or chapter directly.
Press 10+ key and then another digit key to select the track
which number is 10 or more than 10.
You can press digit keys at PROGRAM and MENU
selection.
•When playing DVD, SVCD, VCD, CD disc, press STOP once,
the unit will memorize the previous ending point. Press PLAY
button to go on the play. Press STOP for the second time to
stop the play and end memory.
•When playing the disc, press PLAY/PAUSE once to pause,
press PLAY/PAUSE again to return to normal play.
•When playing DVD, SVCD, VCD, CD disc, press STEP once,
the picture changes to next frame. Press PLAY to resume
normal play.
•Press this button for quick forward search.
•Press this button for quick rewind search.
•When playing DVD disc, press PREV to the previous chapter.
When playing SVCD, VCD, CD, MP3 disc, press PREV to the
previous track.
•When playing DVD disc, press NEXT to the next chapter.
When playing VCD, VCD, CD, MP3 disc, press NEXT to the
next track.
•If the disc is with 2 or more tracks, chapters or titles, set up
the playing order as your preference. Press this button to
enter program menu.
Play

14
•Press the digit key to input the number of the track, title or
chapter. If the programmed tracks are over ten, press NEXT to
go on programming. (Maximum 20 programable items) use
the up/down/left/right key to move the cursor to the START.
Press ENTER to start PROGRAM play.
•When playing MP3 disc, NO program function! Press
PROGRAM button once to enter DIRECTORY- PLAY mode,
you can select program to play in the current directory; Press
PROGRAM again to enter FILE-LIST mode, you can select
program to play in the file list of whole disc.
•Press REPEAT button to repeat a title, chapter, track or the
whole disc.
When playing DVD disc, press REPEAT button continually,
the TV screen shows chapter repeat, title repeat, all repeat,
repeat cancel in turn.
When playing SVCD, VCD, CD disc, the turn is track repeat,
all repeat, repeat cancel.
When playing MP3 disc, the turn is single repeat, directory
repeat, repeat cancel.
•When playing DVD, SVCD, VCD, CD disc, press A-B button to
repeat a certain contents.
Press A-B key on the start point (A) and the ending point (B)
to select the repeat part.
Press A-B the third time, cancel A-B repeat and return to
normal play.
•Press TIME (or GOTO) button to select title time, chapter
time, track time to play. You can use digit keys input the
goto time.
•When playing DVD, SVCD, VCD disc, press ZOOM to zoom in
or zoom out the picture.
•In zoom in mode, press up/down/left/right to move the
picture for viewing. The picture can not be moved in zoom
out mode.
Play

15
•PressS.EFFECT (or SURR) button to change the surround
sound effect.
•Press VOLUME + to adjust volume up
Press VOLUME - to adjust volume down
•Press MUTE button, no sound will give out and the mute
symbol will display on the TV screen.Press MUTE again,
MUTE OFF will display and the sound will resume.
•Press the OSD button, the relative information of the disc will
display on the TV screen.
Play
NOTE:
A few buttons is not necessary for some types of machine. The normal
operation will not be affected without them!

16
Play
•Adjust microphone volume and echo volume to the minimum
level. Insert microphones into microphone jacks on the front
panel. The two microphones can be used in the same time.
Press SETUP key to enter AUDIO SETUP PAGE. Then select
KARAOKE ON mode.
•Use microphone volume knob to adjust the microphone
volume.
•Use echo volume knob to adjust the echo level.
•When playing karaoke disc, to eliminate the original singing,
press L/R/ST key on the remote controller to select left
channel or right channel. When playing DVD, SVCD disc,
press AUDIO key on the remote controller to select the sound
track to eliminate the original singing.
Note: Karaoke doesn't work in the digital audio output
mode.
PLAY PICTURE CD DISC
•Press STOP key, 12 small pictures will show on the TV screen.
•Press up/down/left/right to select the desired picture.
•Use up/down/left/right key to select RANDOM, then press ENTER to start
random play.
•Use up/down/left/right key to INSTRUCTION, the press ENTER to
instruction menu.
Instruction menu as follows:
[PROGRAM]: to change picture transform mode; [STOP]: entering
picture preview mode; [PREV]: previous picture; [NEXT]: next picture;
[PLAY]: to play picture; [ UP]: mirror image in vertical; [DOWN]:
mirror image in horizon; [LEFT]: rotate 90 degrees anticlockwise;
[RIGHT]: rotate 90 degrees clockwise; [ZOOM]: change zoom mode;
[FAST FORWARD]: zoom in the picture; [FAST REWIND]: zoom out
the picture; [UP/DOWN/LEFT/RIGHT]: move zoom center. select
CONTINUE to exit.
KARAOKE (NO THIS FUNCTION IN SOME TYPES OF
MACHINE)

17
Play
TUNER MODE:
•AM/FM switch
•Mono/Stereo switch in FM tuner mode
•Preset the FM or AM channel ( memorize the channel ),
operating with key [RADIO+] and [RADIO-].
•Automatic searching in FM/AM tuner mode
•Press the digit to choose the relative preset channel, if the
channel digit is >=10, press [10+], then press a relative
digit
•Searching with frequency up
•Searching with frequency down
•Switch preset channel
•Switch preset channel

18
Before resorting to maintenance service, please kindly check by yourself
with the following chart.
Symptom Cause(s) Remedy
No power •The power cord isn’t •Connect the power cord
connected properly
•Fuse melting •Replace a same
specification fuse!
No picture •TV video setup isn’t correct •Select the suitable setup
•The setup mismatch the •Press [V-MODE] until the
real connection picture appear again
•Video cable isn’t •Connect the cable properly
connected well
No sound •Audio cable isn’t •Connect the cable properly
connected well
•Source select incorrect •Switch to the proper source
•Audio setup isn’t correct •Select the suitable audio
setup
Distorted •Dirty disc •Clean the disc
picture •In fast forward or •Sometimes, the tiny distortion
fast rewind mode appears. It’s normal
Luminance •Anti-copy circuit •Connect the DVD unit to TV
unsteady or influence directly
picture with
noise
Unable to play •Without disc •Put in the disc
•Disc is bad •Clean or replace the disc
•Disc is put upside down •Put the disc properly
•Dirty disc •Clean the disc
•There are menu on TV screen •Use SETUP to turn off menu
•Parental control is working •Set up parental off or
change the setup
Key malfunction •Power wave or other static •Turn on/off the power and
interference. try again.
Remote control •Doesn't work •Point the remote control
Doesn't work at the sensor
•Remote control is too •Operate the remote
far from DVD unit control within 7m
•Batteries are exhausted. •Replace the batteries
Can't locate any •Antenna is not connected •Connect antenna
channels •Source mode is not •Switch to tuner mode
in tuner mode in tuner mode
Troubleshooting

19
DVD MINI COMBINATION SYSTEM
Specification
Power supply AC230V 10%,50Hz~60Hz
Power consumption 100VA
Working Temperature -10 ~ +400Ñ
environment Relative humidity 5%~90%
Disc output TV System PAL/NTSC
Output level 1V (P-P 75 ΩNEGATIVE
SYUCHRONISM)
Output level 1.0~2.2V (rms 1 KHz/0 dB)
Frequency Reponse 20 Hz~20 KHz
S/N A weight > 80 dB (1 KHz)
Frequency Range ≥70 dB (1 KHz)
THD+NOISE ≤60 dB (1 KHz)
WOW FLUTTER Below the limit of apparatus
measure
Tuner AM frequency Range (522 1629) KHz (step = 9 kHz);
(530 1710) KHz (step = 10 kHz)
S/N(A weight) 46 dB
FM band Range 64 MHz~108 MHz
S/N(STEREO) 40dB
Bass control ± 7 dB (200 KHz)
Treble control ± 7 dB (10 KHz)
Power output (Max) 25 W + 25 W
Frequency reponse ± 1.5 dB (20 Hz~20 KHz)

GUANGZHOU PANYU JUDA CAR AUDIO EQUIPMENT
CO. LTD.
Address: 10-12 Building, Licum Industrial Industrial
Zone, Dashi Town, Panyu, Guangzhou, China.
MADE IN CHINA
Table of contents
Languages:
Other Elenberg DVD Player manuals

Elenberg
Elenberg DVDP-2402 User manual

Elenberg
Elenberg DVDP-2410 User manual

Elenberg
Elenberg DVDP-2445 User manual

Elenberg
Elenberg DVDP-2420 User manual

Elenberg
Elenberg DVDP-2415 User manual

Elenberg
Elenberg DVDP-2404 User manual

Elenberg
Elenberg DVDP-2448 User manual

Elenberg
Elenberg DVDP-2417 User manual


