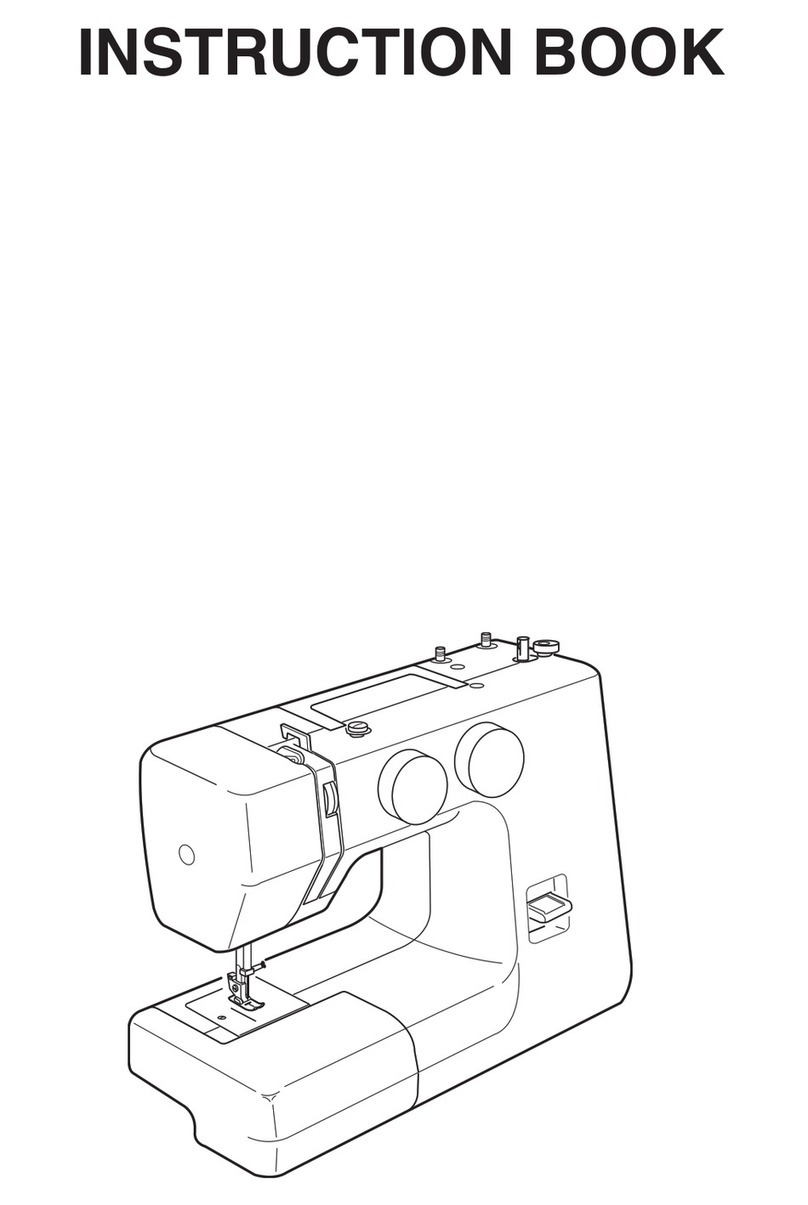
ELNA 2110 User manual

PDFMAILER.DE
INSTRUCTIONBOOK
2110/2130

PDFMAILER.DE
IMPORTANT SAFETY INSTRUCTIONS
Your Elna 2000 series sewing machine is designed and constructed for HOUSEHOLD use only. Read
all instructions before using this machine.
DANGER– To reduce the risk of electric shock:
1. Your sewing machine shouldnever be left unattended when plugged in. Alwaysunplug themachine from
theelectricaloutlet immediatelyafterusingandbeforecleaning.
2. Always unplug beforereplacing light bulb. Replacebulb with same bayonet socket type, 15W max.
3. Do not place or store machine where it can fall or be pulled intoa tub or sink. Do not reach for the ma-
chineif ithasfallenintowater.Unplug immediately.
WARNING– To reduce the risk of burns, fire, electrical shock or injury:
1. Do not allowmachine to be used as a toy. Supervision is necessary when this machine is usedby or
nearchildren.
2. Use thissewing machineonly for its intendeduse as described in this manual. Only use attachments
recommendedby the manufacturer as described in this manual.
3. Never operate this machine if it has a damagedcord or plug, is not working properly, has been dropped
or damaged or dropped into water. Returnthe machine tothe nearest authorized dealeror servicecen-
ter for examination,repair,electricalor mechanicaladjustment.
4. Thismachine is equipped with a special connection cord which, if damaged, must be replaced by an
identicalcord.This can be obtainedfrom your dealer.
5. Never operate thesewing machine withany air opening blocked.Keep ventilation openingsof the sew-
ing machineand footcontrol free fromthe accumulation of lint, dust and fibers.
6. Never drop or insert any object into any opening.
7. Do not use outdoors.
8. Do not operate where aerosol (spray) products arebeing used or where oxygen is being administered.
9. Todisconnect, turnmachineoff andremoveplug from outlet.
10. Do not unplug by pulling oncord. To unplug, grasp the plug, not the cord.
11. Keep fingersaway fromall movingparts, especiallythe needle.
12. Always use the proper needleplate. The wrongplate can cause the needle to break.
13. Do not use bent needles.
14. Do not pull or push fabric while stitching. This may deflect the needlecausing it to break.
15. Switch the sewing machine off when makinganyadjustment in the needlearea, suchas threading
needle, changing needle, threadingbobbin, changing presser foot, etc.
16. Always unplug thesewing machine from theelectrical outlet when removingcovers, lubricatingor mak-
ing anyother servicing adjustmentsmentioned in the instruction manual.
SAVE THESE INSTRUCTIONS
USAonly
Your machinecomes equipped with a polarized plug (oneprong wider than the other). Apolarized plug re-
ducesthe risk of electricalshock. Thisplug isintendedto fit intoapolarizedoutlet. If the plugdoesnot fit
fully intothe outlet, reverse the plug. If it still doesnot fit, contact a qualifiedelectrician to install the proper
outlet. Do not modify the plug inany way.
Useonly foot control YC-482J or TJC-150 (UL, CSA).
1

PDFMAILER.DE
TABLE OF CONTENTS
SECTION I– Machine Parts and Functions
Part Names .............................................................. 3
Standard Accessories .............................................. 3
Extension Table (Accessory Storage Box)
and Free Arm ...................................................... 4
Centimeter/Inch Measurements ..............................4
Circular Sewing Pivot Points................................... 4
Foot Pressure Dial ................................................... 4
Additional Presser Foot Clearance ......................... 5
How to Snap Presser Foot Off and On ................... 5
How to Remove and Attach the Shank ................... 5
Seam Allowance Lines............................................. 6
How to Drop the Feed Dog ...................................... 6
Stitch Selection Knob............................................... 6
Stitch Length Knob................................................... 7
Fine Tuning Stretch Stitches ................................... 7
Stitch Width/Needle Position Dial ........................... 7
Reverse Stitch Lever ............................................... 7
Thread Tension Dial ................................................. 8
SECTION II – Getting Ready to Sew
Selecting the Correct Needle and Thread .............. 9
Changing the Needle ............................................... 9
Needle Definitions.................................................. 10
Connecting the Machine to Power Supply.............11
Foot Control and Sewing Speed ........................... 12
Removing the Bobbin Case................................... 12
Spool Pins .............................................................. 12
Winding a Bobbin ................................................... 13
Inserting the Bobbin ............................................... 14
Threading the Machine .......................................... 15
Drawing Up the Bobbin Thread ............................. 16
SECTION III – Sewing Basics
Example of How to Read the Machine Set-Up
Information ....................................................... 17
Which Presser Foot To Use................................... 17
Straight Stitch ......................................................... 18
Starting to Sew....................................................... 18
Finishing Off a Seam ............................................. 18
Changing Sewing Direction ................................... 18
Gathering................................................................ 19
Zipper Insertion ................................................. 20-21
Pintucks .................................................................. 22
Twin Needle Hem (Optional needle) ..................... 23
Zigzag Stitch .............................................................. 23
Overcasting ................................................................ 23
Whip and Roll Hem .................................................... 24
Satin Stitch Applique .................................................. 24
3-Step Zigzag ............................................................. 25
Mending a Tear..................................................... 25
Stretch Blind Hem or Woven Blind Hem ................... 26
Shell Tuck ................................................................... 27
Box Stitch ................................................................... 27
Picot Stitch ................................................................. 28
Automatic Buttonhole (Model 2130 only) .............29-30
4-Step Buttonhole (Model 2110 only) ........................31
Corded Buttonhole ..................................................... 32
How to Sew on a Button ............................................ 33
SECTION IV – Stretch Stitches
Triple Seam ................................................................ 34
Decorative Stretch Stitches ....................................... 34
Smocking.................................................................... 35
Super Stretch Stitch ................................................... 36
Double Overlock Stitch .............................................. 36
SECTION V – Satin Stitches
Scallop Edges ............................................................ 37
SECTION VI– Taking Care of Your Machine
Cleaning the Bobbin Case and Hook ........................ 38
Cleaning the Feed Dog .............................................. 39
Oiling........................................................................... 39
Changing the Light Bulb ............................................ 39
TROUBLESHOOTING ........................40
INDEX .................................................41
NOTE: Information found in this instruction
manual is current at the time of printing. Elna
reserves the right to change and update specifi-
cations and information as needed.
2
PDFMAILER.DE
SECTION 1
Machine Parts and Functions
Part Names
1. Extension table (accessory storage box)
2. Centimeter/inchmeasurements
3. Bobbincover
4. Needleplate
5. Circular sewingpivotpoints
6. Presser foot
7. Presser footrelease lever
8. Threadcutter
9. Face plate
10. Foot pressure dial
11. Thread tension dial
12. Threadtake-up lever
13. Thread guide
14. Bobbin winder thread guide
15. Stitchselectionknob
16. Spool pins
17. Bobbin winder
18. Bobbin winder stop
19. Stitch lengthknob
20. Stitchwidth/Needlepositiondial
21. Reversestitchlever
22. Carrying handle
23. Buttonhole lever (Model2130only)
24. Presser foot lever
25. Freearm
26. Needleclampscrew
27. Machinesocket
28. On/offswitch
29. Flywheel (always turn towards you)
Standard Accessories
1. Metal foot
2. Satinstitch foot (Model 2130 only)
3. Zipper foot (Model 2130only)
4. Blindhem foot
5. R: Automaticbuttonholefoot (Model 2130 only)
6. 4-step buttonhole foot (Model 2110only)
7. Needles
8. Bobbins (4total)
9. Seamripper
10. Screwdrivers, largeandsmall
11. Footcontrol
12. Vinyl dust cover
3
1
2
3
54
67
8
9
1011 1213 14 15 16 17 18
19
20
21
22
23
24
25
26
27
28
29
1 2 34
5678
910
11 12
OR

PDFMAILER.DE
ExtensionTable (Accessory Storage Box)
and Free Arm
ExtensionTable
The extension tableprovides more sewing space to
make sewing easier. The extension can be easily
removed for free armsewing.
Free arm sewing isgood for circle areas like sleeves,
waistbands and pant legs. If socks, kneeor elbow
areasneed mending, the free arm will be best to
use.
Pull the end of the extension table away from the
machine, as shown in the drawing.
Push the table back into place to reattach the exten-
sion table.
Accessory Box
Theextension table isalso a storage box. Pull the
door open to see thestorage space.
Centimeter/Inch Measurements
Use thishandy tool locatedon the lowerportion of
the frontof themachine for quick measurements.
Circular Sewing Pivot Points
The extension table hasholes that are 1cm apart
from eachother. Usethe holes tosewcirclesand
scallops with the optional pivot pin.
Foot Pressure Dial
Set the pressuredial at “2” for regular sewing.
Depending on the weight of your fabric, you may
need to increase (higher number) or decrease (lower
number) the pressure.
4

PDFMAILER.DE
Additional Presser Foot Clearance
You can raise the presser foot higher than the nor-
mal up position for easy removal of the presser foot
or toplaceheavy fabrics under thepresser foot.Pull
thepresser foot lever up beyond the normal upposi-
tion.
How To Snap Presser Foot Off and On
To snap off:
Turn the flywheel toward you toraise theneedle to
itshighest position.
Raise thepresser foot.
Press the presser foot release lever. The presser
foot will drop off.
To snap on:
Place the presser foot so that thepin on the foot lies
just under the groove of the shank. Lower the shank
toattach the foot.
HowTo Remove and Attach the Shank
Raise thepresser foot.
Turn the thumbscrewcounterclockwise with the
screwdriver toremovethe shank.
When attaching, place shank on needlebar. Lower
the presser foot lever. Turn thumbscrewclockwise to
tighten.
5

PDFMAILER.DE
Seam Allowance Lines
The lines on the needleplate help you measure
seam width.
The number shows you the space between the cen-
ter needleposition and the line onthe needle plate.
Thenumbers at the front are in millimeters. The
numbers at the back are in inches.
How To Drop the Feed Dog
The feeddog must always beup for normal sewing
and down for special sewing, such as free motion
embroidery, buttonsewing, etc.
Removeextension tableand open bobbincover.
Push the feed dog lever down and slide it to the right
until lever fitsintonotch.
Whenspecial sewing iscomplete, pull the feed dog
lever downandslide it tothe leftuntil lever fits into
place. Hand turn the flywheel toraise the feed dog.
Stitch Selection Knob
Theneedle must be at a high position beforeselect-
ing a stitch. Turn the flywheel toward you toraise the
needle.
Turnboth the stitch selection knob andthe stitch
lengthknob toselect astitch.
Set the stitch lengthknob between 0 and 4 to access
stitches 1-11 (2130) and 1-7 (2110).
Set the stitch lengthknob on “+S.S-” toaccess
stretch stitches 12-22 (2130) and 8-14 (2110).
Set stitch length at .
6

PDFMAILER.DE
Stitch Length Knob
Turnthe stitch lengthknob. The lower the number,
the shorter the stitch length. Thehigher the number,
the longer the stitch length.
Each stitch will have a suggested length range.
Fine Tuning Stretch Stitches
If the stretchstitch doesn’t look right, you can
adjust it.
If stitches aretoo short, correct by turning the knob
toward the “+”.
If stitches are too long, correct by turning the knob
towardthe “-“.
Stitch Width/Needle Position Dial
The needlemust be at a high position before chang-
ing stitch width. Turnthe flywheel toward youtoraise
the needle.
The lower the number, the narrower the stitch. The
higher the number, the wider the stitch. The widest
width thismachine can sewis5 mm.
StraightStitchandTripleSeam can sewfrom differ-
ent needlepositions.
•
center needleposition –set dial between 3
and 5
•
left needleposition – set dial between 3 and 0,
with0 being the farthest left
Reverse Stitch Lever
The machine will sewbackwards while you press
down the reversestitch lever.
7

PDFMAILER.DE
Thread Tension Dial
Straight Stitch
In straight seams, the needle thread and the bobbin
threadshould lock together in the center of the two
layersof fabric.
If you look at the top and bottom of the stitch, you
will notice that there are no gaps; each stitch is
smoothandeven.
Whenadjusting needle thread tension, the higher
the number, the tighter theneedle thread.
Herearesome reasons you may change the thread
tension dial:
1. The fabric isstiff or heavy.
2. You aresewing morethan two layersof fabric.
3. The stitch you are using needs the threads not
to lock together in thecenter of the fabric.
•Tension is too tight
The bobbin thread shows through on the topside of
the fabricandit will feelbumpy.
Turn thedial toa lower number to loosen the needle
thread tension.
•Tension is too loose
The needle thread shows through on the underside
of the fabricand it will feel bumpy.
Turn the dial to a higher number to tighten the
needle thread tension.
•Adjusting Tension for Zigzag and
Embroidery
The upper thread tension should be slightly weaker
when sewing a zigzag or a satin stitch. The upper
thread should appear slightlyon the underside of the
fabric.
8

PDFMAILER.DE
SECTION II
Getting Ready to Sew
Selecting the Correct Needle and Thread
Thereare many kinds of fabrics, threadsand
needles. It is important to use the correct ones to-
gether.
Always purchase good quality thread. It should be
strong, smoothand even in thickness. Use the same
thread for needle and bobbin. Alwaystest threadand
needlesize on ascrap piece of fabric.
Ingeneral, fine threads (the larger the number, the
finer the thread) andneedles (thesmaller thenum-
ber, the finer theneedle) areused for sewing light-
weight fabrics and heavier threads and larger
needles are used for sewing heavyweight fabrics.
Therearemanyspecialtyneedlesavailablefrom
your sewing machine dealer.
Check your needles frequently for rough or blunt
tips. Snagsand runs inknits, finesilks andsilk-like
fabrics are permanent andare oftencaused by dam-
aged needles.
Changing the Needle
Turnoff the machine. Turn the flywheel toward you
toraise the needle. Lower thepresser foot.
Turn the needle clampscrewcounterclockwise to
loosen.
Removetheneedlefrom theclamp.
Insert the newneedleinto theclamp with the flat
side to theback,pushing it upas far as it will go.
Tightentheclampscrewfirmly.
Todetermine if the needle isdefective,place the flat
side of the needleon something flat (a needle plate,
piece of glass, etc.). The gap between the needle
and the flat surface should be even.
Never use a bent or broken needle. It may cause
skipped stitches or thread breakage. Defective
needlescan ruin the fabric.
Always purchase good quality needles. Change
needleoften.
Weight Fabric Needle Type Needle
Size
Very
Light Chiffon, Fine Lace,
Organdy Universal
Ball Point 9 (65)
9 (65)
Batiste, Lawn, Crepe
de Chine, Challis
Handkerchief Linen,
Crepe, Taffeta, Satin
Stretch
Universal
11 (75)
11 (75)
12 (80)
Single Knits, Jersey,
Swimwear, Tricot Stretch
Ball Point 11 (75)
11 (75)
Light
Leather, Suede Leather 11 (75)
Flannel, Velour, Velvet,
Velveteen, Corduroy,
Linen, Gabardine,
Wool, Terry, Burlap
Universal 14 (90)
Double Knits, Stretch
Velour, Stretch Terry,
Sweater Knits
Ball Point 14 (90)
Medium
Leather, Vinyl, Suede Leather 14 (90)
Denim, Sailcloth,
Ticking Denim 16 (100)
Coating, Polar Fleece,
Drapery and
Upholstery Fabrics
Universal 16 (100)
Heavy
Leather, Suede Leather 16 (100)
Canvas, Duck,
Upholstery Fabrics Universal 18 (110)Very
Heavy
Topstitching for
Special Finish Topstitching 11 (75)
14 (90)
9

PDFMAILER.DE
Needle Definitions
The illustration identifies the main parts of a sewing
machineneedle.
1. Body
2. Shaft
3. Long groove (round side of needle)
4. Short groove(flat sideof needle)
5. Eye
6. Point
Universal – anall-purpose needle that handles most
woven andknit fabrics. Auniversal needlesize 14/90
comes inserted inyour machine.
Ball point – the point spreads the fibers, preventing
tearsand isespeciallysuited for knit fabrics. Not
recommendedforembroidery.
Denim – the sharp tipeffectivelypierces densely
woven fabrics such as denim andcanvas.
Stretch – specially designed toprevent skipped
stitches in syntheticsuedes andelasticized knits
(swimwear).
Leather – thecuttingpoint createssmall holesin
leather and suede.
Topstitching – the extrasharp tippenetrates layers of
fabrics; extra large eye andlarge grooveaccommo-
dateheavyweight topstitching thread.
Twin/Double – 2 needles are joined on a crossbar
and share a single shaft. Sews two parallel rows of
stitching.Availableinuniversalandballpoint.
10
1
2
3
4
5
6

PDFMAILER.DE
Connecting the Machine to Power Supply
Your machine is equipped with a detachable power
cord. Before connecting the power cord, make sure
the voltageand frequency shown on the machine
are identical to your electrical power.
Check that the power/light switch isin the off posi-
tion. Push the plug into the machine socket and plug
the machine into the wall socket.
Your machine may comeequipped with a polarized
plug (oneprong wider than the other). A polarized
plug reduces the risk of electrical shock. This plug is
intendedto fit intoa polarizedoutlet. If the plugdoes
not fit fully intotheoutlet,reverse theplug.If itstill
doesnot fit, contact a qualified electrician to install
the proper outlet. Donot modify the plug inany way.
Switch on the machine.
For Your Safety
Do not use extension cords or plug adapters.
Do not touch plug with wet hands.
Always turn off the power/light switch first and then
unplug fromtheelectricaloutlet.Examples:
•
when leaving the machine unattended
•
when cleaning the machine
Always turn off the power/light switch:
•
when attaching or removing partssuch as
needle, presser foot, needleplate
•
when threading needle or bobbin
Do not placeanything on the foot control.
Do not placeheavy items on cords. Do not subject
cords to heat. Do not use damaged cords. Have the
cordrepairedimmediately.
While the machine is inoperation, alwayskeep your
eye on the sewingarea and do not touch any mov-
ing parts such as the thread take-up lever, flywheel
or needle.
11
(U.S.A.)

PDFMAILER.DE
Foot Control and Sewing Speed
Sewing speed is determined by howhard you press
on the foot control. The harder youpress on the foot
control, the faster the machineruns.
IMPORTANT: Before using your sewing machine
the first time, place waste fabric under the
presser foot and run the machine without thread
for a few minutes. Wipe away any excess oil.
Removing the Bobbin Case
Removeextension table andopen the bobbin cover.
Hand turn the flywheel toward you to raise the
needle. Pull out the latch toremove the bobbin case.
Release latch.Drop bobbin out of bobbin case.
Spool Pins
Pull up spool pin(s) to place threadspool. Push
spool pin(s) down when carrying or storing machine.
NOTE: If thread tangles under spool A, pass
thread through hole B as shown.
12
(U.S.A.)
A B

PDFMAILER.DE
Winding a Bobbin
1. Pull out the flywheel to keep the needle from
moving up anddown.
2. Place thespool of threadon the spool pin with
the thread coming off the spool asshown. Pull
the thread over aroundthe bobbin winder thread
guide.
3. Pass the thread through the hole in the bobbin
from inside to the outside. Place the bobbin on
the bobbin winder spindle.
4. Push the bobbin winder spindle to the right.
5. Hold the free end of the thread and press the
foot control. Stop the machine when it has made
a fewturns and cut the thread tail close to the
hole in the bobbin.
6. Press the footcontrol again until the bobbin is
fully wound.Return thebobbin winder spindle to
the left andcut the thread.
7. Push the flywheel back intoplace. (The machine
needle will not go up and down until you push in
the flywheel.)
13
1
2
3
4
5
6
7

PDFMAILER.DE
Inserting the Bobbin
1. Place the bobbin in the bobbin case. Make sure
the thread unwinds in the direction shown in the
illustration.
2. Pull the thread intothe bobbin case slot.
3. Drawthe thread under the tension springand
intothedeliveryeye.
Pull out about 15 cm (6”) of thread.
4. Pull out the latchon thebobbin case.
Insert bobbincase. Makesure the prong fits into
the hook race.
Closebobbincover.
14
1
2
3
4

PDFMAILER.DE
Threading the Machine
Turn the flywheel toward you toraise theneedle to
itshighest position.
Raise thepresser foot.
1. Pull the thread under the thread guide.
2. Guide the thread down the right side slot into
the tension area, continuing down around the
check spring holder.
3. Firmly pull the thread fromright toleft,over the
take-up lever anddown intothe take-up lever
eye.
4. Pull the thread down behind the lower thread
guide.
5. Pull thread down behind left needlebar thread
guide.
6. Thread the needle from front to back.
15
1
2
3
4
5
6

PDFMAILER.DE
Drawing Up the Bobbin Thread
1. Raise the presser foot and hold the needle
thread lightly withyour left hand.
2. Turn the flywheel towards you to lower needle
intomachine. Continue turning until the needle
has risenand the take-up lever is at its highest
position.
Pull up the needle thread together with a loop of
bobbin thread.
3. Slide 10 cm (4”) of boththreads to the back un-
der thepresser foot.
16
1
2
3

PDFMAILER.DE
SECTION III
Sewing Basics
Example Of HowTo Read the Machine Set-
Up Information
Set Stitch Selection Knob
j
Set stitch selectionknob on straight stitch.
Set Stitch Length Knob
k
Set stitch lengthknob according to fabric weight
(see page 18).
Set Thread Tension Dial
l
Set thread tension to 4. The fabric, thread and
number of layers of fabric might change where
tension should be set.
Set Stitch Width/Needle Position Dial
m
Move theStitch Width/NeedlePositionDialto5
for center needlepositionor 0 for left position.
Which Presser Foot to Use
n
Usepresser foot shown for the best sewing re-
sult.
Metal foot –Usedmainly for straight and zigzag
stitches longer than 1.0.
Satinstitch foot (Model 2130only) – The cutout
on theunderside of the foot is designed for
densestitch formation. Ideal for satinand deco-
rativestitches.
Zipper foot (Model 2130 only) –Use when sew-
ing zippersintoplace toavoidthe foot riding on
top of the zipper coil.
BlindHem foot –
The adjustable guide ensures
that theneedle catches only one or two fibersof
the hem.
R: Automaticbuttonhole foot(Model 2130only) –
Placebutton in foot. Themachinewill automati-
cally sewthe correct size.
4-step buttonhole foot (Model 2110only) – Use
the measurements on the foot to make a
properly sized buttonhole.
17
12
34
5

PDFMAILER.DE
Straight Stitch
The straight stitch isused to sewa seam in woven
fabricsand mayalso beused for gathering, basting,
sewing in a zipper, pintucks, rolled hems and twin
needlehems.
NOTE:
Fine fabricsshouldhavea stitch lengthbe-
tween 1.5and 2.5, medium fabrics between 2.0 and
3.0and heavier fabrics between 3.0and 4.0.
StartingTo Sew
Raise the presser foot andposition the fabric next to
a seam allowance line on the needle plate. Lower
the needle to the point where sewing is to begin.
Pull the threads under the foot towards the back and
lower thepresser foot. Press the foot control. Gently
guide the fabric along the seam allowance line letting
the fabricfeednaturally.
Finishing Off a Seam
To fasten the threads at the end of a seam, press
and hold the reverse stitch lever while sewing.
Raise thepresser foot. Use the flywheel tobring the
needle toits highest position before moving the fab-
ric.Remove the fabric;pull the threads up and into
threadcutter tocut them the proper length tostart
the next seam.
Changing Sewing Direction
Beginsewing and stop when youreach the point
whereyou want to turn the fabric.Using the flywheel,
bring the needle down intothe fabric.
Raise thepresser foot.
Pivot the fabric around the needleto change the
sewing direction. Lower the presser foot and con-
tinue sewing.
18

PDFMAILER.DE
Gathering
Gathering/shirringevenlydistributes fullness inan
area with very tiny pleats. Gathering is one rowor
two parallelrows. Shirring is three or more parallel
rows. Light tomedium weight fabricsprovide the
best results.
Decrease tension to 2.0 – 4.0.
Increasestitch lengthto 4.
Sewtwo rows of parallel stitches. Sew first rownext
torawedge using foot edge as guide. Sewsecond
rownext to first rowusing foot edge as guide. Leave
long thread tailsat beginning and end of each row.
Pull the bobbin threads simultaneously from each
end of the fabricuntil the desired amount is gath-
ered.
Knot the threads at each end and distribute the gath-
ersevenly.
Reset machine settings tostraight stitch. See page
18.
Sewbetween two rows of stitching to secure gather-
ing.
OR
Lay gather fabricover flat fabricandsewthe two
fabrics together directly on the secondrowof gather-
ing stitches.
19
Other manuals for 2110
1
This manual suits for next models
1
Table of contents
Other ELNA Sewing Machine manuals

ELNA
ELNA eXpressive 850 User manual

ELNA
ELNA 8300 - LEAFLET User manual

ELNA
ELNA easy cover User manual

ELNA
ELNA 8007 Wiring diagram

ELNA
ELNA 3210 JEANS - User manual

ELNA
ELNA eXpressive 970 User manual

ELNA
ELNA 744 User manual

ELNA
ELNA eXpressive 970 User manual

ELNA
ELNA 7200 User manual

ELNA
ELNA 450 User manual