1
TABLE OF CONTENTS
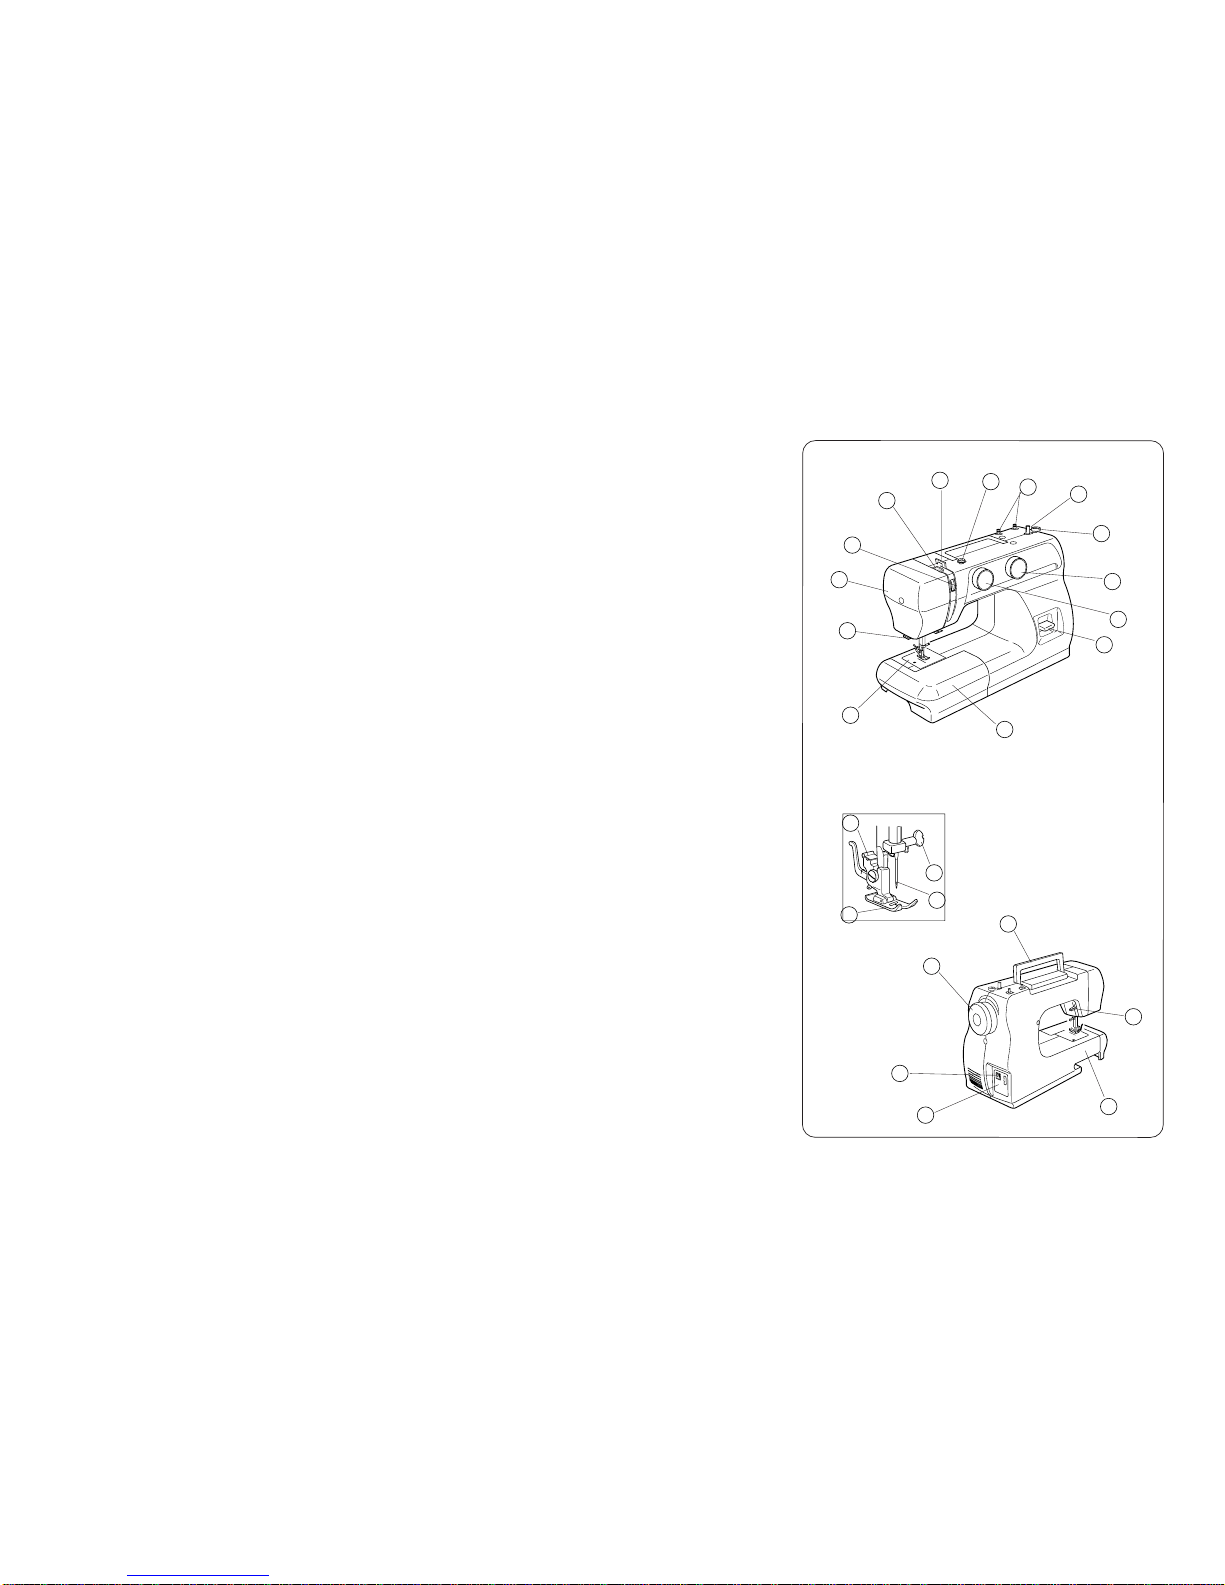
SECTION 1. ESSENTIAL PARTS
Name of Parts ........................................................................2
SECTION 2. GETTING READY TO SEW
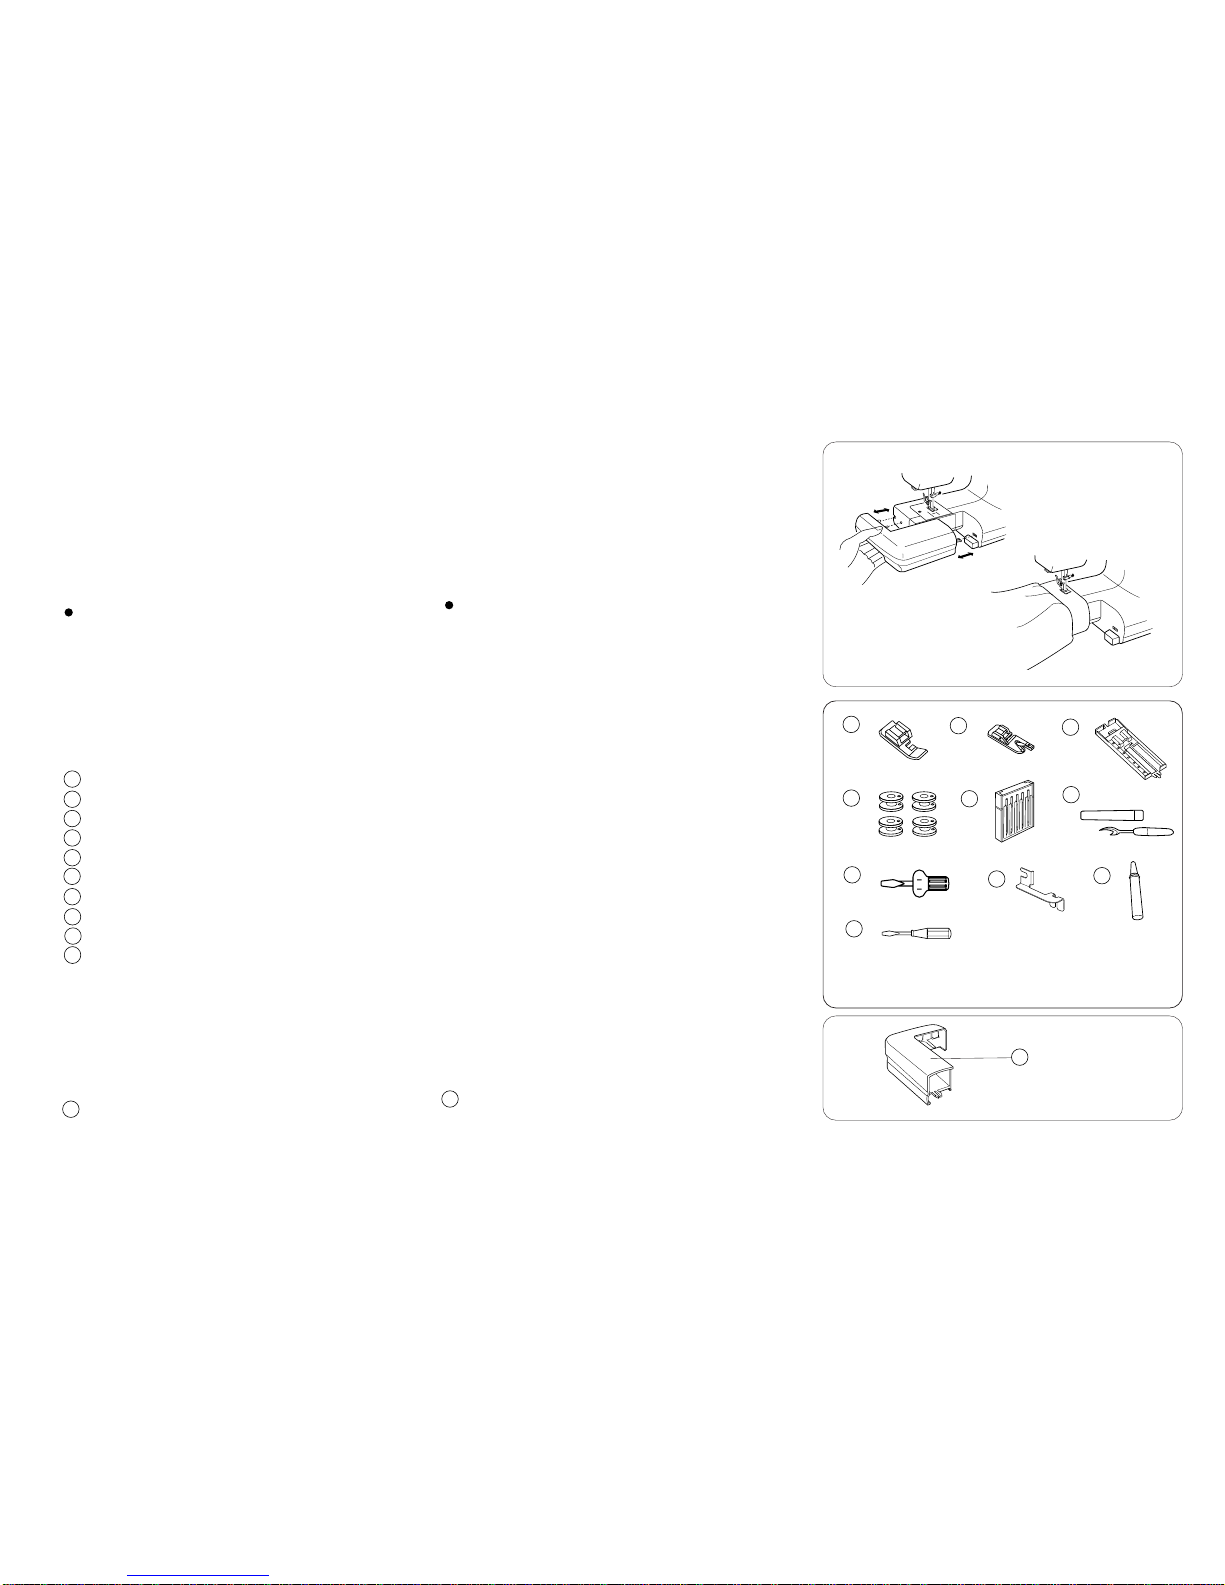
Extension Table .....................................................................3
Standard Accessories ............................................................3
Accessories Storage Box .......................................................3
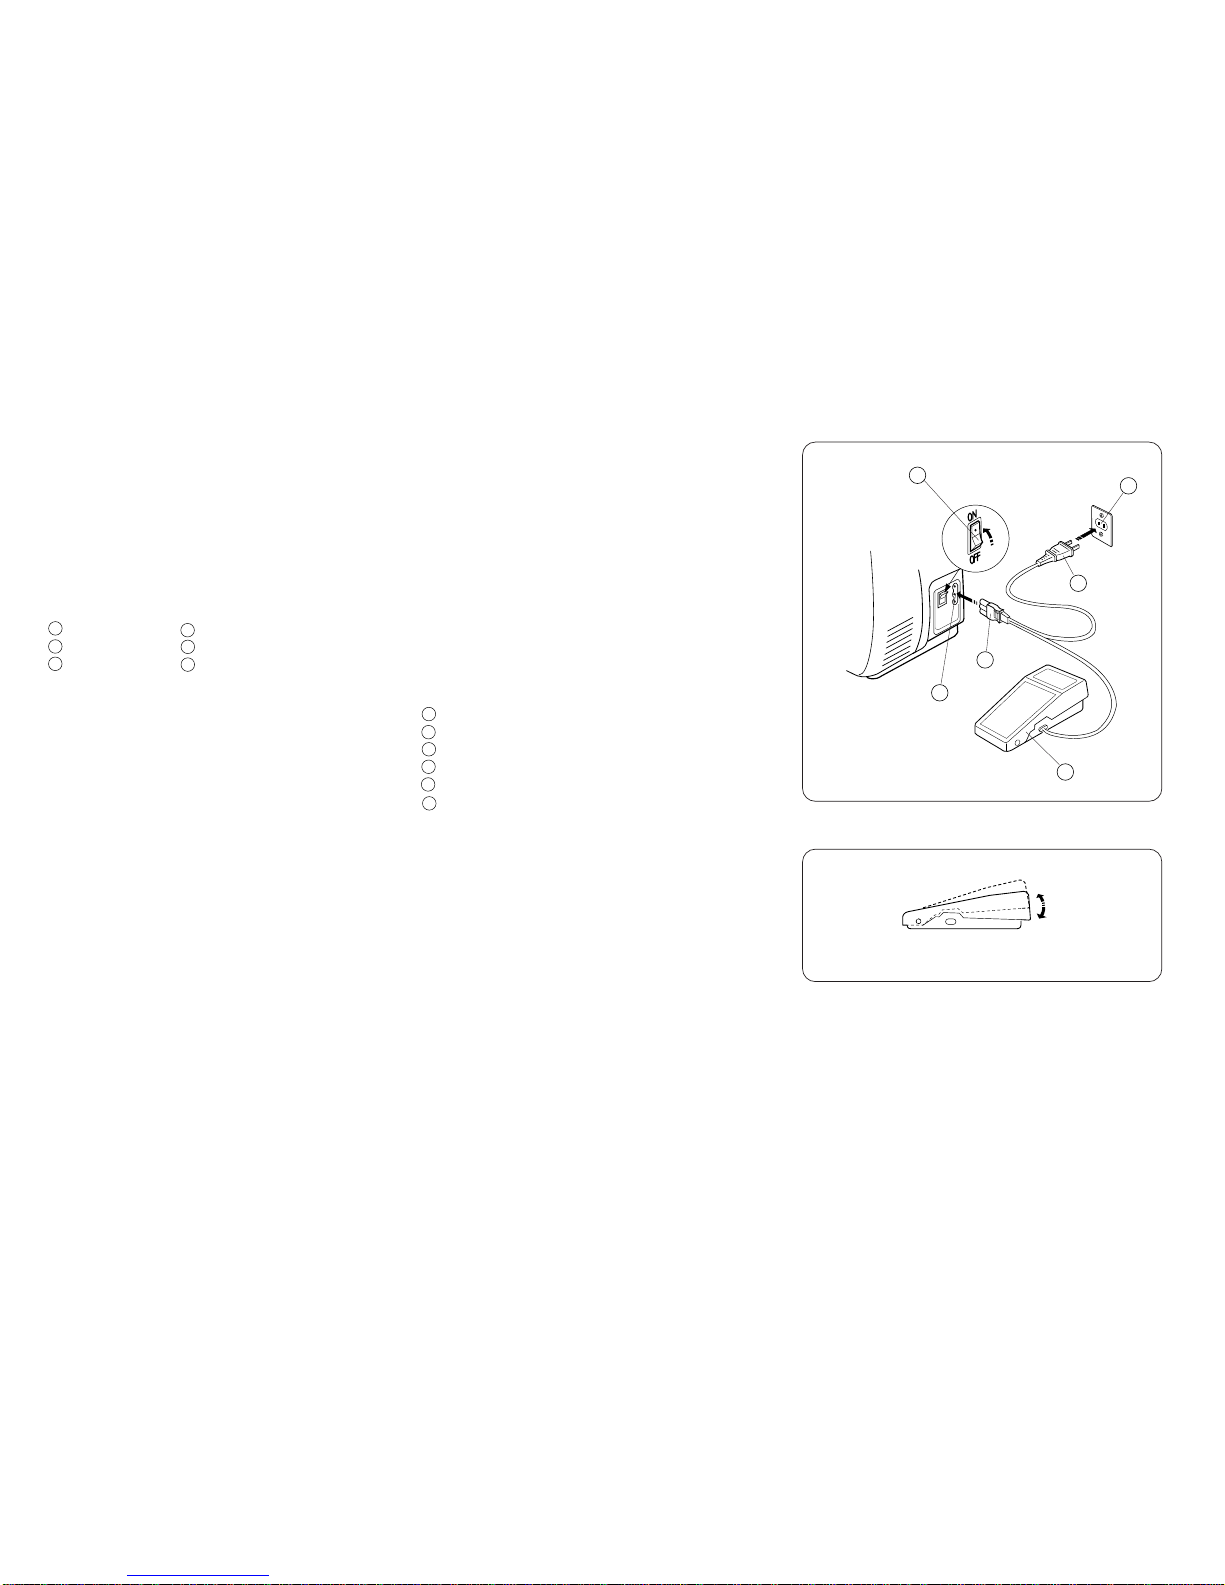
Connecting the Machine to the Power Supply .......................4
Foot Control ...........................................................................4
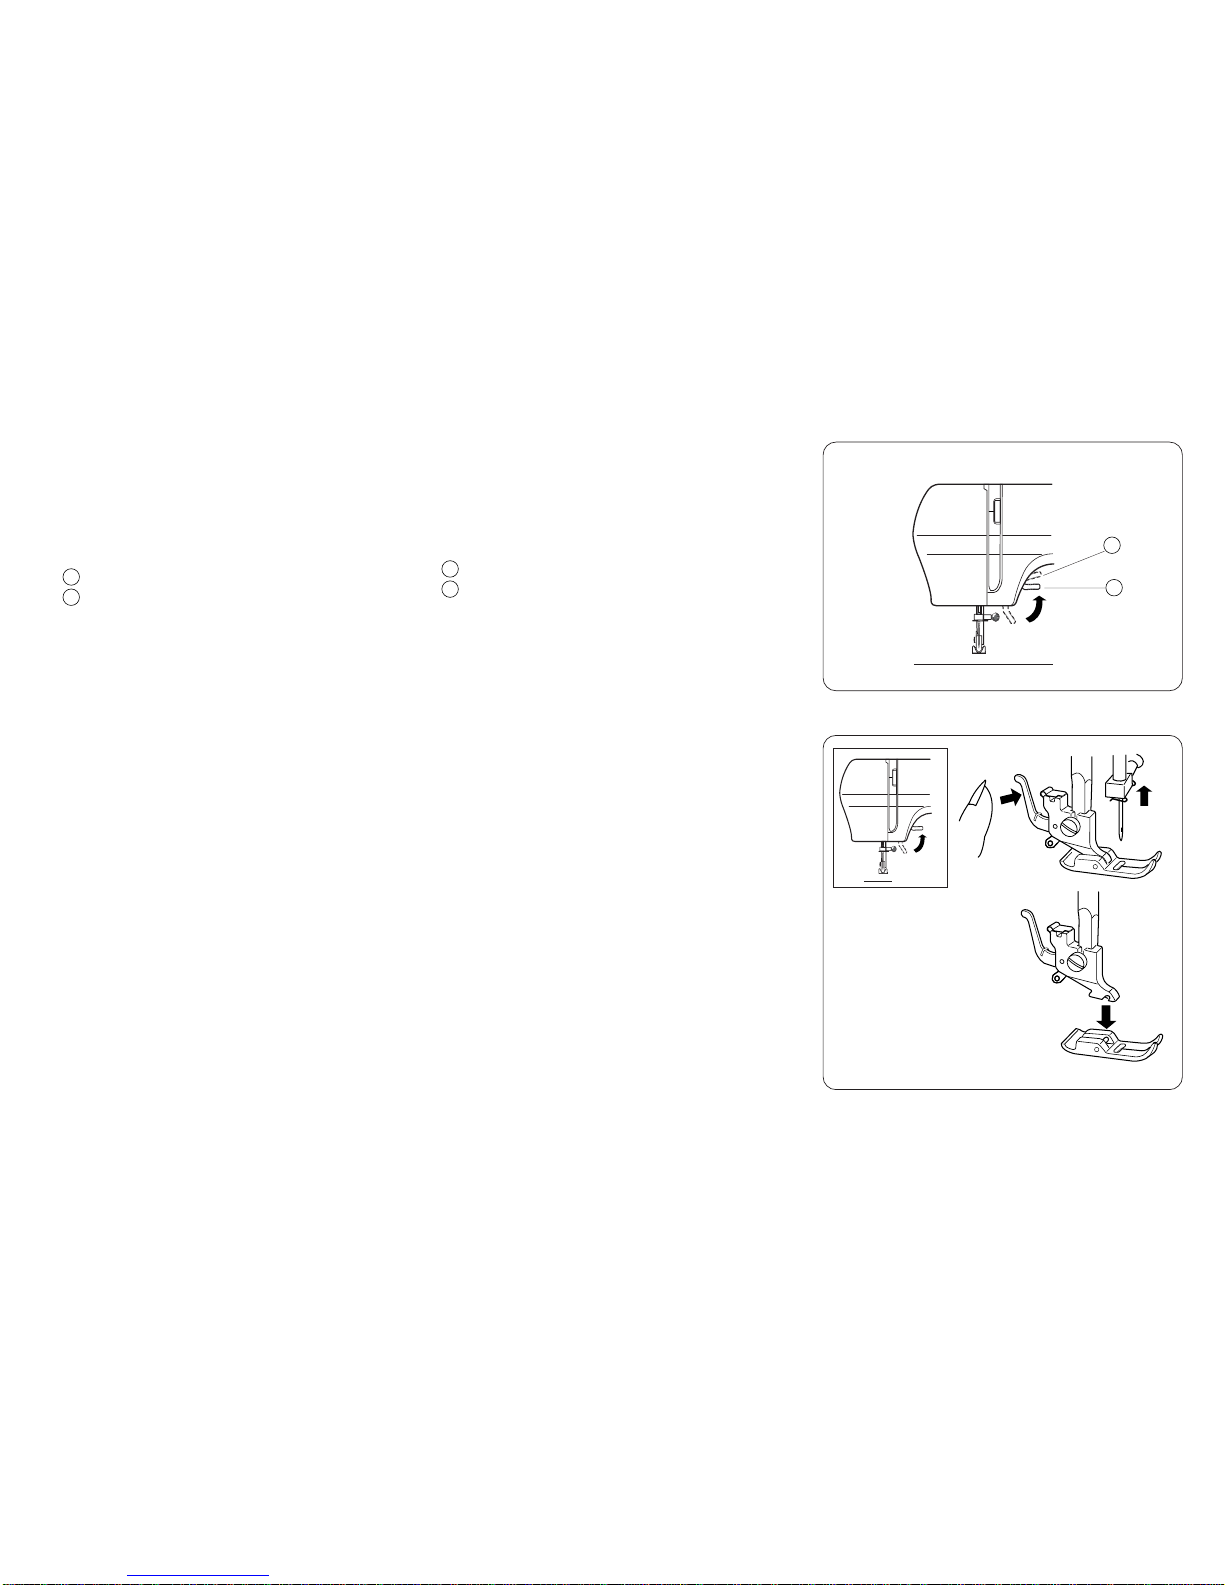
Presser Foot Lifter .................................................................5
To Attach and Remove the Presser Foot...............................5
Changing Needle ...................................................................6
Thread and Needle Chart ......................................................6
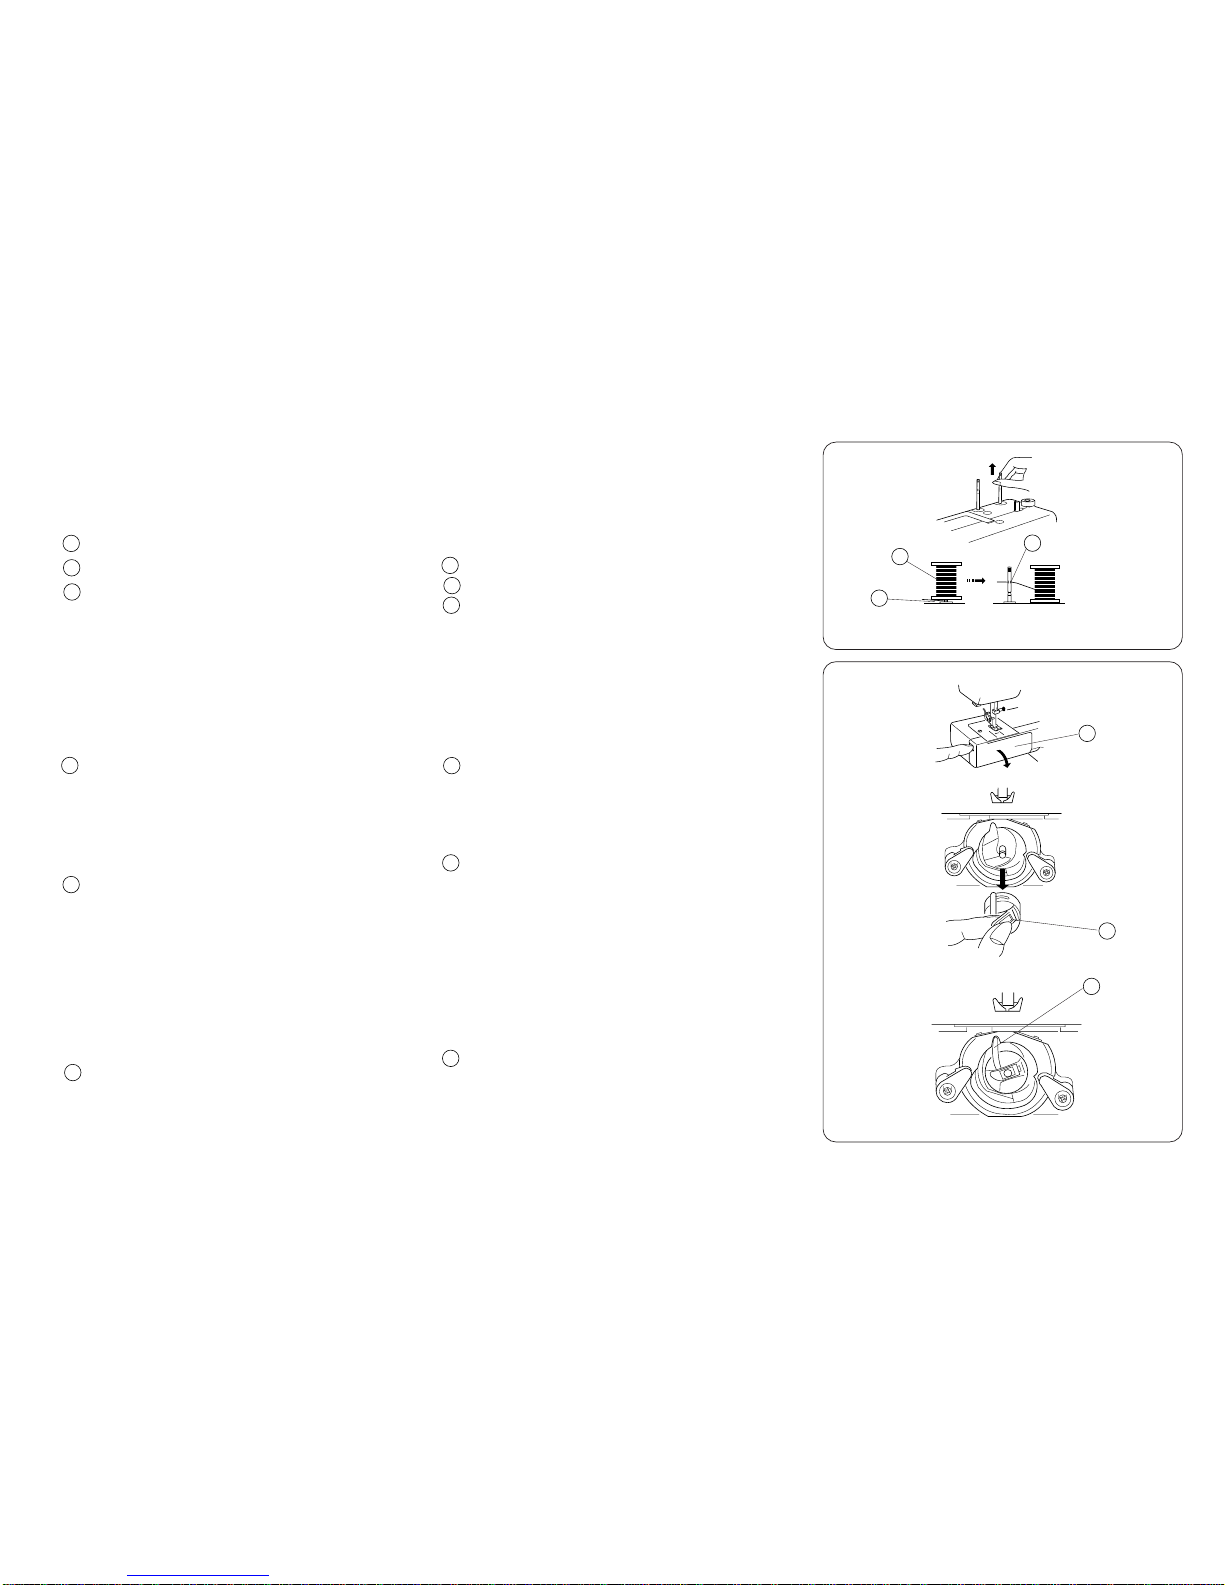
Setting Spool Pins..................................................................7
Removing or Inserting the Bobbin Case ................................7
Winding the Bobbin ................................................................8
Threading Bobbin Case .........................................................8
Threading the Machine ..........................................................9
Drawing Up Bobbin Thread..................................................10
Balancing Needle Thread Tension.......................................11
Adjusting Bobbin Thread Tension ........................................11
Pattern Selector Dial ............................................................12
Stitch Length Dial .................................................................13
Reverse Stitch Button ..........................................................14
Dropping the Feed Dog........................................................14
SECTION 3. BASIC SEWING
Straight Stitch Sewing ..........................................................15
To Change Sewing Direction ...............................................15
Using the Seam Guides on the Needle Plate ......................16
Turning Square Corners ......................................................16
Zigzag Stitching ...................................................................17
SECTION 4. UTILITY STITCHING
Overcasting ..........................................................................17
Tricot Stitch ..........................................................................18
Sewing on Buttons ...............................................................19
Buttonhole ............................................................................20
Corded Buttonhole ...............................................................21
Zipper Application ................................................................22
Blind Stitch Hemming...........................................................23
Rolled Hem ..........................................................................24
SECTION 5. DECORATIVE STITCHING
Shell Tuck (6-stitch model only) ...........................................25
Applique ...............................................................................25
SECTION 6. CARE OF YOUR MACHINE
Dismantling and Assembling Hook Race Unit .....................26
Cleaning the Feed Dog ........................................................26
Sewing Light ........................................................................27
Oil the Machine ....................................................................27
Troubleshooting ...................................................................28
ÍNDICE
SECCIÓN 1. PIEZAS ESENCIALES
Nombre de las piezas ............................................................2
SECCIÓN 2. PREPARACIÓN PARA COSER
Mesa supletoria .....................................................................3
Accesorios
estándar............................................................................ .....3
Caja de accesorios ................................................................3
Conexión de la máquina a la fuente de
alimentación eléctrica ............................................................4
Pedal ......................................................................................4
Palanca de elevación del prensatelas ...................................5
Montaje y extracción del pie prensatelas ...............................5
Cambio de la aguja ................................................................6
Tabla de hilos y agujas ..........................................................6
Preparación de los pasadores portacarretes .........................7
Extracción o inserción de la caja de bobina...........................7
Devanado de la canilla...........................................................8
Enhebrado de la caja de bobina ............................................8
Enhebrado de la máquina ......................................................9
Extracción del hilo de la canilla ............................................10
Compensación de la tensión del hilo de la aguja.................11
Ajuste de la tensión del hilo de la canilla .............................11
Selector de puntada .............................................................12
Selector de longitud de puntada ..........................................13
Tecla de cosido hacia atrás .................................................14
Descenso del Corretelas(Dientes de transporte) .................14
SECCIÓN 3. COSTURA BÁSICA
Costura de puntada recta ....................................................15
Cambio de dirección de costura ..........................................15
Utilización de las guías de costura de la placa de aguja .....16
Esquinas en ángulo recto ....................................................16
Puntadas en zigzag .............................................................17
SECCIÓN 4. COSTURA FUNCIONAL
Sobrehilado ..........................................................................17
Zigzag en punto ...................................................................18
Coser botones......................................................................19
Ojales ...................................................................................20
Ojales acordonados .............................................................21
Aplicación de cremalleras ....................................................22
Dobladillo con puntada invisible...........................................23
Dobladillo enrollado .............................................................24
SECCIÓN 5. COSTURA DECORATIVA
Puntada de ondas
(solamente en el modelo de 6 puntadas).............................25
Aplicaciones .........................................................................25
SECCIÓN 6. CUIDADO DE LA MÁQUINA
Desmontaje y montaje de la pista de la lanzadera ..............26
Limpieza de los dientes de arrastre .....................................26
Lámpara de Costura ............................................................27
Engrase de la máquina ........................................................27
Identificación y resolución de problemas .............................28