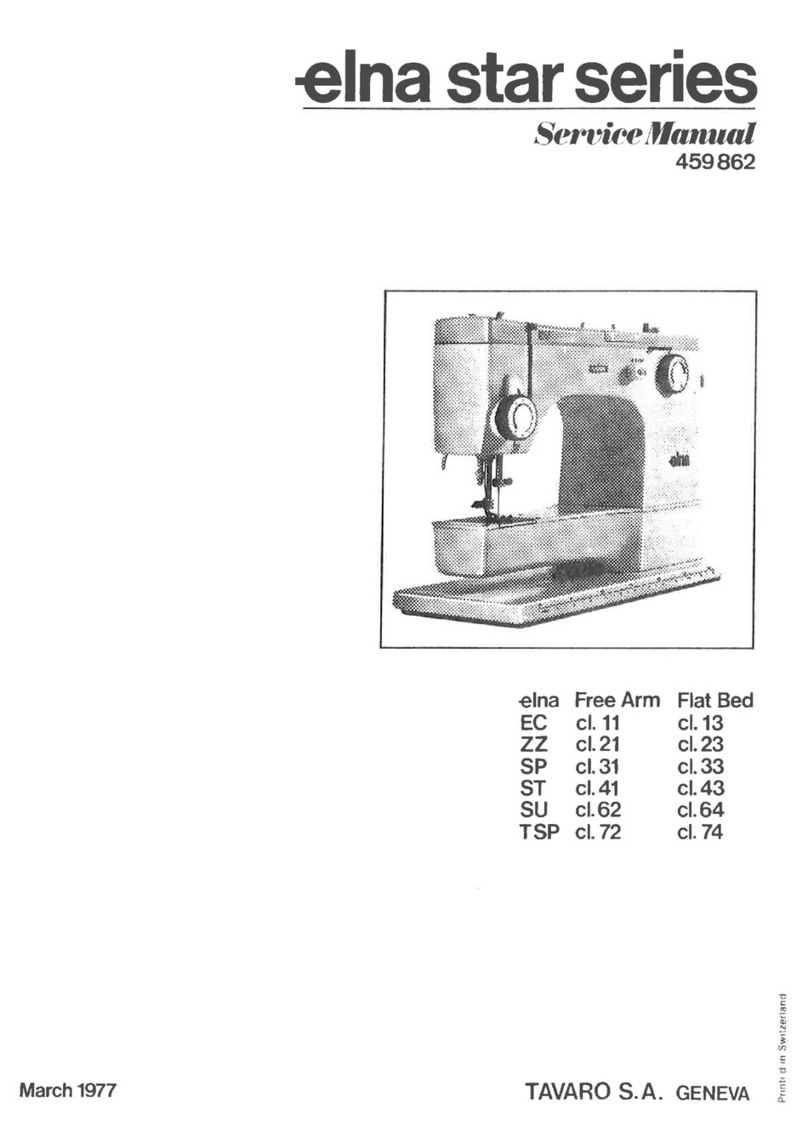
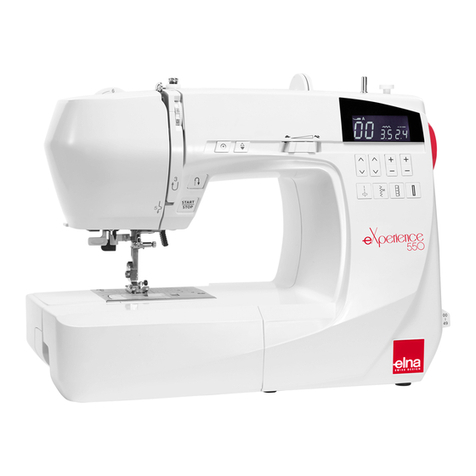
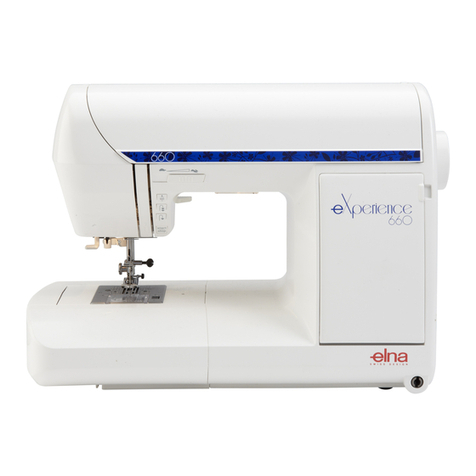
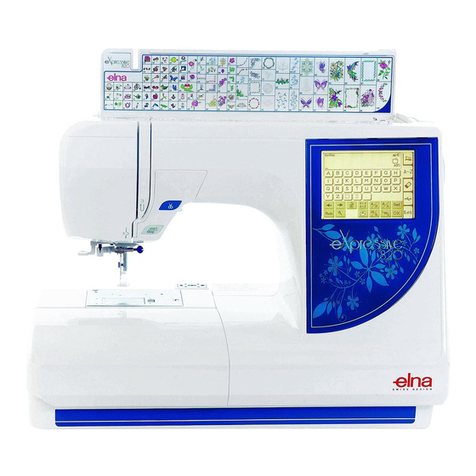
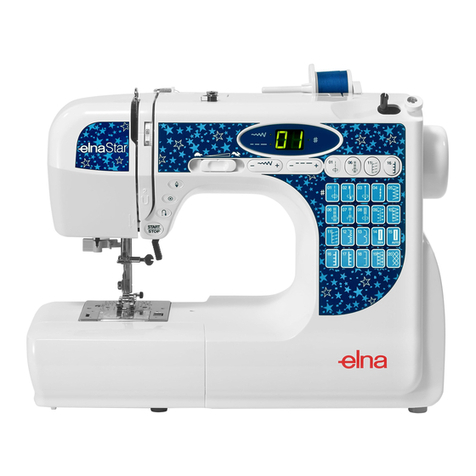
ELNA eXplore 320 User manual

eXplore 320-340
Instruction Manual | Uputstvo za upotrebu | Gebrauchsanleitung

U S A onl y
Y our machine comes equipped with a polarized plug (one prong wider than the other). A polarized plu g
reduces the risk of electrical shock. This plug is intended to fit into a polarized outlet. If the plug does no t
fit fully into the outlet, reverse the plug. If it still does not fit, contact a qualified electrician to install th e
proper outlet. Do not modify the plug in any wa y .
Use only foot control model YC-482J or TJC-150 for this sewing machine (UL, CSA).
IMPORTANT SAFETY INSTRUCTIONS
This appliance is not intended for use by persons (including children) with reduced physical, sensory or
mental capabilities, or lack of experience and knowledge, unless they have been given supervision or
instruction concerning use of the appliance by a person responsible for their safety.
Children should be supervised to ensure that they do not play with this sewing machine.
When using an electrical appliance, basic safety precautions should always be followed, including the
following:
This sewing machine is designed and manufactured for household use only.
Read all instructions before using this sewing machine.
DANGER— To reduce the risk of electric shock:
1. An appliance should never be left unattended when plugged in. Always unplug this sewing
machine from the electric outlet immediately after using and before cleaning.
2. Always unplug before replacing a sewing machine bulb. Replace bulb with same type rated 15 Watts.
WARNING— To reduce the risk of burns, fire, electric shock, or injury to persons:
1. Do not allow to be used as a toy. Close attention is necessary when this sewing machine is used
by or near children.
2. Use this appliance only for its intended use as
Use only attachments recommended by the m
3. Never operate this sewing machine if it has a damaged cord or plug, if it is not working properly, if
it has been dropped or damaged, or dropped into water.
Return this sewing machine to the nearest authorized dealer or service center for examination,
repair, electrical or mechanical adjustment.
4. Never operate the appliance with any air opening blocked. Keep ventilation openings of this
sewing machine and foot controller free from accumulation of lint, dust and loose cloth.
5. Never drop or insert any object into any opening.
6. Do not use outdoors.
7. Do not operate where aerosol (spray) products are being used or where oxygen is being
administered.
8. To disconnect, turn all controls to the off (“O”) position, then remove plug from outlet.
9. Do not unplug by pulling on cord. To unplug, grasp the plug, not the cord.
10. Keep fingers away from all moving parts. Special care is required around the sewing machine
needle and/or cutting blade.
11. Always use the proper needle plate. The wrong plate can cause the needle to break.
12. Do not use bent needles.
13. Do not pull or push fabric while stitching. It may deflect the needle causing it to break.
14. Switch this sewing machine off (“O”) when making any adjustment in the needle area, such as
threading the needle, changing the needle, threading the bobbin or changing the presser foot, and
the like.
15. Always unplug this sewing machine from the electrical outlet when removing covers, lubricating, or
when making any other adjustments mentione
SAVE THESE INSTRUCTIONS
The design and specifications are subject to change without a prior notice.
Please note that on disposal, this product must be safely recycled in accordance with relevant National
legislation relating to electrical/electronic products. If in doubt please contact your retailer for guidance.
(European Union only)
2

3
VAŽNA SIGURNOSNA UPUTSTVA
OPASNOST- Da biste smanjili rizik od strujnog udara:
UPOZORENJE Da biste smanjili rizik od opekotina, požara I strujnog udara ili povreda:
1.Ne dozvoljavajte deci da se igraju sa mašinom. Mašina nije namenjena deci niti mentalno labilnim osobama.
Ne dozvolite da se koristi kao igračka. Potrebna je posebna pažnja ukoliko mašinu koristite u
prisustvu dece.
2. Koristite ovu mašinu za šivenje po uputstvu za šta je namenjena. Po uputstvu koristite samo one dodatke
koje preporučuje proizvođač.
3. Ne upravljajte mašinom koja ima oštećen utikač ili kabl, ako ne radi kako treba, ako je pala, oštećena ili ako
je pala u vodu. Vratite mašinu do najbližeg ovlašćenog dilera ili servisera na ispitivanje, popravku električnih ili
mehaničkih dodataka.
4. Ne koristite mašinu ako joj je zatvorena ventilacija tj. dovod vazduha. Pazite da otvori za ventilaciju uvek
budu zaštićeni od akumulacije dlačica, prašine i vlakana.
5. Ne ubacujte nikakve predmete u otvore mašine
6. Ne koristite mašinu napolju.
7. Ne koristite mašinu tamo gde se upotrebljavaju proizvodi sa aerosolom ili kiseonikom.
8. Da biste isključili mašinu pritisnite OFF prekidač a potom izvucite utikač iz struje.
9. Kada isključujete iz struje ne vucite kabl već čvrsto držite za utikač.
10. Držite prste dalje od pokretnih delova, naročito igle.
11. Koristite odgovarajuću ubodnu ploču. Pogrešna ploča može prouzrokovati lomljenje igle.
12. Ne upotreblajvajte savijene igle.
13. Nemojte gurati niti vući platno dok šijete. To može prouzrokovati lomljenje igle.
14. sključite mašinu za šivenje kada radite bilo kakva podešavanja u predelu igle, kao što je zamena igle,
kada želite da udenete konac, zamenite stopicu ili slično.
15. Uvek isključite mašinu iz struje kada skidate poklopce, kada podmazujete ili vršite bilo kakva
podešavanja pomenuta u uputstvu.
Ovaj uredjaj nije namenjen osobama (uključujući i decu) sa smanjenim fizičkim ili menatalnim sposobnostima, niti
osobama koje nemaju iskustva ni znanja, osim ukoliko su pod nadzorom osobe odgovorne za njihovu bezbednost.
Posebnu pažnju treba obratiti na decu jer mašina za šivenje nijeigračka i ne treba da služi toj svrsi.
Mašina zašivenje napravljena je isključivo za kućnu upotrebu.
Pročitajte pažljivo uputstvo za upotrebu pre nego što započnete rad na Vašoj mašini.
Prilikom korišćenja bilo kog električnog uredjaja treba uvek odgovorno pratiti sigurnosna uputstva, kao što su:
1. Mašinu nikada ne ostavljati bez nadzora niti uključenu u struju. Obavezno je uvek posle upotrebe i pre
čišćenja isključite iz štekera.
2. Uvek je isključite iz zida pre menjanja sijalice, i sijalicu zamenite istim tipom 12 Volti, 15 Wati.
“Molimo Vas obratite pažnju da se ovaj ne sme bacati zajedno sa otpatcima iz domaćinstva. Proizvod se mora
reciklirati u skladu sa zakonom koji se odnosi na električne i elektronske uredjaje. Ako imate nekih dodatnih pitanja
posavetujte se sa proizvođačem.
SAČUVAJTE OVA UPUTSTVA
Izgled i specifikacije mašine mogu se menjati i bez prethodne najave od strane proizvođača.
Mašinu držite podalje od statičkog elektriciteta, izvora toplote, vlage ili direktne sunčeve svetlosti.
Koristite isključivo nožnu papučicu Model YC-482J ili TJC-150 (UL, CSA).
Samo za SAD
Mašina sadrži polarizovanu utičnicu (gde je jedna šitra od druge). Ovakva utičnica smanjuje mogućnost elektro
šoka. Ovakav utikač može se uključiti jedino u polarizovanu zidnu utičnicu. Ukoliko ne može da se uključi,
probajte da okrenete utikač, a u slučaju da i dalje ne odgovara pozovite kvalifikovanog električara kako bi Vam
namontirao odgovarajuću utičnicu. Ne pokušavajte sami da modifikujete utikač.

Nur für US A
Ihre Maschine ist mit einem polarisierten Stecker versehen (ein Pol ist breiter als der andere). Ein
polarisierter Stecker kann Stromschläge vermeiden helfen. Diese Art Stecker gilt für eine polarisierte Dose.
Den Stecker umdrehen, wenn er nicht gleich in die Dose passt. Passt er dennoch nicht, soll ein Elektriker
die geeignete Steckdose einbauen. Auf keinen Fall den Stecker verändern.
Nur benutzen: Fusskontroll-ModellYC-482JoderTJC-150fürdieNähmaschine(UL,CSA).
WICHTIGE SICHERHEITSHINWEISE
Diese Nähmaschine eignet sich nur für den Hausgebrauch.
Diese Nähmaschine ist kein Spielzeug. Erlauben Sie Kindern nicht, mit der Maschine zu spielen.
Die Maschine darf nicht von Kindern oder geistig behinderten Personen ohne geeignete Aufsicht benutzt werden.
Bei der Benutzung eines elektrischen Geräts sind stets grundlegende Sicherheitsvorkehrungen zu treffen, darunter:
Lesen Sie vor Inbetriebnahme dieses Geräts alle Anweisungen.
GEFAHR – Befolgen Sie die nachstehenden Anweisungen, um das Risiko eines Stromschlags zu mindern:
1. Lassen Sie das Gerät niemals unbeaufsichtigt, wenn es an den Netzstrom angeschlossen ist. Trennen Sie die
Maschine nach der Benutzung und vor der Reinigung immer vom Netzstrom.
2. Trennen Sie die Maschine immer vom Netzstrom, bevor Sie die Glühbirne der Nähmaschinenlampe auswechseln.
Ersetzen Sie die Glühbirne durch eine neue Birne gleichen Typs (15 W).
WARNUNG – Mindern Sie wie folgt das Risiko von Verbrennungen, Bränden, Stromschlag oder
Personenverletzungen:
1. Lassen Sie es nicht zu, dass die Maschine als Spielzeug benutzt wird. Bei der Benutzung dieser Nähmaschine
durch Kinder oder in der Nähe von Kindern ist größte Aufmerksamkeit erforderlich.
2. Benutzen Sie diese Maschine ausschließlich für den in dieser Gebrauchsanleitung beschriebenen Zweck.
Benutzen Sie ausschließlich Zubehör, das vom Hersteller empfohlen wird. Näheres dazu entnehmen Sie bitte dieser
Gebrauchsanleitung.
3. Nehmen Sie diese Nähmaschine niemals in Betrieb, wenn Ihr Stromkabel oder Netzstecker schadhaft ist, wenn sie
nicht vorschriftsmäßig funktioniert, wenn sie fallen gelassen oder beschädigt wurde oder in Wasser gefallen ist.
Bringen Sie diese Nähmaschine zwecks Überprüfung, Reparaturen und elektrischer und mechanischer
Einstellungen zu Ihrem nächsten Händler oder einem Kundendienstzentrum.
4. Nehmen Sie das Gerät niemals in Betrieb, wenn eine der Luftöffnungen blockiert ist. Sorgen Sie dafür, dass sich in
den Ventilationsöffnungen dieser Nähmaschine und des Fußanlassers weder Fusseln noch Staub oder Stoffreste
ansammeln.
5. Lassen Sie keine Gegenstände in irgendwelche Öffnungen fallen und versuchen Sie nicht, Gegenstände in
Öffnungen zu stecken.
6. Benutzen Sie die Maschine nicht im Freien.
7. Benutzen Sie diese Maschine nicht in Bereichen, in denen Aerosol-Produkte (Sprühdosen) benutzt oder Sauerstoff
zugeführt werden.
8. Schalten Sie die Maschine aus, indem Sie alle Betätigungselemente aus “Aus” (“0”)stellen und dann den
Netzstecker abziehen.
9. Ziehen Sie den Netzstecker nicht ab, indem Sie am Kabel ziehen. Halten Sie zum Abziehen des Netzsteckers den
Stecker fest und nicht das Kabel.
10. Halten Sie Ihre Finger von allen beweglichen Teilen fern. Besondere Aufmerksamkeit ist im Bereich der Nähnadel
erforderlich.
11. Benutzen Sie immer die richtige Stichplatte. Beim Einsatz der falschen Stichplatte kann die Nadel brechen.
12. Benutzen Sie keine verbogenen Nadeln.
13. Der Stoff darf während des Nähens nicht gezogen oder geschoben werden. Die Nadel könnte sich sonst biegen und
abbrechen.
14. Schalten Sie diese Nähmaschine aus (“0”), wenn Justierungen im Nadelbereich – wie zum Beispiel Einfädeln und
Auswechseln der Nadel, Spulen, Auswechseln des Nähfußes, usw. – vorgenommen werden.
15. Ziehen Sie immer den Netzschalter dieser Nähmaschine ab, wenn Abdeckungen entfernt, Maschinenteile geölt oder
andere in diesen Gebrauchsanleitungen aufgeführte Justierungen vorgenommen werden.
BEWAHREN SIE DIESE ANLEITUNG AUF.
Technische Änderungen ohne vorherige Ankündigung vorbehalten.
Entsprechend der gesetzlichen Regelungen über das umweltgerechte Entsorgen von Elektro- und
Elektronikgeräten, ist dieses Produkt nach Verwendung dem Wertstoffkreislauf zuzuführen. Im Zweifelsfalle
wenden Sie sich bitte an den Verkäufer. (Nur innerhalb der EU)
4

5
TABLE OF CONTENTS
SECTION 1. KNO
W
YOUR MACHINE
Names of Parts................................................................ 8
Standard Accessories....................................................10
Accessory storage......................................................... 10
Extension Table.............................................................12
Free-arm sewing............................................................12
SECTION 2. GETTING READY TO SEW
Connecting the Power Supply....................................... 14
Controlling the Sewing Speed....................................... 14
Reverse Stitch Lever..................................................... 16
Foot Pressure Dial......................................................... 16
Dropping the Feed Dog ................................................. 16
Raising and Lowering the Presser Foot........................ 18
Changing the Presser Foot............................................ 18
Removing and Attaching the Foot Holder...................... 18
Changing Needles......................................................... 20
Needle and Fabric Chart................................................ 20
Winding the Bobbin........................................................ 24
Setting the spool............................................................ 24
Removing the bobbin..................................................... 24
Winding the bobbin........................................................ 26
Inserting the bobbin ....................................................... 28
Threading the Machine.................................................. 30
Needle threader............................................................. 32
Drawing up the Bobbin Thread...................................... 34
Selecting the Stitch Pattern........................................... 36
Pattern selector dial ....................................................... 36
Stitch Length Dial........................................................... 36
Adjusting stretch stitch balance ..................................... 38
Stitch Width Dial............................................................. 38
Variable needle position................................................ 38
Balancing Needle Thread Tension................................ 40
SETION 3. BASICSEWING
Straight Stitch Sewing.................................................... 42
Changing the sewing direction....................................... 42
Finishing sewing............................................................ 42
Seam guides on the needle plate .................................. 44
Turning a square corner................................................ 44
SECTION 4. UTILITYSTITCHES
Basic Zigzag................................................................... 46
Overcasting.................................................................... 46
Super Stretch Stitch....................................................... 48
3-Step Zigzag Stitch....................................................... 48
Triple Seam.................................................................... 50
Rickrack or Triple Zig-zag .............................................. 50
Button Sewing................................................................ 52
Automatic Buttonhole (Model 340)................................ 54
Adjusting the buttonhole stitch density .......................... 58
4-step Buttonhole (Model 320)....................................... 60
Adjusting the buttonhole stitch density .......................... 60
Corded Buttonhole (Model 340)..................................... 62
Corded Buttonhole (Model 320)..................................... 64
Manual Buttonhole (Model 340)..................................... 66
Zipper Application.....................................................68-72
Blind Hemming............................................................... 74
SECTION 5. DECORATIVESTITCHES
Decorative Satin Stitches............................................... 76
Decorative Stretch Stitches............................................ 76
Smocking ....................................................................... 78
Quilting (Model 340)....................................................... 80
Pin Tucking.................................................................... 82
Shell Tucking.................................................................. 82
Fagoting......................................................................... 84
Patchwork...................................................................... 84
Appliqué......................................................................... 86
SECTION 6. CAREANDMAINTENANCE
Cleaning the Hook Race and Feed Dogs...................... 88
Replacing the Bobbin Holder ......................................... 90
Replacing the Light Bulb................................................ 90
Troubleshooting............................................................. 92
OPTIONAL ACCESSORIES........................... 95
RECYCLING REGULATIONS........................ 95
NOTE :
Information found in this instruction manual is
current at the time of printing. Elna reserves the right to
change and update specifications and information as
needed.

6
SADRŽAJ
Osnovni cik-cak bod ...................................................... 47
Opšivanje .................................................................... 47
Extra rastegljivi bod ....................................................... 49
Rastegljivi cik-cak bod.................................................. 49
Trostruki porub.............................................................. 51
Trostruki cik-cak bod.............................................. 51
Našivanje dugmića ........................................................ 53
Automatska rupica za dugme (Model 340)................... 55
Podešavanje gustine boda rupice ..........................59
Rupica u 4 koraka (Model 320).................................... 61
Podešavanje gustine boda rupice .......................... 61
Okasta rupica (Model 340)..................................... 63
Okasta rupica (Model 320)..................................... 65
Ručno šivena rupica (Model 340).................................67
Našivanje rajsfešlusa ..............................................71-73
Nevidljivi porub............................................................... 75
Čišćenje grajfera i zubaca transportera ...................... 89
Zamena držača špulne ......................................... 91
Zamena sijalice .............................................................. 91
Mogući problemi............................................................. 93
RECIKLAŽA.................................................95
DODACI.......... .............................................95
Dekorativni ravan bod............................................... 77
Dekorativni rastegljivi bod............................................ 77
Smoking ....................................................................... 79
Kućni tekstil (Model 340)............................................... 81
Falte i nabori ................................................................ 83
Školjkasti porub............................................................. 83
Sastavljanje.................................................................... 85
Pečvork ...................................................................... 85
Aplikacije ......................... .............................................. 87
Povezivanje mašine u struju ....................................... 15
Kontrola brzine šivenja ....................................... 15
Ručkica za šivenje unazad............................................ 17
Taster za određivanje pritiska stopice........................... 17
Spuštanje zubaca transportera .................................... 17
Podizanje i spuštanje stopice. ....................................... 19
Zamena stopice............................................................ 19
Skidanje i postavljanje držača stopice...................... 19
Zamena igle .................................................................. 21
Tabela vrsta igala i tkanina.......................................... 21
Namotavanje špulne..................................................... 25
Postavljanje vretena ..................................................... 25
Skidanje špulne............................................................ 25
Namotavanje špulne ...................................................... 27
Postavljanje špulne ....................................................... 29
Uvođenje konca u mašinu.......................................... 31
Uvođenje konca u iglu .................................................. 33
Uvođenje konca špulne ........................................... 35
Odabir boda ........................................................... 37
Brojčanik za odabir boda................................................ 37
Odabir dužine boda........................................................ 37
Podešavanje rastegljivosti šava .................................. 39
Odabir širine boda......................................................... 39
Različiti položaji igle ................................................ 39
Određivanje napetosti konca igle .................................. 41
Šivenje ravnog boda.................................................... 43
Promena pravca šivenja.............................................. 43
Završavanje šivenja ...................................................... 43
Vođice za štep na ubodnoj ploči .................................. 45
Skretanje na uglovima.................................................... 45
NAPOMENA :
Informacije date u ovom uputstvu aktuelne su
u vreme štampanja. Elna zadržava pravo promene i dodavanja
specifikacija i informacija u slučaju promene.
DEO 1. UPOZNAVANJE MAŠINE
Delovi mašine ................................................................9
Standardni pribor.............................................................11
Dodaci.................... ....................................................... 11
Produženi sto ..................................................................13
Rukavna platforma..........................................................13
DEO 2. PRIPREMA ZA ŠIVENJE
DEO 3. OSNOVE ŠIVENJA
DEO 4. OSNOVNI BODOVI
DEO 5. DEKORATIVNI BODOVI
DEO 6. ČIŠĆENJE I ODRŽAVANJE

7
INHALTSVERZEICHNIS
TEIL 1. IHRE MASCHINE
Teilebezeichnungen......................................................... 9
Serienmäßiges Zubehör................................................11
Zubehörfach...................................................................11
Anschiebetisch...............................................................13
Freiarmnähen.................................................................13
TEIL 2. VORBEREITUNGEN FÜR DAS NÄHEN
Anschluss an den Netzstrom .........................................15
Regulieren der Nähgeschwindigkeit..............................15
Rückwärtstaste..............................................................17
Fußdruckregler...............................................................17
Herabsenken des Transporteurs...................................17
Heben und Senken des Nähfußes.................................19
Auswechseln des Nähfußes..........................................19
Abnehmen und Anbringen des Fußhalters....................19
Auswechseln der Nadeln ...............................................21
Faden- und Nadeltabelle...............................................23
Spulen............................................................................25
Einsetzen der Garnrolle.................................................25
Zuätzlicher Garnrollenhalter ..........................................25
Entnahme der Spule......................................................25
Spulen............................................................................27
Einsetzen der Spule.......................................................29
Einfädeln der Maschine.................................................31
Nadeleinfädler................................................................33
Heraufholen des Unterfadens........................................35
Wahl des Stichmusters..................................................37
Musterauswahlregler.....................................................37
Stichlängenregler...........................................................37
Feine Einstellungen der Stretchstitche..........................39
Stichbreitenregler...........................................................39
Variable Nadelstellung...................................................39
Einstellen der Oberfadenspannung ............................... 41
TEIL 5. ZIERSTICHE
Dekorative Federstiche ..................................................77
Dekorative Stretchstiche ................................................77
Smoken ..........................................................................79
Wattierungsführer ( nur für Mod. 340)............................81
Biesen ............................................................................83
Nähen eines Muschelsaums..........................................83
Hohlsaum .......................................................................85
Patchwork.......................................................................85
Applizieren mit dem Kordonstich....................................87
TEIL 6. PFLEGE UND WARTUNG
Reinigen von Greifer und Transporteuren.....................89
Wiedereinstzen des Spulengehäuses............................91
Auswechseln der Glühbirne...........................................91
Problemlösungen...........................................................94
ZUBEHÖR .....................................................95
RECYCLINGS-VORSCHRIFTEN ..................95
Hinweis : Alle informationen in diesem Handbuch gelten im
Augenblick des Druckens.Wir behalten uns des Recht vor,
Beschreibungen und Informationen bei Bedarf zu ändern oder
zu aktualisieren.
TEIL 3. EINFACHES NÄHEN
Geradstichnähen............................................................43
Änderung der Nährichtung.............................................43
Fertigstellen der Naht.....................................................43
Nahtführungslinien auf der Stichplatte...........................45
Ändern der Nährichtung um 90°.....................................45
TEIL 4. PRAKTISCHE STICHE
Zick-Zack-Stich...............................................................47
Abdeckungsnähte...........................................................47
Superstretch Stich..........................................................49
3-Stufen Zick-Zack-Stich ................................................49
Dreifachnaht...................................................................51
Dekorativer Stretchstich .................................................51
Annähen von Knöpfen ....................................................53
Automatische Knopflöcher (nur für Mod. 340)................55
Einstellen der Knopflochstichdichte................................59
Knopflochnähen in 4-Schritten (nur für Mod. 320)..........61
Mit Bündchen verstärkte Knopflöcher
(nur für Mod. 340)...........................................................63
Mit Bündchen verstärkte Knopflöcher
(nur für Mod. 320)...........................................................65
Manuelles Knopfloch (nur für Mod. 320 ) .......................67
Reißverschlüsse .....................................................71 – 73
Blindsaum.......................................................................75
8
SECTION 1. KNO
W
YOUR MACHINE
N ames o
f
Parts
1 Bobbin winder stopper
2 Bobbin winder spindle
3 Hole for additional spool pin
4 Spool holder
5 Spool pin
6 Bobbin winder thread guide
7 Thread take-up lever
8 Foot pressure dial
9 Face plate
10 Thread cutter
11 Needle threader
12 Needle plate
13 Extension table (Accessory storage)
14 Hook cover plate
15 Hook cover plate release button
16 Thread tension dial
17 Reverse stitch lever
18
Stitch length dial
19 Pattern selector dial
20 Stitch width dial
21 Presser foot
22 Needle
23 Needle clamp screw
24 Shank
25 Setscrew
26 Carrying handle
27 Flywheel
28 Power switch
29 Machine socket
30 Drop feed lever
31 Free-arm
32 Buttonhole lever (Model 340 only)
33 Presser foot lever

9
1 Spuleranschlag
2 Spuler
3 Anbringung für zweiten Garnrollenhalter
4 Fadenabziehscheibe
5 Garnrollenhalter
6 Spulerfadenführung
7 Fadenhebel
8 Fußdruckregler
9 Kopfabdeckung
10 Fadenabschneider
11 Nadeleinfädler
12 Stichplatte
13 Anschiebetisch (Zubehörfach)
14 Greiferplatte
15 Auslöseknopf für Greiferabdeckung
16 Fadenspannungsregler
17 Rückwärtstaste
18 Stichlängenregler
19 Musterauswahlregler
20 Stichbreitenregler
21 Nähfuß
22 Nadel
23 Nadelklemmschraube
24 Fußhalter
25 Befestigungsschraube
26 Tragegriff
27 Handrad
28 Netzschalter
29 Maschinensteckdose
30 Schieber zum Versenken des Transporteurs
31 Freiarm
32 Knopflochhebel (nur für Mod.340)
33 Nähfußhebel
DEO 1. UPOZNAJTE MAŠINU
Nazivi delova Teilebezeichnungen
1 Zaustavljač namotača špulne
3 Rupa za iglu dodatnog kalema
4 Držač kalema
5 Igla kalema
2 Kalem namotača špulne
6 Vođica konca namotača špulne
7 Ručkica za podizanje konca
8 Brojčanik za podešavanje pritiska stopice
9 Prednja ploča
10 Sekač konca
12 Ubodna ploča
13 Produženi sto (kutija za odlaganje dodataka)
14 Poklopac grajfera
15 Dugme za otvaranje poklopca grajfera
16 Brojšanik za podešavanje napetosti konca
17 Ručka za šivenje unazad
19 Brojčanik za odabir boda
18 Brojčanik za podešavanje dužine boda
20 Brojčanik za podešavanje širine boda
21 Stopica
22 Igla
23 Zavrtanj na nosaču igle
24 Držač
25 Zavrtanj za podešavanje
26 Ručka za nošenje
27 Zamajac
28 Glavni prekidač
29 Utičnica na mašini
30 Ručkica za spuštanje zubaca transportera
31 Rukavna platforma
32 Ručka za šivenje rupica za dugmiće (model 340)
33 Ručkica za spuštanje stopicee
11 Vodič konca igle

10
qw
er
tyu
oi
!0 !1
!2 !3
!4 !5
Standard Accessories
qOverlock foot C (Model 340 only)
wZipper foot E
eBlind hem foot G
rSatin stitchfoot F
tAutomatic buttonhole foot R (Model 340 only)
ySliding buttonhole foot J (Model 320 only)
uNeedles
iBobbins
oScrewdriver
!0 Lintbrush
!1 Seam ripper (buttonhole opener)
!2 Quilt guide (Model 340 only)
!3 Spool holder (large)
!4 Spool holder (small)
!5 Additional spool pin
!6 Feltcushion
Accessory storage
The standard accessories can be stored in the accessory
storage box under the extension table.
Draw out the storage box from the table as shown.
qAccessory storage box
q
!65

11
Serienmäßiges Zubehör
1 Overlock Fuss C (nur für Mod.340)
2 Reißverschlussfuß E
3 Blindstichfuß G
4 Satinstich Fuss F
5 Automatik-Knopflochfuss R (nur für Mod.340)
6 Sohle für 4-Stufen Knopflöcher (nur für Mod.320)
7 Nadeln
8 Spulen
9 Schraubendreher
10 Reinigungspinsel
11 Nahttrenner (Knopflochtrenner)
12 Kantenlineal (nur für Mod.340)
13 Fadenabziehscheibe (groß)
14 Fadenabziehscheibe (klein)
15 Zusätzlicher Garnrollenhalter
16 Filzpolster
Zubehörfach
Das Standardzubehör kann im Zubehörfach unter dem
Anschiebetisch untergebracht werden.
Ziehen Sie das Zubehörfach unter dem Anschiebetisch
wie dargestellt heraus.
qZubehörfach
Standardni dodaci
1 Stopica za overlok C (samo model 340)
2 Stopica za rajsfešlus E
3 Stopica za nevidljivi porub G
4 Stopica za satenski bod F
5 Stopica za automatsko šivenje rupice (samo model340)
6 Stopica za klizno šivenje rupice (samo model 320)
7 Igle
8 Špulne
9 Šrafciger
10 Četkica
11 Paralica (otvarač za rupice)
12 Vođica za čiveje kućnog tekstila (samo model 340)
13 Držač špulne (veliki)
14 Držač špulne (mali)
15 Rezervna igla špulne
16 Jastučić
Čuvanje dodataka
Standardni dodaci mogu se čuvati u kutiji koja se
nalazi ispod produženog stola.
Izvucite kutiju na način koji je prilazan na slici
qKutija za čuvanje dodataka

12
Extension Table
To detach:
Pull the extension table to the left.
To attach:
Insert the pin into the hole and push the extension table to
snap it in place.
Pin
Hole
Free A
r
msewing
Free arm sewing is used for stitching sleeves, waistbands,
pant legs or any other tubular garment.
It is also useful for darning socks or mending knees o
r
elbows.

13
A
bnehmen:
A
nschiebetisch nach links ziehen.
A
nbringen:
Führen Sie den Stift in die Öffnung und schieben Sie den
Anschiebetisch ein, bis er einrastet.
Stift
Öffnung
Freiarmnähen
Freiarmnähen eignet sich zum Nähen von Ärmeln,
Bünden, Hosenbeinen oder anderen röhrenförmigen
Teile n.
Es ist außerdem nützlich zum Stopfen von Socken oder
Knien und Ellbogen.
Produženi sto Anschiebetisch
Odvojiti:
Povucite produženi sto u levo.
Rukavna platforma
Rukavna platforma se koristi prilikom šivenja rukava,
pojaseva, nogavica ili bilo kojg drugog dela odeće koje
ima oblik cevi.
Veoma je korisno prilikom krpljenja čarapa ili ušivanja
nogavica na kolenima ili laktovima.
Postaviti:
Postavite iglu u rupu i gurnite produženi sto dok
ne čujete da je legao na svoje mesto.
Igla
Rupa

14
SECTION 2. GETTING READY TO SE
W
Connecting the Powe
r
Supply
1 Turn the power switch off.
2 Insert the machine plug into the machine socket.
3 Insert the power supply plug into the wall outlet.
4 Turn the power switch on.
Power switch
Machine plug
Machine socket
Power supply plug
Wall outlet
NOTE:
Before connecting to the power supply, make sure the
voltage shown on the machine conforms to your
electrical power.
WARNING:
While in operation, always keep your eyes on the sewing
area, and do not touch any moving parts such as the
thread take-up lever, flywheel or needle.
Always turn off the power switch and unplug from the
power supply:
- when leaving the machine unattended.
- when attaching or removing parts.
- when cleaning the machine.
Do not place anything on the foot control, otherwise the
machine will run intermittently.
Controlling the Sewing Speed
Foot control
Sewing speed can be varied by the foot control.
The harder you depress the foot control, the faster the
machine runs.
Operating Instructions:
The symbol "O" of a switch indicates the "off" position.
For an appliance with a polarized plug (one blade wider than the other):
To reduce the risk of electrical shock, this plug is intended to fit in a polarized outlet only one way.
If it does not fit fully in the outlet, reverse the plug. If it still does not fit, contact a qualified electrician to install the
proper outlet. Do not modify the plug in any way.
The foot controller Model YC-482J or TJC-150 is used with this sewing machine (USA market only).
q
w
e
r
t

15
TEIL 2.
V
ORBEREITUNGEN F
Ü
R D
A
S
NÄHEN
Anschluss an den Netzstrom
1 Schalten Sie den Netzschalter aus.
2 Stecken Sie den Maschinenstecker in die
Maschinensteckdose.
3 Stecken Sie den Netzstecker in die Wandsteckdose.
4 Schalten Sie den Netzschalter ein.
Netzschalter
Maschinenstecker
Maschinensteckdose
Netzstecker
Wandsteckdose
HINWEIS:
Bitte achten Sie vor Einstecken des Kabels darauf,
dass die auf der Maschine gezeigte Spannung mit der
Ihres Netzanschlusses übereinstimmt.
WARNHINWEIS:
Wenden Sie beim Nähen Ihren Blick nicht vom
Nähbereich ab und berühren Sie keine beweglichen
Teil e wie den Fa den heb el, d as Handrad o der die Na del .
Schalten Sie den Netzschalter immer auf AUS und
ziehen Sie den Stecker ab:
- wenn Sie die Maschine unbeaufsichtigt lassen,
- wenn Sie Teile befestigen oder entfernen,
- wenn Sie die Maschine reinigen.
Bitte stellen Sie keine Gegenstände auf den
Fußanlasser, da die Maschine sonst unbeabsichtigt
startet.
Regulieren der Nähgeschwindigkeit
Fußanlasser
Die Nähgeschwindigkeit kann mit dem Fußanlasser
geändert werden.
Je stärker man auf den Fußanlasser drückt, um so
schneller läuft die Maschine.
Bedienungshinweise:
Auf einem Schalter bedeutet das Symbol “O” die “AUS”-
Stellung des Schalters.
DEO 2. PRIPREMA ZA ŠIVENJE
Povezivanje mašine se strujom
2 Utičnicu mašine uključite u utikač na mašini
4 Uključite glavni prekidač na mašini.
Glavni utikač
Utikač za mašinu
Utičnica na mašini
Zidni utikač
Zidna utičnica
PAŽNJA:
Pre povezivanja mašine sa strujom, proverite voltažu
za koju je mašina pravljena da se uverite da odgovara
onoj koju Vi koristite.
UPOZORENJE :
Dok je mašina u radu stalno motrite na deo na
kome se šije, ne dodirujte ni jedan deo koji se
pomera kao npr.ručkicu za podizanje konca,
zamajac ili iglu.
Uvek isključite glavni prekidač i isključite mašinu iz
struje kada :
- ostavljate mašinu,
- postavljate ili skidate delove,
- čistite mašinu,
Ne stavljajte ništa na nožnu papučicu kako se
mašina ne bi sama upalila.
Kontrola brzine šivenja
Nožna papučica
Brzina šivenja kontroliše se pritiskom na nožnu papučicu,
ukoliko jače pritisnete papučicu, amašina će brže šiti.
Radna uputstva
Simbol “O” pokazuje da je prekidač isključen.
1 Isključite glavni prekidač
3 Utikač mašine uključite u zidnu utičnicu

16
Reverse Stitch Leve
r
Push the reverse stitch lever down to sew in reverse.
The machine will sew in reverse while the lever is
pushed.
Foot Pressu
r
eDial
Turn the foot pressure dial to adjust the foot pressure.
The
foot
pressure
dial
should
be
set
at
“3”
for
regular
sewing.
Reduce the pressure to “2” for appliqué, cutwork, draw
work and basting.
Setting mark
w
Dropping the Feed Dog
The drop feed lever is located underneath the free-arm
bed on the backside of the machine.
To
drop
the
feed
dog,
push
the
lever
in
the
direction
of
the arrow, as illustrated.
To raise the feed dog, push the lever in the direction of
the arrow, as illustrated, and turn the handwheel toward
you.
The feed dog must be up for regular sewing.
Drop feed lever
Raised position
Lowered position
e

17
Rückwärtstaste
Zum Rückwärtsnähen drücken Sie die Rückwärtstaste
herunter.
Die Maschine näht rückwärts, solange die
Rückwärtstaste gedrückt wird.
Fußdruckregle
r
Drehen Sie den Fußdruckregler, um den Fußdruck
einzustellen.
Der Fußdruckregler sollte beim normalen Nähen auf “3”
stehen.
Verringern Sie den Druck auf “2” für Applikationen,
Durchbruchstickerei, Hohlsaumarbeit und Heftarbeiten.
Einstellmarke
Herabsenken des Transporteu
r
s
Der Schieber zum Versenken des Transporteurs befindet
sich unter dem Freiarm an der Rückseite der Maschine.
Senken Sie den Transporteur herab, indem Sie den
Schieber in Richtung des Pfeils bewegen (siehe Abbildung
)
Stellen Sie den Transporteur hoch, indem Sie den
Schieber in Richtung des Pfeils bewegen (siehe
Abbildung) und das Handrad auf sich zu drehen.
Der Transporteur muss beim normalen Nähen in der
angehobenen Position sein.
Schieber zum Versenken des Transporteurs
Angehobene Stellung
Gesenkte Stellung
Ručkica za promene pravca šivenja
Pritisnite ručkicu za promenu pravca šivenja na dole
kako biste promenili pravac šivenja. Sve dok je ručkica
pritisnuta mašina će šiti u tom pravcu.
Pokazivač pritiska stopice
Okrenite pokazivač kako biste podesili pritisak stopice.
za standardno šivenje pritisak treba da bude podešen na
3.
Kada radite aplikacije, vez, slikanje ili fircanje smanjite
pritisak stopice na 2.
Spuštanje zubaca transportera
Ručkica za spuštanje zubaca nalazi se ispod rukavne
platforme, sa zadnje strane mašine.
Kako biste spustili zupce pritisnite ručkicu u pravcu
strelice kao što je pokazano na slici.
Kako biste podigli zupce transportera, pritisnite ručkicu
u pravcu strelive, kao što je prikazano na slici i okrenite
zamajac ka sebi.
Zupci treba da budu podignuti prilikom standardnog
šivenja.
Ručkica za spuštanje zubaca transportera
Podignuti položaj
Spušten položaj

18
Raising and Lowering
the
Presse
r
Foot
The presser foot lifter raises and lowers the presser
foot.
You can raise the foot about 1/4" (0.6 cm) higher than
the normal up position for easy removal of the presser
foot, or to help you place heavy fabric under the foot.
Lowered position
Normal up position
Extra up position
Changing the Presse
r
Foot
To remove:
Raise the needle to its highest position by turning th
e
handwheel counterclockwise. Raise the presser foot
,
and press the lever on the back of the foot holder.
Lever
CAUTION:
Turn OFF the power switch before changing the foot.
Always use the proper foot for the selected pattern.
The wrong foot can cause the needle to break.
Do not push the lever down to prevent it from being
broken.
To attach:
Place the desired presser foot, so that the pin on the foot
lies just under the groove on the foot holder. Lower the
presser foot lifter to lock the foot in place.
Groove
Pin
Removing and
A
ttaching
the
Shank
WARNING:
Turn OFF the power switch before detaching or
attaching the shank.
To remove:
Remove the setscrew by turning it counterclockwise
with a screwdriver and remove the shank.
To attach:
Match the hole in the shank with the threaded hole
In the presser bar. Fit the setscrew into the hole. Tighten
the screw by turning it clockwise with a screwdriver.
Setscrew
Shank
Hole
Threaded
hole

19
Der Nähfußhebel hebt und senkt den Nähfuß.
Sie können den Fuß etwa 0,6 cm über die normale
gehobene Stellung heben, damit der Nähfuß leichter
entfernt werden kann, oder wenn Sie dicken Stoff unter
den Fuß legen wollen.
Gesenkte Stellung
Normale angehobene Stellung
Zusätzlich an
g
ehobene Stellun
g
Entfernen Sie den Fußhalter wie folgt:
Bringen Sie die Nadel in ihre höchste Stellung, indem Sie
das Handrad gegen den Uhrzeigersinn drehen. Stellen
Sie den Nähfuß hoch und drücken Sie den Hebel an der
Rückseite des Fußhalters.
Hebel
V
ORSICH
T
:
Schalten Sie den Netzschalter aus, bevor Sie den Fuß
auswechseln.
Verwenden Sie stets den richtigen Fuß für das
Gewählte Muster.
Beim Einsatz des falschen Fußes kann die Nadel
brechen.
Drücken den Hebel nicht nach unten – dies kann ihn
beschädigen.
Anbringen:
Positionieren Sie den gewünschten Nähfuß so, dass sich
der Stift am Fuß direkt unter der Rille des Fußhalters
befindet. Senken Sie den Nähfußhebel ab, um den Fuß in
dieser Stellung zu sichern.
Rille
Stift
W
A
RNHINWEIS:
Schalten Sie den Netzschalter vor Lösen ode
r
Befestigen des Fußhalters aus.
Entfernen Sie den Fußhalter wie folgt:
Entfernen Sie die Befestigungsschraube, indem Sie diese
mit einem Schraubendreher gegen den Uhrzeigersinn
drehen. Nehmen Sie den Fußhalter ab.
A
nbringen:
Richten Sie das Loch im Fußhalter auf das Gewindeloch
in der Stoffdrückerstange aus Führen Sie die
Befestigungsschraube durch das Loch. Ziehen Sie die
Schraube an, indem Sie diese mit einem
Schraubendreher im Uhrzeigersinn drehen.
Befestigungsschraube
Fußhalter
Öffnung
Gewindeloch
Podizač stopice qpodiže i spušta stopicu.
Stopica se može podići oko 0,6 cm iznad standardne
gornje pozicije wza lakše otklanjanje stopice, ili kako bi
vam pomoglo prilikom postavljanja debljih materijala.
Spuštanje i podizanje stopice Heben und Senken des Nähfußes
Zamena stopice Auswechseln des Nähfußes
• Skidanje stopice
Podignite iglu u najvišu poziciju tako što ćete
okretati zamajac suprotno kazaljkama na satu.
Podignite stopicu i pritisnite ručkicu qkoja se
nalazi sa zadnje strane držača stopice.
PAŽNJA:
• Postavljanje stopice
Postavite željenu stopicu tako da igla ena stopici
naleže tik ispod žljeba wna držaču stopice. Spustite
nosač kako bi se stopica zaključala na odgovarajućem
mestu.
Isključite glavni prekidač pre nego sto počnete
skidanje ili montiranje nosača stopice.
PAŽNJA:
• Skidanje nosača stopice
Skinite zavrtanjqtako što ćete ga odvrnuti u
pravcu suprotnom kazaljkama na satu koristeći
šrafciger.
• Postavljanje nosača stopice
Poravnjajte rupu na držaču stopice wsa rupom za
konac e.Postavite zavrtanj qu rupu. Zategnite ga q
tako pto ćete ga šrafcigerom zavrnuti u pravcu kazaljki
na satu.
Šrafciger
Nosač stopice
Rupa
Rupa nosača stopice
Skidanje i postavljanje nosača stopice Abnehmen und Anbringen des Fußhalters
q Podizač stopice
w Standardna gornja pozicija
e Najviša gornja pozicija
Ručkica
Isključite glavni prekidač pre nego što započnete
zamenu stopice. Uvek koristite odgovarajuću stopicu
za zeljeni bod. Pogrešna stopica može da dovede do
pucanja igle. Ne spuštajte ručkicu na dole da ne bi
došlo do lomljenja.
Žljeb
Igla

20
Changing Needles
CAUTION:
Always make sure to turn the power switch off an
d
disconnect the machine from power supply befor
e
changing the needle.
T
urn off the power switch.
Raise the needle by turning the handwheel and lower the
presser foot.
1 Loosen the needle clamp screw by turning it
counterclockwise.
Remove the needle from the clamp.
Needle clamp screw
T
ocheckneedlestraightness,placetheflatsideofthe
needle onto something flat (a needle plate, glass etc.)
The gap between the needle and the flat surface should
be consistent.
Never use a blunt needle.
Needle
and
Fabric
Cha
r
t
WEIGHT
Very Light
Light
FABRIC
Chiffon, Georgette, Fine Lace, Organdy
Net, Tulle
Batiste, Voile, Lawn, Pure Silk, Crepe de Chine,
Sheer Crepe, Chambray, Handkerchief Linen,
Gingham, Challis, Percale, Wool Crepe, Peau de
Soie, Taffeta, Satin, Silk Surah, Satin-backed
Crepe, Qiana
Single Knits, Jersey, Swimwear, and Tricot
TYPE of NEEDLE
Universal
Ball Point
Blue Tipped Needle
Universal
Blue Tipped Needle
Ball Point
NEEDLE SIZE
9 (65)
9 (65)
11 (75)
11 (75)
12 (80)
11 (75)
11 (75)
Medium
Leathe
r
, Suede
Flannel, Velour, Velvet, Muslin, Velveteen,
Poplin, Corduroy, Broadcloth, Linen, Chintz,
Gabardine, Felt, Terry, Burlap, Quilted Fabrics
Wedge Point
Leather Needle
Universal
11 (75)
14 (90)
Double Knits, (synthetic and natural) Stretch
Velour, Stretch Terry, Sweater Knits
Leather, Vinyl, Suede
Ball Point
Wedge Point
Leather Needle
14 (90)
14 (90)
Heavy Denim, Sailcloth, Ticking
Double Faced Wool, Heavy Coating, Fake Fur,
Drapery Fabrics
Denim Needle
Universal
16 (100)
16 (100)
Very Heavy
Leathe
r
, Suede
Canvas, Duck, Upholstery Fabrics
Topstitching for Special Finishes
Wedge Point
Leather Needle
Universal
Topstitching N eedl e
16 (100)
18 (110)
16 (100)
14 (90)
2 Insert a new needle into the needle clamp with the
flat side of the needle to the rear.
When inserting the needle into the needle clamp,
push it up against the stopper pin and tighten the
needle clamp screw firmly.
Stopper pin
Flat side
Gap
Other manuals for eXplore 320
2
This manual suits for next models
1
Table of contents
Other ELNA Sewing Machine manuals

ELNA
ELNA 8600 User manual

ELNA
ELNA 683 - LEAFLET User manual

ELNA
ELNA eXcellence 680+ User manual

ELNA
ELNA 2600 User manual

ELNA
ELNA 8300 - LEAFLET User manual

ELNA
ELNA XPRESSIVE 2 User manual

ELNA
ELNA eXcellence 730 PRO User manual

ELNA
ELNA eXcellence 720PRO User manual

ELNA
ELNA 9500 - LEAFLET User manual

ELNA
ELNA eXplore 320 User manual