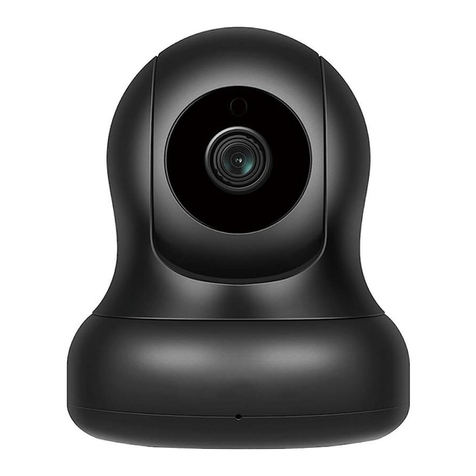
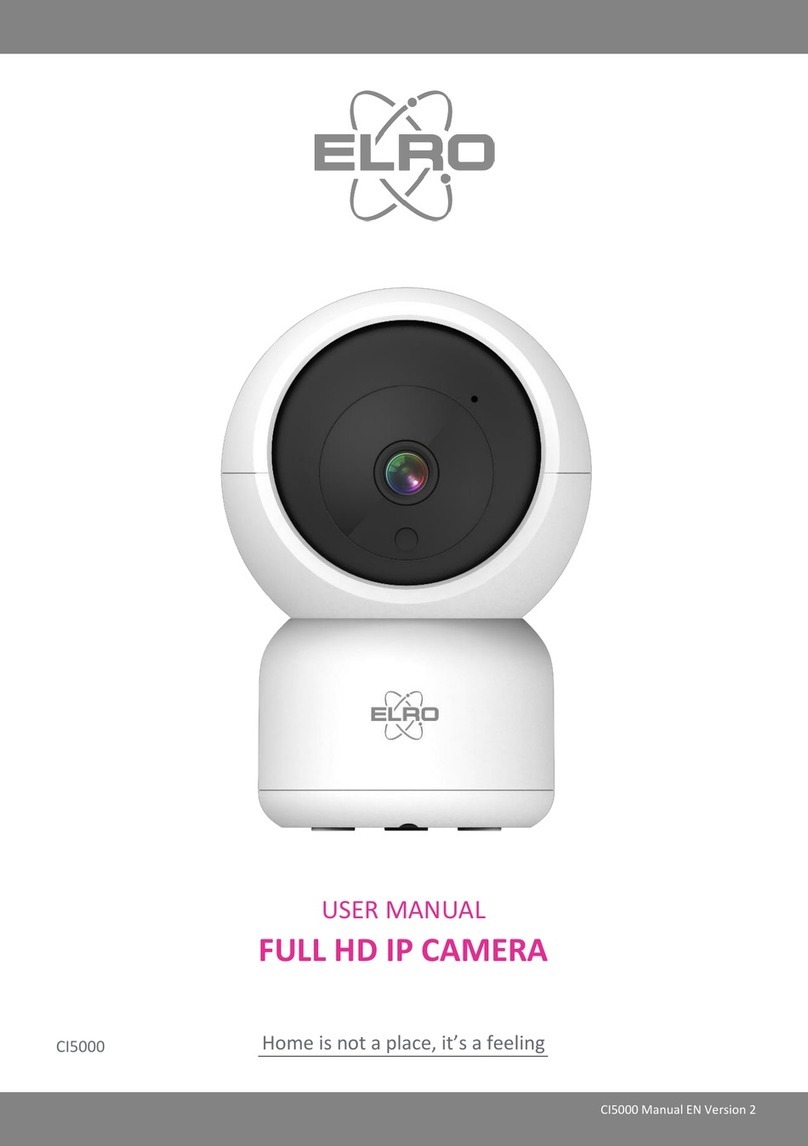
ELRO CI5000 User manual

jK
CI5000 Manual EN Version 1
USER MANUAL
FULL HD IP CAMERA
Home is not a place, it’s a feeling
CI5000

- 1 -
Content
1. Introduction...........................................................................................................................- 2 -
2. Package contents...................................................................................................................- 2 -
3. Overview of the camera ........................................................................................................- 2 -
4. ELRO Home Safe App.............................................................................................................- 3 -
4.1 Register ................................................................................................................................- 3 -
4.2 Login.....................................................................................................................................- 3 -
5. Add camera ...........................................................................................................................- 4 -
6. Explanation about the camera ..............................................................................................- 5 -
7. Explanation of the settings....................................................................................................- 7 -
8. Reset......................................................................................................................................- 9 -
9. Frequently asked questions / FAQ.......................................................................................- 10 -
10. Specifications.......................................................................................................................- 11 -
11. Symbols ...............................................................................................................................- 11 -
Go to www.elro.eu to download the latest version of this user manual.

- 2 -
1. Introduction
Congratulations on the purchase of the ELRO CI5000 Indoor Pan/Tilt Camera! This camera allows
you to keep an eye on everything indoors. The camera can be added in the free ELRO Home Safe
App. This app allows you to control multiple cameras. This way, you put together a security system
that keeps an eye on all the important things for you. Give yourself time to read this manual
carefully before you start installing.
2. Package contents
a. 1080P Full HD Pan/Tilt Camera
b. Mounting plate with screws and dowels
c. USB-C power cable with adapter
d. Manual
3. Overview of the camera
a. Microphone
b. Lens with 6x Infrared LEDs
c. Day/night sensor
d. Reset Button
e. Card slot for Micro SD card
f. Speaker
g. Adapter connection
h. USB-C cable
i. Power adapter

- 3 -
4. ELRO Home Safe App
Download the free ELRO Home Safe app from the Google Play Store or App Store.
Read through User Agreements and Privacy Policy and accept them to
continue.
Google Play Store iOS Apple App Store
4.1 Register
If you do not yet have an account, you can register one for free.
a. Click on "Sign up".
b. Enter your country and enter the correct e-mail address.
c. Check the box next to the Privacy Policy and User Agreement. Then press ''Retrieve
Verification Code''.
d. Check if you received an e-mail with the verification code. Also check for SPAM. When
received, enter this code.
e. Set a new password. Use 6-20 characters with a combination of letters and numbers. Then
press ''Done''.
f. Accept all permissions to complete the registration. Once this is done, you can use the
ELRO Home Safe App.
4.2 Login
If you already have an account, you can log in with your details.
a. Click on ''Log In''.
b. Enter your country, email address and password.
c. Check the box next to the Privacy Policy and User Agreement. Press ''Log In''.
d. Now you are logged in and can use the ELRO Home Safe App.

- 4 -
5. Add camera
The camera can easily be added using the QR Code. Follow the steps carefully and the camera will
be added to the app within minutes.
a. Insert the power plug into the back of the camera and plug
in the adapter. Wait a few seconds until the camera
automatically spins around and plays a cheerful music.
The camera indicates: ''Waiting for Connection''.
b. Go to the ''Home'' tab Press the ''+'' right at the top and select ''Add device''.
c. In the left-hand row, select the ''Camera'' category and press ''CI5000''.
d. When you hear ''Waiting for Connection'', you can tick the box. When this is ticked, you
can press the ''Next'' button.
e. The WiFi name is filled in automatically. Then enter the password of
this network. Press ''Next''.
f. A QR-Code will now appear on the smartphone screen. Hold this
QR-Code about 20 cm in front of the camera so that the camera can
read it.
g. The camera will say ''QR-Code Scanning Succeeding''.
Then the camera says ''Connecting to wifi''.
When successful, the camera says ''Wifi is successful''.
After this, press ''I heard a prompt''.
h. The camera is now automatically added to the app.
When the addition is successful, the app will indicate this. Then press ''Done''.
i. The camera is now successfully added to the app and will immediately play live footage.
Important
-Connect to your router/modem's 2.4Ghz WiFi signal.
-The camera has no ability to use AP mode, EZ mode or Cable mode.

- 5 -
6. Explanation about the camera
Description of all menus and functionalities of the app. The functionalities appear when the
camera is opened and when the is pressed.
Full screen mode
-Ensures screen-filling and tilting of footage.
Snapshot
-Tap this to take a photo. The photo is stored locally in the app and thus uses the
smartphone's memory.
Talk –One-way communication
-Tap this and hold down. This allows you to speak through the smartphone's
microphone and you will be heard from the camera. When the Talk mode / Two-way
call (see 7 Explanation of the settings, Talk mode) setting is set, the icon will change
to a phone symbol.
Manual recording
-Tap this and a recording is made. Tap again to stop and save the recording. The video is
stored locally in the app and therefore uses the smartphone's memory.
Volume muted
-Tap this and the volume is switched on. Press again to mute the volume again.
Fill screen
-Filling the screen without tilting the image.
Quality
-Sets the image quality, tap to change to and conversely. This affects the images
and photos recorded and may affect the smartphone's memory.
Full High Definition 1920 x 1080
Standard Definition 640 x 360
Playback
-Review all recordings stored on the SD card.
Timeline
-Slide on the timeline to the moment you specifically want to watch back.
Full screen
-Tap here during playback and watch the recording in full screen.
Manual recording
-Tap this and a recording is made. Tap again to stop and save the recording. The video
is stored locally in the app and thus uses the smartphone's memory.
Snapshot
-Tap this to take a photo. The photo is stored locally in the app and thus uses the
smartphone's memory.
Delete
-Tap here during playback of the recording to delete it.

- 6 -
Download
-The recorded video is saved on the SD card. Tap here while playing the recording to
download and save it in the gallery in the app.
Reduce timeline
-Tap here to reduce the size of the timeline. Tap again to enlarge the timeline.
Calendar
-Select a specific day to watch recordings here.
Volume muted
-Tap this and the volume is switched on. Press again to mute the volume again.
Playback speed
-Tap here to double the playback speed. Tap to restore speed.
Gallery
-Review all photos and recordings stored locally in the app.
Theme Color
-Change the app's theme to a Light Mode or Dark Mode.
Private Mode
-Put the camera in sleep mode. Press ''Turn on the camera'' to wake up the camera.
Motion Tracking
-Switch on and the camera will track when motion is detected. The icon will turn red when
the function is enabled.
Motion Detection
-Switch on and the camera will record and send notifications when motion is detected. The
icon will turn red when the function is enabled. Further settings via general settings.
Sound Detection
-Switch on and the camera will record and send notifications when sound is detected. The
icon will turn red when the function is enabled. Further settings via general settings.
Patrol
-Switch on and the camera will patrol the area. The icon will turn red when the function is
enabled. Mode and schedule can be set as desired.
Siren
-Switch on the siren. Press the to switch off the siren.
Button Management
-View all functions and shortcuts.
Messages
-View all recent notifications detected by the camera.
Pan/Tilt Direction
-Use this function to control the camera manually. Make the camera look at different
locations in the room. You can zoom in by making a magnifying/pinning motion in the
screen with your fingers.

- 7 -
Favourite Direction
-Set a default favourite direction. Set the camera in a specific direction and save this
direction as a favourite. Also give this direction a specific name, such as living room or
kitchen.
Cloud
-Make optional use of cloud storage. Activate a subscription of your choice.
Smart Scenes
-Create a specific scene or action. For example, switch on the siren when motion is
detected.
Features
-Open the menu to view, enable or disable all functions.
7. Explanation of the settings
At the top right, press to access the settings.
Device name
-Change camera icon, device name and device location.
Device information
-View further information on the device.
Tap-to-Run and Automation
-See all linked scenes here.
Private Mode
-Put the camera in sleep mode or disable sleep mode.
Basis function settings
-Change some basic functions here.
-Flip Screen; rotate the screen when hanging the camera upside down.
-Time Watermark; shows time during live viewing and recording.
-Talk mode; Change the direction of a communication conversation.
▪One-way communication; press and hold the microphone button
to speak through the camera.
▪Two-way talk; communicate via smartphone and camera like a
phone call.
Detection alarm settings
-Change detection alarm settings here.
-Motion
▪Enable Motion Detection.
▪Set the sensitivity of motion detection.
-Motion Tracking (see 6 Explanation about the camera, Patrol)
-Sound Detection
▪Enable Sound Detection.
▪Set the sensitivity of sound detection.

- 8 -
-Alarm Timer Settings
▪Set a schedule when the camera should record certain detection.
This can be set completely as desired.
-Alarm Interval
▪Set the notification interval. This can be set to 1min, 3min, 5min.
Alarm interval means that, for example, the camera checks for
detection every 1min and sends a notification every minute
when it is present.
-Trigger Siren
▪Makes a siren sound when motion is detected.
Siren Adjustment
-Change siren duration (min 10 sec - max 600 sec).
Storage settings
-View the capacity of the SD card here. From here, you can also format (empty) the SD card.
Recording settings
-Change the settings for recording on the SD card.
-Local recording; Specify whether the camera should record or not. The
recorded images are saved on the SD card.
-Recording Mode; Change whether the camera should record non-stop
(continuous) or at an event (motion or sound).
-Schedule; Set a schedule for when the camera should record certain
detection. This can be set completely as desired.
Cloud Storage
-Adjust settings for the cloud feature.
Offline notification
-Enable the app to notify when the camera is offline for more than 30 minutes.
Frequently asked questions and feedback
-Quickly go to the FAQ or provide feedback on the product, app or other services.
Share device
-Share the camera with one or more users who also wish to use the camera and its
features. Sharing can be done by linking an existing ELRO Home Safe account or by sharing
a link from the camera.
Add to home screen
-Create a shortcut from the smartphone to open the camera directly, without first opening
the ELRO Home Safe and activating the camera.
Device update
-Check whether any updates are available. When they are available, you can also download
and install them from here. It is possible to have these updates installed automatically.
Restart device
-The camera will reboot.
- 9 -
Remove device
-Delete the camera from the app. The camera will also be reset. The camera will say:
''Reset successful''.
8. Reset
You can easily reset the camera. This can be done in two ways.
Method 1:
Have the camera face up and hold the reset button (see 3 Overview Camera, d Reset Button)
and release as soon as the camera says ''Reset successful''.
Then delete the camera from the app by holding the selected camera in the home screen and
then press ''Delete Device''.
Method 2:
Remove the camera from the app by holding the selected camera in the home screen and then
press ''Remove Device''.
The camera will then say: ''Reset successful''.

- 10 -
9. Frequently asked questions / FAQ
View all frequently asked questions on our website www.elro.eu. Is your question not among
Q: My Wi-Fi name is not entered automatically during installation.
A: Make sure the location feature is on. This way, the wifi name will be filled in automatically.
Q: After installing a new router, my camera remains offline.
A: Reset and reinstall the camera with the data from the new internet router.
Q: Why is my SD card not recognized?
A: Check the camera's settings and make sure the camera is recording through the SD card.
Also try inserting the SD card when the camera is active.
Q: Why am I not receiving notifications?
A: Make sure all notifications permissions are accepted and that the app is allowed to send you
messages.
Q: Can I add multiple cameras to the app?
A: Yes, you can add multiple and different cameras to the ELRO Home Safe App.
Q: Can the camera also look outside?
A: Yes, this is partly possible. During the day this will not be a problem, but as soon as it gets
dark and the camera switches to night vision, nothing will be recognizable. The Infrared will
reflect against the glass.

- 11 -
10. Specifications
Resolution
1920 x 1080 (Full HD)
Focal length
f3.6mm
Aperture
F 1.2
Angle
Horizontal : 355° / Diagonal : 80°
Frame rate
Max 25fps
Flip-image
Flipping and mirroring
IR LEDs
6 pieces
Night-time visibility
6 m
Day and night
IR -CUT filter auto switch
Smartphone version
iOS7 or higher, Android 4.0 or higher
Wireless standard
IEEE802.11b 11Mbps/11g: 54Mbps/11n: 150Mbps
Wireless security
WPA, WPA2 (P2P)
Power supply (adapter)
Input 100-240V AC 50/60Hz 0.3A max.
Output 5V/1500mA USB-C
Power consumption
2-4 Watt max.
Storage
Built-in SD card slot, max 128gb Micro SD (excl.)
Dimensions
80 mm (L) x 75 mm (B) x 115 mm (H)
Net weight
180 gram
11. Symbols
Recycling and disposal: The WEEE symbol means that this product and batteries should be
disposed of separately from household waste. When this product reaches the end of its
life, take it to a designated waste collection point nearby to ensure safe disposal or
recycling. Protect environment and public health, handle natural resources responsibly!
Read the manual before use and keep it in a safe place for future use and maintenance.
Guarantee visit www.elro.eu
ELRO Europe | www.elro.eu
PO Box 9607 - Box E800
1006 GC Amsterdam - The Netherlands

jK
CI5000 Manual NL Version 1
GEBRUIKSAANWIJZING
FULL HD IP CAMERA
Home is not a place, it’s a feeling
CI5000

- 1 -
Inhoud
1. Inleiding.................................................................................................................................- 2 -
2. Inhoud van de verpakking .....................................................................................................- 2 -
3. Overzicht van de camera .......................................................................................................- 2 -
4. ELRO Home Safe App.............................................................................................................- 3 -
4.1 Registreren...........................................................................................................................- 3 -
4.2 Inloggen................................................................................................................................- 3 -
5. Camera toevoegen ................................................................................................................- 4 -
6. Uitleg over de camera ...........................................................................................................- 5 -
7. Uitleg over de instellingen.....................................................................................................- 7 -
8. Resetten ................................................................................................................................- 9 -
9. Veel gestelde vragen / FAQ .................................................................................................- 10 -
10. Specificaties.........................................................................................................................- 11 -
11. Symbolen.............................................................................................................................- 11 -
Ga naar www.elro.eu om de meest recente versie van deze gebruiksaanwijzing te downloaden.

- 2 -
1. Inleiding
Gefeliciteerd met de aankoop van de ELRO CI5000 Indoor Pan/Tilt Camera! Met deze camera kun
je binnenshuis alles in de gaten houden. De camera kan worden toegevoegd in de gratis ELRO
Home Safe App. Deze app biedt de mogelijkheid om meerdere camera’s te bedienen. Op deze
manier stel je een beveiligingssysteem samen die voor jou alle belangrijke zaken in de gaten houdt.
Gun jezelf de tijd om deze handleiding zorgvuldig te lezen voordat je start met het installeren.
2. Inhoud van de verpakking
a. 1080P Full HD Pan/Tilt Camera
b. Bevestigingsplaat met schroeven en pluggen
c. USB-C-Stroomkabel met adapter
d. Handleiding
3. Overzicht van de camera
a. Microfoon
b. Lens met 6x Infrarood LED’s
c. Dag/Nacht sensor
d. Reset knop
e. Kaartgleuf voor Micro SD-Kaart
f. Luidspreker
g. Aansluiting adapter
h. USB-C-kabel
i. Voedingsadapter

- 3 -
4. ELRO Home Safe App
Download de gratis ELRO Home Safe App via de Google Play Store of App Store.
Lees Gebruiker overeenkomt en Privacy beleid door en accepteer deze om
verder te gaan.
Google Play Store iOS Apple App Store
4.1 Registreren
Als je nog geen account hebt, kun je gratis een account registreren.
a. Klik op "Aanmelden".
b. Voer je land in en voer het juiste e-mail adres is.
c. Vink het vakje aan naast het Privacy beleid en Gebruikersovereenkomst. Druk vervolgens
op ‘’Verificatiecode Ophalen’’.
d. Controleer of je een e-mail hebt ontvangen met de verificatie code. Controleer ook de
SPAM. Wanneer deze code is ontvangen, voer deze code in.
e. Stel een nieuw wachtwoord in. Gebruik 6-20 tekens met een combinatie van letters en
cijfers. Druk vervolgens op ‘’Gedaan’’.
f. Accepteer alle machtigingen om de registratie te voltooien. Wanneer dit is gedaan, kun je
de ELRO Home Safe App gebruiken.
4.2 Inloggen
Als je al een account hebt, kun je inloggen met je gegevens.
a. Klik op ‘’Log In’’.
b. Voer je land, email adres en wachtwoord in.
c. Vink het vakje aan naast het Privacy beleid en Gebruikersovereenkomst. Druk op ‘’Log In’’.
d. Nu ben je ingelogd en kun je de ELRO Home Safe App gebruiken.

- 4 -
5. Camera toevoegen
De camera kan eenvoudig worden toegevoegd door middel van de QR-Code. Volg de onderstaande
stappen zorgvuldig en de camera is binnen enkele minuten toegevoegd aan de app.
a. Steek de stekker achter in de camera en steek de adapter in
het stopcontact. Wacht enkele seconden totdat de camera
automatisch ronddraait en een vrolijk muziekje afspeelt.
De camera geeft aan: ‘’Waiting for Connection’’.
b. Ga naar het tabblad ‘’Huis’’ Druk recht bovenin op de ‘’+’’ en selecteer ‘’Voeg apparaat
toe’’.
c. Selecteer in de linker rij de categorie ‘’Camera’’ en druk op ‘’CI5000’’.
d. Wanneer je ‘’Waiting for Connection’’ hoort, kun je het vakje aanvinken. Wanneer dit is
aangevinkt, kun je op de knop ‘’Volgende’’ drukken.
e. De WiFi-naam wordt automatisch ingevuld. Voer vervolgens het
wachtwoord van dit netwerk in. Druk op ‘’Volgende’’.
f. Er komt nu een QR-Code op het scherm van de smartphone. Houd
deze QR-Code op circa. 20 cm voor de camera zodat de camera
deze kan lezen.
g. De camera zal zeggen ‘’QR-Code Scanning Succeeding’’.
Vervolgens zegt de camera ‘’Connecting to wifi’’.
Wanneer dit is gelukt, zegt de camera ‘’Wifi is successful’’.
Druk hierna op ‘’Hoor een Toon’’.
h. De camera wordt nu automatisch toegevoegd aan de app.
Wanneer het toevoegen succesvol is, zal de app dit aangeven. Druk vervolgens op
‘’Gereed’’.
i. De camera is nu succesvol toegevoegd aan de app en zal direct live beelden afspelen.
Belangrijk
-Maak verbinding met het 2.4Ghz WiFi-signaal van uw router/modem.
-De camera heeft geen mogelijkheid om gebruik te maken van de AP-modus, EZ-modus of
Cable-modus.

- 5 -
6. Uitleg over de camera
Beschrijving van alle menu’s en functionaliteiten van de app. De functionaliteiten
verschijnen wanneer de camera is geopend en wanneer er op wordt gedrukt.
Full screen modus
-Zorgt er voor dat de beelden scherm vullend worden weergeven en
gekanteld.
Snapshot
-Tik hierop om een foto te maken. De foto wordt lokaal opgeslagen in de app en maakt dus
gebruik van het geheugen van de smartphone.
Talk –Eenrichtingscommunicatie
-Tik hierop en houdt ingedrukt. Zo kun je spreken door de microfoon van de
smartphone en zal je vanuit de camera te horen zijn. Wanneer de instelling
Spreekmodus / Tweerichtingsgesprek (zie 7 Uitleg over de instellingen, Spreekmodus)
wordt ingesteld, zal het pictogram veranderen in een telefoon-symbool.
Handmatige opname
-Tik hierop en er wordt een opname gemaakt. Druk nogmaals op de opname te stoppen en
op te slaan. De video wordt lokaal opgeslagen in de app en maakt dus gebruik van het
geheugen van de smartphone.
Volume gedempt
-Tik hierop en het volume wordt ingeschakeld. Druk nogmaals om het volume weer te
dempen.
Scherm vullen
-Het beeld scherm vullend maken, zonder het beeld te kantelen.
Beeldkwaliteit
-Hiermee stel je de beeldkwaliteit in, tik op om te veranderen naar en omgekeerd.
Dit is van invloed op de beelden en foto’s die worden opgenomen en kan het geheugen
van de smartphone beïnvloeden.
Full High Definition 1920 x 1080
Standard Definition 640 x 360
Playback
-Bekijk alle opnames terug die op de SD-kaart zijn opgeslagen.
Tijdlijn
-Schuif op de tijdlijn naar het moment dat je specifiek wilt terugkijken.
Volledig scherm
-Tik tijdens de opname hier op en bekijk de opname in volledig scherm.
Handmatige opname
-Tik hierop en er wordt een opname gemaakt. Druk nogmaals op de opname te
stoppen en op te slaan. De video wordt lokaal opgeslagen in de app en maakt dus
gebruik van het geheugen van de smartphone.

- 6 -
Snapshot
-Tik hierop om een foto te maken. De foto wordt lokaal opgeslagen in de app en
maakt dus gebruik van het geheugen van de smartphone.
Verwijderen
-Tik hier op tijdens het afspelen van de opname om deze te verwijderen.
Downloaden
-De opgenomen video is opgeslagen op de SD-kaart. Tik hier op tijdens het afspelen
van de opname om deze te downloaden en op te slaan in het album in de app.
Tijdlijn verkleinen
-Tik hier op om de tijdlijn te verkleinen. Tik nogmaals om de tijdlijn te vergroten.
Kalender
-Selecteer hier een specifieke dag om opnames terug te kijken.
Volume gedempt
-Tik hierop en het volume wordt ingeschakeld. Druk nogmaals om het volume weer te
dempen.
Afspeelsnelheid
-Tik hier op om de afspeelsnelheid te verdubbelen. Tik op om de snelheid te
herstellen.
Album
-Bekijk alle foto’s en opnames terug die lokaal in de app zijn opgeslagen.
Theme Color
-Verander het thema van de app in een Light Mode of Dark Mode.
Privé Mode
-Zet de camera in slaapstand. Druk op ‘’Turn on the camera’’ om de camera wakker te
maken.
Motion Tracking
-Schakel in en de camera zal volgen wanneer er beweging word gedetecteerd. Het
pictogram zal rood kleuren wanneer de functie is ingeschakeld.
Motion Detection
-Schakel in en de camera zal opnemen en notificaties sturen wanneer er beweging word
gedetecteerd. Het pictogram zal rood kleuren wanneer de functie is ingeschakeld. Verder
in te stellen via de algemene instellingen.
Sound Detection
-Schakel in en de camera zal opnemen en notificaties sturen wanneer er geluid word
gedetecteerd. Het pictogram zal rood kleuren wanneer de functie is ingeschakeld. Verder
in te stellen via de algemene instellingen.
Patrol
-Schakel in en de camera zal de omgeving patrouilleren. Het pictogram zal rood kleuren
wanneer de functie is ingeschakeld. Modus en schema naar wens in te stellen.
Sirene
-Schakel de sirene in. Druk nogmaals op de om de sirene uit te schakelen.

- 7 -
Functieknoppen Management
-Bekijk alle functies en shortcuts.
Meldingen
-Bekijk alle recente meldingen die de camera heeft gedetecteerd.
Pan/Tilt Richting
-Gebruik deze functie om de camera handmatig te sturen. Laat de camera naar
verschillende locaties in de ruimte kijken. Je kunt inzoomen door in het scherm met je
vingers een vergrotende/knijpende beweging te maken.
Favoriete Richting
-Stel een standaard favoriete richting in. Zet de camera in een bepaalde richting en sla deze
richting op als favoriet. Geef deze richting ook een specifieke naam, zoals woonkamer of
keuken.
Cloud
-Maak optioneel gebruik van de cloud-opslag. Activeer een abonnement naar wens.
Smart Scenes
-Maak een specifieke scene of actie aan. Schakel bijvoorbeeld de sirene in wanneer er
beweging wordt gedetecteerd.
Features
-Open het menu om alle functies te bekijken, in te schakelen of uit te schakelen.
7. Uitleg over de instellingen
Druk rechtsboven in op om naar de instellingen te gaan.
Toestelnaam
-Verander het icoon, toestelnaam en apparaat locatie van de camera.
Apparaat informatie
-Bekijk verdere informatie over het apparaat.
Druk & Activering en Automatisering
-Bekijk hier alle gekoppelde scenes.
Privé Modus
-Zet de camera in slaapstand of schakel de slaapstand uit.
Basisfunctie-instellingen
-Wijzig hier enkele basisfuncties.
-Scherm omdraaien; draai het scherm wanneer je de camera
ondersteboven hangt.
-Tijd Watermerk; laat de tijd zien tijdens het live bekijken en opnemen
-Spreekmodus; Wijzig de richting van een communicatiegesprek.
▪Eenrichtingscommunicatie; houd de microfoonknop ingedrukt
om te spreken via de camera.
▪Tweerichtingsgesprek; communiceer via de smartphone en de
camera als een telefoongesprek.
Other manuals for CI5000
1
Table of contents
Languages:
Other ELRO Security Camera manuals