Precipitation and Wind Sensor KNX RW sl 1
Precipitation and Wind Sensor KNX RW sl • Version: 14.04.2020 • Technical changes and errors excepted. • Elsner Elektronik GmbH • Sohlengrund 16 • 75395 Ostelsheim • Germany • www.elsner-elektronik.de • Technical Service: +49 (0) 7033 / 30945-250
EN
KNX RW sl
Precipitation and Wind Sensor
1. Description
The Precipitation and Wind Sensor KNX RW sl for the KNX building bus system
measures wind speed and detects precipitation.
The wind value can be used for the control of limit dependent switching outputs.
States can be linked via AND logic gates and OR logic gates. Multi-function modules
change input data as required by means of calculations, querying a condition, or
converting the data point type.
The compact housing of the KNX RW sl accommodates the sensors, evaluation cir-
cuits and bus-coupling electronics.
Functions:
•Wind measurement: The wind strength is measured electronically and thus
noiselessly and reliably, even during hail, snow and sub-zero temperatures.
Even turbulent air and rising winds in the vicinity of the device are recorded
•Precipitation detection: The sensor surface is heated, so that only drops
and flakes are recognised as precipitation, but not mist or dew. When the rain
or snow stops, the sensor is soon dry again and the precipitation warning
ends
•Switching outputs for all measured and computed values. Threshold
values can be adjusted per parameter or via communication objects
•8 AND and 8 OR logic gates, each with 4 inputs. All switching events as
well as 16 logic inputs (in the form of communications objects) can be used
as inputs for the logic gates. The output of each gate can be configured
optionally as 1-bit or 2 x 8-bit
•8 multi-function modules (computers) for changing the input data by
calculations, by querying a condition or by converting the data point type
Configuration is made using the KNX software ETS. The product file can be dow-
nloaded from the Elsner Elektronik website on www.elsner-elektronik.de in the
“Service” menu.
1.0.1. Deliverables
• Sensor
• Connection cable approx. 3 m, with plug
• Surface-mounted junction box (IP 55, not weatherproof)
• Worm drive hose clip for pole mounting (Ø 40-60 mm)
• 4×50 mm stainless steel roundhead screws and 6×30 mm dowels for wall
mounting. Use fixing materials that are suitable for the base!
1.1. Technical specification
The product conforms with the provisions of EU directives.
2. Installation and start-up
2.1. Installation notes
Installation, testing, operational start-up and troubleshooting should
only be performed by an electrician.
CAUTION!
Live voltage!
There are unprotected live components inside the device.
• National legal regulations are to be followed.
• Ensure that all lines to be assembled are free of voltage and take
precautions against accidental switching on.
• Do not use the device if it is damaged.
• Take the device or system out of service and secure it against
unintentional use, if it can be assumed, that risk-free operation is
no longer guaranteed.
The device is only to be used for its intended purpose. Any improper modification
or failure to follow the operating instructions voids any and all warranty and gua-
rantee claims.
After unpacking the device, check it immediately for possible mechanical damage.
If it has been damaged in transport, inform the supplier immediately.
The device may only be used as a fixed-site installation; that means only when as-
sembled and after conclusion of all installation and operational start-up tasks and
only in the surroundings designated for it.
Elsner Elektronik is not liable for any changes in norms and standards which may
occur after publication of these operating instructions.
2.2. Installation location
Select an installation position on the building where the sensors can measure wind
and rain without hindrance. No structural elements should be mounted above the
weather station, from which water could continue to drop on the precipitation sen-
sor even after it has stopped raining or snowing.
At least 60 cm of clearance must be left around the device. This facilitates correct
wind speed measurement without eddies. At the same time, this prevents spray
(raindrops hitting the device) or snow (snow penetration) from impairing the mea-
surement. The wind sensor must not come into contact with water. This also pre-
vents birds from biting it.
The installation position should prevent rain and wind sensors from being touched
by people.
Please ensure that the extended awning does not cast shade on the unit, and that it
is protected from the wind.
Housing Plastic
Colour White / Translucent
Assembly Surface mount
Protection category IP 44
Dimensions approx. 62 × 75 × 155 (W × H × D, mm)
Weight Weather station with mount, approx. 90 g,
Total weight including accessories, approx.
280 g
Ambient temperature Operation -30…+50°C, storage -30…+70°C
Auxiliary supply 20...32 V DC.
An appropriate power supply unit can be pur-
chased from Elsner Elektronik.
Auxiliary current at 24V DC: max. 90 mA
Bus current max. 10 mA
Data output KNX +/-
BCU type Integrated microcontroller
PEI type 0
Group addresses max. 2000
Assignments max. 2000
Communication
objects
180
Wind sensor:
Measurement range 0 m/s … 35 m/s
Resolution 0.1 m/s
Accuracy ±15% of the measurement value when inco-
ming flow is 45°…315°
(Frontal incoming flow corresponds to 180°)
Technical specifications and installation instructions
Item number 70162
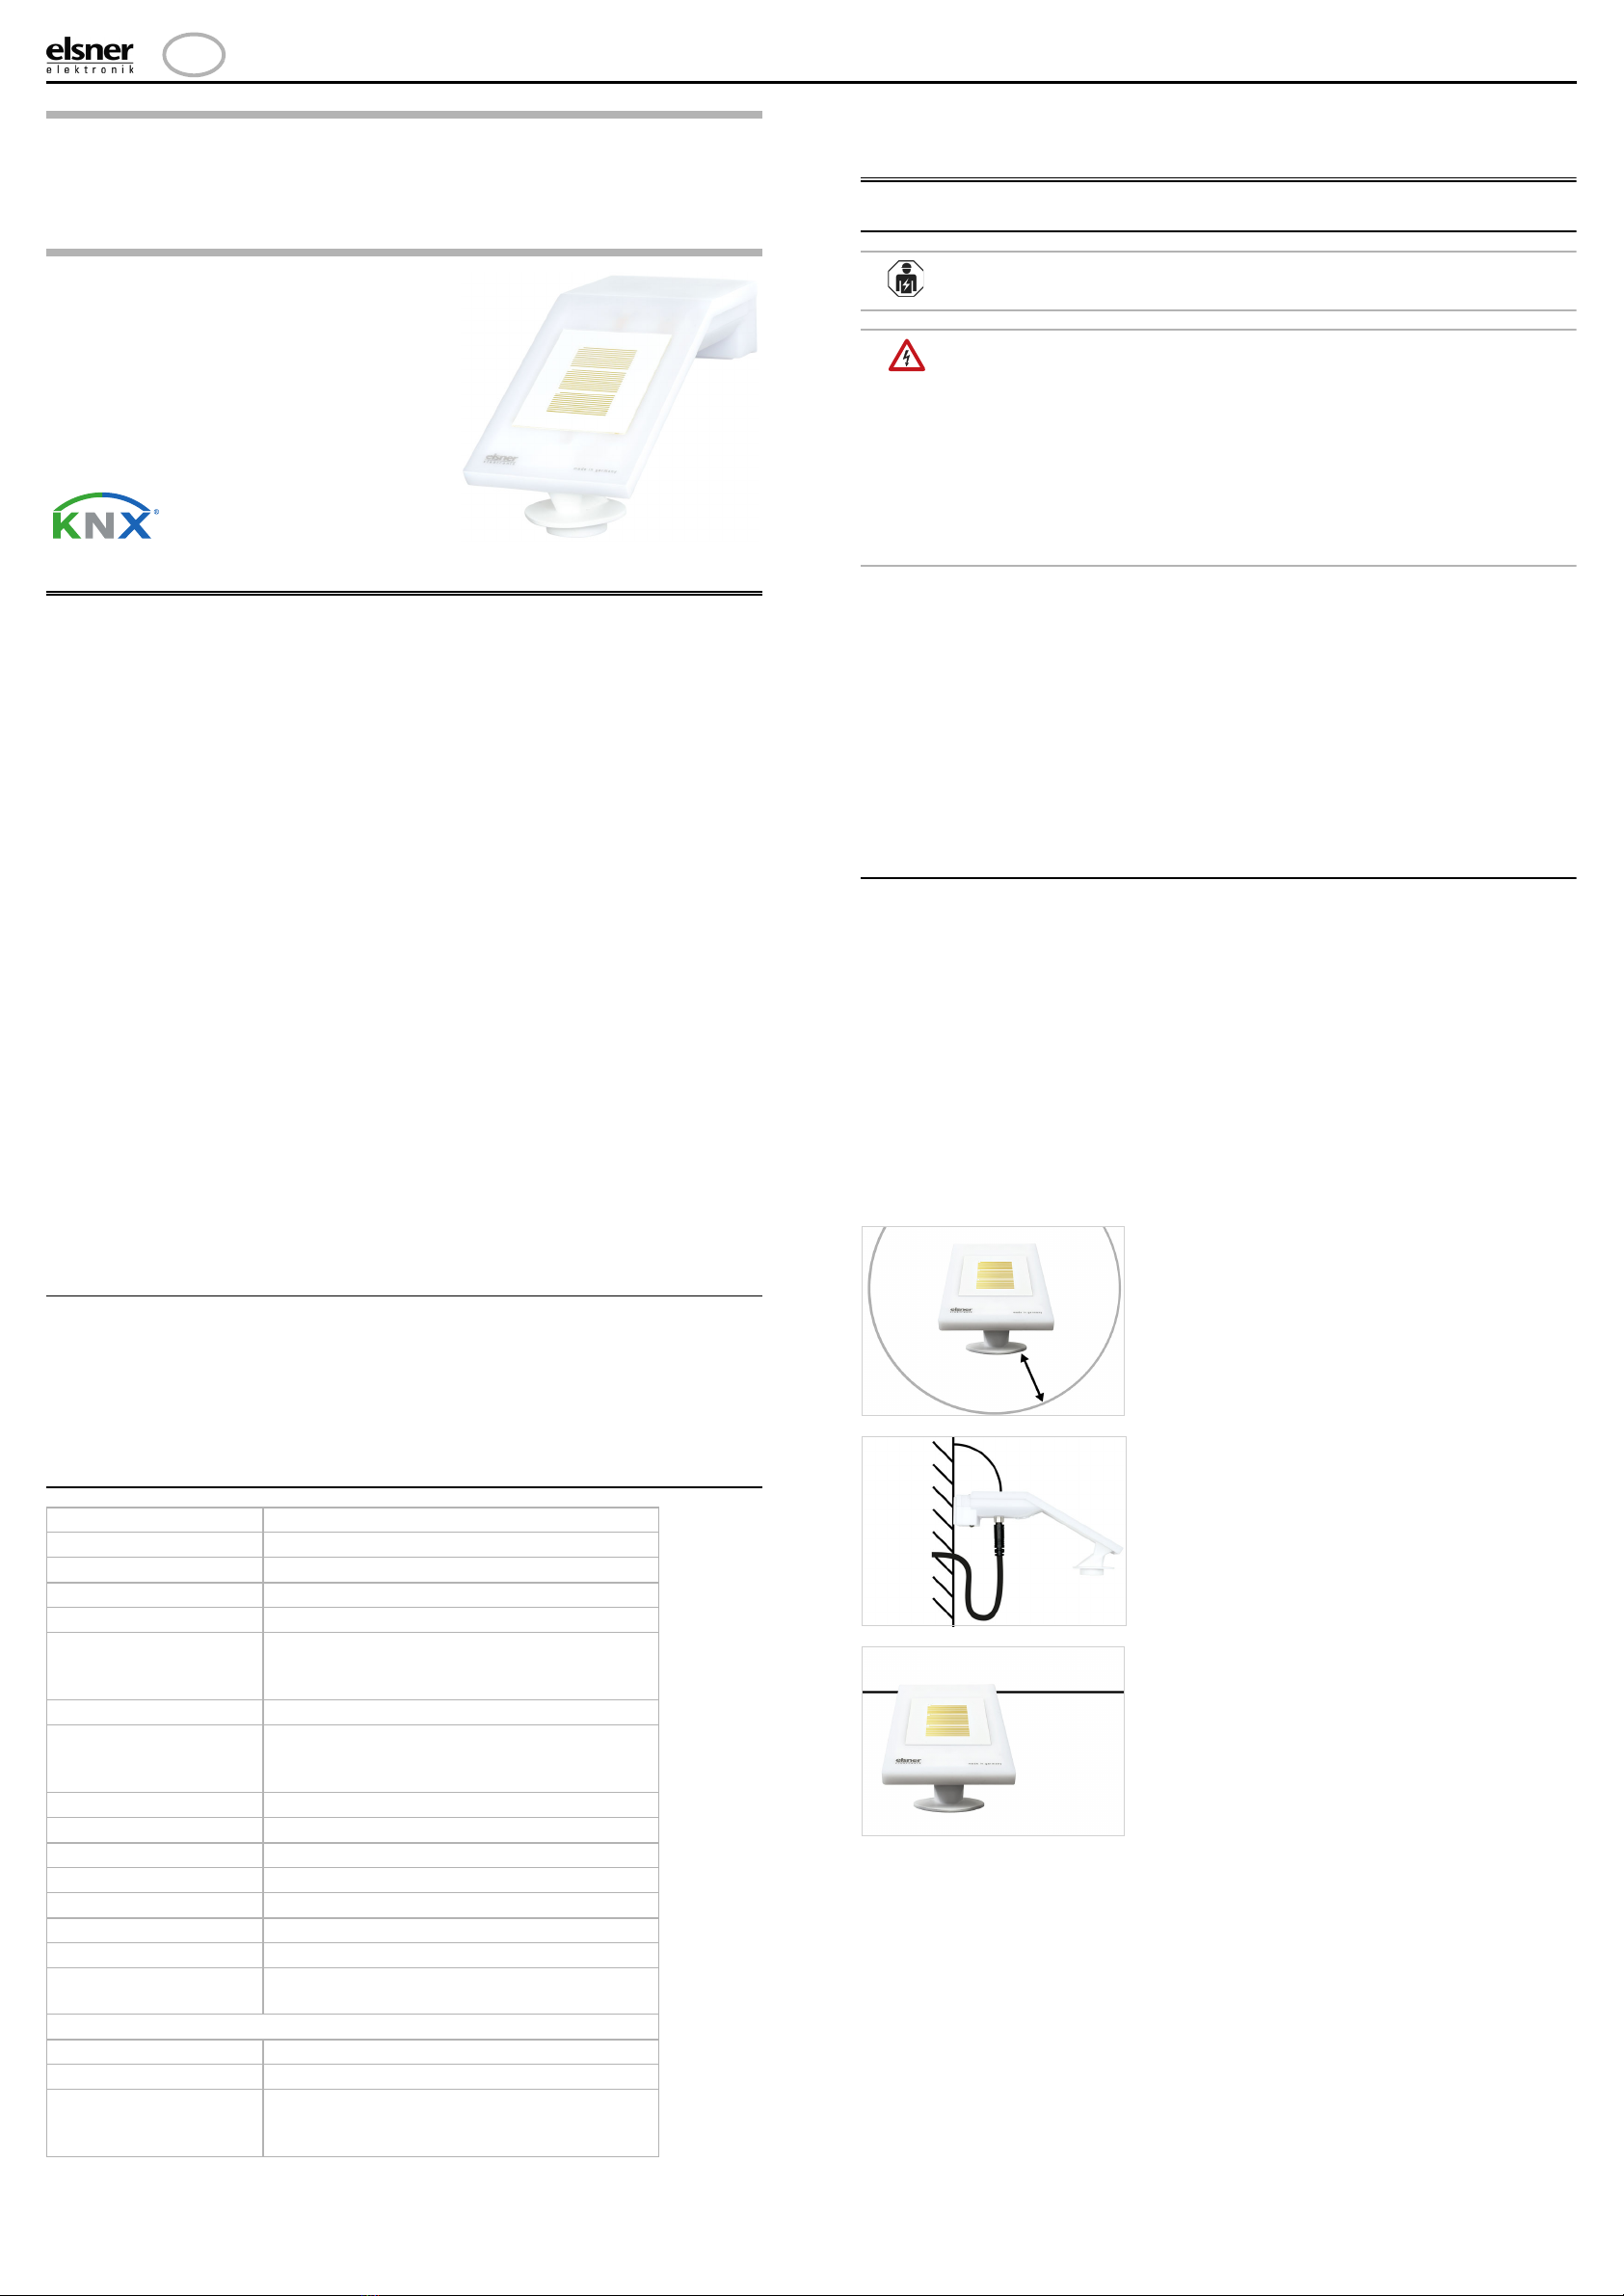
Fig. 1
There must be at least 60 cm clearance
to other elements (structures, cons-
truction parts, etc.) below, to the sides
and in front of the device.
60 cm
Fig. 2
The device must be attached to a ver-
tical wall (or a pole).
Place the supply line in a loop before
leading it into the wall or junction box.
This will allow rain to drip off and not
drain into the wall or box.
Wall
or
pole
90°
Fig. 3
The device must be mounted in the
horizontal (transverse) direction.
Horizontal


