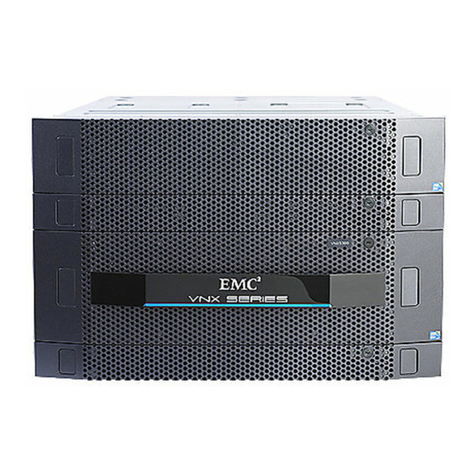
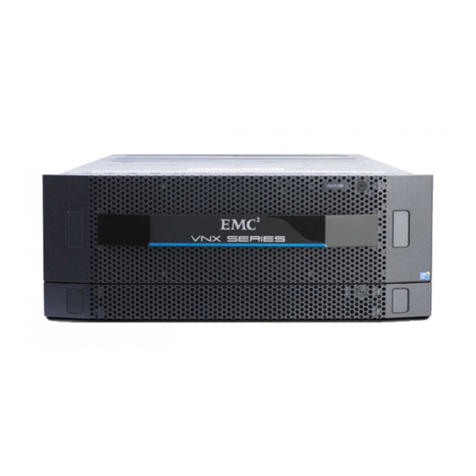
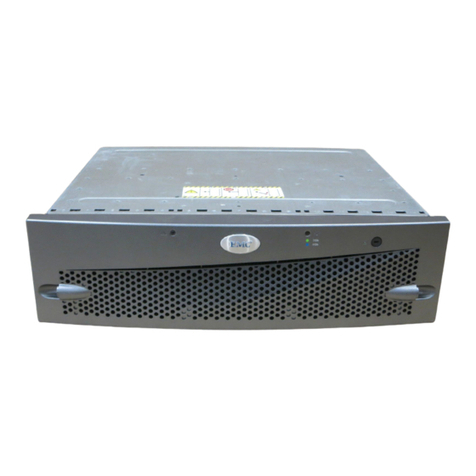
EMC VNXe3200 User manual

EMC® VNXe2 Series
VNXe3200 Installation Guide
P/N 300-015-331
REV 03

Copyright © 2014-2015 EMC Corporation. All rights reserved. Published in USA.
Published November, 2015
EMC believes the information in this publication is accurate as of its publication date. The information is subject to change
without notice.
The information in this publication is provided as is. EMC Corporation makes no representations or warranties of any kind with
respect to the information in this publication, and specifically disclaims implied warranties of merchantability or fitness for a
particular purpose. Use, copying, and distribution of any EMC software described in this publication requires an applicable
software license.
EMC², EMC, and the EMC logo are registered trademarks or trademarks of EMC Corporation in the United States and other
countries. All other trademarks used herein are the property of their respective owners.
For the most up-to-date regulatory document for your product line, go to EMC Online Support (https://support.emc.com).
EMC Corporation
Hopkinton, Massachusetts 01748-9103
1-508-435-1000 In North America 1-866-464-7381
www.EMC.com
2EMC VNXe2 Series VNXe3200 Installation Guide

Unpack your system 5
Unpack the disk processor enclosure.............................................................. 6
Unpack [optional] disk-array enclosures..........................................................7
Prepare your system 11
Before you begin........................................................................................... 12
Installation requirements.............................................................................. 12
Rack and install 15
Install the DPE rails....................................................................................... 16
Installing the DPE adjustable rails.................................................... 16
Installing Snap-in Rails.................................................................... 17
Install the disk processor enclosure.............................................................. 20
Installing the disk processor enclosure......................................................... 21
Install the DAE rails....................................................................................... 22
Install 2U DAE rails...........................................................................22
Installing Snap-in Rails.................................................................... 23
Install the disk array enclosure......................................................................26
Install the 2U DAE............................................................................ 26
Cabling the DPE to a DAE...............................................................................27
Cable the DPE to DAE.....................................................................................28
Attach the storage processors to the network................................................ 31
Power up.......................................................................................................32
Verify status LEDs..........................................................................................35
Attach the bezels.......................................................................................... 37
Connect 41
Connect a management station..................................................................... 42
Automatically Assigning a Dynamic VNXe Management Port IP Address.........42
Manually Assigning a Static VNXe Management Port IP Address.................... 43
Chapter 1
Chapter 2
Chapter 3
Chapter 4
CONTENTS
EMC VNXe2 Series VNXe3200 Installation Guide 3
CONTENTS
4EMC VNXe2 Series VNXe3200 Installation Guide

CHAPTER 1
Unpack your system
Unpack and install the system components. Verify that you have everything that you need
to assemble and cable the system.
lUnpack the disk processor enclosure...................................................................... 6
lUnpack [optional] disk-array enclosures..................................................................7
Unpack your system 5

Unpack the disk processor enclosure
The disk processor enclosure (DPE) is a 2U component with either twelve 3.5" drive slots
or twenty-five 2.5" drive slots. Verify that you have received all of the DPE components,
including cables, bezel, rail kit, and mounting screws.
Table 1 DPE container contents
Item
Disk processor enclosure
(DPE) - 2U component with
either
12 3.5" drive slots
or
25 2.5" drive slots
Twelve 3.5" drive slots
Installation
Removing these drives will
make the array unusable
SPD
Removing these drives will
make the array unusable
SPD
Removing these drives will
make the array unusable
SPD
Removing these drives will
make the array unusable
SPD
1
Twenty-five 2.5" drive slots
e0 e1 e2 e3
2345
AC
DC
HDMI
X4
6Gb SAS 1GbE
2/4Gb 8Gb
10GbE
1
0
e0 e1 e2 e3
2345
AC
DC
HDMI
X4
6Gb SAS 1GbE
2/4Gb 8Gb
10GbE
1
0
Will Make the Array Unusable
Caution:Array Software on drives 0-3. Removing or relocating them
Rail kit, including
Adjustable rails (2)
Adjustable rails and DPE
mounting screws (10)
or
Snap-in rails (2)
Snap-in rails and DPE
mounting screws (6)
Adjustable rails
Unpack your system
6EMC VNXe2 Series VNXe3200 Installation Guide

Table 1 DPE container contents (continued)
Item
Snap-in rails
CL5583
Power cables (2)
Bezel (1), with key
Mini-USB adaptor (1)
Documentation kit Quick Start document
Configuration Worksheet
Environmental information
Unpack [optional] disk-array enclosures
Disk-array enclosures (DAEs) provide additional storage. The VNXe3200 can utilize either
of two DAEs. One is a 2U twelve disk 3.5" drive DAE. The other is a 2U twenty-five disk
2.5" drive DAE. DAEs are optional. If you have one or more DAE in the system, verify that
you have received all of the DAE components, including cables, bezel, rail kit, and
mounting screws.
Unpack your system
Unpack [optional] disk-array enclosures 7

Table 2 DAE container contents
Item
Disk-array enclosure (DAE) - 2U
component with either
12 3.5" disks
or
25 2.5" disks
DAE with twelve 3.5" disks
Installation
X4
6Gb SAS
1
#
X4
6Gb SAS
X4
6Gb SAS
1
#
X4
6Gb SAS
DAE with twenty-five 2.5" disks
6 Gb
SAS
X4
#
6 Gb
SAS
X4
#
Mounting screws (4)
Rail kit, including
Adjustable rails (2)
Screws (3 per rail)
or
Snap-in rails (2)
Screws (3 per rail)
Adjustable rails
Unpack your system
8EMC VNXe2 Series VNXe3200 Installation Guide

Table 2 DAE container contents (continued)
Item
Snap-in rails
CL5583
Power cables (2)
SAS cables (2)
mini-SAS to mini-SAS
connectors
DAE to DAE connections
cable label sheet
SAS cables (2)
mini-SAS HD to mini-SAS
connectors
DPE to DAE connections
cable label sheet
Bezel (1), with key
Unpack your system
Unpack [optional] disk-array enclosures 9

Unpack your system
10 EMC VNXe2 Series VNXe3200 Installation Guide

CHAPTER 2
Prepare your system
Use this section to understand what you need before you begin the installation as well as
the site requirements for the system.
lBefore you begin................................................................................................... 12
lInstallation requirements...................................................................................... 12
Prepare your system 11

Before you begin
Procedure
1. Set up a product support account.
If you do not already have a Product Support account, go to https://
support.emc.com/products/30951 to set one up. You will need a support account to
access the latest documentation and troubleshooting information, online chat,
installation and maintenance videos, utilities and wizards.
2. Complete the
VNXe Series Configuration Worksheet
.
The
VNXe Series Configuration Worksheet
is available for download from https://
support.emc.com/products/30951.
Installation requirements
Table 3 Site requirements
Requirement Description
Power For high availability: At least two 110 or 240 V AC circuits are required. Types
of plugs: C13 and C14.
Network lTwo 1-gigabit Ethernet management connections
lTwo to eight 1 or 10-Gigabit copper Ethernet data connections for CIFS
NFS, and iSCSI connectivity
lCAT5e or better cables for each connection to the network
lDNS and NTP servers accessible from the VNXe system (recommended)
lWindows Domain Controller (recommended)
lSMTP server network connection to the VNXe3200 and the management
host (optional)
Network
information
If you are using the VNXe Connection Utility, the management port and the
login information required include:
lA static IP address for the system
lThe subnet mask of the LAN to which the system is connected
lThe default gateway address of the LAN to which the system is connected
lPasswords for system users admin and service
If you are setting up the system on a network with DHCP servers, DNS servers,
and Dynamic DNS services, you need:
lSystem serial number
lDomain information
Space lCabinet vertical space 2U (3.5 inches, 8.9 cm) for the disk processor
enclosure (DPE)
lCabinet vertical space of 2U for each optional DAE
Prepare your system
12 EMC VNXe2 Series VNXe3200 Installation Guide

Table 3 Site requirements (continued)
Requirement Description
Tools Slotted or Phillips screwdriver
Management
Console
A Windows-based computer to run the initialization, maintenance, and
management tools with:
lAt least 100 MB of free space
lConnection on same LAN subnet as your VNXe system (recommended)
lWeb browser (Internet Explorer, Mozilla Firefox, Google Chrome)*
lAdobe Flash Player*
*Supported versions are listed in the EMC VNXe Simple Support Matrix.
Prepare your system
Installation requirements 13

Prepare your system
14 EMC VNXe2 Series VNXe3200 Installation Guide

CHAPTER 3
Rack and install
EMC recommends installing the disk processor enclosure (DPE) in the lowest available
location in a cabinet and then installing any optional disk-array enclosure (DAEs) above
the DPE.
CAUTION
The enclosures are heavy and should be installed into or removed from a rack by two
people. To avoid personal injury and/or damage to the equipment, do not attempt to lift
and install an enclosure into a rack without a mechanical lift and/or help from another
person.
lInstall the DPE rails............................................................................................... 16
lInstall the disk processor enclosure...................................................................... 20
lInstalling the disk processor enclosure................................................................. 21
lInstall the DAE rails............................................................................................... 22
lInstall the disk array enclosure..............................................................................26
lCabling the DPE to a DAE.......................................................................................27
lCable the DPE to DAE.............................................................................................28
lAttach the storage processors to the network........................................................ 31
lPower up...............................................................................................................32
lVerify status LEDs..................................................................................................35
lAttach the bezels.................................................................................................. 37
Rack and install 15

Install the DPE rails
Among the DPE components is a rail kit. The rail kit will contain either a set of snap-in
rails or a set of adjustable rails. Either set of rails can be used. To install the rails, follow
the instructions that are specific to the type of rails in the kit.
Installing the DPE adjustable rails
Before you begin
Install the DPE rails first, at the bottom of the space reserved for the system in your
cabinet. The DPE box provides a set of adjustable rails and one bag of screws for the
installation. Those screws are used for both the installation of the rails and attaching the
enclosure to the cabinet. Refer to Figure 1 on page 17.
Note
The front edge of each rail is stamped L or R for left or right side when the rail faces the
cabinet front.
Procedure
1. Locate the 2U adjustable rail kit for the DPE, and identify the rails.
The left rail for the DPE has an electronic connector for the bezel protruding from the
front face.
2. From the front of the cabinet, insert the rail alignment pins into the rear cabinet
channel so that the pins are in the appropriate holes above the bottom U mark for the
2U space for the DPE.
lLeft rail: Alignment pin goes in the 3rd hole from the bottom U mark
lRight rail: Alignment pin goes in the 4th hole from the bottom U mark
3. Extend the left adjustable rail so that it reaches the front channel of the cabinet and
carefully ensure that the electronic connector aligns with and extends through a hole
in the cabinet channel. Check the alignment of the rail to ensure that the front of the
rail is level with the back. Once you are satisfied with the alignment, insert one screw
from the front of the cabinet into the rail's threaded screw hole. .
4. Insert, extend, and attach the right rail in a similar fashion. Secure it to the front
channel using one screw.
5. Secure the rails to the rear channel using two screws (each side), leaving them loose
enough for adjustment when you install the DPE on the rails.
Rack and install
16 EMC VNXe2 Series VNXe3200 Installation Guide

Figure 1 Installing the DPE rails
Alignment pin
Front
Rear
Adjustable rail
L
R
CL5324
Alignment pin
Left Front
L
Screw (1)
Mounting rail
R
Right Front
Screw (1)
Mounting
rail
Left Rear
Alignment pin
Screw (2)
Mounting
rail
Right Rear
Screw (2)
Alignment pin
Mounting
rail
Installing Snap-in Rails
This procedure describes how to install the snap-in rails.
Before you begin
The snap-in rails have key tabs. The key tabs are positioned at the rear of the rails. The
key tabs ensure that the rails are installed in the appropriate 2U space.
Rails are dedicated left and right, and cannot be interchanged. Depending upon the
configuration, the left rail may contain a field bezel cord cover. Rails that have this cover
are installed in the same way.
Procedure
1. Align the 2U key tabs with the holes of the U-space in the rear rack channel.
Rack and install
Installing Snap-in Rails 17

Figure 2 Aligning the Key Tabs
CL5578
2. Holding the rail extended, push the key tabs and the adaptors into the rear mounting
holes until the spring clips snap into place on the outside of the rear rack channel.
Figure 3 Aligning the Rear Adaptors
CL5579
3. Pull the rail forward and align the adaptor with the mounting hole on the front rack
channel. Make sure the rail is level.
Rack and install
18 EMC VNXe2 Series VNXe3200 Installation Guide

Figure 4 Aligning Front Adaptor
CL5581
4. Push in on the spring clip while pulling forward on the rail. When the spring clip is
forward of the front rack channel, and the adaptor is in the mounting holes, release
the spring clip so it holds the rail in place.
CAUTION
Make sure the spring clip is securely attached to the channel. It may be necessary to
push in on the clip to assist in snapping it into place.
Figure 5 Securing the Spring Clips
CL5582
5. From the rear of the rack, secure the rail in place using one M5 screw.
Rack and install
Installing Snap-in Rails 19

Figure 6 Installing the M5 Screw
CL5580
6. Repeat for the other rail.
Install the disk processor enclosure
There are two types of DPE(s). Each is 2U. One utilizes 3.5" disks, while the other utilizes
2.5" disks. The installation procedure is identical, no matter which one you have in your
system. Each DPE contains dual storage processors.
Figure 7 DPE front views
Installation
Removing these drives will
make the array unusable
SPD
Removing these drives will
make the array unusable
SPD
Removing these drives will
make the array unusable
SPD
Removing these drives will
make the array unusable
SPD
123
Will Make the Array Unusable
Caution: Array Software on drives 0-3. Removing or relocating them
The DPE has a Product Serial Number Tag (PSNT tag) attached to the rear of the chassis.
Before installation of the chassis, record the information from this PSNT tag on the VNXe
Series Configuration Worksheet. See Figure 8 on page 21.
Rack and install
20 EMC VNXe2 Series VNXe3200 Installation Guide
Table of contents
Other EMC Storage manuals

EMC
EMC CLARiiON CX4-120 User manual

EMC
EMC Data Domain DD990 Assembly instructions

EMC
EMC Celerra NX4 User manual

EMC
EMC DATA DOMAIN DD4200 Assembly instructions

EMC
EMC VPLEX Assembly instructions

EMC
EMC Atmos Installation instructions

EMC
EMC VNX5500 User manual

EMC
EMC CX3-10 User manual

EMC
EMC Celerra NS20 User manual

EMC
EMC D860 Archiver Assembly instructions

EMC
EMC VNX Series Owner's manual

EMC
EMC Iomega StorCenter ix2-dl User manual

EMC
EMC DATA DOMAIN DD160 Assembly instructions

EMC
EMC Disk Library DL4106 User manual

EMC
EMC Atmos Installation instructions

EMC
EMC VNX Series User manual

EMC
EMC VNX Series Owner's manual

EMC
EMC Celerra NS20FC User manual

EMC
EMC FC4700 Technical manual

EMC
EMC CX700 Technical manual