manuals.online logo
Brands
  1. Home
  2. •
  3. Brands
  4. •
  5. Emerson
  6. •
  7. Industrial Equipment
  8. •
  9. Emerson CASH VALVES Manual

Emerson CASH VALVES Manual

Before installation, these instructions must be carefully read and understood.
© 2019 Emerson. All Rights Reserved.Emerson.com
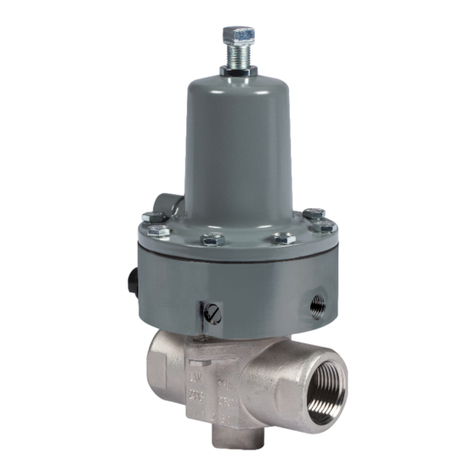
CASH VALVES™ TYPE LTC CRYOGENIC REVERSE ACTING TEMPERATURE REGULATOR
INSTALLATION, OPERATION, AND MAINTENANCE INSTRUCTIONS
DESCRIPTION
The Type LTC Temperature Control Valve
is a double-port valve with a range of
0 to -40°F (-17 to -40°C) for low temperature
cut-off. As it is subject to ambient temperature
under normal conditions, it will normally
be in a wide-open position. A copper well is
recommended for each installation, which
allows the removal of the capillary bulb without
depressurizing the system.
Note: Valve seat closure may take several seconds
under normal operating conditions. In addition,
Type LTC fails in the closed position. Type LTC is not
intended to be bubble tight on closing. It is only meant
to drastically reduce flow on sensing temperature
based on set.
TECHNICAL DATA
Service: Liquid or gas
Sizes: ½", ¾", 1", 1¼", 1½" and 2"
Connections: Threaded union inlet and outlet
Operating temperature range:
0 to -40°F (-17 to -40°C)
Standard valve setting: -20°F (-28°C)
Max. temperature limit: 300°F (208°C)
Min. temperature limit: -320°F (-195°C)
Max. body pressure on all sides:
400 psi - see maximum pressure differentials
table on page 3
CONSTRUCTION
Brass union ends; bronze body and trim;
copper capillary armor and bellows; PTFE
gasket and packing; stainless steel spring;
copper bulb and capillary.
Copper bulb is ½" NPT x 5.82"
(15 mm x 147.83 mm). All parts are
commercially cleaned for oxygen service. A
copper well is available as an option and is
recommended for each cryogenic application.
MAXIMUM OPERATING LIMITS
Operating temperature range is
0 to -40°F (-17 to -40°C); standard setting is
-20°F (-28°C). Maximum temperature limit is
300°F (208°C); minimum temperature limit
is -320°F (-195°C). Maximum body pressure
on all sizes is 400 psi (27.5 bar); however,
for proper operation, maximum pressure
differentials as shown on page 3 must
be observed.
VCIOM-14762-EN 22/01
WARNING
Failure to follow these instructions or to properly
install and maintain this equipment could result in
an explosion, fire and/or chemical contamination
causing property damage and personal injury
or death.
Cash Valve regulators must be installed, operated
and maintained in accordance with federal,
state and local codes, rules and regulations
and Emerson Process Management Regulator
Technologies, Inc. instructions.
If the regulator vents gas or a leak develops in
the system, service to the unit may be required.
Failure to correct trouble could result in a
hazardous condition.
Installation, operation and maintenance
procedures performed by unqualified personnel
may result in improper adjustment and unsafe
operation. Either condition may result in
equipment damage or personal injury. Only
a qualified person shall install or service the
Type LTC Temperature Regulator.
CALIFORNIA PROPOSITION 65 WARNING
This product can expose you to chemicals
including lead, which is known to the State of
California to cause cancer, birth defects or other
reproductive harm. For more information, go to
www.P65Warnings.ca.gov.
INTRODUCTION
Scope of the Manual
This manual provides instructions for the
installation, adjustment and maintenance for
the Type LTC Temperature Regulator.
2
CASH VALVES™ TYPE LTC CRYOGENIC REVERSE ACTING TEMPERATURE REGULATOR
INSTALLATION, OPERATION, AND MAINTENANCE INSTRUCTIONS
OPERATING INSTRUCTIONS
Temperature Adjustment
The temperature regulator can be set to
cut-off the flow of gas at any temperature
from 0 to -40°F (-17 to -40°C) temperature
range. To adjust the cut-off temperature turn
the temperature adjustment wheel (10) in a
counter-clockwise direction to set the regulator
at a higher temperature. Turn the wheel in a
clockwise direction to set the regulator at a
lower temperature. The wheel is mounted on
ball bearings to eliminate friction and ensure
easy operation.
MAINTENANCE INSTRUCTION
CAUTION
Before attempting to replace any spare parts,
be sure to shut off all pressure connections to
the valve. With the valve closed however, system
pressure could still be locked between the shut
off valve and the inlet and/or outlet sides of the
regulator. Before proceeding with any valve
service, be certain to relieve the pressure from
both sides of the regulator.
When properly applied and correctly installed
the Type LTC Temperature Regulator should
require very little attention or maintenance.
However, the Type LTC, like every mechanical
device, deserves some care to ensure
continued dependability and to protect the
long service life for which it was designed.
When attention is required use only genuine
Cash Valve replacement parts.
Refer to the Type LTC Regulator cut
away view for parts identification during
maintenance procedures.
Servicing The Valve Pull Rod Packing (16)
The valve yoke nut should be kept tight. Should
it become necessary to replace the pull rod
packing proceed as follows:
1. Remove the yoke assembly (9) from
the valve body (19) by removing the
yoke nut (13).
2. Remove the spacer (14), female adapter (15),
the two worn packing seals (16), and the
male adapter (17).
3. Replace the packing seals and reassemble
in reverse order. Tighten the yoke
nut securely.
Servicing the Thermal System
The thermal system used on the Type LTC
Temperature Regulator is serviced only as
a complete assembly except for the bulb
bushing (2) and the bulb gasket (3). The
thermal system is set at the factory to operate
only at the temperature range stamped on
the nameplate which is affixed to the bellows
housing. If it is necessary to install a new
thermal system, the procedure listed below
should be followed.
1. Shut off the vaporizer system.
2. Completely loosen the bushing nut (5), then
take the bulb (1) out of the bulb bushing (2).
3. Turn the temperature adjustment wheel (10)
to its lowest position (counter-clockwise).
4. Remove the screws (8) retaining the bellows
housing (7) to the yoke (9), then lift the
housing from the yoke.
Note: The bellows housing (7) may be under slight
spring tension. Exercise care when removing
the housing.
5. Position the new bellows housing (7) on top
of the spring, aligning the screw holes in the
housing with those in the yoke.
6. Using three 10-32 x 1" screws inserted
in alternate holes in the bellows flange,
tighten the screws evenly to draw the
bellows housing (7) down until it contacts
the yoke (9). Install the shorter standard
screws (8) in the remaining holes, then
replace the 10-32 x 1" slave screws with the
standard screws.
Note: An alternative method of installing the new
bellows housing to the yoke would be to cool the
thermal bulb to approximately -40°F (-40°C) allowing
the bellows to contract and thereby permitting the
standard screws to be installed.
7. Install the new thermal system bulb (1) in
its original position and lighten the bulb
bushing nut (5).
8. Turn the temperature adjustment wheel
clockwise to its original position or
approximately .675 inches above the
lowest position.
INSTALLATION INSTRUCTIONS
Type LTC Regulator is to be installed between
the vaporizer and the service line (or final line)
regulator. The valve should be installed in a
horizontal position with the bellows housing
upright. For other installation requirements
consult the factory. For ease of operation and
maintenance, it is suggested that manual
shut-off valves be installed upstream and
downstream from the valve. Before installing
the valve, the piping should be thoroughly
flushed out to remove any foreign material.
Install the valve so that the arrow cast on the
valve body points in the direction of flow. Use
a compatible sealant on the male pipe threads
and do not over tighten the valve connections.
Exercise care when tightening the unions to
ensure that the gaskets located in the union
ends are properly positioned.
Bulb Installation
Install the thermostatic bulb at a point that is
downstream from the vaporizer but upstream
from the temperature regulator. When a
thermometer is to be installed in the line, it
should be placed directly after the bulb in the
pipe line or at the same level as the bulb in a
tank. The standard bulb is shown in the cut
away view of the valve. A copper well is strongly
recommended for each cryogenic temperature
regulator installation, both for the protection
of tho bulb and to allow for the removal of
the capillary bulb without depressurizing
the system.
To install the bulb, remove the bulb bushing
from the bulb. Insert the bulb and fasten
by tightening the nut onto the bushing. The
preferred bulb installation position is with the
end of the bulb below horizontal. Although the
horizontal position is permissible, care must
be exercised to NEVER INSTALL THE BULB
WITH THE END OF THE BULB ABOVE THE
BULB FLANGE.
Note: The flexible armored capillary tubing connecting
the bulb and valve must not be cut, kinked, mashed
or twisted. II may, however, be bent on a 4" radius
or larger. During installation the tubing can be
fastened permanently to a rigid location, however,
never connect the capillary tubing to steam pipes,
cold water lines or other locations where the tubing
would be subject to extreme temperatures. It is
recommended that a single coil ot tubing be made
next to the regulator to absorb vibrations occurring in
the pipe lines.
3
½15 6.04 153.42 2.08 52.84 9.80 248.92 4.31 109.48 2.50 63.50
¾20 6.04 153.42 2.08 52.84 9.80 248.92 4.31 109.48 2.50 63.50
125 6.04 153.42 2.08 52.84 9.80 248.92 4.31 109.48 2.50 63.50
1¼ 32 7.61 193.30 2.75 69.85 10.47 265.94 4.31 109.48 3.56 90.43
1½ 40 7.61 193.30 2.75 69.85 10.47 265.94 4.31 109.48 3.56 90.43
250 8.58 217.43 3.12 79.25 10.84 275.34 4.31 109.48 4.31 109.48
½ - ¾ 15-20 400 27.5 400 27.5 400 27.5
125 275 18.9 400 27.5 400 27.5
1¼ - 1½ 32-40 275 18.9 350 24.1 350 24.1
250 275 18.9 275 18.9 300 20.6
CASH VALVES™ TYPE LTC CRYOGENIC REVERSE ACTING TEMPERATURE REGULATOR
INSTALLATION, OPERATION, AND MAINTENANCE INSTRUCTIONS
MAXIMUM PRESSURE DIFFERENTIALS
Valve size
Temperature setting
0°F
psi
-17°C
bar
-20°F
psi
-28°C
bar
-40°F
psi
-40°C
barinches mm
Note: It requires approximately 15°F change in temperature to fully close valve.
DIMENSIONS
Size
Dimension
A B C D E
in. mm in. mm in. mm in. mm in. mm in. mm
Note: Also available: Separable well - contact factory for more information.
Thermal system repair kit - contact factory for more information.
C
AE
B
D
½"
NPTF
5.82"
6 ft. approx.
Dia.
HOW TO ORDER
To order repair parts, refer to the cut away
view of the Type LTC Regulator to identify the
part required. When ordering, please use the
part names listed and provide the valve serial
number stated on the metal identification tag
attached to the bellows housing. Also state
the following:
1. Valve size
2. Service
3. Temperature range
4. Maximum working pressure
5. Valve temperature setting
6. Part description
7. Quantity of each part
8. Valve assembly or serial number
TYPE LTC SELECTION GUIDE
Example: LTC C S − 01 A
Model
LTC LTC Valve
Valve size
C½"
D¾"
E1"
F1¼"
G1½"
H2"
Connection type
SNPT threaded union ends
BBSPT threaded union ends
Design revision
(-) Indicates original design
Variation
01 Catalog standard
02 With Thermowell
Temperature range
A-40 to 0°F
4
CASH VALVES™ TYPE LTC CRYOGENIC REVERSE ACTING TEMPERATURE REGULATOR
INSTALLATION, OPERATION, AND MAINTENANCE INSTRUCTIONS
VCIOM-14762-EN © 2019, 2022 Emerson Electric Co. All rights reserved 01/22 Cash Valve is a mark owned by one of the companies in the Emerson Automation
Solutions business unit of Emerson Electric Co. The Emerson logo is a trademark and service mark of Emerson Electric Co. All other marks are the property of their
prospective owners.
The contents of this publication are presented for informational purposes only, and while every effort has been made to ensure their accuracy, they are not to be
construed as warranties or guarantees, express or implied, regarding the products or services described herein or their use or applicability. All sales are governed
by our terms and conditions, which are available upon request. We reserve the right to modify or improve the designs or specifications of such products at any time
without notice.
Emerson Electric Co. does not assume responsibility for the selection, use or maintenance of any product. Responsibility for proper selection, use and maintenance of
any Emerson Electric Co. product remains solely with the purchaser.
Emerson.com
PARTS LIST
Item Description
1. Thermostatic Bulb
2. Bulb Bushing
3. Bulb Gasket
4. Bulb Flange
5. Bulb Bushing Nut
6. Armored Capillary Tubing
7. Bellows Housing
8. Housing Screws (6)
9. Yoke
10. Temperature Adjustment Wheel
11. Gasket, seat
11. Upper Pull Rod
12. Pull Rod Lock Nut
13. Yoke Nut
14. Spacer
15. Female Adapter
16. Seal (2)
17. Male Adapter
18. Lower Pull Rod
19. Valve Body
20. Double Ported Plug
21. Teflon Gasket

Other Emerson Industrial Equipment manuals

Emerson Liebert eXL User manual

Emerson

Emerson Liebert eXL User manual

Emerson YARWAY 460D3 Series Operation and maintenance manual

Emerson

Emerson YARWAY 460D3 Series Operation and maintenance manual

Emerson Fisher 3024C User manual

Emerson

Emerson Fisher 3024C User manual

Emerson FB3000 User manual

Emerson

Emerson FB3000 User manual

Emerson PACSystems RX3i User guide

Emerson

Emerson PACSystems RX3i User guide

Emerson Rosemount 5900C User manual

Emerson

Emerson Rosemount 5900C User manual

Emerson Rosemount 3051S Series Instruction Manual

Emerson

Emerson Rosemount 3051S Series Instruction Manual

Emerson Anderson Greenwood 727 Series User manual

Emerson

Emerson Anderson Greenwood 727 Series User manual

Emerson Bettis RTS User manual

Emerson

Emerson Bettis RTS User manual

Emerson CC200 User manual

Emerson

Emerson CC200 User manual

Emerson B302 Manual

Emerson

Emerson B302 Manual

Emerson Rosemount 5900S Series User manual

Emerson

Emerson Rosemount 5900S Series User manual

Emerson ROSEMOUNT OCX8800C User manual

Emerson

Emerson ROSEMOUNT OCX8800C User manual

Emerson Rosemount Model 500 User manual

Emerson

Emerson Rosemount Model 500 User manual

Emerson SA1-2 Series Installation instructions

Emerson

Emerson SA1-2 Series Installation instructions

Emerson PACMOTION VFD Installation and operating instructions

Emerson

Emerson PACMOTION VFD Installation and operating instructions

Emerson CSB400 Series Assembly instructions

Emerson

Emerson CSB400 Series Assembly instructions

Emerson SolaHD SCM-W-HRT7 User manual

Emerson

Emerson SolaHD SCM-W-HRT7 User manual

Emerson Rosemount 3410 Series User manual

Emerson

Emerson Rosemount 3410 Series User manual

Emerson PACSystems RXi Series User manual

Emerson

Emerson PACSystems RXi Series User manual

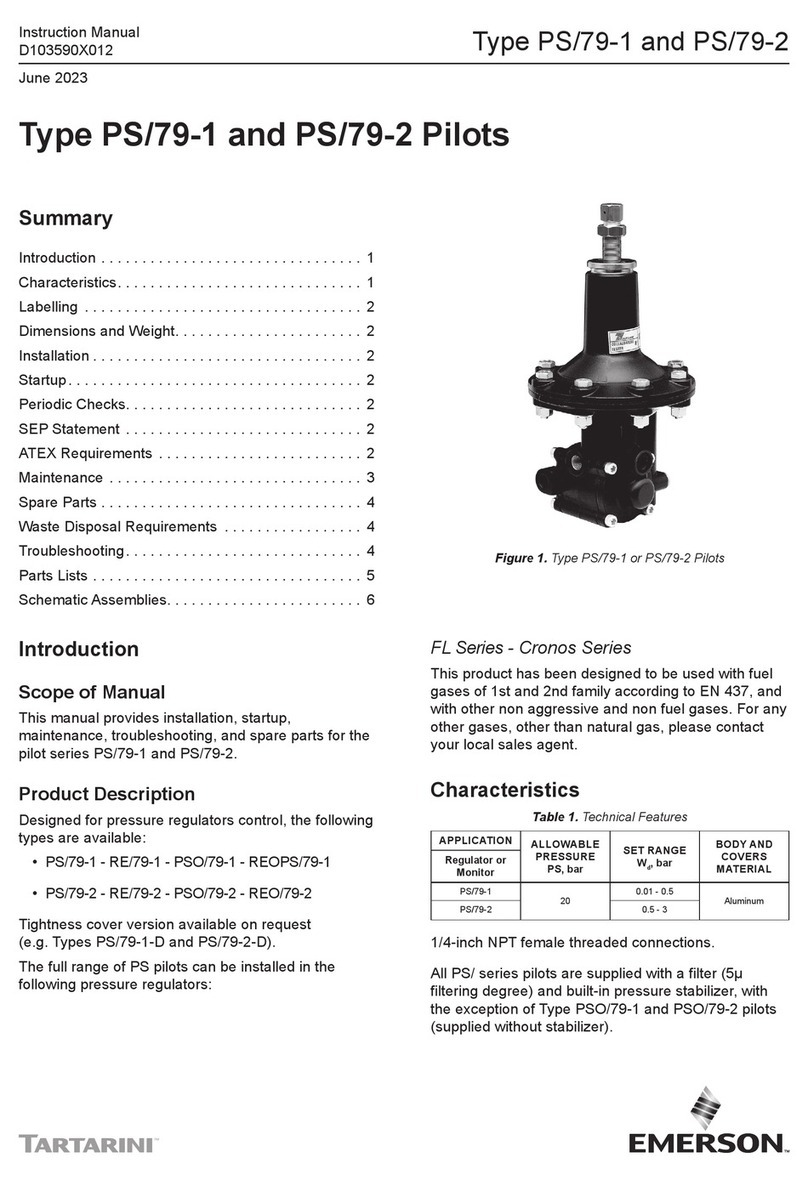
Emerson TARTARINI PS/79-1 User manual

Emerson

Emerson TARTARINI PS/79-1 User manual

Emerson GPC Series Installation instructions

Emerson

Emerson GPC Series Installation instructions

Emerson PACSystems RX3i User manual

Emerson

Emerson PACSystems RX3i User manual

Emerson Digistart CS User manual

Emerson

Emerson Digistart CS User manual

Popular Industrial Equipment manuals by other brands

morse CP-305-1-220-50 quick start guide

morse

morse CP-305-1-220-50 quick start guide

ACS FRV Seroes Operation and instruction manual

ACS

ACS FRV Seroes Operation and instruction manual

ABB HT609377 Operation manual

ABB

ABB HT609377 Operation manual

Schmalz FMP-SVK Series operating instructions

Schmalz

Schmalz FMP-SVK Series operating instructions

SAINT-GOBAIN VISION-LITE Guidelines

SAINT-GOBAIN

SAINT-GOBAIN VISION-LITE Guidelines

THORLABS DTS25 user guide

THORLABS

THORLABS DTS25 user guide

Welker LS-14 Installation, operation and maintenance manual

Welker

Welker LS-14 Installation, operation and maintenance manual

Ammeraal Beltech uni chains uni M-QNB Series Instructions and installation

Ammeraal Beltech

Ammeraal Beltech uni chains uni M-QNB Series Instructions and installation

Air Liquide Cryo-Alarm Operator's manual

Air Liquide

Air Liquide Cryo-Alarm Operator's manual

Nord Drivesystems B 1000 Manual with installation instructions

Nord Drivesystems

Nord Drivesystems B 1000 Manual with installation instructions

Husky 32045 Assembly, Installation, Operation and Maintenance Instructions

Husky

Husky 32045 Assembly, Installation, Operation and Maintenance Instructions

Siemens SIRIUS S2 operating instructions

Siemens

Siemens SIRIUS S2 operating instructions

Woodstock SHOP FOX M1011 instruction manual

Woodstock

Woodstock SHOP FOX M1011 instruction manual

UWAVE UPOWER-1500-48 manual

UWAVE

UWAVE UPOWER-1500-48 manual

Siemens Reyrolle 7SR5 manual

Siemens

Siemens Reyrolle 7SR5 manual

PushCorp AFD92 manual

PushCorp

PushCorp AFD92 manual

IMEON ENERGY 3.6 installation guide

IMEON ENERGY

IMEON ENERGY 3.6 installation guide

PairGain HLU-319 manual

PairGain

PairGain HLU-319 manual

manuals.online logo
manuals.online logoBrands
  • About & Mission
  • Contact us
  • Privacy Policy
  • Terms and Conditions

Copyright 2025 Manuals.Online. All Rights Reserved.