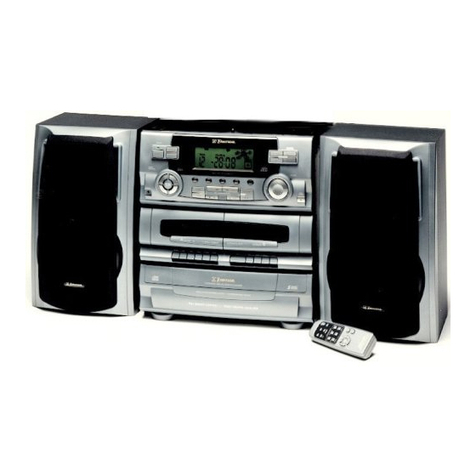
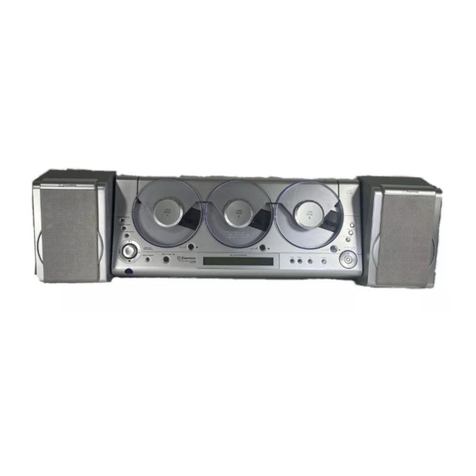
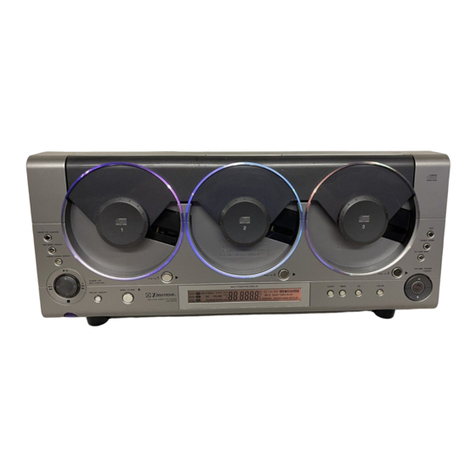
Emerson MS3103 User manual

HOMEAUDIO SYSTEM
with3CD CHANGER
and DIGITALAM/FMRECEIVER
MS3103
OWNER'SMANUAL
Visitourweb siteatwww.emersonradio.com
MS3103_ib012803.p65 28/1/2003, 11:3638

1
TO PREVENT FIRE OR SHOCK HAZARD, DO NOT USE THIS PLUG WITH AN
EXTENSION CORD, RECEPTACLE OR OTHER OUTLET UNLESS THE BLADES
CAN BE FULLY INSERTED TO PREVENT BLADE EXPOSURE. TO PREVENT FIRE
ORSHOCKHAZARD,DONOTEXPOSETHISAPPLIANCETORAINORMOISTURE.
IMPORTANTSAFETYINSTRUCTIONS
1.) Read these instructions.
2.) Keep these instructions.
3.) Heed all warnings.
4.) Follow all instructions.
5.) Do not use this apparatus near water.
6.) Clean only with dry cloth.
7.) Do not block any ventilation openings. Install in accordance with the manufacturer’s
instructions.
8.) Do not install near any heat sources such as radiators, heat registers, stoves, or other
apparatus (including amplifiers) that produce heat.
9.) Do not defeat the safety purpose of the polarized or grounding-type plug. A polarized plug has
two blades with one wider than the other. A grounding type plug has two blades and a third
groundingprong.Thewidebladeorthethirdprongareprovidedforyour safety. If the provided
plug does not fit into your outlet, consult an electrician for replacement of the obsolete outlet.
10.) Protect the power cord from being walked on or pinched particularly at plugs, convenience
receptacles, and the point where they exit from the apparatus.
11.) Only use attachments / accessories specified by the manufacturer.
12.) Unplug this apparatus during lightning storms or when unused for long periods of time.
13.) Refer all servicing to qualified service personnel. Servicing is required when the apparatus
has been damaged in any way, such as power-supply cord or plug is damaged, liquid has
been spilled or objects have fallen into the apparatus, the apparatus has been exposed to rain
or moisture, does not operate normally, or has been dropped.
14.) This appliance shall not be exposed to dripping or splashing water and no object filled with
liquids such as vases shall be placed on the apparatus.
15.) Do not overload wall outlet. Use only power source as indicated.
16.) Use replacement parts as specified by the manufacturer.
17.) The product may be mounted to a wall only if recommended by the manufacturer.
18.) Upon completion of any service or repairs to this product, ask the service technician to
perform safety checks.
!
CAUTION
RISK OFELECTRICSHOCK
DONOTOPEN
The lightning flashwitharrow-
head symbol,withinan equi-
lateraltriangleisintented to
alertthe usertothe presence
ofuninsulated‘dangerousvoltage’
withinthe product’s enclosure
thatmaybe ofsufficient
magnitude toconstitutearisk
ofelectricshock topersons.
The exclamation pointwithin
an equilateraltriangleisin-
tended toalertthe userto
the presenceofimportant
operating and maintenance
(servicing)instructionsin
the literatureaccompany-
ing the appliance.
WARNING:TOREDUCETHE
RISK OFELECTRICSHOCK
DONOTREMOVE COVER
(ORBACK),NOUSER
SERVICEABLEPARTSINSIDE
REFERSERVICINGTO
QUALIFIEDSERVICE
PERSONNEL.
CAUTION
MS3103_ib012803.p65 28/1/2003, 11:361

2
BEFOREWEBEGIN
Thankyou forpurchasing thisEmerson audioproduct. The Emerson brand isyour
assuranceofquality,performanceand value.
Ourengineershaveincluded manyusefuland convenientfeaturesinthisproduct.
Pleasebe suretoread thisOwner’s Manualcompletelytomakesureyou are
getting the maximumbenefitfromeachfeature.
Thisproductwasmanufacturedusingthehighestqualitycomponentsand standards
ofworkmanship.It wastested byEmerson inspectorsand found tobe inperfect
working orderbeforeitleft ourfactory.However,thereisalways the chancethat
someproblemmayoccurbecauseofrough handling during shipmenttothe retail
storeortothe finalconsumer.
If, afterreading thisManual,you experienceanyproblemswiththe operation of
thisproduct, pleaserefertothe instructionsforobtaining serviceatthe end ofthis
Manual.Emerson and Emerson retailersarecommitted toyoursatisfaction.
Onceagain,thanks forpurchasing thisEmerson audioproduct.
For future reference, record the serial number in the space provided.
Model No: MS3103
Serial No:
MS3103_ib012803.p65 28/1/2003, 11:362

3
•Operatecontrolsand switchesas
described inthe manual.
•Beforeturning ‘On’the power,make
certainthatpowercordisproperly
installed.
•StoreyourCDs,inacoolarea toavoid
damage fromheat.
•When moving the set, be suretofirst
disconnectthe powercord.
•Avoidinstalling thisunitinplaces
exposed todirectsunlightorcloseto
heatradiating appliancessuchas
electricheaters,on top ofotherstereo
equipmentthatradiatestoo muchheat,
placeslackingventilationordustyareas,
placessubjecttoconstantvibrationand/
orhumidormoistareas.
•Donotattempttoclean thisunitwith
chemicalsolventsasthismightdamage
the finish.Useaclean drycloth.
CLASS 1LASERPRODUCT
CLASS 1LASERPRODUCT
APPAREILÁLASERDECLASSE 1
PRODUCTOLASERDECLASE 1
CAUTION
INVISIBLELASERRADIATION
WHENOPENAND INTERLOCKS
DEFEATED.
AVOIDEXPOSURETOBEAM
ThisproductcontainsalowpowerLaserDevice.
FCC INFORMATION
Thisequipmenthasbeen tested and found tocomplywiththe limitsforaClass Bdigital
device,pursuanttoPart15 ofthe FCC Rules.Theselimitsaredesigned toprovide
reasonableprotection againstharmfulinterferenceinaresidentialinstallation.This
equipmentgenerates,uses,and can radiateradiofrequency energyand,ifnotinstalled
and used inaccordancewiththe instructions,maycauseharmfulinterferencetoradio
communications.However,thereisno guarantee thatinterferencewill notoccurina
particularinstallation.Ifthisequipmentdoescauseharmfulinterferencetoradioortelevision
reception,whichcan be determined byturning the equipmentoff and on,the useris
encouraged totrytocorrectthe interferencebyone ormoreofthe following measures:
•Reorientorrelocatethe receiving antenna.
•Increasethe separation between the equipmentand receiver.
•Connectthe equipmentintoan outleton acircuitdifferentfromthattowhichthe receiver
isconnected.
•Consultthe dealeroran experienced radio/TVtechnician forhelp.
ThisdevicecomplieswithPart15 ofthe FCC Rules.Operation issubjecttothe following
twoconditions:
(1)Thisdevicemaynotcauseharmfulinterference,and
(2)Thisdevicemustacceptanyinterferencereceived,including interferencethat
maycauseundesired operation.
IMPORTANTNOTES
MS3103_ib012803.p65 28/1/2003, 11:363

4
PREPARATIONFORUSE
UNPACKING AND SET-UP
• Carefully remove the main unit, speakers, and remote control from the carton,
and remove all packing materials from the components.
• Remove any descriptive labels or stickers from the front panel of the main
unit. Do not remove any labels or stickers on the back panel of the main unit or
the speakers.
• Carefully remove any small strips of tape that may have been used to hold the
CD door closed during shipment.
•· Unwind theAC power cord on the main unit and extend it to its full length.
• Unwind the lead wire FM antenna on the back of the main unit and extend it to
its full length.
• Please save the carton and packing materials in case it ever becomes
necessary to return your unit for service. The original carton and packing
materials are the only way to protect your unit from damage in transit.
• Place the system on a stable, level shelf, table, desk or stand, out of direct
sunlight, convenient to a 120V 60Hz AC outlet, and away from sources of
excess heat, dust, moisture or humidity.
POSITIONING THE MAIN UNIT AND SPEAKERS
The main unit and the speakers are designed to be used on a shelf, desk, table or
stand. The main unit is shipped with two plastic legs installed for added stability
when the system is used on a flat surface. These two plastic legs allow the main
unit to “lean backward” slightly and prevent it from tipping forward when the CD
door is opened.
IMPORTANT: THESE TWO PLASTIC LEGS MUST REMAIN ON THE
MAIN UNIT FOR TABLE-TOP, DESK-TOP, OR SHELF OPERATION.
MS3103_ib012803.p65 28/1/2003, 11:364

5
NOTE: If this system is to be used on a bookshelf, or inside a cabinet, be sure to
allow at least 3 inches clearance between the top of the main unit and the shelf
above the unit so that the CD door can open fully without interference. If the CD
door encounters an obstruction as it is opening, the door will close automatically.
Do not block the ventilation openings on the top or back of the main unit.
MS3103_ib012803.p65 28/1/2003, 11:365

6
SPEAKER CONNECTIONS
Connect the speakers to the red and black terminals on top of the
unit as shown below. (Lift red or black terminal flap, insert wire,
release flap to hold wire in place.)
The speakers may be placed close to the main unit or as far apart as the cables
will allow. Please leave a gap of at least 1/4” between the main unit and speakers
to prevent any vibration in the speakers from causing the CD player to skip.
NOTE: The speakers are not magnetically shielded. They should not be placed
directly on top of, or next to, a TV set. The magnets in the speakers could cause
color distortion on the TV screen if the speakers are too close to the TV.
The entire system may also be wall-mounted if desired. Wall-mounting instructions
can be found at the end of this manual.
MS3103_ib012803.p65 28/1/2003, 11:366

7
CONNECTING TO EXTERNAL AUDIO SOURCES
• Connect your playback* equipment (eg. MiniDisc or cassette player) to the
AUX IN jacks.
• Connect your recording equipment (eg. MiniDisc or cassette recorder) into
the LINE OUT jacks.
* Other examples of playback equipment include your TV, video recorder, DVD
player or satellite receiver, or your computer or games console.
Always refer to the equipment manufacturer’s instructions.
L
R
AUX IN
TV
LINE
OUT
LR
LINE IN
CASSETTE
RECORDER
LINE OUT
MS3103_ib012803.p65 28/1/2003, 11:367

8
AC Plug
AC Outlet
POWER SOURCE
This system is designed to operate on 120VAC 60Hz power supply only. Connecting
this system to any other power source may cause damage to the system and such
damage is not covered by your warranty.
Make sure that you connect this system to anAC outlet that is always “live”. Do not
connect this system to an AC outlet that is controlled by a wall switch.
1.)Unwind the ACPowerCordcompletely.
2.)Insertthe plug intoanyconvenient120V60HzACoutlet.
NOTE:Thisunithasapolarized ACplug withone wide blade and one narrow
blade.Thisplug will onlyfitintoamatching polarized ACoutlet. Thisisasafety
featuretoreducethe possibilityofelectricshock.If thisplug will notfitinyourAC
outlet, you probablyhavean outdated non-polarized outlet. You shouldhaveyour
outdated outletchanged byaqualified,licensed electrician.Donotfilethe wide
blade on the plug,orusean adaptertomakethe plug fitintoyouroutlet. This
defeatsthe safetyfeatureand couldexposeyou toelectricshock.
MS3103_ib012803.p65 28/1/2003, 11:368

9
INSTALLINGREMOTECONTROLBATTERIES
The remotecontrollerrequires2“AAA”batteries(notincluded).Pleaseuseawell-
knownbrand ofalkaline batteriesforlongestlifeand bestperformance.
Removethe remotecontrolbatterycompartmentcoverbysliding the coverinthe
direction ofthe
arrow..
Insert2“AAA”alkaline batteriesintothe compartment. Besuretoobservethe
polaritymarkingsinside the batterycompartment. If the batteriesareinserted
incorrectlythe remotecontrolwill notoperate.
The remotecontrolmustbe pointed atthe remotesensoron the lowerpartofthe
frontpanel.The effectiveoperating range ofthe remotecontrolisapproximately
15 feet. The effectiveoperating angleisapproximately15 degreestothe left or
rightof‘dead center’.
When the operation ofthe remotecontrolbecomesintermittent, orthe operating
range ofthe remoteisreduced,replacethe batteries.
BATTERYPRECAUTIONS
Followtheseprecautionswhen using batteriesinthisdevice:
1.Useonlythe sizeand type ofbatteriesspecified.
2.Besuretofollowthe correctpolaritywhen installing the batteriesasindicated inthe battery
compartment. Reversed batteriesmaycausedamage tothe device.
3.Donotmixdifferenttypesofbatteriestogether(e.g.Alkalineand Carbon-Zinc)oroldbatteries
withfreshones.
4. If the deviceisnottobe used foralong period oftime,removethe batteriestoprevent
damage orinjuryfrompossiblebatteryleakage.
5.Donottrytorecharge batteriesnotintendedtobe recharged;theycan overheatand rupture.
(Followbatterymanufacturer’s directions.)
MS3103_ib012803.p65 28/1/2003, 11:369

10
LOCATIONOFCONTROLSAND INDICATORS
1.) POWER/STANDBY Button.
2.) Rev Skip/search Button.
3.) CD Stop Button.
4.) Fwd Skip/search Button.
5.) CD Play/Pause Button.
6.) TIME-SET/MEMORY Button.
7.) CD Door OPEN/CLOSE Button.
8.) CD1 PLAY Button.
9.) Muti-function LCD Display.
10.) CD2 PLAY Button.
11.) SLEEP Button.
12.) TIMER Button.
13.) EQ (Equalizer) Button.
14.) FM MONO/STEREO Selector.
15.) CD3 PLAY Button.
16.) VOLUME Up/ Down Buttons.
17.) PRESET-UP/RANDOM Button.
18.) TIME MODE/REMAIN Button.
19.) PRESET-DOWN/REPEAT Button.
20.) CD/DISC SKIP Button.
21.) TUNER/BAND Button.
22.) AUX Input Button.
23.) LINE OUT Jacks.
24.) AUX IN Jacks.
25.) SPEAKERS Terminals.
26.) AC Power Cord.
27.) PHONES Jack.
28.) FM antenna wire.
MS3103_ib012803.p65 28/1/2003, 11:3610

11
29.) POWER/STANDBY Button.
30.) CD/DISC SKIP Button.
31.) TUNER/BAND Button.
32.) AUX Input Button.
33.) SKIP FWD Button.
34.) PLAY/PAUSE Button.
35.) TIME MODE/REMAIN Button.
36.) PRESET-DOWN/REPEAT Button.
37.) TIME MODE/REMAIN Button.
38.) CD3 Play Button.
39.) MUTE Button.
40.) VOL UP/ DOWN Buttons.
41.) SKIP REV Button.
42.) CD STOP Button.
43.) CD Door OPEN/CLOSE Button.
44.) CD Track / TUNER Channel numbers.
45.) CD INTRO Button.
46.) PRESET-DOWN/REPEAT Button.
47.) CD1 Play Button.
48.) CD2 Play Button.
49.) EQ (Equalizer) Button.
50.) Remote Transmitter.
REMOTECONTROL
MS3103_ib012803.p65 28/1/2003, 11:3611

12
OPERATINGINSTRUCTIONS
TURNING THE SYSTEM ‘ON’
Plug the unit into the 120AC outlet.
At the front of the unit, the light within thePOWER/STANDBY button will be red
to indicate that the unit is in standby (standby means plugged-in but not switched
on).
Switch the unit on by pressing thePOWER/STANDBY button on the front panel
or the remote. The main display and CD door lighting comes on.
The unit is now ready to use.
(To switch the unit back to standby, simply press button again.)
MS3103_ib012803.p65 28/1/2003, 11:3612

13
SETTING THE CLOCK
Use the buttons on the unit’s front panel to carry out this procedure.
1.) Press POWER/STANDBY button to switch the unit on.
2.) Press the AUX button.
(Note the time setting flashes in the center of
the display.)
3.) Press the TIME-SET/MEMORYbutton so that
the hour setting flashes, then press or
button to set the correct hour (making sure the
flashing AM or PM is correct).
4.) Press TIME-SET/MEMORYso that the minute
setting flashes, then press or button to
set the correct minute.
5.) Press TIME-SET/MEMORYto finish clock
setting.
Once the time has stopped flashing, the clock is
set.
NOTE: If ever you find the whole time display is flashing, this means that the clock
needs to be re-set (possibly due to the unit having been disconnected from the AC
outlet, or a power interruption).
MS3103_ib012803.p65 28/1/2003, 11:3613

14
GENERAL CONTROLS
Switch the unit on or off by pressing the button.
Selecting The Sound Source
To select the sound source you wish to listen to, press:
• CD/DISC SKIP to listen to compact disc, or
• TUNER/BAND to listen to radio, or
• AUX to listen to auxiliary equipment connected to the AUX IN jacks.
Volume
To adjust the volume, use VOLUME UP/ DOWN Buttons.
To shut off the sound temporarily, press MUTE on the remote (press again to
restore sound).
(Note that mute is indicated by the blue illuminated CD doors flashing.)
Headphones
For private listening, plug a pair of stereo headphones (not included) into the
PHONES jack on top of the unit.
When headphones are plugged-in, the speakers are switched off automatically.
NOTE: Always reduce the volume level before you put the headphones on. Then
gradually increase the volume to a comfortable level.
MS3103_ib012803.p65 28/1/2003, 11:3614

15
Graphic Equalizer
The graphic equalizer (EQ) adjusts the character of the sound. It provides a range
of 4 tonal shapes: ROCK, CLASSIC, POP and FLAT.
Press EQ repeatedly to set the graphic equalizer according to your taste or the
style of music being played. The selected setting:ROCK, CLASSIC, POP or FLAT
appears at the bottom of the display.
Standby (Power Off)
To switch off to standby, press the button.
Note* - This unit is intended to be switched off to standby. If you unplug the unit,
the clock setting will be incorrect when you switch on again. Additionally, any timer
setting will be lost.
MS3103_ib012803.p65 28/1/2003, 11:3615

16
LISTENING TO THE RADIO
Tuning-in A New Radio Station
Pressing TUNER/BAND button selects radio operation. The display indicates the
tuning frequency.At the left of the display, the band is indicated:FM or AM. Pressing
the TUNER/BAND button changes the band.
After selecting the required band, you can tune to a radio station in either of the
following ways:
Automatic Tuning
• To search up or down the band for a station, hold in or button
for 2 seconds then release. The tuner will search up or down until it finds a
strong station and stop on that station. Repeat until you find the desired station.
Manual Tuning
• To change frequency one step at a time, repeatedly press and release or
button until the frequency of the desired station appears on the display.
You can keep any new station you’ve tuned-in by storing it in the memory.
(see following page)
Note:Forbest FMreception,position the leadwire FM antennaforleast interference.
(Note if AM reception is poor, you may need to rotate the unit.)
MS3103_ib012803.p65 28/1/2003, 11:3616

17
Presetting Stations In The Tuner Memory
You can preset up to 40 stations (20 AM and 20 FM) in the tuner memory for
immediate recall.
1.) Tune to the first station you wish
to memorize using the either the
Automatic or Manual Tuning
method described on page16.
Example: FM 103.5 MHz.
2.) When the desired station
frequency appears on the display
press the TIME-SET/MEMORY
button on the front panel or
remote control. The MEMORY
indicator and Preset Memory
(Channel) number “00” will flash in the display.
3.) While the MEMORY indicator is
flashing press the PRESET UP/
RANDOM button on the front
panel or remote control to
advance the Preset Memory
(Channel) number from “00” to
“01”. Then press the TIME-SET/
MEMORY button again to enter
the desired station in Preset
Memory (Channel) number 01.
The MEMORY indicator stops
flashing and the display appears.
4.) Tune to the next station to be memorized, press the TIME-SET/ MEMORY
button, press the PRESET UP/MEMORY button to select Preset (Channel)
number “02”, and press the TIME SET/MEMORY button again.
5.) Repeat Step 4, selecting a different Preset (Channel) number each time, until
you have entered up to 20 stations on one band, then press the TUNER/
BAND button to select the other band and follow the same procedure to preset
up to 20 stations on that band.
MS3103_ib012803.p65 28/1/2003, 11:3617

18
NOTE: You may also select the Preset (Channel) numbers directly by pressing
the appropriate number buttons on the remote control while the MEMORY indicator
isflashing.To select Preset (Channel) numbers 1 through 9 press the corresponding
number buttons. To select Preset (Channel) numbers 11 through 19 press the
“+10” button first and then appropriate number button. To select Preset (Channel)
number 20, press the “+10” button twice, then press the “0” button.
Recalling Preset Stations
1.) Press the TUNER/BAND button to select the Tuner function and the desired
band.
2.) Press the PRESET UP/RANDOM or PRESET DOWN/REPEAT buttons on
the front panel or the remote control to select the desired Preset (Channel)
number.
NOTE: You may also select the Preset (Channel) numbers directly by pressing
the appropriate number buttons on the remote control. To select Preset (Channel)
numbers 1 through 9 press the corresponding number buttons. To select Preset
(Channel) numbers 11 through 19 press the “+10” button first and then appropriate
number button. To select Preset (Channel) number 20, press the “+10” button
twice, then press the “0” button.
Changing Preset Stations
To change any preset station simply enter a new station in the Preset (Channel)
number that you wish to change. When the new station is entered in the memory
the previously memorized station will be erased.
MS3103_ib012803.p65 28/1/2003, 11:3618

19
FMModeSelector(MONO/STEREO)
If you arelistening toadistantorweakFMStereo station and the reception is
unsatisfactory,you maypress the FMMONO/STEREObutton on the frontpanel
ofthe mainunittoswitchtothe FMMONOreception mode.Thiswill normally
provide someimprovementinreception although the sound will no longerbe in
stereo.
TIMEMODE/REMAINButton
During Tuneroperation the displaywill showthe frequency ofthe radiostation.To
see the timepress the TIMEMODE/REMAINbutton on the frontpanelorremote
control.The displaywill showthe timeforapproximately10 secondsand then
change back toradiofrequency automatically.
MS3103_ib012803.p65 28/1/2003, 11:3619
Table of contents
Other Emerson Stereo System manuals

Emerson
Emerson MS3100 User manual

Emerson
Emerson NR303TT User manual

Emerson
Emerson MS3108 User manual

Emerson
Emerson MS3108C User manual

Emerson
Emerson ES11 User manual

Emerson
Emerson CKD9906 User manual

Emerson
Emerson MS3111M User manual

Emerson
Emerson NR303TTC User manual

Emerson
Emerson MS7630 User manual

Emerson
Emerson MS9923TT User manual

Emerson
Emerson ES30 User manual

Emerson
Emerson ES128 User manual

Emerson
Emerson ES13 User manual

Emerson
Emerson ES50 User manual

Emerson
Emerson SpongeBob SquarePants SB230 User manual

Emerson
Emerson MS3100 User manual

Emerson
Emerson ES58 User manual

Emerson
Emerson RS1008 User manual

Emerson
Emerson ES3 User manual

Emerson
Emerson NR290TTC User manual