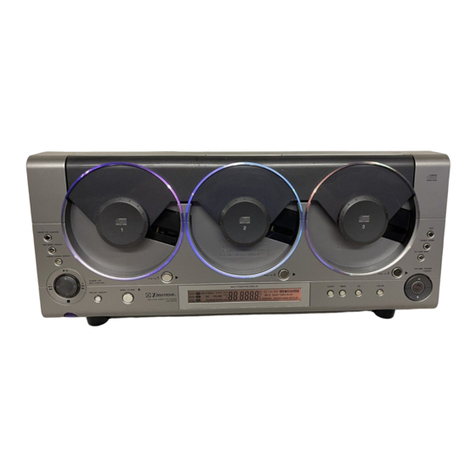
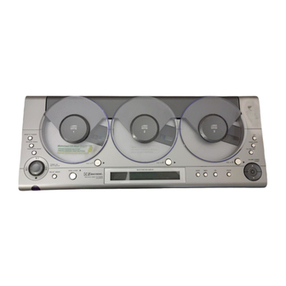
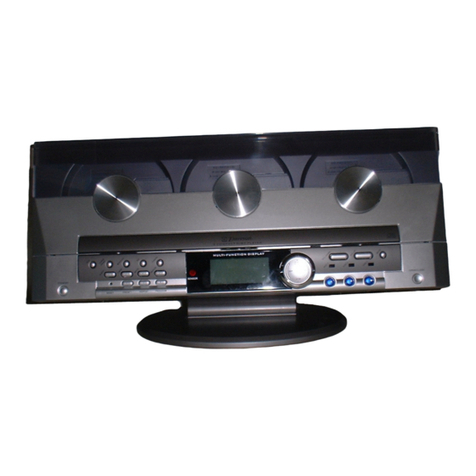
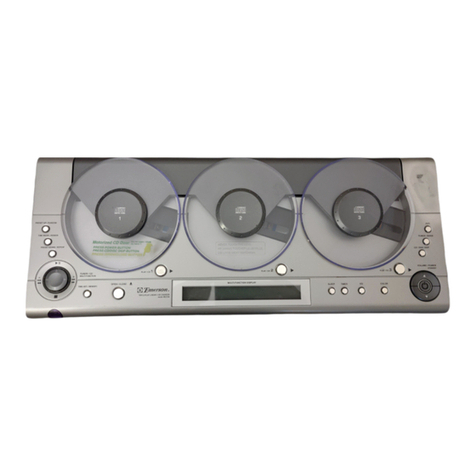
Emerson MS9700 User manual

OWNER'SMANUAL
MS9700
HOMEAUDIOSYSTEM
with6CD CHANGER
and CASSETTERECORDER
Visitourweb siteatwww.emersonradio.com
MS9700_ib021903.p65 19/2/2003, 9:2331

1
TO PREVENT FIRE OR SHOCK HAZARD, DO NOT USE THIS PLUG WITH AN
EXTENSION CORD, RECEPTACLE OR OTHER OUTLET UNLESS THE BLADES
CAN BE FULLY INSERTED TO PREVENT BLADE EXPOSURE. TO PREVENT FIRE
ORSHOCKHAZARD,DONOTEXPOSETHISAPPLIANCETORAINORMOISTURE.
IMPORTANTSAFETYINSTRUCTIONS
1.) Read these instructions.
2.) Keep these instructions.
3.) Heed all warnings.
4.) Follow all instructions.
5.) Do not use this apparatus near water.
6.) Clean only with dry cloth.
7.) Do not block any ventilation openings. Install in accordance with the manufacturer’s
instructions.
8.) Do not install near any heat sources such as radiators, heat registers, stoves, or other
apparatus (including amplifiers) that produce heat.
9.) Do not defeat the safety purpose of the polarized or grounding-type plug. A polarized plug has
two blades with one wider than the other. A grounding type plug has two blades and a third
groundingprong.Thewidebladeorthethirdprongareprovidedforyour safety. If the provided
plug does not fit into your outlet, consult an electrician for replacement of the obsolete outlet.
10.) Protect the power cord from being walked on or pinched particularly at plugs, convenience
receptacles, and the point where they exit from the apparatus.
11.) Only use attachments / accessories specified by the manufacturer.
12.) Unplug this apparatus during lightning storms or when unused for long periods of time.
13.) Refer all servicing to qualified service personnel. Servicing is required when the apparatus
has been damaged in any way, such as power-supply cord or plug is damaged, liquid has
been spilled or objects have fallen into the apparatus, the apparatus has been exposed to rain
or moisture, does not operate normally, or has been dropped.
14.) This appliance shall not be exposed to dripping or splashing water and no object filled with
liquids such as vases shall be placed on the apparatus.
15.) Do not overload wall outlet. Use only power source as indicated.
16.) Use replacement parts as specified by the manufacturer.
17.) The product may be mounted to a wall only if recommended by the manufacturer.
18.) Upon completion of any service or repairs to this product, ask the service technician to
perform safety checks.
!
CAUTION
RISK OFELECTRICSHOCK
DONOTOPEN
The lightning flashwitharrow-
head symbol,withinan equi-
lateraltriangleisintented to
alertthe usertothe presence
ofuninsulated‘dangerousvoltage’
withinthe product’s enclosure
thatmaybe ofsufficient
magnitude toconstitutearisk
ofelectricshock topersons.
The exclamation pointwithin
an equilateraltriangleisin-
tended toalertthe userto
the presenceofimportant
operating and maintenance
(servicing)instructionsin
the literatureaccompany-
ing the appliance.
WARNING:TOREDUCETHE
RISK OFELECTRICSHOCK
DONOTREMOVE COVER
(ORBACK),NOUSER
SERVICEABLEPARTSINSIDE
REFERSERVICINGTO
QUALIFIEDSERVICE
PERSONNEL.
CAUTION
MS9700_ib021903.p65 19/2/2003, 9:231

2
Forfuturereference,recordthe serialnumberinthe spacebelow.
Model:MS9700
Serial Number :
BEFOREWEBEGIN
Thankyou forpurchasing thisEmerson product. The Emerson brand isyour
assuranceofquality,performanceand value.
Ourengineershaveincluded manyusefuland convenientfeaturesinthisproduct.
Pleasebe suretoread thisOwner'sManualcompletelytomakesureyou are
getting the maximumbenefitfromeachfeature.
Thisproductwasmanufacturedusingthehighestqualitycomponentsandstandards
ofworkmanship.It wastested byEmerson inspectorsand found tobe inperfect
working orderbeforeitleft ourfactory.However,thereisalways the chancethat
someproblemmayoccurbecauseofrough handling during shipmenttothe retail
storeortothe finalconsumer.
If, afterreading thisManual,you experienceanyproblemswiththe operation of
thisproduct, pleaserefertothe instructionsforobtaining serviceatthe end ofthis
Manual.Emerson and Emerson retailersarecommitted toyoursatisfaction.Once
again,thanks forpurchasing thisEmerson audioproduct.
MS9700_ib021903.p65 19/2/2003, 9:232

3
FCC INFORMATION
Thisequipmenthasbeen tested and found tocomplywiththe limitsforaClass Bdigital
device,pursuanttoPart15 ofthe FCC Rules.Theselimitsaredesigned toprovide
reasonableprotection againstharmfulinterferenceinaresidentialinstallation.This
equipmentgenerates,uses,and can radiateradiofrequency energyand,ifnotinstalled
and used inaccordancewiththe instructions,maycauseharmfulinterferencetoradio
communications.However,thereisno guarantee thatinterferencewill notoccurina
particularinstallation.Ifthisequipmentdoescauseharmfulinterferencetoradioortelevision
reception,whichcan be determined byturning the equipmentoff and on,the useris
encouraged totrytocorrectthe interferencebyone ormoreofthe following measures:
•Reorientorrelocatethe receiving antenna.
•Increasethe separation between the equipmentand receiver.
•Connectthe equipmentintoan outleton acircuitdifferentfromthattowhichthe
receiverisconnected.
•Consultthe dealeroran experienced radio/TVtechnician forhelp.
ThisdevicecomplieswithPart15 ofthe FCC Rules.Operation issubjecttothe following
twoconditions:
(1)Thisdevicemaynotcauseharmfulinterference,and
(2)Thisdevicemustacceptanyinterferencereceived,including interferencethatmay
causeundesired operation.
•Placesexposedtodirectsunlightorclose
toheatradiating appliancessuchas
electricheaters,on top ofotherstereo
equipmentthatradiatestoo muchheat,
placeslacking ventilation ordustyareas,
placessubjecttoconstantvibration and/
orhumidormoistareas.
•Donotattempttoclean thisunitwith
chemicalsolventsasthismightdamage
the finish.Useaclean drycloth.
Avoidinstalling theunitinlocationsdescribedbelow:
•Operatecontrolsand switchesas
described inthe manual.
•Beforeturning ‘On’thepower,makecertain
thatthe speakersareproperlyinstalled.
•Storeyourcassettetapesand CDsinacool
area toavoiddamage fromheat.
•When moving the set, be suretofirst
disconnectthe powercordand remove
cordsconnected tootherequipment.
IMPORTANTNOTES
CLASS 1LASERPRODUCT
ThisproductcontainsalowpowerLaserDevice.
CAUTION
INVISIBLELASERRADIATION
WHENOPENANDINTERLOCKS
DEFEATED.
AVOIDEXPOSURETOBEAM
CLASS 1LASERPRODUCT
APPAREILÁLASERDECLASSE 1
PRODUCTOLASERDECLASE 1
MS9700_ib021903.p65 19/2/2003, 9:233

4
PREPARATIONFORUSE
UNPACKING
•Removethemainunitandthe speakersfromthecarton andremoveallpacking
materialsfromthe components.
•Removeanydescriptivelabelsfromthe frontsofthe mainunitand speakers.
•Removeanysmallstripsoftapethatmayhavebeenusedtosecurethecassette
doororCD drawerintransit.
PLACEMENT
•Placethe uniton astable,leveltable,shelforstand convenienttoan AC
outlet.
•The unitshouldnotbe exposed todirectsunlightorsourcesofexcess heat,
moisture,dust, vibration,orhumidity.
•The speakersmaybe positioned along side the mainunit, orseparated asfar
asthe cordswill allowformaximumstereo separation.You shouldmaintaina
gap ofatleastone inchbetween the mainunitand the speakerstopreventany
skipping ofthe CD playerwhen the unitoperated athigh volume.
PROTECTYOUR FURNITURE!!
Thismodelisequipped withnon-skidrubber'feet'topreventthe productfrom
moving when you operatethe controls.These'feet'aremade fromnon-migrating
rubbermaterialspeciallyformulated toavoidleaving anymarks orstainson your
furniture.Howevercertaintypesofoil based furniturepolishes,wood preservatives,
orcleaning sprays maycausethe rubber'feet'tosoften,and leavemarks ora
rubberresidue on the furniture.Topreventanydamage toyourfurniturewestrongly
recommend thatyou purchasesmall self-adhesivefeltpads,availableathardware
storesand homeimprovementcenterseverywhere,and applythesepadstothe
bottomofthe rubber'feet'beforeyou placethe producton fine wooden furniture.
MS9700_ib021903.p65 19/2/2003, 9:234

5
RIGHT LEFT
SPEAKERCONNECTION
The speakercablesand the speakerterminalson the back ofthe mainunitare
colorcoded foryourconvenience.Connectthe cablesfromthe left speakertothe
“LEFT”terminals,and the cablesfromthe rightspeakertothe “RIGHT”terminals.
Toconnectthe speakercabletothe terminaldepress the plastictab belowthe
terminal,insertthe barewireatthe end ofthe cableintothe terminalopening,and
releasethe plastictab tolock the wireinplace.
Besuretoconnectthe Red cablestothe Red terminalsand the Black cablestothe
Blackterminals.Ifthespeakersareconnectedincorrectlythesoundmaybe“muddy”
and distorted.
RIGHT LEFT
Black
Red
MS9700_ib021903.p65 19/2/2003, 9:235

6
AC Plug
AC Outlet
CONNECTINGTHEAC POWERCORD
Afterconnecting the speakersunwind theACpowercordfullyand connectittoany
convenienthouseholdACoutlet. Thissystemisdesigned tooperateon 120V60Hz
ACpoweronly.Connecting thissystemtoanyotherpowersupplymaycause
damage tothe unitwhichisnotcovered byyourwarranty.
Thisunithasapolarized ACplug withone wide blade and one narrowblade.This
plug will onlyfitintoamatching polarized ACoutlet. Thisisasafetyfeatureto
reducethe possibilityofelectricshock.If thisplug will notfitinyourACoutlet, you
probablyhavean outdated non-polarized outlet. You shouldhaveyouroutdated
outletchanged byaqualified,licensed electrician.Donotfilethe wide blade on the
plug,orusean adaptertomakethe plug fitintoyouroutlet. Thisdefeatsthe safety
featureand couldexposeyou toelectricshock.
MS9700_ib021903.p65 19/2/2003, 9:236

7
ANTENNA INFORMATION
FM
Thisunithasan externallead wireFMantenna permanentlyattached tothe back
ofthe maincabinet. Unwrap thisantenna wire,extend ittoitsfull length,and allow
ittohang downfromthe back ofthe set. Insomecasesyou mayhavetovarythe
direction ofthisantenna until you find the position thatprovidesthe bestreception,
and then useasmall pieceoftape tosecurethe antenna inthatposition.
AM
ThissystemhasabuiltinAMferritebarantenna.You mayhavetovarythe position
and direction ofthismainunituntil you find the position thatprovidesthe clearest
reception foreachofyourfavoriteAMstations.
FMWIREANTENNA
RIGHT
LEFT
MS9700_ib021903.p65 19/2/2003, 9:237

8
LOCATIONOFCONTROLSAND INDICATORS
1.)CDDIRECTACCESS Buttons.
2.)Multifunction LCDDisplay.
3.)6CD ChangerTray.
4.)POWERONIndicator.
5.)SURROUND (ON/OFF)
Button.
6.)POWER(On/Off)Button.
7.)VOLUME(UP/DN)Buttons.
8.)PHONES Jack.
9.)X-BASS (ON/OFF)Button.
10.)FUNCTION(CD/TUNER/TAPE)
Selector.
11.)CassetteDoor.
12.)CassetteDeck ControlKeys.
(RECORD-PLAY-REWIND-F.FWD
-STOP/EJECT-PAUSE)
13.)DISCSCANButton.
14.)CD ReverseSKIP/SEARCH
Button.
15.)CD ForwardSKIP/SEARCH
Button.
16.)CDSTOPButton.
17.)CD PLAY/PAUSE Button.
18.)REPEATButton.
19.)BAND (FMST/FM/AM)Selector.
20.)TUNINGControl.
21.)PROGRAMButton.
22.)OPEN/CLOSE (FRONT)Button.
23.)OPEN/CLOSE (REAR)Button.
24.)FMSTEREOIndicator.
25.)REMOTESENSOR.
26.)DialScale&Pointer.
FRONTPANEL
FRONT
REAR
SKIP/SEARCH
REMOTE
SENSOR
1
2
3
4
5
6
7
8
9
10
11
12
26
25
24
23
22
21
20
19
17
18
15
16
14
13
MS9700_ib021903.p65 19/2/2003, 9:238

9
RIGHT
LEFT
27.)FMWireANTENNA.
28.)SpeakerTerminals.
29.)ACPowerCord.
BACK PANEL
28
29
27
MS9700_ib021903.p65 19/2/2003, 9:239

10
MULTIFUNCTIONLCD DISPLAY(ForCD OperationsOnly)
RANDOM
MEMORY
INTRO
Disc location indicators
IndicatesDisc 1isatback halfoftray.
IndicatesDisc 1isatfronthalfoftray.
IndicatesDisc 1isinplayposition.
IndicatesDisc 1isplaying.
MS9700_ib021903.p65 19/2/2003, 9:2310

11
REMOTECONTROL
1.)OPEN/CLOSE (REAR)Button.
2.)Disc 2Button.
3.)Disc 1Button.
4.)Disc 6Button.
5.)DISCSCANButton.
6.)PROG(Program)Button.
7.)INTROButton.
8.)REPEATButton.
9.)RANDOMButton.
10.)CDSTOPButton.
11.)CD PAUSE Button.
12.)VOLUMEDN Button.
13.)VOLUMEUPButton.
14.)CDPLAY Button.
15.)SKIPForwardButton.
16.)SKIPReverseButton.
17.)Disc 5Button.
18.)Disc 4Button.
19.)Disc 3Button.
20.)OPEN/CLOSE (FRONT)Button.
21.)POWEROn/Off Button.
2
1
4
3
6 5
1
2
3
4
5
6
7
8
9
10
21
19
20
18
17
16
15
14
13
12
11
MS9700_ib021903.p65 19/2/2003, 9:2311

12
BATTERYINSTALLATION
Insert2‘AAA’sizealkaline batteries,notincluded,intothe batterycompartment
ofthe remotehandset, observing the batterypolarityand replacethe cover.
BATTERYREPLACEMENT
Whenthebatteriesbecometooweak,theoperating distanceoftheremotehandset
isgreatlyreduced and you will need toreplacethe batteries.
NOTES:
•Tomaintainthe accuracy and long lifeofthe transmitter,do notpress twoor
morebuttonssimultaneously.
•If the remotecontrolisnottobe used foralong time,removethe batteriesto
preventpossibledamage through leaking batteries.
•Donotmixdifferenttypesofbatteries,oroldbatterieswithnewones.
USINGTHEREMOTECONTROLLERCORRECTLY
•Pointthe remotehandsetatthe RemoteSensoron the frontpanel.
•The functionsofthe buttonson the remotehandsetarethe sameasthe
corresponding controlson the mainunit.
•When thereisastrong ambientlightsource,the performanceofthe infrared
RemoteSensormaybe degraded,causing unreliableoperation.
•The maximumeffectivedistanceforremotecontroloperation isabout16 feet
(Approx.5m)
MS9700_ib021903.p65 19/2/2003, 9:2312

13
OPERATINGINSTRUCTIONS
SOUND CONTROLS
VOLUME
Press the VOLUMEUPorDN(Down)buttonson the frontpanel,oron the remote
controltoincreaseordecreasethe volumelevel.The systemmemoryremembers
the volumelevelwhen the powerisshutoff and automaticallyreturnstothe same
levelwhen the powerisswitched on again.
X-BASS BOOSTBUTTON
Press the X-BASS (Bass Boost) button ( ON) on the front paneltoenhancethe
bass response.Press again(OFF) to cancelX-BASS boost.
UseX-BASS when you arelistening atlowvolumelevelswherethe bass tendsto
disappear.
•If you arelistening tomusicwithheavy bass athigh volumeand the X-BASS
ON,you mayexperiencesomedistortion.
•If thisoccurs,switchthe X-BASS OFF,orreducethe volumelevel.
SURROUND (STEREOWIDE)BUTTON
Setthe SURROUND button tothe ‘On’position (ON) foran expanded stereo/
surround effect. Thiscausesaveryslightdelayinthe sound coming fromone of
the speakersand createsafeeling ofadded widthand depth.Setthe SURROUND
button back tothe ‘Off’position (OFF) torestorenormalstereo sound.
Note:The SURROUNDbutton onlyworks withstereo sound sources.You will not
getany‘Surround Effect’frommono AMradio,orothermono sound sources.
MS9700_ib021903.p65 19/2/2003, 9:2313

14
LISTENINGTOTHERADIO
1.)Press the POWERbutton toturnthe system‘On’.The POWERONindicator
lights.
2.)Slide the FUNCTIONselectortothe ‘TUNER’position.
3.)Slide the BANDselectortothe desired band,FMST(Stereo),FM,orAM.
4.)Rotatethe TUNINGcontroltofind the desired station.
Note:If you tune toan FMStereo station and the BAND selectorissettoFM
ST,the FMSTEREOindicatorwill light. If the FMreception isnoisy orweak
you maybe abletoimproveitbysliding the BAND selectortothe FM(Mono)
position,howeverthe sound will no longerbe instereo.
5.)Adjustthe VOLUMEand X-BASS controlsasdesired.
6.)When you arefinished listening press the POWERbutton toturnthe system
‘Off’.The POWERONindicatorgoesout.
MS9700_ib021903.p65 19/2/2003, 9:2314

15
PLAYING COMPACT DISCS
This system features a unique “double decker” CD changer that holds 3 CDs in
the upper tray and 3 CDs in the lower tray. When 6 CDs are loaded in the changer
you can enjoy over 6 hours of uninterrupted music (depending on the length of the
individual discs).
UNDERSTANDING THE CD DISPLAY
In addition to the normal track number and elapsed time information the CD display
in this system includes icons which show you the position of each disc on the
platter at any given time, and which of the 6 discs is in the playing position.
Refer to the following illustration.
This diagram shows that there are 6 CDs in the changer. The half circles above
the disc numbers indicate that Discs 1, 2, and 6 are at the back half of the drawer.
The half circles below the disc numbers indicate that Discs 3, 4, and 5 are at the
front half of the drawer. The flashing number 1 indicates that Disc 1 is in the play
position. The display also indicates that Disc 1 has 22 tracks and a total playing
time of 61 minutes and 14 seconds. If the PLAY button is pressed in this
illustration the number 1 will stop flashing and the half circle above the number will
begin to flash indicating that Disc 1 is playing. Refer to the following illustration:
TRACK
DISCSLOCATEDATFRONTHALFOFDRAWER.
DISCSLOCATED
ATBACKHALF
OFDRAWER.
FLASHINGNUMBER
INDICATES DISC1
INTHEPLAY
POSITION.
TRACK
MS9700_ib021903.p65 19/2/2003, 09:3915

16
As each disc plays and the drawer rotates the disc location icons will show which
discs are at the back of the drawer and which discs are at the front of the drawer.
NORMAL PLAYBACK
1.) Press the POWERbutton toturnthe system‘On’.The POWERONindicator
lights.Slide the FUNCTIONselectortothe ‘CD’position.The LCD display
lights.
2.) Press the lower half (FRONT) of the OPEN/CLOSE button on the front panel,
or the FRONT open button on the remote control, to open the CD drawer
immediately. As the drawer opens the front edge of the drawer drops down
slightly to allow easier access to the lower tray. See following illustration.
3.) Place 1, 2, or 3 CDs in the 3 pockets on the front of the tray.
IMPORTANT: Make sure that the discs are properly positioned in the center
of each pocket. If the discs are not centered properly they may not be
recognized by the player, or they could jam in the mechanism.
Disc pockets 1, 3, and 5 are in the upper tray. Disc pockets 2, 4, and 6 are in
the lower tray. The pockets in the lower tray are partially covered by the pockets
in the upper tray. To load CDs in the lower tray pick up the disc with your index
finger in the center and your thumb on the outer edge, as shown in the following
illustrations, and slide the disc into the desired pocket on the lower tray.Again,
make sure that the disc is properly centered in the pocket, otherwise it may
not be recognized by the player.
LOWERTRAY LOWERTRAY
UPPERTRAY
MS9700_ib021903.p65 19/2/2003, 9:2316

17
4.)Press the lowerhalf(FRONT)ofthe OPEN/CLOSE button on the frontpanel,
orthe FRONTopen button on the remotecontrol,toclosethe CD drawer.
Afterthe drawerclosesthe traywill rotatesothatthe 3frontpocketswill move
tothe rear.The playerwill begintosearchforadisc.It will read the firstdisc
thatitfindsand the displaywill showthe totaltracks and playing timeofthat
disc.Also,the numberofthe disc inthe playposition will be flashing.
5.)If you wishtobeginplayback immediatelypress the PLAY/PAUSE button
on the frontpanelorthe PLAY button the remotecontrol.If you wishtoloadd
additionaldiscs press the lowerhalf(FRONT)ofthe OPEN/CLOSE button on
the frontpanel,orthe FRONTopen button on the remotecontrol,toopen the
CD draweragain.The drawerwill open withthe 3remaining emptypockets
facing you.
Place1,2,or3additionaldiscs inthe emptypockets.
LOWERTRAY
UPPERTRAY
UPPERTRAY
MS9700_ib021903.p65 19/2/2003, 9:2317

18
6.)Press the lowerhalf(FRONT)ofthe OPEN/CLOSE button on the frontpanel,
orthe FRONTopen button on the remotecontrol,toclosethe CDdrawer.The
playerwill read the disc thatisinthe playposition and displaythe totaltracks
and playingtimeofthatdisc.One ofthediscnumberswill be flashingtoindicate
whichdisc isinthe playposition.Foreachdisc on the traythe corresponding
DIRECTACCESS button on the frontpanelwill lightup.
7.)Tobeginplayback ofthe disc inthe playposition press the PLAY/PAUSE
button on the frontpanelorthe PLAY button on the remotecontrol.Too
beginplayback ofadifferentdisc you can press theDISCSKIPbutton tomove
tothe nextdisc,orpress one ofthe 6DIRECTACCESS buttonstomove
directlytoanydisc inthe player.
8.)When playback beginsthe halfcircleicon flashesabovethe numberofthe
disc being played,and theDIRECTACCESS button ofthe playing disc remains
‘On’.
9.)Adjustthe VOLUME,X-BASS controlsasdesired.
10.)Playback will continue until all tracks on all discs havebeen played.Then the
playerstopsand the displayshowsthe totaltracks and playing timeofthe last
disc thatplayed.Press the lowerhalf(FRONT)ofthe OPEN/CLOSE button
on the frontpanel,orthe FRONTopen button on the remotecontrol,toopen
the CD drawer.Removethe first3discs,closethe drawer.Waituntil the tray
rotates,press the FRONTOPENbutton againand removethe remaining 3
discs.
PAUSE CONTROL
Topausemomentarilyduring playback press the PLAY/PAUSE button on the
frontpanelorthe PAUSE button on the remotecontrol.The sound stops,the
Pause“ ” indicatorappearsinthe displayand the appropriateDirectAccess
button flashes.Howeverthe disc continuestospin.Tocancelpauseand resume
normalplayback press the PLAY/PAUSE button on the frontpanelorthe PLAYY
button on the remotecontroloncemore.
MS9700_ib021903.p65 19/2/2003, 9:2318

19
TRACK SKIPAND MUSICSEARCH
During CD playback press the (Forward)or(Reverse)buttonstoskipto
higherorlowernumbered tracks.Eachtimethe buttonsarepressed the playerwill
skipone track and playback will beginon the newtrack.
During CDplayback depress and holdthe (Forward)or(Reverse)buttonss
tosearchthrough atrack athigh speed tolocateorbypass aspecificportion ofa
song.The playerwill searchrapidlyforwardorbackwardaslong asthe buttonsare
depressed.Normalplayback will resumewhen the buttonsarereleased.
STOPBUTTON
Afterall discs haveplayed the playerstopsautomaticallyand the displayshows
the totaltracks and playing timeofthe lastthatplayed.Alsothe disc numberofthe
disc inthe playposition continuestoflash.Tostop playback atanytimepress the
STOPbutton.The displaywill showthe totaltracks and playing timeofthe disc
inthe playposition.
DISCSCAN BUTTON
Press thisbuttonduring playback tomoveimmediatelytothe nexthighernumbered
disc inthe drawer.Playback beginsautomaticallyon the nextdisc.If the button is
pressed twicethe playerwill moveahead twodiscs,and soon.
DIRECTDISCACCESS BUTTONS
Press the appropriatebutton tobeginimmediateplayback on anydisc inthe drawer.
The button ofthe selected disc remains‘On’and all ofthe otherbuttonsgo ‘Off’.
REPEATPLAYBACK
You can repeatasingletrack,one disc,orall discs continuouslywiththe repeat
function.Press the REPEATbutton one,two,orthree timestoselect1Track,
1Disc,orAll Discs Repeat. The appropriateREPEATindicatorappearsinthe
display.
TocancelRepeatplayback continuepressing theREPEATbutton untilthe REPEAT
indicatordisappears.
RepeatPlayback can be selected whileadisc isplaying,orinthe Stop mode.
MS9700_ib021903.p65 19/2/2003, 9:2319
Table of contents
Other Emerson Stereo System manuals

Emerson
Emerson MS7630 User manual

Emerson
Emerson ES769 User manual

Emerson
Emerson ES830 User manual

Emerson
Emerson MS9600 User manual

Emerson
Emerson ES58 User manual

Emerson
Emerson NR303TTC User manual

Emerson
Emerson ES3 User manual

Emerson
Emerson MS3106 User manual

Emerson
Emerson MS7616R User manual

Emerson
Emerson RS1008 User manual

Emerson
Emerson MS3100 User manual

Emerson
Emerson MS7625 User manual

Emerson
Emerson Research ES299 User manual

Emerson
Emerson ES27 User manual

Emerson
Emerson PD6511 User manual

Emerson
Emerson NR101TT User manual

Emerson
Emerson MS3108C User manual

Emerson
Emerson MS7609 User manual

Emerson
Emerson ES30 User manual

Emerson
Emerson MS3111M User manual