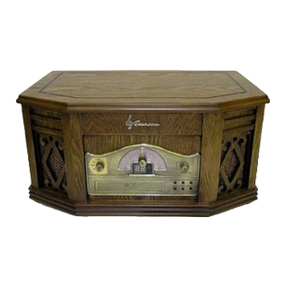
Emerson MS9903TT User manual

OWNER'SMANUAL
MS9903TT
HomeAudioSystem
with3CD Changer,
Belt-Drive Turntable,
DualCassetteDeck
and RemoteControl
Visitourweb siteatwww.emersonradio.com
MS9903TT_082205.p65 22/8/2005, 16:1131

1
TO PREVENT FIRE OR SHOCK HAZARD, DO NOT USE THIS PLUG WITH AN
EXTENSION CORD, RECEPTACLE OR OTHER OUTLET UNLESS THE BLADES
CAN BE FULLY INSERTED TO PREVENT BLADE EXPOSURE. TO PREVENT FIRE
ORSHOCKHAZARD,DONOTEXPOSETHISAPPLIANCETORAINORMOISTURE.
IMPORTANTSAFETYINSTRUCTIONS
1.) Read these instructions.
2.) Keep these instructions.
3.) Heed all warnings.
4.) Follow all instructions.
5.) Do not use this apparatus near water.
6.) Clean only with dry cloth.
7.) Do not block any ventilation openings. Install in accordance with the manufacturer’s
instructions.
8.) Do not install near any heat sources such as radiators, heat registers, stoves, or other
apparatus (including amplifiers) that produce heat.
9.) Do not defeat the safety purpose of the polarized or grounding-type plug. A polarized plug has
two blades with one wider than the other. A grounding type plug has two blades and a third
grounding prong. The wide blade or the third prong is provided for your safety. If the provided
plug does not fit into your outlet, consult an electrician for replacement of the obsolete outlet.
10.) Protect the power cord from being walked on or pinched particularly at plugs, convenience
receptacles, and the point where they exit from the apparatus.
11.) Only use attachments / accessories specified by the manufacturer.
12.) Unplug this apparatus during lightning storms or when unused for long periods of time.
13.) Refer all servicing to qualified service personnel. Servicing is required when the apparatus
has been damaged in any way, such as power-supply cord or plug is damaged, liquid has
been spilled or objects have fallen into the apparatus, the apparatus has been exposed to rain
or moisture, does not operate normally, or has been dropped.
14.) This appliance shall not be exposed to dripping or splashing water and no object filled with
liquids such as vases shall be placed on the apparatus.
15.) Do not overload wall outlet. Use only power source as indicated.
16.) Use replacement parts as specified by the manufacturer.
17.) The product may be mounted to a wall only if recommended by the manufacturer.
18.) Upon completion of any service or repairs to this product, ask the service technician to
perform safety checks.
!
CAUTION
RISK OFELECTRICSHOCK
DONOTOPEN
The lightning flashwitharrow-
head symbol,withinan equi-
lateraltriangleisintended to
alertthe usertothe presence
ofuninsulated‘dangerousvoltage’
withinthe product’s enclosure
thatmaybe ofsufficient
magnitude toconstitutearisk
ofelectricshock topersons.
The exclamation pointwithin
an equilateraltriangleisin-
tended toalertthe userto
the presenceofimportant
operating and maintenance
(servicing)instructionsin
the literatureaccompany-
ing the appliance.
WARNING:TOREDUCETHE
RISK OFELECTRICSHOCK
DONOTREMOVE COVER
(ORBACK),NOUSER
SERVICEABLEPARTSINSIDE
REFERSERVICINGTO
QUALIFIEDSERVICE
PERSONNEL.
CAUTION
MS9903TT_082205.p65 22/8/2005, 16:111
2
Thank you……………
For purchasing this Emerson complete home audio system including a
stereo radio, 3 disc changer, dual cassette deck, stereo phonograph,
matching speakers, and remote control.
Please read this Owner’s Manual carefully and completely to make sure
that you get the maximum benefit out of all the outstanding features we’ve
included in this compact system. It’s designed to give you many years of
trouble free operation with an absolute minimum of care and maintenance.
Every component in this system was in perfect working order when it left
our factory.
If you experience any problems with the set up or operation of this system
please do not return it to the retail store. Please call the Emerson Customer
Service Hotline toll free at 1-800-898-9020 and one of our service
technicians will attempt to diagnose and correct the problem for you.
Once again, thanks for purchasing this Emerson audio product.
MS9903TT_082205.p65 22/8/2005, 16:112

3
IMPORTANTNOTES
•Operatecontrolsand switchesas
described inthe manual.
•Beforeturning ‘On’the power,make
certainthatpowercordisproperly
installed.
•StoreyourCDs,cassettesinacoolarea
toavoiddamage fromheat.
•When moving the set, be suretofirst
disconnectthe powercord.
•Avoidinstalling thisunitinplaces
exposed todirectsunlightorcloseto
heatradiating appliancessuchas
electricheaters,on top ofotherstereo
equipmentthatradiatestoo muchheat,
placeslackingventilationordustyareas,
placessubjecttoconstantvibrationand/
orhumidormoistareas.
•Donotattempttoclean thisunitwith
chemicalsolventsasthismightdamage
the finish.Useaclean drycloth.
CLASS 1LASERPRODUCT
CLASS 1LASERPRODUCT
APPAREILÁLASERDECLASSE 1
PRODUCTOLASERDECLASE 1
CAUTION
INVISIBLELASERRADIATION
WHENOPENAND INTERLOCKS
DEFEATED.
AVOIDEXPOSURETOBEAM
ThisproductcontainsalowpowerLaserDevice.
FCC INFORMATION
Thisequipmenthasbeen tested and found tocomplywiththe limitsforaClass Bdigital
device,pursuanttoPart15 ofthe FCC Rules.Theselimitsaredesigned toprovide
reasonableprotection againstharmfulinterferenceinaresidentialinstallation.This
equipmentgenerates,uses,and can radiateradiofrequency energyand,ifnotinstalled
and used inaccordancewiththe instructions,maycauseharmfulinterferencetoradio
communications.However,thereisno guarantee thatinterferencewill notoccurina
particularinstallation.Ifthisequipmentdoescauseharmfulinterferencetoradioortelevision
reception,whichcan be determined byturning the equipmentoff and on,the useris
encouraged totrytocorrectthe interferencebyone ormoreofthe following measures:
•Reorientorrelocatethe receiving antenna.
•Increasethe separation between the equipmentand receiver.
•Connectthe equipmentintoan outleton acircuitdifferentfromthattowhichthe receiver
isconnected.
•Consultthe dealeroran experienced radio/TVtechnician forhelp.
ThisdevicecomplieswithPart15 ofthe FCC Rules.Operation issubjecttothe following
twoconditions:
(1)Thisdevicemaynotcauseharmfulinterference,and
(2)Thisdevicemustacceptanyinterferencereceived,including interferencethat
maycauseundesired operation.
MS9903TT_082205.p65 22/8/2005, 16:113

4
SPEAKERCONNECTION
Connecteachspeakertothe corresponding speakerterminalson the back panel
ofthe mainunit. Makesurethatthe left speakerisconnected tothe left (L)speaker
jack and the rightspeakertothe right(R)speakerjack.
CONNECTINGTHEAC POWERCORD
Afterconnecting the speakersunwind theACpowercordfullyand connectittoany
convenienthouseholdACoutlet.
NOTE:
Thisproductisdesigned tooperateon normal120V60HzAConly.Connecting
thissystemtoanyotherpowersupplycouldresultindamage tothe unitwhichis
notcovered byyourwarranty.You will notethatthissystemisequipped witha
polarized ACpowerplug having one blade widerthan the other.Thisisasafety
feature.
If thisplug doesnotfitintoyourexisting ACoutlet,
do nottrytodefeatthissafetyfeaturebyfiling the
wide blade tomakeitfitintoyouroutlet. If thisplug
will notfitintoyouroutlet, you probablyhavean out-
datednon-polarizedACoutlet.Youshouldhaveyour
outletchanged byaqualified licensed electrician.
PREPARATIONFORUSE
Right Speaker
Left Speaker
SPEAKER
RL
AC Plug
AC Outlet
MS9903TT_082205.p65 22/8/2005, 16:114

5
PROTECT YOUR FURNITURE !!
Thismodelisequipped withnon-skidrubber'feet'topreventthe product
frommoving when you operatethe controls.These'feet'aremade from
non-migrating rubbermaterialspeciallyformulated toavoidleaving any
marks orstainson yourfurniture.Howevercertaintypesofoil based
furniturepolishes,wood preservatives,orcleaning sprays maycausethe
rubber'feet'tosoften,and leavemarks orarubberresidue on the furniture.
Topreventanydamage toyourfurniturewestronglyrecommend thatyou
purchasesmall self-adhesivefeltpads,availableathardwarestoresand
homeimprovementcenterseverywhere,andapplythesepadstothebottom
ofthe rubber'feet'beforeyou placethe producton fine wooden furniture.
MS9903TT_082205.p65 22/8/2005, 16:115

6
2
1
3
4
5
6
7
8
9
10
11
12
13
14
15
16
17
18
19
20
21
22
23
24
25
26
27
28
29
30
31
32
33
34
35
36
FRONTVIEW
CONTROLPANEL
LOCATIONOFCONTROLSAND INDICATORS
MS9903TT_082205.p65 22/8/2005, 16:116

7
1.)POWEROn/Off Button.
2.)PRESETEQButton.
3.)FMSTEREOIndicator.
4.)STANDBY/MUTEIndicator.
5.)ROCKEqualizerIndicator.
6.)POPEqualizerIndicator.
7.)DialScale.
8.)LCDDisplay.
9.)JAZZ EqualizerIndicator.
10.)CLASSICEqualizerIndicator.
11.)RemoteSENSOR.
12.)VOLUMEUPButton.
13.)VOLUMEDOWNButton.
14.)FMMONO/HI-SPEEDDUBBING(ON/OFF )Button.
15.)BALANCEControl.
16.)CassetteDECKBDoor.
17.)CassetteDECKBControlKeys.
18.)CD TrayOpen/CloseButton.
19.)Disc 3SelectButton.
20.)Disc 2SelectButton.
21.)Disc 1SelectButton.
22.)CD Tray.
23.)CassetteDECKAControlKeys.
24.)CassetteDECKADoor.
25.)PHONES (Headphone)Jack.
26.)DISCSKIPButton.
27.)PROGRAMButton.
28.)REPEATButton.
29.)FUNCTION(PHONO/TUNER/TAPE/CD)SelectorSwitch.
30.)STOPButton.
31.)TUNINGControl.
32.)PLAY/PAUSE Button.
33.)BAND (FM/AM)SelectorSwitch.
34.)SKIP/SEARCH ReverseButton.
35.)SKIP/SEARCH ForwardButton.
36.)INTROButton.
MS9903TT_082205.p65 22/8/2005, 16:117

8
1
2
3
1.)FMWireAntenna.
2.)SpeakerL/RJacks.
3.)ACPowerCord.
BACK VIEW
MS9903TT_082205.p65 22/8/2005, 16:118

9
BATTERYINSTALLATION
1.)Open the batterycompartmentcover.
2.)Inserttwo"AAA"(UM4)batteries(notincluded)
tomatchthe polaritiesasindicated inside the
batterycompartment.
3.)Closethe cover.
REMOTECONTROL
1.)STANDBY/ONButton.
2.)STOPButton.
3.)PROGRAMButton.
4.)PLAY/PAUSE Button.
5.)SKIP/SEARCH Button.
6.)SKIP/SEARCH Button.
7.)DISCSelectButton.
8.)MUTEButton.
9.)VOLUME–Button.
10.)VOLUME+Button.
11.)BatteryCompartment(Back Cabinet).
DISC
MUTE
VOLUME
+
STANDBY/
ON
PROGRAM
SKIP/SEARCH
PLAY/
PAUSE
STOP
1
2
3
4
5
6
7
8
9
10
11
BatteryPrecautions
•Replacementofbatteriesmustbe done byan adult.
•Donotmixoldand newbatteries.
•Donotmixalkaline,standard(carbon-zinc)orrechargeable(nickel-cadmium)
batteries.
•The supplyterminalsarenottobe short-circuited.
•Non-rechargeablebatteriesarenottobe recharged.
•Exhausted batteriesaretobe removed.
•Onlybatteriesofthe equivalenttype aretobe used.
•Batteriesaretobe inserted withthe correctpolarity.
•Disposeofbatteriesproperly.Donotdisposeofbatteriesinfire.The batteries
mayexplode orleak.
MS9903TT_082205.p65 22/8/2005, 16:119

10
OPERATINGINSTRUCTIONS
GENERALCONTROLS
PresetElectronicEqualizer
When the unitisswitched ‘On’forthe firsttime,the Equalizerwill be inthe “Flat”
setting.Press the PRESETEQbutton toselect“ROCK”,“POP”,“CLASSIC”or
“JAZZ”sound effecttosuityourtaste.The appropriateEQIndicatorlightstoconfirm
yourselection.
MuteButton (RemoteControlOnly)
Totemporarilyshutoff the sound fromthe speakerspress the MUTEbutton on the
remotecontrol.The STANDBY/MUTEindicatoron frontpanelwill flashand the
sound will stop.Press the MUTEbutton againtocancelMuteand restorethe
sound.The MUTEindicatorgoes“Off”.
Balance Control
Thiscontroladjuststhe relativevolumeofthe left and rightspeakers.When this
controlissettothe center-click position you will haveequalvolumefromboth
speakers.If yournormallistening position isclosertoone ofthe twospeakers,
rotatethiscontroltothe left ortothe rightuntil the volumefrombothofthe speakers
soundsthe sameatyournormallistening position.
FMMono/Hi-SpeedDubbing “ON/OFF ”Selector
Thisbutton isused toselectbetween the FMSTEREOand FMMONOoperation
modes(It isalsoused toselecteitherNormalSpeed orHigh Speed tapepe
dubbing.)ToreceiveFMStereo broadcaststhisswitchmustbe settothe STEREO
position.Howeverifyou arelistening toadistantorweakFMStereo station
and reception isunsatisfactory,setting the selectortothe FMMONOposition
mayprovide someimprovement.
PHONES Jack
The Stereo Headphone Jack islocated on the left frontpanel.Connectasetof
stereo headphones(notincluded)tothisjack forprivatelistening withoutdisturbing
others.The speakersareautomaticallydisconnected when headphonesare
connected tothe headphone jack.
IMPORTANT:When using headphonesalways setthe volumecontroltoalow
levelbeforeyou putthe headphoneson.Then putthe headphoneson and
graduallyincreasethe volumetoacomfortablelistening level.
MS9903TT_082205.p65 22/8/2005, 16:1110

11
LISTENINGTOTHERADIO
1.)Slide the FUNCTIONselectortothe TUNERposition.
2.)Slide the BANDselectortothe desired band,FMorAM.
3.)Tune toyourdesired station withthe TUNINGcontrol.If you havetuned toa
FMStereo station the FMSTEREOLEDIndicatorwill light.
4.)Adjustthe VOLUMEcontroland EQasdesired.
5.)When you arefinished listening press the POWERbutton toshutthe power
‘Off’.
AntennaInformation
AM – The AM antenna is inside the cabinet. IFAM reception is unsatisfactory try
rotating the entire unit until you find the position that provides the best reception.
FM – For best FM reception, the FM lead wire antenna, located on the back of the
set, should fully unwound and extended.
NOTE:If you arelistening toaweakFMStereo station you can usuallyimprove
the reception bypressing the FMMONOselectortothe ONposition,however
the sound will nowbe mono.
FMWireAntenna
MS9903TT_082205.p65 22/8/2005, 16:1111

12
PLAYINGCOMPACTDISCS
IMPORTANT: This CD player can play normal CDs plus CD-R and CD-RW
discs. However the playability of CD-R/RW discs may be affected by the type
of software that was used in ‘ripping’ the tracks from the original discs and
‘burning’ the tracks onto the blank media. Playability may also be affected by
the quality and condition of the blank media you use for recording. 100%
compatibility cannot be guaranteed. This is not an indication of any problems
with your player.
Thissystemfeaturesacarouseltype 3-CD changerwhichcan provide you with
up to3hoursofuninterrupted musicplayback.You mayload up to3CDsinthe
changerforcontinuousplayback,oryou mayprogramup to32 tracks among all 3
discs tobe played back inthe specificorderyou select.
LOADINGTHEDISCS
1.)Press the POWERbutton toturnthe system‘On’.
2.)Slide the FUNCTIONselectortothe CD position.
3.)Press the Open/Close button to open the CD tray.When the trayopenss
twoofthe three CDpocketswill be accessibletoyou.Load up to2CDsinthe
pocketsmaking surethatthe labelside ofthe discs faceup and thatthe discs
arecorrectlycentered inthe pockets.
4.)Press the DISCSKIPbutton torotatethe CD trayand exposethe 3rdCD
pocket. Insertan additionaldisc inthe open pocketifdesired.
5.)Press the Open/Close button toclose
the CD tray.The CD playerwill search
forthe firstdisc and the displaywill show
the numberoftracks and totalplaying
timeofthatdisc.
NOTES:
•Keep the CD disc trayclosed when the systemisnotinusetopreventdirt
and dustfromentering the CD mechanism.
•Neverplacemorethan one CD inthe samepocketofthe CD tray.If two
discs areloaded inthe samepocket, the CD mechanismmayjamand /or
the discs themselvesmaybe damaged.
MS9903TT_082205.p65 22/8/2005, 16:1112

13
TOBEGINCD PLAYBACK
Afteryou haveloaded up the 3CDsinthe changer:
1.)Press the PLAY/PAUSE button tobeginplayback.The changerwill search
forthe firstavailabledisc inthe trayand will beginplayback fromTrack 1on
the firstdisc.The
numberofthe disc
being played flashes
on the display.It will
continue playing until
ithasplayed all ofthe discs inthe trayand then stopsautomatically.
NOTE:Tobeginplayback fromaspecificdisc,press the DISCSKIPbutton
on frontpanelorDISCbutton on remotecontroltoselectthe desired disc,
and then press the PLAY/PAUSE button.Or,press the appropriatedisc
button (DISC1,DISC2,DISC3.)on frontpanelforthe disc you wishto
start. Playback will beginon Track 1ofthe selected disc.It stops
automaticallyafterfinished playing all discs.
2.)Adjustthe VOLUMEand EQcontrolasdesired.
3.)Totemporarilystop playback,press the PLAY/PAUSE button again.The
“II”indicatorappearsinthe display.The disc continuestospin,butno sound
isheard.Press the PLAY/PAUSE button oncemoretocancelpauseand
resumeplayback.
4.)Tostop playback beforethe end ofadisc,press the STOPbutton.
ALL DISC
ALL DISC
MS9903TT_082205.p65 22/8/2005, 16:1113

14
IMPORTANT!!
If the disc issmudged orscratched itmayskiporstop completely.Thisdoes
notindicateaproblemwiththe player.If thisoccurs,tryplaying anotherdisc.
If thatdisc plays properly,you mayassumethatthe firstdisc isdamaged and
unplayable.
SimultaneousPlay and LoadSystem
ThisCDchangerallowsyoutochangetwodiscs whileathirddisc continuesplaying.
Press the CDdrawerOpen/Closebutton during playback.The drawerwill open,
allowing you toremovetwodiscs and inserttwonewdiscs,whilethe thirddisc
continuestoplay.Afterloading twonewdiscs inthe traypress the Open/Close
button toclosethe drawer.
SKIP/SEARCH /Buttonss
Toskipforwardorback tothe beginning ofaparticulartrack during playback,
press the orSKIP/SEARCH buttonsrepeatedlyuntil the desired track number
appearson the display.Playback will beginon the desired track.
Tosearchforaparticularpassage on atrack during playback,press and holdthe
orSKIP/SEARCH buttons.The playerwill searchrapidlyforwardorback.
Releasethe buttonswhen you reachthe desired pointon the track and normal
speed playback will resumeatthatpoint.
MS9903TT_082205.p65 22/8/2005, 16:1114

15
PROGRAMMEDCD PLAYBACK
You can programthe CD changertoplayup toatotalof32 tracks on all 3discs in
anydesired order.
NOTE:You can notprogramthe CD changerduring playback.If adisc is
playing press the STOPbutton firstand then followthe instructions.
1.)Press the PROGRAMbutton once.The PROGRAM,EDITindicators,program
#01,disc #01 appearsinthe display.
2.)Press the DISCSKIPbutton orone ofthe three DISCbuttonstoselectthe
disc whichcontainsthe firsttrack you wishtoprogram.Example:Disc 2.
3.)Press the orbuttonstoselectthe firsttrack you wishtoprogram.m.
Example:Track 8.
4.)Press the PROGRAMbutton againtostorethe desired disc and track number
intomemorylocationNumber1.ThedisplaywillchangefromProgramNumber
“01”toProgramNumber“02”.
MS9903TT_082205.p65 22/8/2005, 16:1115

16
5.)UsetheDISCSKIPbutton orone ofthe threeDISCbuttonstoselectthe disc
containing the nexttrack you wishtoprogram.Example:Disc 3.
6.)Press the orbuttonstoselectthe nexttrack you wishtoprogram.m.
Example:Track 18.
7.)Press the PROGRAMbutton againtostorethe desired disc and track into
memorylocation Number“02”.
•Repeatthe aboveprocedureuntil you havestored up to32 tracks inthe
programmemory.
•Afterall yourdesired tracks areprogrammed you maypress the PROGRAM
button toreconfirmthatthe information hasbeen stored correctly.
8.)Press the PLAY/PAUSE button tobeginprogrammed playback.Playback
willstartatthefirstdiscandtrack whichyouhaveprogrammedandwillcontinue
until all programmed discs and tracks (up toatotalof32)havebeen played.
NOTE:If you press the orbuttonsduring programmed playback,the
playerwill skipforwardorback tothe nexttrack and disc whichyou have
programmed,notthe nexttrack on the disc whichisbeing played.
TOCLEAR THEPROGRAMMEMORY
If the disc isplaying,press the STOPbutton tostop the discs.Then press the
STOPbutton again,switchtootherfunction,orturnpower“Off”toclearthe
programmemory,
MS9903TT_082205.p65 22/8/2005, 16:1116

17
REPEATPlayback (OnFrontPanelOnly)
Thissystemhasafour-wayrepeatfunction whichallowsyou tocontinuouslyrepeat
one track,one disc,all discs,orall ofthe tracks whichyou haveprogrammed.
OneTrack Repeat
1.)Press the REPEATbutton until the “REPEAT1”Indicatorappearsinthe CD
display.
2.)Usethe orbuttons(and the “DISCSKIP”button,ifnecessary)toselectct
the exacttrack thatyou wishtorepeat.
3.)Press the PLAY/PAUSE button tobeginone track repeat. The selected
track will beginplaying.It will repeatcontinuouslyuntil repeatfunction is
cancelled.
OneDisc Repeat
1.)Press the REPEATbutton until the “REPEAT1DISC”Indicatorappearson
the display.Press the DISCSKIPbutton toselectthe disc you wishtoplay.
2.)Press the PLAY/PAUSE button.The selected disc will begintoplaystarting
withTrack 1.When the finaltrack on the disc hasbeen played,itwill
automaticallybeginplaying againstarting withTrack 1.
3.)TocancelOne Disc Repeatplayback,press the REPEATbutton until the
indicatorno longerappearsinthe Display.
REPEAT 1
DISC
REPEAT 1
MS9903TT_082205.p65 22/8/2005, 16:1117

18
All Discs Repeat
1.)Press the REPEATbutton until the “REPEATALLDISC”Indicatorappearsin
the Display.
2.)Press the PLAY/PAUSE button,the changerwill beginplaying the first
track ofthe disc whichisinthe playposition.It will continue until ithasplayed
all tracks on all discs inthe changer.When ithasplayed the lasttrack on the
lastdisc itwill beginplaying againwiththe firsttrack on the firstdisc.ThisAll
Discs Repeatwill continue indefinitely.
3.)TocancelAll Discs Repeatplayback,press the REPEATbutton until the
Indicatorno longerappearsinthe Display.
ProgrammedRepeatPlayback
You can usethe Programand Repeatfeaturestogethertocontinuouslyrepeata
programmed sequenceoftracks.First, programthe desired tracks according to
Steps1through 7inpreviouspage.When Programmed Playback beginspress
the REPEATbutton until the “REPEATALLDISC”Indicatorappearsindisplay.All
the tracks inyourprogrammed sequencewill be repeated continuously.
TocancelProgrammed RepeatPlayback press the STOPbutton until boththe
PROGRAMand REPEATIndicatorsgo ‘Off’.
ALL DISC
REPEAT
REPEAT
ALL DISC
MS9903TT_082205.p65 22/8/2005, 16:1118

19
INTROScan(OnFrontPanelOnly)
The IntroScan featureletsyou heara10 second introduction ofeachtrack on
eachdisc.Thisfeatureisusefulifyou aretrying tofind aparticularsong butyou
do notknowthe title.
1.)Press the INTRObutton once.The “INTRO”and “ALLDISC”Indicatorsappear
inthe display.The CD playerwill beginplaying Track 1ofthe disc inthe play
position.After10 secondsitwill advancetoTrack 2,and soon,until ithas
played the first10 secondsofeverytrack.Then itcontinuestonextdisc until
all discs hasbeen played.
2.)TocancelIntroScan and resumenormalplayback,press the INTRObutton
again.The INTROIndicatordisappears.
ALL DISC
MS9903TT_082205.p65 22/8/2005, 16:1119
Table of contents
Other Emerson Stereo System manuals

Emerson
Emerson MS9600 User manual

Emerson
Emerson ES1065 User manual

Emerson
Emerson ES30 User manual

Emerson
Emerson MS9920TT User manual

Emerson
Emerson ES830 User manual

Emerson
Emerson ES58 User manual

Emerson
Emerson NR303TTC User manual

Emerson
Emerson MS7609 User manual

Emerson
Emerson NR290TTC User manual

Emerson
Emerson MS3108C User manual

Emerson
Emerson MS3100 User manual

Emerson
Emerson SpongeBob SquarePants SB230 User manual

Emerson
Emerson NR101TT User manual

Emerson
Emerson MS7622 User manual

Emerson
Emerson NR303TT User manual

Emerson
Emerson MS7616R User manual

Emerson
Emerson MS9904TTC User manual

Emerson
Emerson MS7618R User manual

Emerson
Emerson ES88 User manual

Emerson
Emerson MS3105 User manual