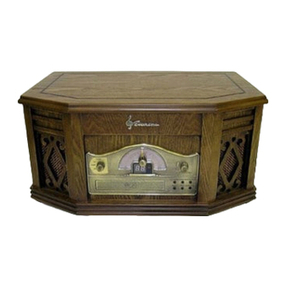
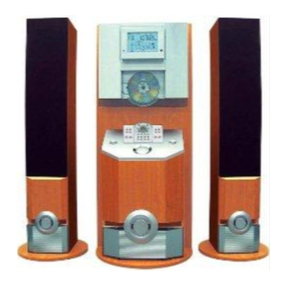
Emerson NR303TT User manual

OWNER'SMANUAL
NR303TT
COMPLETE STEREO SYSTEM
with AM/FM STEREO RADIO,
CD and CASSETTE PLAYER,
and FULL SIZE STEREO PHONOGRAPH
Visitourweb siteatwww.emersonradio.com
NR303TT_050704.p65 7/5/2004, 10:1419

1
TO PREVENT FIRE OR SHOCK HAZARD, DO NOT USE THIS PLUG WITH AN
EXTENSION CORD, RECEPTACLE OR OTHER OUTLET UNLESS THE BLADES
CAN BE FULLY INSERTED TO PREVENT BLADE EXPOSURE. TO PREVENT FIRE
ORSHOCKHAZARD,DONOTEXPOSETHISAPPLIANCETORAINORMOISTURE.
IMPORTANTSAFETYINSTRUCTIONS
1.) Read these instructions.
2.) Keep these instructions.
3.) Heed all warnings.
4.) Follow all instructions.
5.) Do not use this apparatus near water.
6.) Clean only with dry cloth.
7.) Do not block any ventilation openings. Install in accordance with the manufacturer’s
instructions.
8.) Do not install near any heat sources such as radiators, heat registers, stoves, or other
apparatus (including amplifiers) that produce heat.
9.) Do not defeat the safety purpose of the polarized or grounding-type plug. A polarized plug has
two blades with one wider than the other. A grounding type plug has two blades and a third
grounding prong. The wide blade or the third prong is provided for your safety. If the provided
plug does not fit into your outlet, consult an electrician for replacement of the obsolete outlet.
10.) Protect the power cord from being walked on or pinched particularly at plugs, convenience
receptacles, and the point where they exit from the apparatus.
11.) Only use attachments / accessories specified by the manufacturer.
12.) Unplug this apparatus during lightning storms or when unused for long periods of time.
13.) Refer all servicing to qualified service personnel. Servicing is required when the apparatus
has been damaged in any way, such as power-supply cord or plug is damaged, liquid has
been spilled or objects have fallen into the apparatus, the apparatus has been exposed to rain
or moisture, does not operate normally, or has been dropped.
14.) This appliance shall not be exposed to dripping or splashing water and no object filled with
liquids such as vases shall be placed on the apparatus.
15.) Do not overload wall outlet. Use only power source as indicated.
16.) Use replacement parts as specified by the manufacturer.
17.) The product may be mounted to a wall only if recommended by the manufacturer.
18.) Upon completion of any service or repairs to this product, ask the service technician to
perform safety checks.
!
CAUTION
RISK OFELECTRICSHOCK
DONOTOPEN
The lightning flashwitharrow-
head symbol,withinan equi-
lateraltriangleisintended to
alertthe usertothe presence
ofuninsulated‘dangerousvoltage’
withinthe product’s enclosure
thatmaybe ofsufficient
magnitude toconstitutearisk
ofelectricshock topersons.
The exclamation pointwithin
an equilateraltriangleisin-
tended toalertthe userto
the presenceofimportant
operating and maintenance
(servicing)instructionsin
the literatureaccompany-
ing the appliance.
WARNING:TOREDUCETHE
RISK OFELECTRICSHOCK
DONOTREMOVE COVER
(ORBACK),NOUSER
SERVICEABLEPARTSINSIDE
REFERSERVICINGTO
QUALIFIEDSERVICE
PERSONNEL.
CAUTION
NR303TT_050704.p65 7/5/2004, 10:141

2
Thankyou………… forpurchasing thisEmerson Heritage Seriescomplete
homestereo system.Inside thisbeautifulrealwood veneercabinetyou
will find astateofthe artaudiosystemthatincludesastereo radio,CDand
Cassetteplayers,afull-size,3-speed stereo phonograph,and matching
wide range stereo speakers.Thissystemhasbeen designed toprovide
you withmanyyearsofenjoymentand trouble-free operation withan
absoluteminimumofcareand maintenance.
Everycomponentinthissystemwasinperfectworking orderwhen itleft
ourfactory.If you experienceanyproblemswiththe setup oroperation of
thissystem,PLEASE DONOTRETURN ITTOTHERETAILSTORE.
Pleasecall the Emerson CustomerServiceHotline,toll-free,at800-898-
9020.One ofourrepresentativeswill attempttoresolvethe problemfor
you.If the problemcannotbe resolved byphone you will be instructed on
howtoreceiveareplacementunit.
Pleaseread all ofthe instructionsinthismanualtomakesureyou are
getting the maximumbenefitoutofall the featuresincluded inthissystem.
And pleasesavethismanualforfuturereference.It includesyourwarranty
and importantserviceinformation
Onceagain,thankyou forpurchasing thisEmerson Heritage Series
CompleteStereo System.
The serialnumberofyoursystemislocated on alabelon the back panel.
Pleasetakeamomentnowtolocatetheserialnumberandwritethenumber
inthe spaceprovided below.You maybe asked toprovide thisnumber
when calling forproductservice.
ModelNumber:NR303TT
SerialNumber:
NR303TT_050704.p65 7/5/2004, 10:142

3
IMPORTANTNOTES
•Operatecontrolsand switchesas
described inthe manual.
•Beforeturning ‘On’the power,make
certainthatpowercordisproperly
installed.
•StoreyourCDs,cassettesinacoolarea
toavoiddamage fromheat.
•When moving the set, be suretofirst
disconnectthe powercord.
•Avoidinstalling thisunitinplaces
exposed todirectsunlightorcloseto
heatradiating appliancessuchas
electricheaters,on top ofotherstereo
equipmentthatradiatestoo muchheat,
placeslackingventilationordustyareas,
placessubjecttoconstantvibrationand/
orhumidormoistareas.
•Donotattempttoclean thisunitwith
chemicalsolventsasthismightdamage
the finish.Useaclean drycloth.
CLASS 1LASERPRODUCT
CLASS 1LASERPRODUCT
APPAREILÁLASERDECLASSE 1
PRODUCTOLASERDECLASE 1
CAUTION
INVISIBLELASERRADIATION
WHENOPENAND INTERLOCKS
DEFEATED.
AVOIDEXPOSURETOBEAM
ThisproductcontainsalowpowerLaserDevice.
FCC INFORMATION
Thisequipmenthasbeen tested and found tocomplywiththe limitsforaClass Bdigital
device,pursuanttoPart15 ofthe FCC Rules.Theselimitsaredesigned toprovide
reasonableprotection againstharmfulinterferenceinaresidentialinstallation.This
equipmentgenerates,uses,and can radiateradiofrequency energyand,ifnotinstalled
and used inaccordancewiththe instructions,maycauseharmfulinterferencetoradio
communications.However,thereisno guarantee thatinterferencewill notoccurina
particularinstallation.Ifthisequipmentdoescauseharmfulinterferencetoradioortelevision
reception,whichcan be determined byturning the equipmentoff and on,the useris
encouraged totrytocorrectthe interferencebyone ormoreofthe following measures:
•Reorientorrelocatethe receiving antenna.
•Increasethe separation between the equipmentand receiver.
•Connectthe equipmentintoan outleton acircuitdifferentfromthattowhichthe receiver
isconnected.
•Consultthe dealeroran experienced radio/TVtechnician forhelp.
ThisdevicecomplieswithPart15 ofthe FCC Rules.Operation issubjecttothe following
twoconditions:
(1)Thisdevicemaynotcauseharmfulinterference,and
(2)Thisdevicemustacceptanyinterferencereceived,including interferencethat
maycauseundesired operation.
NR303TT_050704.p65 7/5/2004, 10:143
4
UNPACKING AND SET UP
• Carefully remove the unit from the display carton and remove all packing
material from the unit.
• Unwind theAC power cord and extend it to its full length.
• Unwind the FM Antenna wire and extend it to its full length.
• Place the unit on a stable, level surface, convenient to an AC outlet, out of
direct sunlight, and away from sources of excess heat, dust, moisture, humidity,
or strong magnetic fields.
• Raise the lid to expose the phonograph. The phonograph has been secured
for shipment with a transit screw. Use a coin or screwdriver to turn the transit
screw clockwise. This will allow the turntable to “float”.
PREPARATIONFORUSE
TRANSIT SCREW
NR303TT_050704.p65 7/5/2004, 10:144

5
• Remove the opaque white plastic stylus cover from the phonograph stylus by
sliding it in the direction of the arrow.
Discard the stylus cover.
• Remove the twist-tie that was used to secure the tone arm during shipment.
• Release the tone arm lock lever.
• Connect the plug to yourAC outlet.
STYLUS COVER
TONE ARM LOCK LEVER
NR303TT_050704.p65 7/5/2004, 10:145

6
POWERSOURCE
Thisproductisdesigned tooperateon normal120V60HzAConly.Attempting to
operatethissystemfromanyotherpowersourcemaycausedamagetothesystem,
and suchdamage isnotcovered byyourwarranty.
NOTE:You will notethatthissystemisequipped withapolarized ACpowerplug
having one blade widerthan the other.Thisisasafetyfeature.If thisplug doesnot
fitintoyourexistingACoutlet, do not
trytodefeatthissafetyfeaturebyfiling
the wide blade tomakeitfitintoyour
outlet. If thisplug will notfitintoyour
outlet, you probablyhavean out-
dated non-polarized ACoutlet. You
shouldhaveyouroutletchanged by
aqualified licensed electrician.
PROTECT YOUR FURNITURE
This model is equipped with non-skid rubber 'feet' to prevent the product from
moving when you operate the controls. These 'feet' are made from non-migrating
rubber material specially formulated to avoid leaving any marks or stains on your
furniture. However certain types of oil based furniture polishes, wood preservatives,
or cleaning sprays may cause the rubber 'feet' to soften, and leave marks or a
rubber residue on the furniture. To prevent any damage to your furniture we strongly
recommend that you purchase small self-adhesive felt pads, available at hardware
stores and home improvement centers everywhere, and apply these pads to the
bottom of the rubber 'feet' before you place the product on fine wooden furniture.
IMPORTANT: Raising And Lowering The Lid
To open the lid, raise it as far as it will go until the lid support bracket ‘locks’ in the
open position.
To close the lid, lift it upward slightly until the lid support bracket ‘unlocks’, and then
gently lower the lid.
TO AVOID DAMAGING THE CABINET OR THE LID, NEVER FORCE THE LID
CLOSED.ALWAYS RAISE THE LID TO RELEASE THE LID SUPPORT BRACKET.
AC Plug
AC Outlet
NR303TT_050704.p65 7/5/2004, 10:146

7
LOCATIONOFCONTROLSAND INDICATORS
FRONTPANEL
1.)Speakers.
2.)AMDialScale.
3.)Tuning Control.
4.)FMDialScale.
5.)Turntable.
6.)Phonograph LidSupportBracket.
7.)Phonograph Lid.
8.)CassettePlayerSlot.
9.)CassetteEJ/FF Button.
(Eject/FastForward)
10.)OFF-VOLUMEControl.
11.)CD OPEN/CLOSE Button.
12.)EARPHONE(Headphone)Jack.
13.)CDSTOPButton.
14.)CD F.F(FastForward)Button.
15.)CD F.R(FastReverse)Button.
16.)CD PLAY/PAUSE Button.
17.)POWER‘On’Indicator.
18.)CDDrawer.
19.)CD Track NumberDisplay.
20.)FMST.Indicator.
21.)AM/FM/TAPE/CD/PHONO
Function Selector.
1
5
6
7
1
8
9
10
11
12
13
14
15
16
18
19
21 20 17
2
3
4
NR303TT_050704.p65 7/5/2004, 10:147

8
PHONOGRAPH
1
2 3
4
5
6
7
1.)Turntable.
2.)45 rpmAdapter.
3.)TransitScrew.
4.)Cue Lever.
5.)Speed Selector(33/45/78 rpm)
6.)Tone ArmLock.
7.)Tone ArmwithStylus.
BACK PANEL
22.)ACPowerCord.
23.)FMLead WireAntenna.22
23
NR303TT_050704.p65 7/5/2004, 10:148

9
OPERATINGINSTRUCTIONS
LISTENINGTOTHERADIO
1.)Toturnthe system‘on’,rotatethe OFF-VOLUMEcontrolclockwiseuntil a
‘click’isheard,and setthe Volumetoalowlevel.The POWERindicatorlights
up.
2.)Setthe Function selector(AM/FM/TAPE/CD/PHONO)tothe AMorFMband
asdesired.The dialscalelightcomes‘on’.
3.)Rotatethe Tuning controltotune tothe desired radiostation.If you tune toa
strong FMStereo station the FMST.indicatorwill lightand reception will be in
stereo.If you tune toaweakerFMstation,the reception will automatically
switchtomono.
4.)Adjustthe OFF-VOLUMEcontroltothe desired level.
5.)When you arefinished listening turnthe OFF-VOLUMEcontrolcounter
clockwiseuntil a‘click’isheard.The POWERindicatorand the tuning diallight
go ‘off’.
AntennaInformation
The AMbarantenna isinside the cabinet. If AMreception isunsatisfactorytry
repositioningthe cabinetslightlyuntiltheinternalantenna ispicking upthe strongest
signal.
The FMwireantenna islocated onthe back cabinet. If necessaryadjustthe position
and direction ofthisantenna until you find the position thatprovidesthe best
reception.
VOLUME
PLAY/PAUSE STOP OPEN/CLOSE
F.R F.F EARPHONE
OFF
NR303TT_050704.p65 7/5/2004, 10:149

10
PLAYING COMPACT DISCS
1.) Turn the OFF-VOLUME control
clockwiseuntila ‘click’is heard, and
set the volume to a low level.
2.) Set the Function selector (AM/FM/
TAPE/CD/PHONO) to the CD
position. The CD track number
display comes ‘on’.
3.) Press the CD OPEN/CLOSE button to open the CD drawer.
4.) Place your disc in the drawer with the printed label side facing up.
5.) Press the CD OPEN/CLOSE button once more to close
the drawer. The disc will spin for a few seconds while
the player reads the disc, then the disc stops and the
display shows the total number of tracks on the disc.
6.) Press the CD PLAY/PAUSE button to begin playback on
track number one. The Play Indicator lights.
7.) Adjust the OFF-VOLUME control to the desired level.
8.) Playback will continue until the end of the disc. When the disc ends the display
again shows the total number of tracks on the disc. You may also stop playback
at any time by pressing the CD STOP button.
Pause Control
To pause momentarily during playback press the CD PLAY/
PAUSE button again. Playback stops but the disc continues
to spin and the Play indicator flashes. Press the CD PLAY/
PAUSE button once more to cancel Pause and resume
playback. The Play indicator stops flashing.
VOLUME
PLAY/PAUSE STOP OPEN/CLOSE
F.R F.F EARPHONE
OFF
1
2
3
6
48
NR303TT_050704.p65 7/5/2004, 10:1410

11
Skipping Tracks and High Speed Music Search
During CD Playback, repeatedly press theF.F (Fast Forward) orF.R (Fast Reverse)
buttons to skip to higher or lower number tracks. When the desired track number
appears on the display release the buttons and playback will begin on the desired
track.
To rapidly search forward or back within a track to locate a specific musical passage,
depress and hold either the F.F (Fast Forward) or F.R (Fast Reverse) buttons.
The player will move forward or backward at high speed as long as the buttons are
depressed. When you hear the desired passage release the buttons. Normal
playback will resume at that point.
F.R F.F
VOLUME
PLAY/PAUSE STOP OPEN/CLOSE
F.R F.F EARPHONE
OFF
NR303TT_050704.p65 7/5/2004, 10:1411

12
PLAYINGCASSETTETAPES
Note:Beforeinserting atape inthe playerbe surethatthereisno excess
slack inthe cassettethatcouldbecomejammed inthe mechanism.
Refertothe CAREAND MAINTENANCEsection forinstructionson removing
excess slack fromthe cassette.
1.)Rotatethe OFF-VOLUMEcontrolclockwiseuntil a‘click’isheardand setthe
Volumetoalowlevel.The POWERindicatorcomes‘on’.
2.) Set the Function selector (AM/FM/TAPE/CD/PHONO) to the TAPE position.
3.)Insertyourcassetteintothe slotlocated on rightside cabinet, asshowninthe
illustration,withthe side you wishtoplayfacing ‘up’and the open end on the
rightside.
4.)Cassetteplayback beginsassoon asthe tape isinserted.Adjustthe OFF-
VOLUMEcontroltothe desired level.
5.)Toadvancethe tape rapidly,depress theEJ/FF (Eject/FastForward)
button approximatelyhalfway.The tape will moveforwardrapidly
aslong asthe button isdepressed.Normalplayback will resume
when the button isreleased.
6.)When the tape endsthe playerstopsautomatically.Depress the
EJ/FF (Eject/FastForward)button completelytoremovethe
cassettefromthe player.You maypress the EJ/FF (Eject/Fast
Forward)button tostop playback and removethe cassetteatany
time.
7.)Toturnthe system‘off’,rotatethe OFF-VOLUMEcontrolcounterclockwise
until a‘click’isheard.The POWERindicatorgoes‘off’.
E J
/
F.F
E J
/
F.F
CassetteTapeOpenEnd
NR303TT_050704.p65 7/5/2004, 10:1412

13
PLAYINGRECORDS
Thissystemincludesafull-size,3-speed,belt-driveturntable.You can play33,45,
and 78 rpmrecords.
1.)Turnthe OFF-VOLUMEcontrolclockwiseuntil a‘click’isheard,and setthe
Volumetoalowlevel.
2.)Setthe Function (AM/FM/TAPE/CD/PHONO)selectortothe PHONOposition.
3.)Makesurethatyou haveremoved the styluscoverfromthe stylusand have
released the Tone ArmLock thatsecured the tone armtothe tone armrest.
4.)Setthe turntableSpeed Selectortothe appropriatespeed,33,45,or78 rpm.If
you areplaying 45 rpm‘singles’,placethe 45 rpmadapteron the centerspindle.
5.)Placeyourrecordon the centerspindle.
6.)Raisethe Cue levertolift the tone armoff itsrest. Movethe tone armtothe
edge ofthe record.The turntablestartsautomatically.Usethe Cue leverto
gentlylowerthe tone armontothe record.
7.)Adjustthe OFF-VOLUMEcontroltothe desired level.
8.)When the tone armreachesthe end ofthe recorditautomaticallyreturnstothe
tone armrestand the recordplayerstops.
9.)Toturnthe system‘off’,rotatethe OFF-VOLUMEcontrolcounterclockwise
until a‘click’isheard.The POWERindicatorgoes‘off’.
NOTE:Donotturnorstop the turntablemanually.Moving orjarring the
Turntablewithoutsecuring the Tone Armclampcouldresultindamage tothe
Tone Arm.
NR303TT_050704.p65 7/5/2004, 10:1413

14
USINGSTEREOHEADPHONES (NOTINCLUDED)
Connectasetofstereo headphoneswitha3.5mm mini-plug tothe EARPHONE
jack on the frontpanel.Beforeputting on the headphonesalways setthe OFF-
VOLUMEcontroltoalowlevel.Thenputtheheadphoneson andgraduallyincrease
the Volumetoacomfortablelistening level.The built-inspeakersautomatically
shutoff when headphonesareconnected tothe EARPHONEjack.
EARPHONEJack.
VOLUME
PLAY/PAUSE STOP OPEN/CLOSE
F.R F.F EARPHONE
OFF
IMPORTANT!!
• TO PROTECT THE TURNTABLE FROM DAMAGE DURING
TRANSPORTATION, A SILVER TRANSIT SCREW IS LOCATED AT THE
UPPER RIGHT CORNER OF THE TURNTABLE PLATFORM.
• BEFORE PLAYING, PLEASE USE A
SCREWDRIVERTOTURNTHETRANSITSCREW
IN CLOCKWISE DIRECTION (SCREW GOING
DOWN) COMPLETELY TO UNLOCK THE
TURNTABLE.
• TO LOCK THE TURNTABLE AGAIN FOR
TRANSPORTATION,PLEASETURN THESCREW
IN COUNTER-CLOCKWISE DIRECTION.
NR303TT_050704.p65 7/5/2004, 10:1414

15
CASSETTECARE
Twocommon causesoftroubleexperienced when using cassettesare:
1.)Tape jamming —Leading touneven speed inplayback,and
2.)Tapetangling—Wherethetapewrapsitselfaroundvitalpartsofthemechanism.
Toreducethe likelihood oftheseproblemsoccurring,the following precautions
shouldbe observed:
•Check thatthereareno looselayersoftape visible
through the cassettecenterwindow(see Fig.1).
Takeupanylooselayers,usingapencilorhexagonal
barrelled ballpointpen,beforeinserting thecassette
intothe machine (see Fig.2).
•If the cassettefeels“tight”whileperforming operation
shown(see Fig.2),the tape maybe jamming due to
“ridges”formed inthe winding ofthe tape (visible
throughthecenterwindow).Thesemayberemoved,in
mostcases,byfastwinding ofthe cassettefromone
end tothe otherand back again.
•Useonlywell-knownbrandsoftape.AvoiduseofC-120 cassettes.
Furthermore,donotexposecassettestodirectsunlight,dustoroil,anddonottouch
the tape surfaces.
CAREAND MAINTENANCE
NR303TT_050704.p65 7/5/2004, 10:1415

16
COMPACTDISCCARE
•Toremoveadisc fromitsstorage case,press downon the centerofthe case
and lift the disc out, holding itcarefullybythe edges.
•Fingerprintsand dustshouldbe carefullywiped off the disc’s recorded surface
withasoft cloth.Unlikeconventionalrecords,compactdiscs haveno grooves
tocollectdustand microscopicdebris,sogentlywiping withasoft clothshould
removemostparticles.Wipe inastraightline fromthe inside tothe outside of
the disc.Small dustparticlesand lightstainswill haveabsolutelyno effecton
reproduction quality.
•Clean the disc periodicallywithasoft, lint-free,drycloth.Neverusedetergents
orabrasivecleanerstoclean the disc.If necessary,useaCD cleaning kit.
•Neverwriteon oraffixlabelstothe surfaceofcompactdiscs.
CAREOFTHECABINET
You shouldcareforthe cabinetasyou wouldcareforanypieceoffine furniture.
When the cabinetbecomesdustywipe itwithasoft, non-abrasivedustcloth.If the
cabinetbecomessmudged withfingerprintsyou mayuseanygood quality
commercialdusting and polishing spraycleaner,howeveravoidspraying the plastic
ormetalpartsofthissystem.Werecommend thatyou spraythe cleaneron your
dustcloth,notdirectlyon the cabinet, toavoidgetting anyofthe sprayon the
plasticormetalparts.
NR303TT_050704.p65 7/5/2004, 10:1416

17
TOFIND THELOCATIONAND PHONE
NUMBEROFYOUR NEARESTSERVICE
CENTERPERMITTEDTOPERFORM
WARRANTY...
CALL TOLL FREE:1-800-695-0098
FORCUSTOMERSERVICE,PLEASE WRITETO:
Emerson RadioCorp.
ConsumerAffairsDept.
1901 DiplomatDrive,
FarmersBranch,TX75234.
FORADDITIONALSET-UPOROPERATINGASSISTANCE
PLEASE CALL:
1-800-898-9020
LIMITEDWARRANTY
Emerson RadioCorp.warrantsmanufacturing defectsinoriginalmaterial,including
originalpartsand workmanship,undernormaluseand conditions,foraperiod of
ninety(90)daysfromthedateoforiginalpurchaseintheU.S.Withyourdatedproof
ofpurchase,wewill providerepairservice atno chargeforlaborand partsatan
authorizedDepotRepairFacility,orreplace theproductinourdiscretion.If your
systemfailstooperateproperlyduring thewarrantyperiod duetoamanufacturing
defect,donotreturnthesystemtotheretail store.Pleasecall theEmerson Customer
Service Hotlinetoll free at1-800-898-9020.Wewill diagnosetheproblemand instruct
you howtohaveyoursystemrepairedorreplaced,atourdiscretion.
Thiswarrantydoesnotcoverdamagefromnegligence,misuse,abuse,accident,failure
tofollowoperating instructions,commercialuse,rental,repairsby anunauthorized
facility,orproductspurchased,used,servicedordamagedoutsideoftheUnitedStates.
THISWARRANTYGIVESYOU SPECIFICLEGALRIGHTS,AND YOU MAY
ALSOHAVEOTHERRIGHTSWHICHVARYFROMSTATE TOSTATE.
AU898R
NR303TT_050704.p65 7/5/2004, 10:1417

EMERSON
PARTNO.:16-2956
405-01 PRINTEDINCHINA
NR303TT_050704.p65 7/5/2004, 10:1418
Table of contents
Other Emerson Stereo System manuals

Emerson
Emerson ES769 User manual

Emerson
Emerson ES830 User manual

Emerson
Emerson MS7616R User manual

Emerson
Emerson MS7618R User manual

Emerson
Emerson MS9600 User manual

Emerson
Emerson Research ES299 User manual

Emerson
Emerson Research iE600 User manual

Emerson
Emerson MS3100 User manual

Emerson
Emerson ES58 User manual

Emerson
Emerson MS9923TT User manual

Emerson
Emerson MS7609 User manual

Emerson
Emerson MS9933TT User manual

Emerson
Emerson MS3108C User manual

Emerson
Emerson NR303TTC User manual

Emerson
Emerson NR290TTC User manual

Emerson
Emerson ES50 User manual

Emerson
Emerson MS7630 User manual

Emerson
Emerson MS9903TT User manual

Emerson
Emerson ES27 User manual

Emerson
Emerson ES13 User manual