Englacha Junior X Rider User manual

Junior X Rider
Instruction Manual

Junior X Rider
No.
Parts list
Quantity
1
Foot-board w/Non-slip surface
1
2.
EVA wheel
2
3.
M10 Bolt
2
4.
M10 Nut
2
5.
Coupling adaptor
6
6.
Coupling wire w/Strap
2
7.
Coupling plate with welded M6 screw
1
8.
M6 nut
2
9.
L-attachment
1
10.
M6 screw
2
11.
Storage Strap
1
12.
Plastic Lid
1
13.
Handled Seat with soft grip and harness
1
14.
Seat connecting post
1
15.
Fasten Knob
1
16.
M8 Nut
2
17
M6 screw
1
The Rider that you have purchased is a product that enables you to transport
your child comfortably and without fatigue in the pram. The Junior X Rider is a practical
and comfortable product and can be attached to the axle, rear bar and folding plate of
most of prams, strollers and buggies. It’s a seating rider as well as a standing platform in
one.
Please read this instruction manual carefully before using the Rider. Incorrect use can
endanger the safety of your child.
Caution
● The Rider is built for children aged upwards of 15 months and with a body
weight of up to 25kg.
● The Rider is developed for prams, strollers and folding buggies with a rigid
rear axle or tube, horizontal bow for securing with a diameter of up to 45mm tube. It
may not be suitable for some baby carriages without applicable rear construction or in
cases where the brake function is hindered. Please consult your specialist dealer
before making your purchase.
Assembly instructions
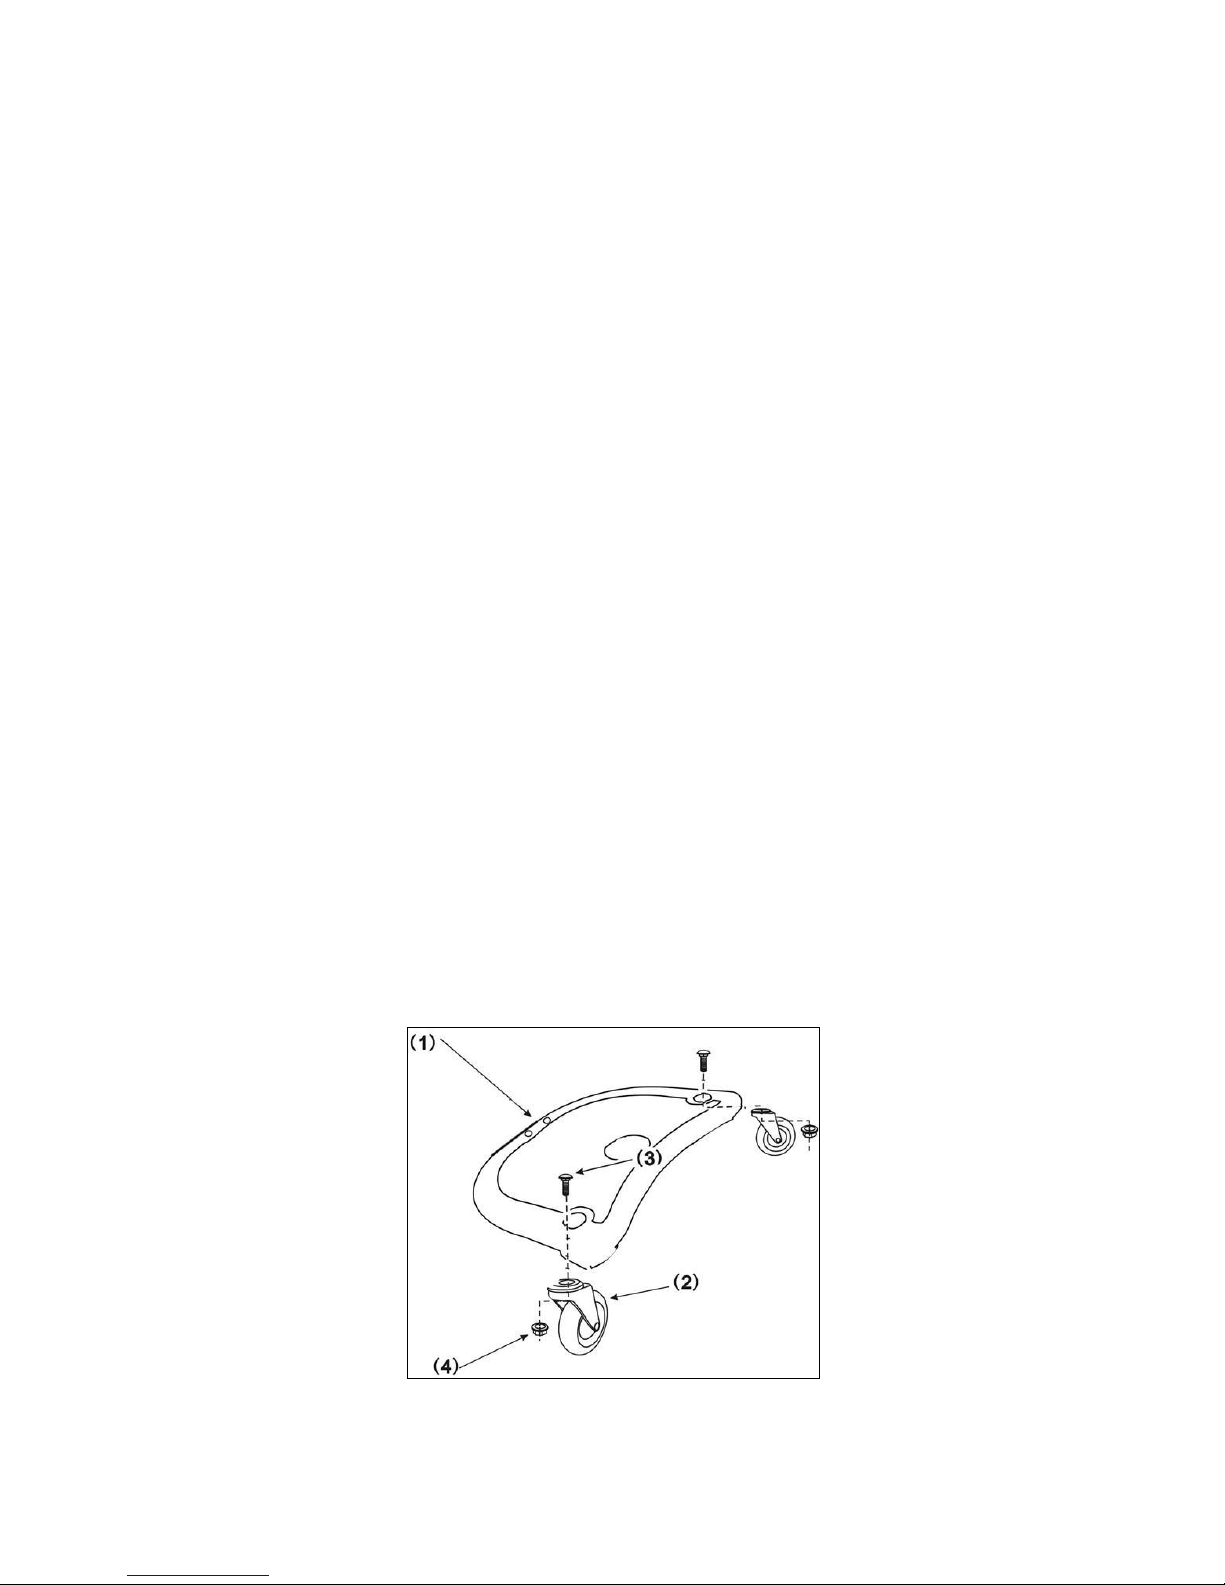
Step 1 Assemble the wheels (2) on the foot-board (1) with the screws (3) and nuts (4).
Ensure that the screws are firmly tightened. Use the attached tool for this and the further
steps.
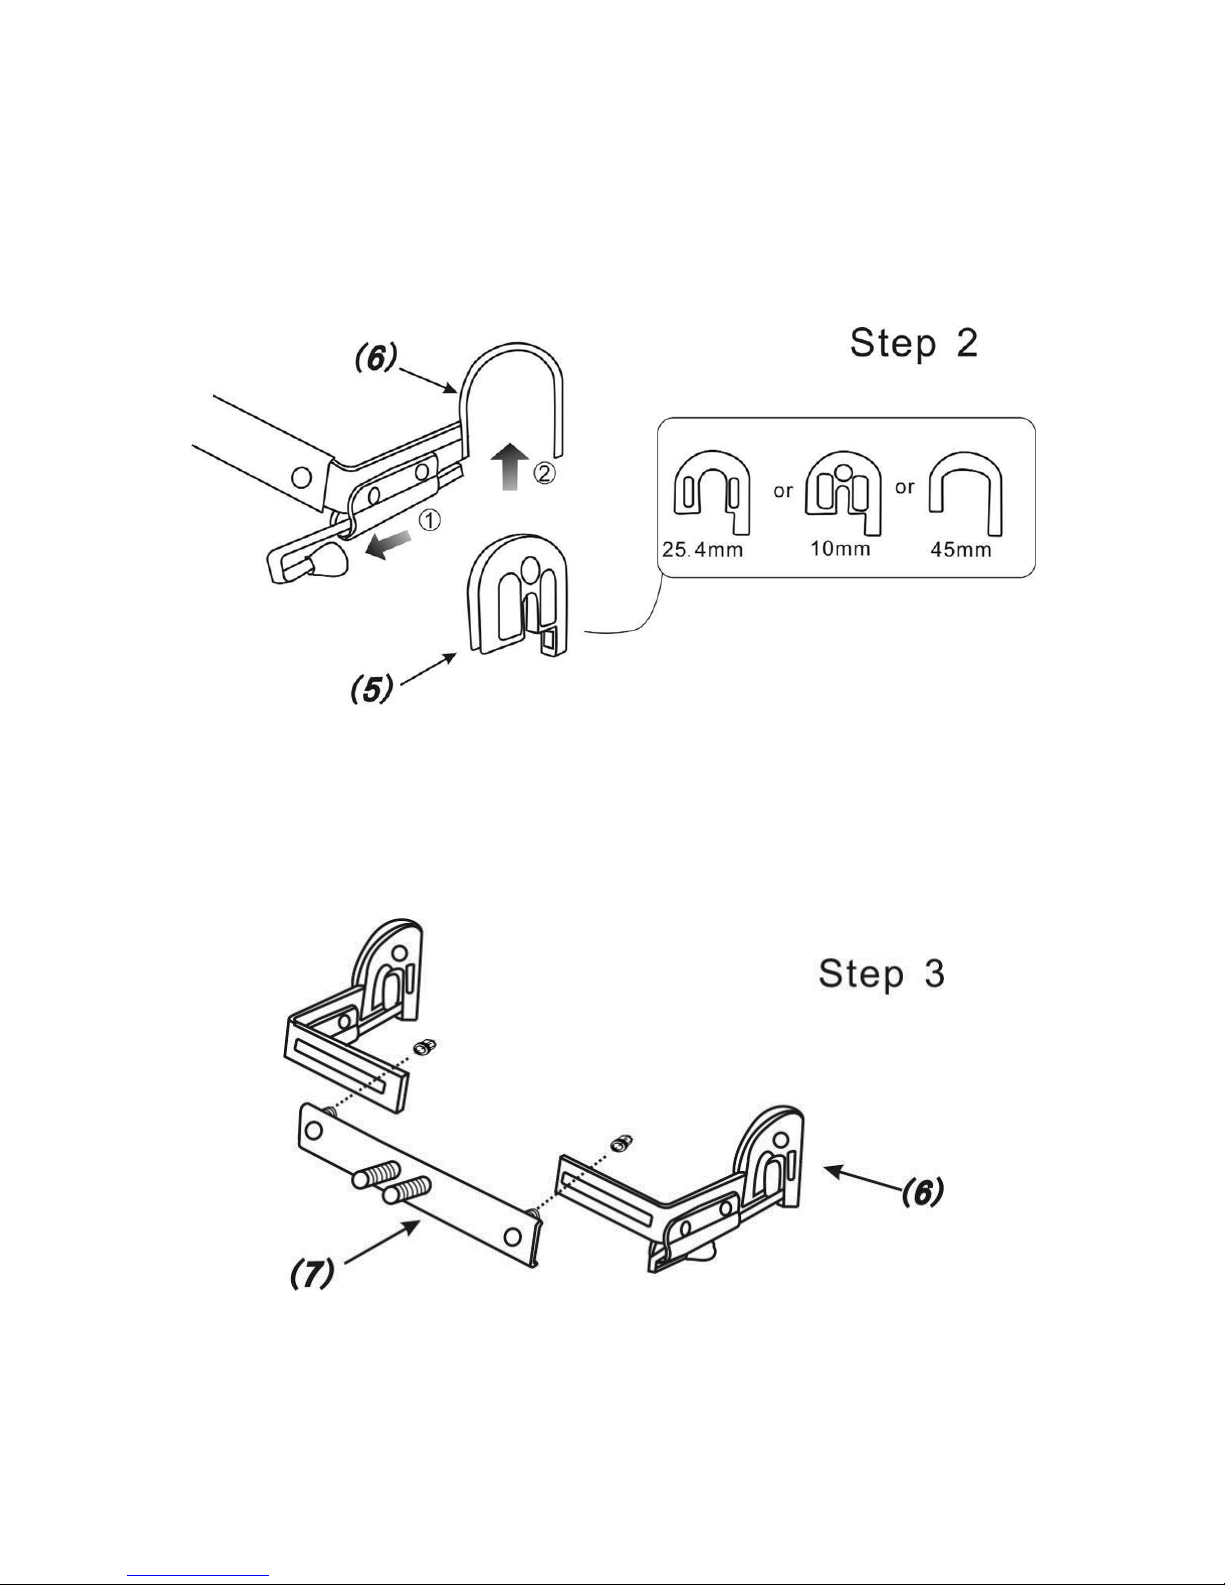
Step 2 The coupling part (6) Junior X Rider is provided with 3 pairs of adaptors that fit
most of the baby carriages at the rear part for 10mm axel(folding pate), 1”(25.4mm)
tube, and up to 45mm tube. Assemble the fitting pairs of adaptor in the coupling wire by
pulling and hold the trigger as illustrated and sliding the adaptor up into the coupling
wire at both sides.
Step 3 The coupling part (6-7) has already been pre-assembled by the manufacturer as
per the following drawing. If the pram is equipped with a basket, it can be of help if some
basket wires are cutoff so that sufficient space can be created for the coupling hooks.

Step 4 Measure the axle height of your pram. Screw connect the L-attachment (9)
provisionally with the coupling plate (7), depending on the axle height with the
L-attachment upward or downward. (see drawings)
Step 5 Assemble the foot-board (1) on the L-attachment (9) using the screws, washers
(10) and nuts (8).Hang the coupling set onto the pram axle with both hooks. Alter the
height on the L-bar (9) by selecting the corresponding hole height (9) until the board is
positioned horizontally to the ground. The foot-board is positioned horizontally at a
height of 16 cm above the ground.
Remark: Use the lid to cover the cavity of board in the use of standing board.
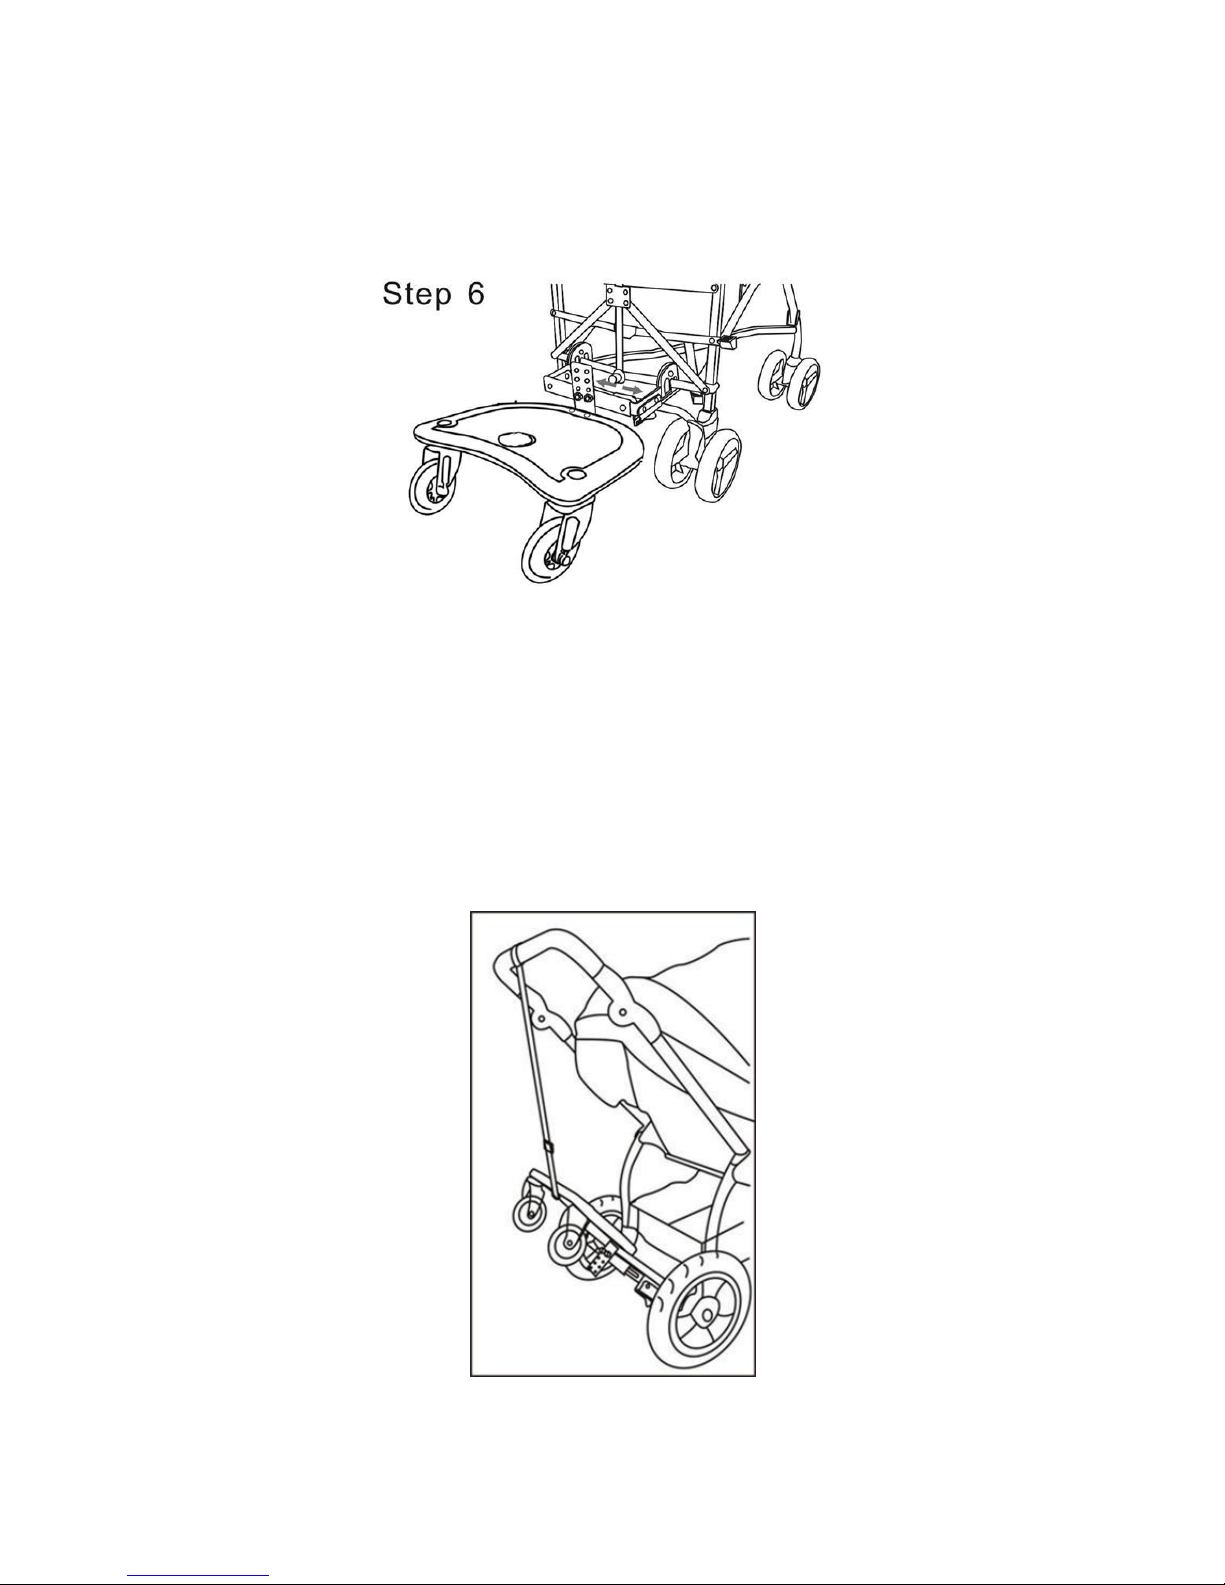
Step 6 Now adapt the coupling parts (6L-6R) to the pram axle as far as the greatest
possible width. Fix all screws in this position. Junior X Rider is now ready for use as a
standing platform.
Step 7. Junior X Rider is equipped with a adjustable strap (11) that helps to storage the
hae unit when not in use.
Attach the strap onto the handle bar and hook the unit at the bottom firmly as illustrated.
Attention: Storage strap may not be suitable for some baby buggies. Please consult with
the vendor for information.
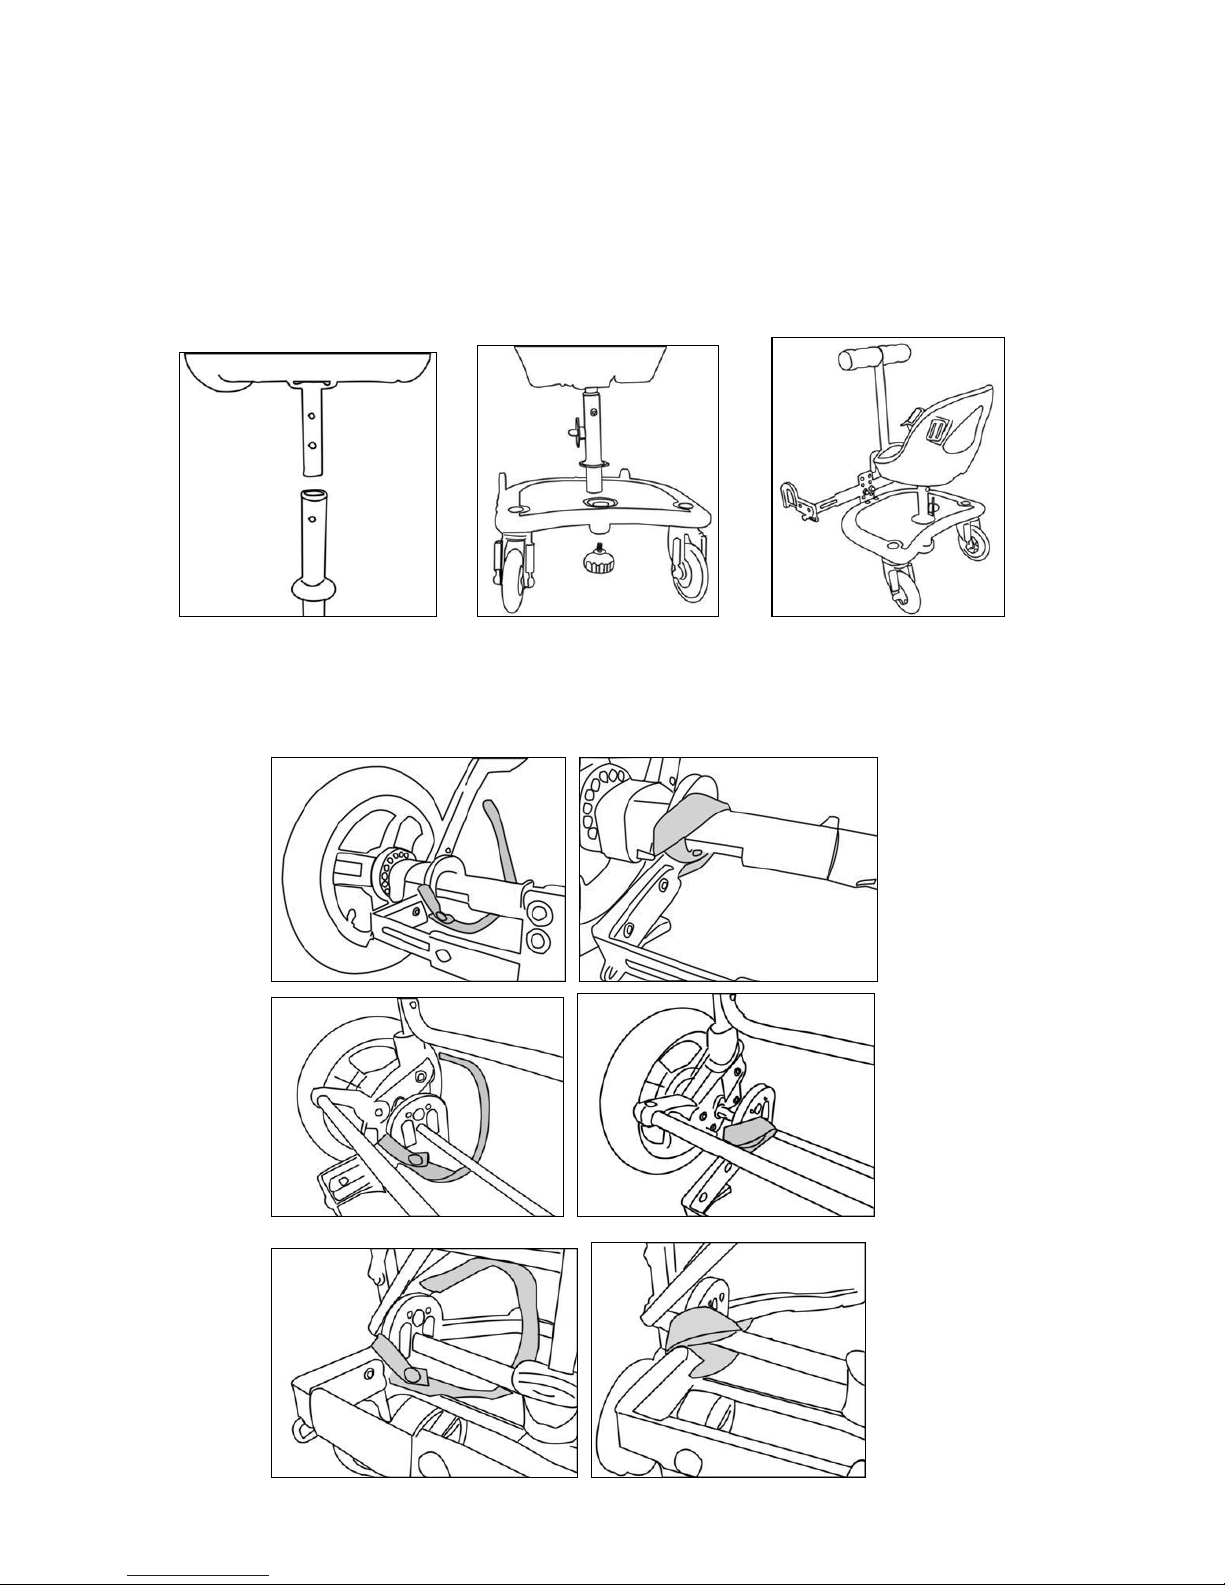
Step 8. Convert the unit to be a seating rider.
Remove the plastic lid (12) from the foot-board. Mount it to the seat post for storage.
Connect the seat (13) with the seat connecting post (14)and insert the seat post and
fasten it with the fasten knob (15).
Please make sure it is securely tightened before in use.
Adjust it to the desired height of seat and fastened it with screws securely.
Your Junior X Rider is now ready to use as a seating rider.
Coupling strap
Junior X Rider is equipped with a pair of strap to provide extra safety for the connecting.
Fasten the strap as illustrated. Please make sure it is securely fastened before in use.

Safety instructions
● Do not use the Junior X Rider until your child can walk independently and without
help. Children must only be transported on the foot-board in a standing position.
● Allow your child to alight from the Rider before reaching pavement edges, stairs, steep
paths, tight corners, as well as when maneuvering backwards.
● There may be types of pram for which the Junior X Rider is not suitable because
the coupling cannot be attached firmly to the frame construction. Consult your
specialist dealer before making your purchase.
● Before starting out on each journey, check whether Board and pram are correctly
connected to one another.
● From time to time, check that all screws and mountings of the Junior X Rider are
sitting firmly and that all parts of the pram are OK.
● No alterations must be made to the Junior X Rider or pram which result in safety no
longer being guaranteed.
● In the event of any possible damage to the device, only original replacement parts of
the manufacturer must be used.
● The Junior X Rider is not suitable for use on snow or soft surfaces.
● Clean the Board and the wheels from time to time with warm soapy water.
● Please keep the plastic packing away from children or dispose of it as there is a risk of
suffocation.
● Keep the instruction manual carefully for any possible subsequent users.
● Apart from this, adhere precisely to the instructions of your pram manufacturer.
WARNING
● The use of the Junior X Rider is only admissible if there is a second child in the pram
or if the pushing handles of the pram are held tightly with both hands by an adult.
● The Junior X Rider is not a toy. Never leave your child unattended.
● The Junior X Rider must not be used if you go jogging with the pram.
● The Junior X Rider is designed for children upwards of 15 months and up to a
maximum weight of 25kg. In order to guarantee the safety and functionality of the
device, avoid any overloading and under no circumstances use it for transporting other
Items.
Importer:ENGLACHA USA INC
www.englachausa.com
Table of contents


