ENKIN SS-EN-00-ZDM150 User manual

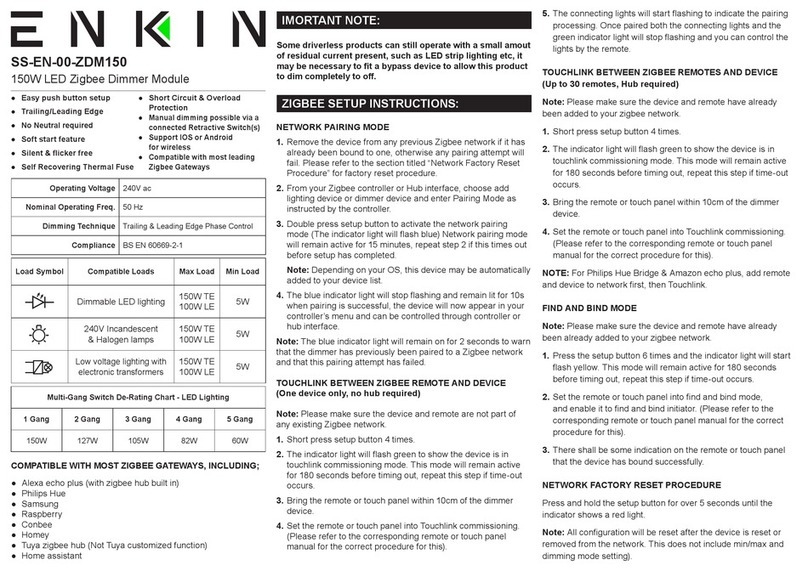
SS-EN-00-ZDM150
150W LED Zigbee Dimmer Module
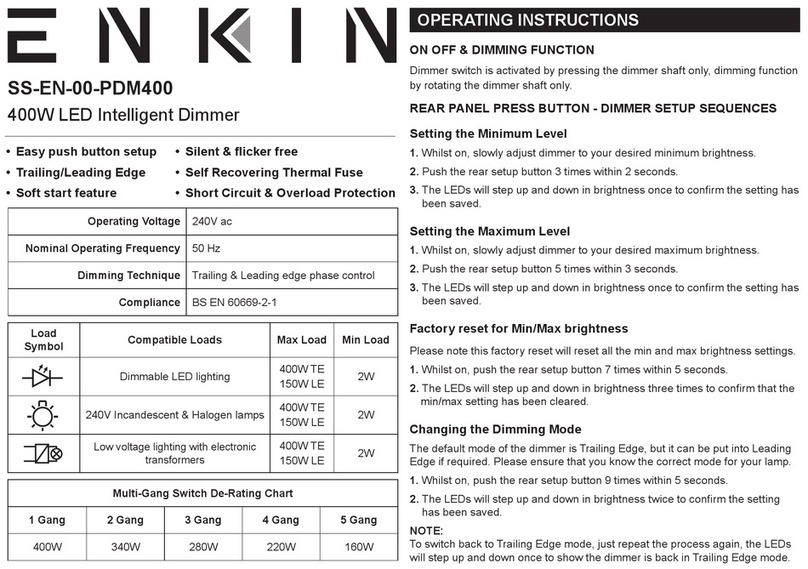
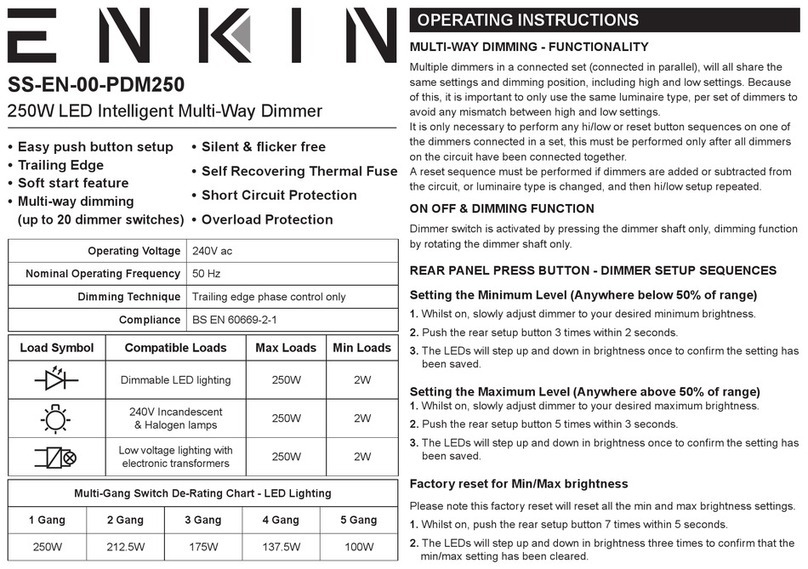
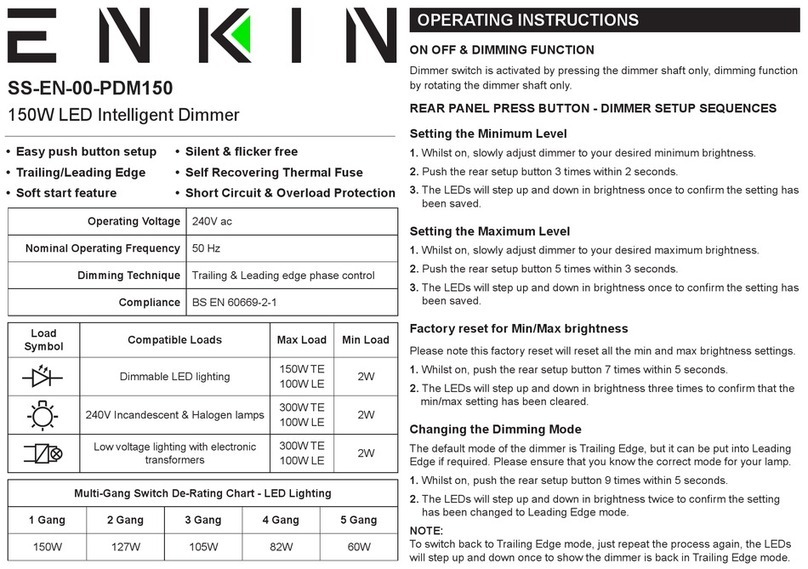
Operating Voltage 240V ac
Nominal Operating Freq. 50 Hz
Dimming Technique
Trailing & Leading Edge Phase Control
Compliance BS EN 60669-2-1
Load Symbol Compatible Loads Max Load Min Load
Dimmable LED lighting 150W TE
100W LE 2W
240V Incandescent
& Halogen lamps
150W TE
100W LE 2W
Low voltage lighting with
electronic transformers
150W TE
100W LE 2W
Multi-Gang Switch De-Rating Chart - LED Lighting
1 Gang 2 Gang 3 Gang 4 Gang 5 Gang
150W 127W 105W 82W 60W
COMPATIBLE WITH MOST ZIGBEE GATEWAYS, INCLUDING;
●Alexa echo plus (with zigbee hub built in)
●Philips Hue
●Samsung
●Raspberry
●Conbee
●Homey
●Tuya zigbee hub (Not Tuya customized function)
●Home assistant
NETWORK PAIRING MODE
1. Remove the device from any previous Zigbee network if it has
already been bound to one, otherwise any pairing attempt will
fail. Please refer to the section titled “Network Factory Reset
Procedure” for factory reset procedure.
2. From your Zigbee controller or Hub interface, choose add
lighting device or dimmer device and enter Pairing Mode as
instructed by the controller.
3. Double press setup button to activate the network pairing
mode (The indicator light will ash blue) Network pairing mode
will remain active for 15 minutes, repeat step 2 if this times out
before setup has completed.
Note: Depending on your OS, this device may be automatically
added to your device list.
4. The blue indicator light will stop ashing and remain lit for 10s
when pairing is successful, the device will now appear in your
controller’s menu and can be controlled through controller or
hub interface.
Note: The blue indicator light will remain on for 2 seconds to warn
that the dimmer has previously been paired to a Zigbee network
and that this pairing attempt has failed.
TOUCHLINK BETWEEN ZIGBEE REMOTE AND DEVICE
(One device only, no hub required)
Note: Please make sure the device and remote are not part of
any existing Zigbee network.
1. Short press setup button 4 times.
2. The indicator light will ash green to show the device is in
touchlink commissioning mode. This mode will remain active
for 180 seconds before timing out, repeat this step if time-out
occurs.
3. Bring the remote or touch panel within 10cm of the dimmer
device.
4. Set the remote or touch panel into Touchlink commissioning.
(Please refer to the corresponding remote or touch panel
manual for the correct procedure for this).
ZIGBEE SETUP INSTRUCTIONS:
IMORTANT NOTE: 5. The connecting lights will start ashing to indicate the pairing
processing. Once paired both the connecting lights and the
green indicator light will stop ashing and you can control the
lights by the remote.
TOUCHLINK BETWEEN ZIGBEE REMOTES AND DEVICE
(Up to 30 remotes, Hub required)
Note: Please make sure the device and remote have already
been added to your zigbee network.
1. Short press setup button 4 times.
2. The indicator light will ash green to show the device is in
touchlink commissioning mode. This mode will remain active
for 180 seconds before timing out, repeat this step if time-out
occurs.
3. Bring the remote or touch panel within 10cm of the dimmer
device.
4. Set the remote or touch panel into Touchlink commissioning.
(Please refer to the corresponding remote or touch panel
manual for the correct procedure for this).
NOTE: For Philips Hue Bridge & Amazon echo plus, add remote
and device to network rst, then Touchlink.
FIND AND BIND MODE
Note: Please make sure the device and remote have already
been already added to your zigbee network.
1. Press the setup button 6 times and the indicator light will start
ash yellow. This mode will remain active for 180 seconds
before timing out, repeat this step if time-out occurs.
2. Set the remote or touch panel into nd and bind mode,
and enable it to nd and bind initiator. (Please refer to the
corresponding remote or touch panel manual for the correct
procedure for this).
3. There shall be some indication on the remote or touch panel
that the device has bound successfully.
NETWORK FACTORY RESET PROCEDURE
Press and hold the setup button for over 5 seconds until the
indicator shows a red light.
Note: All conguration will be reset after the device is reset or
removed from the network. This does not include min/max and
dimming mode setting).
Some driverless products can still operate with a small amout
of residual current present, such as LED strip lighting etc, it
may be necessary to t a bypass device to allow this product
to dim completely to o.
●Easy push button setup
●Trailing/Leading Edge
●No Neutral required
●Soft start feature
● Silent & icker free
●Self Recovering Thermal Fuse
●Short Circuit & Overload
Protection
●Manual dimming possible via a
connected Retractive Switch(s)
●Support IOS or Android
for wireless
●Compatible with most leading
Zigbee Gateways

WARNING
RISK OF ELECTRIC SHOCK
●Hazardous voltage and electrical current may be present at the wire leads of this
product even when the device is switched o.
●Lock out and tag the input circuit before accessing the wiring connections.
●This device must be installed by a qualied and experienced electrician in
accordance with applicable current electrical regulation.
●To comply with all safety standards, the product must be used only for the
purpose described in this instruction and must be installed in accordance with
the wiring rules and regulation in the location where it is installed.
●There are no user serviceable parts inside the product.
Failure to follow these instructions can result in death or serious injury.
EQUIPMENT DAMAGE HAZARD
●Install the device according to instructions in this document.
●Pay attention to the specications and wiring diagrams related to the installation.
●Do not use this product for any other purpose than specied in this instruction.
●The product is suitable for indoor use only.
●Apply IEC60898-1 compliant 250V~ 6A MCB as an overload protective device.
The installation of electrical products is inherently dangerous and can lead to
serious injury or death. The products we sell MUST be installed by a qualied and
experienced electrician in accordance with applicable current electrical regulation.
Any advice, guidance or other information provided by Enkin on their website or within
any of our publications cannot completely anticipate your situation and common
sense must prevail. Products need to be checked prior to installation and regularly for
damage, wear and tear. Products should be returned and not used if in any doubt of
their integrity.
Electrical rated loads and limits of a given product should NEVER be exceeded at
any time. The electricity supply should always be isolated at its source (Distribution
Board) before attempting any installation or maintenance.
No advice or information, whether oral or written, obtained by you from us or through
the service, our employees, consultants and/or retailers shall create any warranty not
expressly made herein.
You agree to assume all and any risk resulting from the utilisation of information
provided by Enkin. You also expressly agree not to hold us responsible for any
damage, personal injury, death or loss resulting from your use of our information,
service or regulatory compliant products.
ENVIRONMENTAL PROTECTION
Waste electrical products should not be disposed of with household waste.
Please recycle where facilities exist. Check with your local authority or retailer for
recycling advice.
Manual control of the On/O function and dimming up and down can
be achieved with a connected Retractive Switch, or multiple (parallel)
Retractive Switches. Please refer to example circuit diagrams to the right
of this text for some connection examples.
A fast click of the Retractive Switch will turn the lamp (or Load) on and o,
holding the switch will alternately dim the lamp up or down, release the
switch when desired lamp brightness has been achieved.
The minimum/maximum level and dimming mode can be manually
adjusted by following the procedures below.
SETTING THE MINIMUM LEVEL
1. Whilst on, adjust dimmer to your desired minimum brightness.
2. Push the rear setup button 3 times within 2 seconds.
3. The LEDs will step up and down in brightness once to conrm the
setting has been saved.
SETTING THE MAXIMUM LEVEL
1. Whilst on, adjust dimmer to your desired maximum brightness.
2. Push the rear setup button 5 times within 3 seconds.
3. The LEDs will step up and down in brightness once to conrm the
setting has been saved.
FACTORY RESET FOR MIN/MAX BRIGHTNESS
1. Please note this factory reset will reset all the min and max brightness
settings.
2. Whilst on, push the rear setup button 7 times within 5 seconds.
3. The LEDs will step up and down in brightness three times to conrm
that the min/max setting has been cleared.
CHANGING THE DIMMING MODE
The default mode of the dimmer is Trailing Edge, but it can be put into
Leading Edge if required. Please ensure that you know the correct mode
for your lamp.
1. Whilst on, push the rear setup button 9 times within 5 seconds.
2. The LEDs will step up and down in brightness twice to conrm the
setting has been changed to Leading Edge mode.
NOTE: To switch back to Trailing Edge mode, just repeat the process
again, the LEDs will step up and down once to show the dimmer is back in
Trailing Edge mode.
DIMMER SETUP INSTRUCTIONS
Enkin declares that the 150W Zigbee Dimmer Module is in
compliance with SI 2017 No. 1206 TELECOMMUNICATIONS The
Radio Equipment Regulations 2017.
The full text of the UK declaration of conformity is available at the
following internet address: https://enkin.com/ZDM150_DoC/
SIMPLIFIED DECLARATION OF CONFORMITY
LEGAL DISCLAIMER
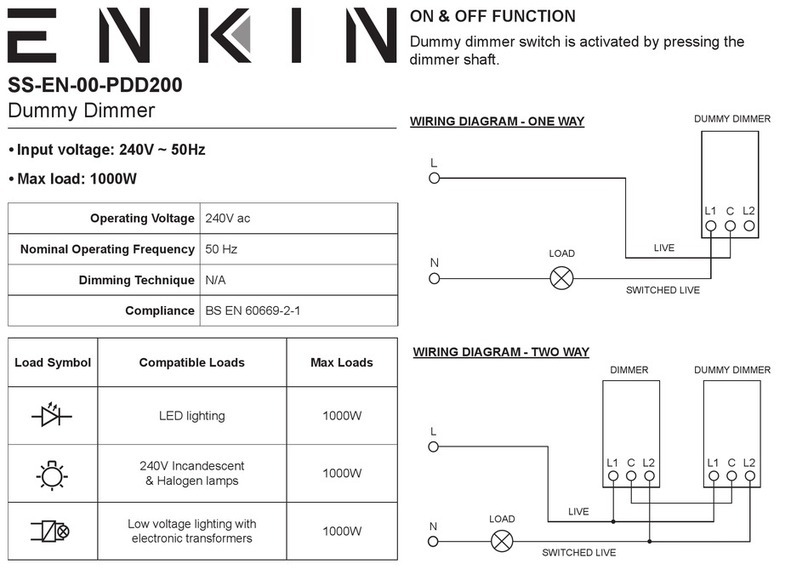
ONE-WAY PUSH RETRACTIVE SWITCH WIRING
TWO-WAY PUSH RETRACTIVE SWITCH WIRING
Enkin is a trading name of Trade Ivy. Registered in England Number: 10809945. Copyright © 2021 All Rights Reserved
Trade Ivy Limited, Unit 3C Latham Park, St Blazey Road, Par, PL24 2HY
Scan QR Code for more detailed
technical information on this product
IP20
www.enkin.com
UP
DOWN
L1
COM
COM
P
RETRACTIVE
SWITCH LOAD
N
L
INDICATOR
LIGHT
SETUP
BUTTON
NOTE:
FOR MULTIPLE SWITCH
LOCATIONS, PLEASE WIRE
SWITCHES IN PARALLEL
UP
DOWN
L1
COM
COM
P
L2 L1
COM
N
L
INDICATOR
LIGHT
SETUP
BUTTON
LOAD
2 WAY & OFF
RETRACTIVE
SWITCH
NOTE:
FOR MULTIPLE SWITCH
LOCATIONS, PLEASE WIRE
SWITCHES IN PARALLEL
Other ENKIN Dimmer manuals
Popular Dimmer manuals by other brands
Trust
Trust START-LINE ACM-250-LD manual
Electron
Electron DEM.214 user manual
Leviton
Leviton Decora Illumatech IPM06-1L installation instructions
Honeywell
Honeywell PEHA 960/3 PSB/D Installation and operating instruction
Perel
Perel 7500-3BD quick start guide
Leviton
Leviton decora smart DZ1KD Installation instructions and operators manual
Unex
Unex 25716-022-99 operating manual
DANLERS
DANLERS WACE RFD250W Installation notes
Lutron Electronics
Lutron Electronics VTELV-600M installation instructions
Lightronics
Lightronics AS-40 owner's manual
DINUY
DINUY RE KNX LE3 quick start guide
GM Lighting
GM Lighting SHWD Installation and programming instructions
