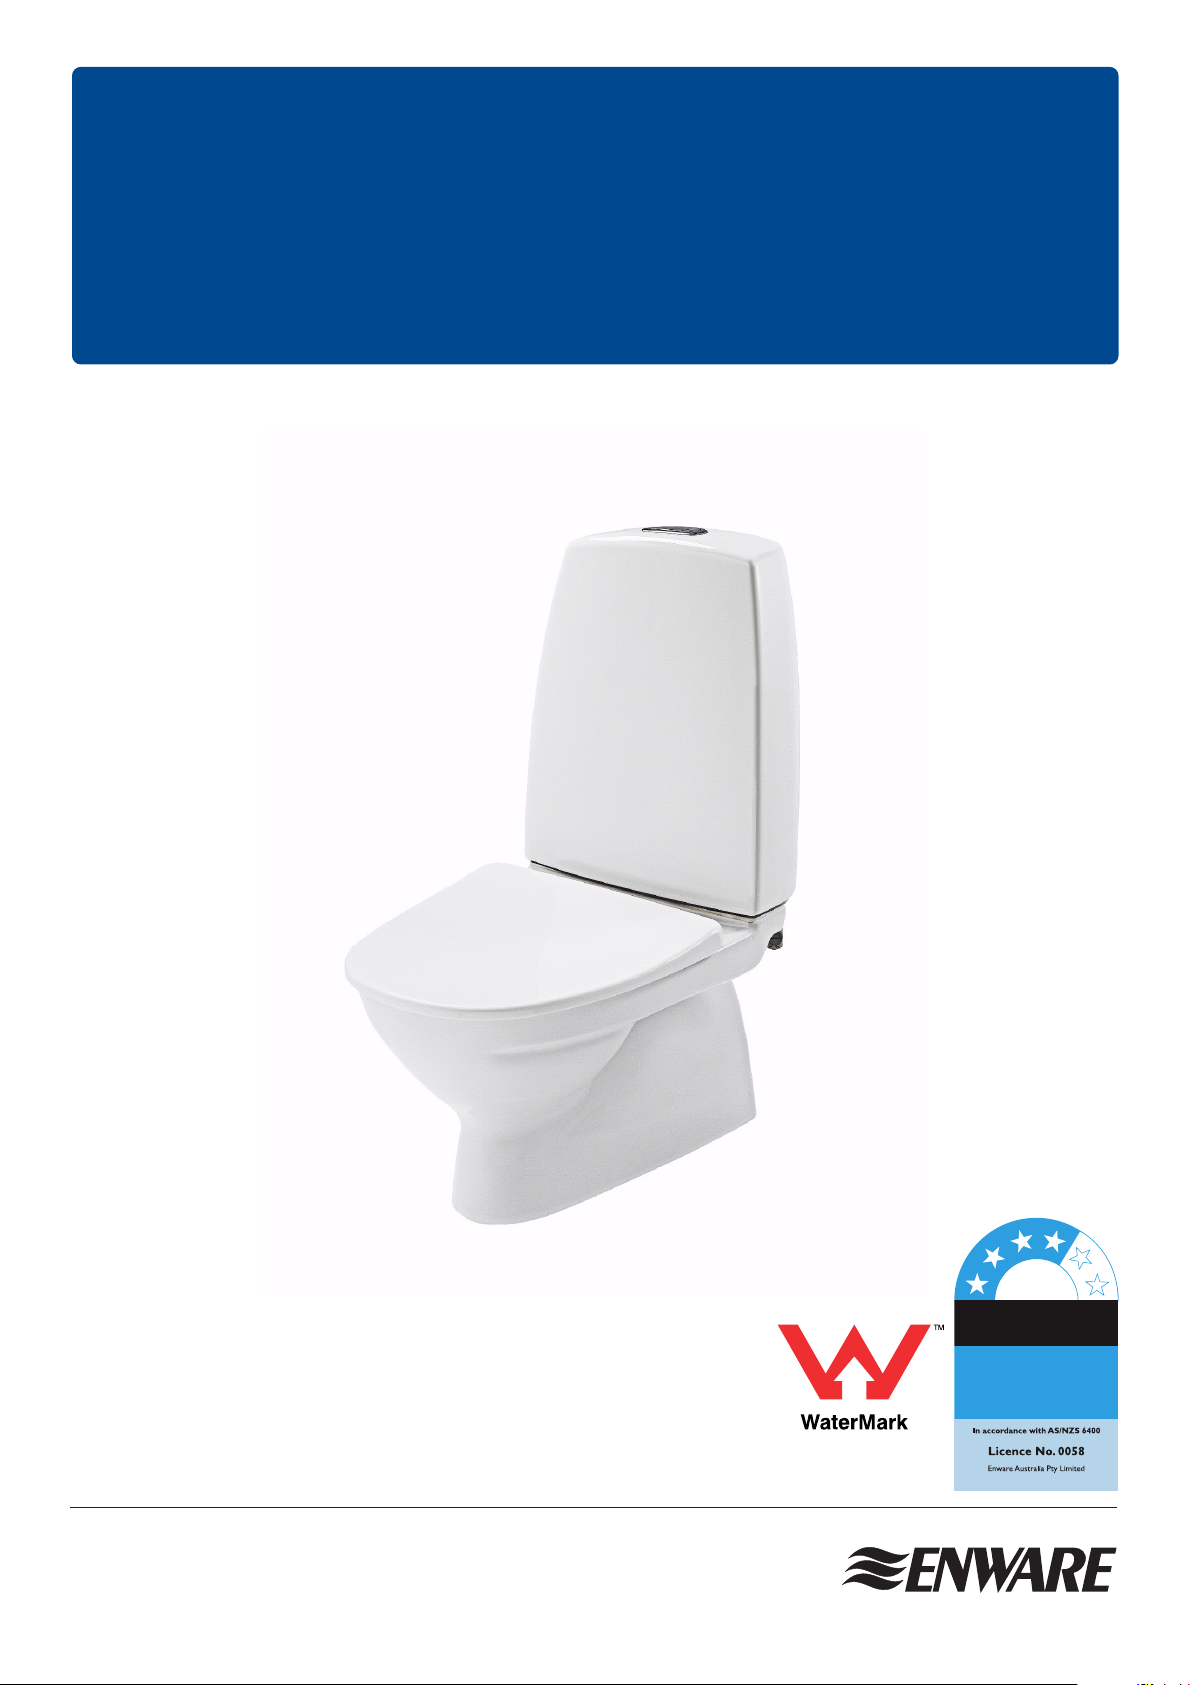
enware Ifo Sign Junior Toilet-S Trap User manual
I00126_Version 2.0__10Jun22
enware.com.au
Installation and Maintenance Instructions
Ifo Sign Junior Toilet – S Trap
The more
stars the more
water efficient
WATER RATING
www.waterrating.gov.au
3.3litres
average flush
4.5 L per full flush / 3 L per half flush
AS1172-1
WM-040187

2 Call 1300 369 273 www.enware.com.au
dimensions
205
355
25
10300
435
100*
70
Minimum
740
420
190
535
* For set-out information please refer to installation instructions
15
Pan outlet
95
Bottom
Inlet
1/2” BSP
Male
FRONT VIEW
Installation shall be in accordance with the AS/NZS3500 series of Standards, the Plumbing Code of
Australia (PCA), and the manufacturer’s instructions.
Installations not complying with AS/NZS 3500, the PCA or the manufacturer’s instructions may void
the product and performance warranty provisions.
Enware Australia advises:1. Due to ongoing Research and Development, specifications may
change without notice; 2. Component specifications may change on some export models.
All measurements are in millimetres.
Water Supply Inlet Pressure Min. 50 kPa - Max. 500 kPa
Inlet Connection 1/2” BSP
Water Inlet Connection Method Bottom Inlet
Outlet Connection DN100 DWV PVC Pan Collar
Flush Volume 4.5 Full Flush / 3.0L Half Flush (WELS 4 Star)
TECHNICAL INFORMATION
technical data

www.enware.com.au Call 1300 369 273 3
100
30
565
Pan outlet
contents
IFO733
39
Rear Cover
Toilet Seat
installation
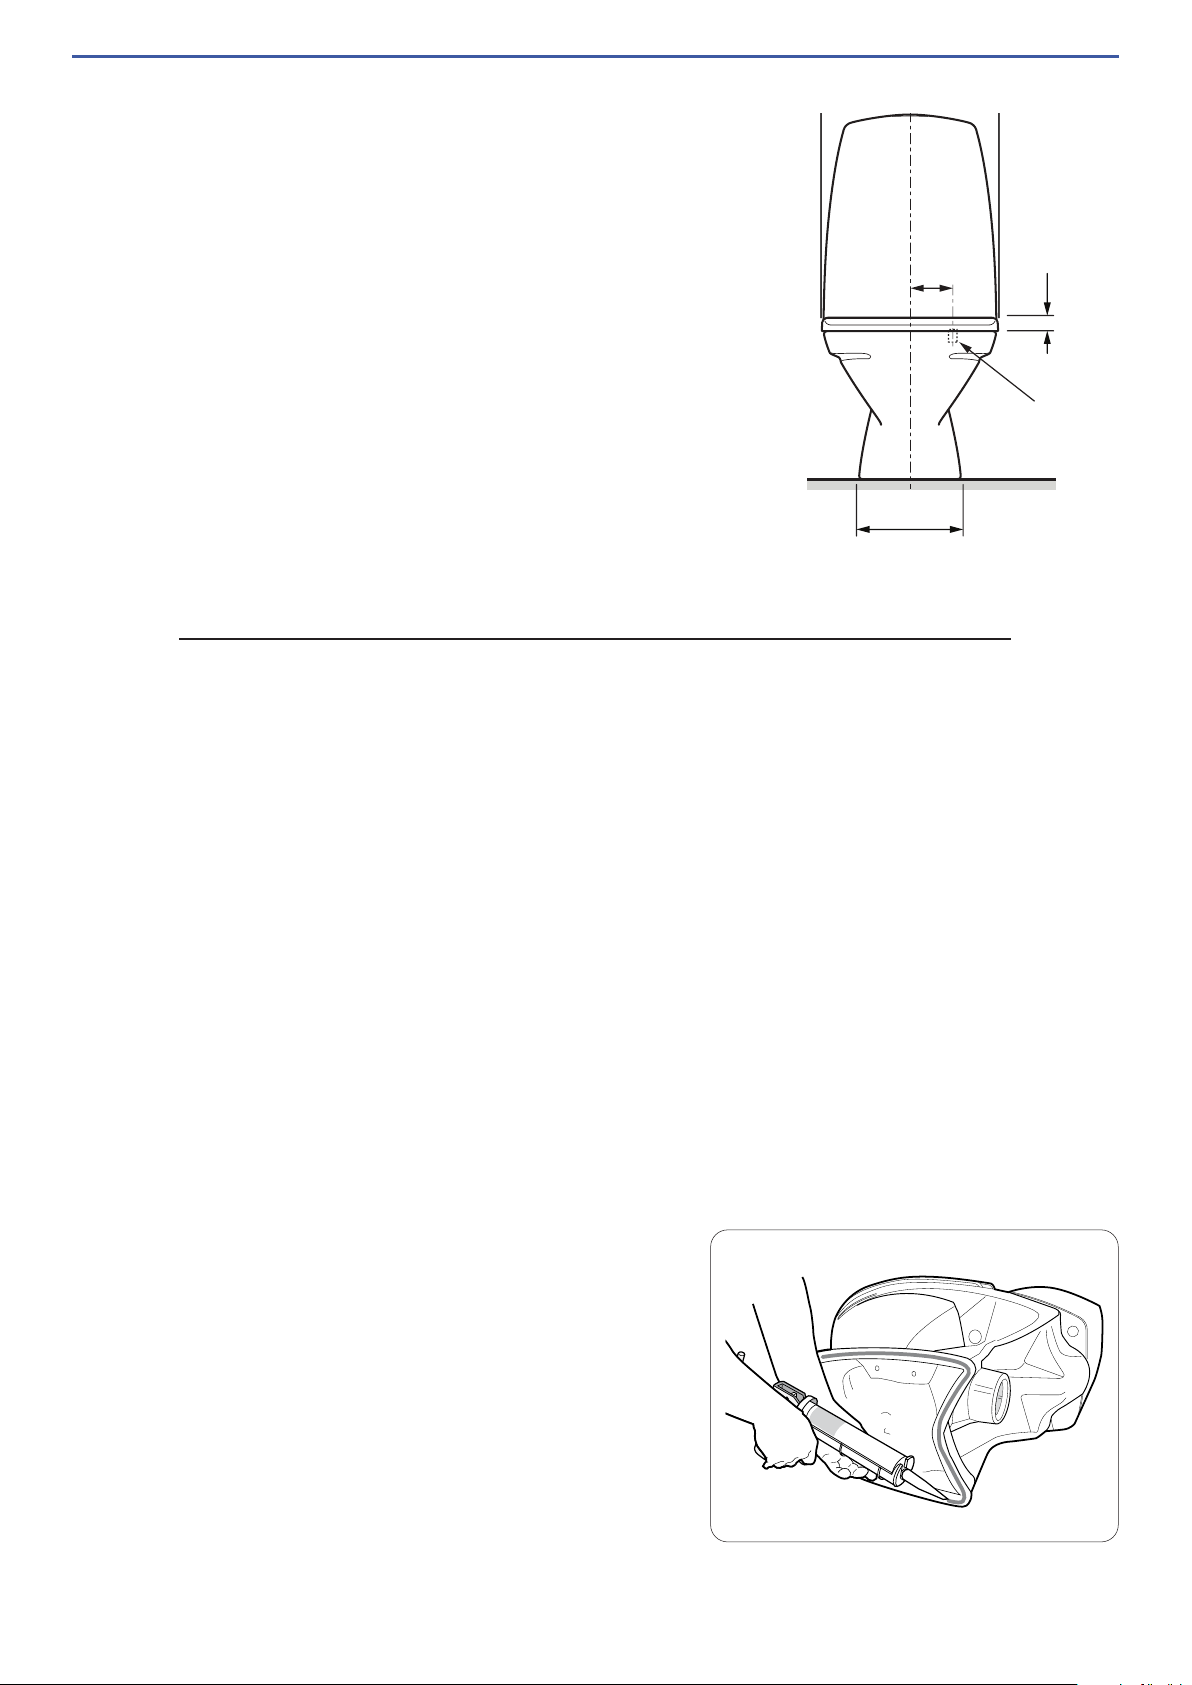
Determine location and set out for the toilet pan.
Minimum Set Out
The minimum set out to allow air circulation behind the WC pan
Distance from finished wall
to front of pan 565mm
Distance from finished wall
to back of pan 30mm
Distance from finished wall
to centre of outlet 100mm
Ø 100 DWV
Finished wall
50 –70
Min 100
Finished Floor
4 Call 1300 369 273 www.enware.com.au
Water Inlet Point
The water connection to the cistern inlet is a 1/2" BSP male,
bottom inlet.
Looking from the front of the pan, it is located on the right hand
side, on the bottom of cistern.
Install a cistern tap in the vicinity.
205
355
25
10300
435
100*
70
Minimum
740
420
190
535
* For set-out information please refer to installation instructions
15
Pan outlet
95
Bottom
Inlet
1/2” BSP
Male
FRONT VIEW
Installing the WC Pan
WC pan should be bedded with silicone sealant.
This method of fixing is only suitable for tiled or similar hard floor surfaces. It is not suitable for
vinyl floors.
Ensure the floor surface and bottom surface of pan are clean and dry - free of dust, moisture
and grease. Apply silicone sealant to the entire bottom contact surface of pan and around the
perimeter, to achieve good adhesion and to create a strong bonding between the pan and
the floor.
Install pan into position.

www.enware.com.au Call 1300 369 273 5
Install Rear Cover
After pan is levelled, water supply and waste are connected, and the pan is tested and
visually inspected for any leaks, install the rear cover to plug the inspection hole.
Apply silicone sealant around the rear cover to create a thorough seal between the rear cover,
pan and floor. Ensure no gap is left that can let any moisture to get through inside the base of
the pan.
Water Inlet Connection
Flush the water supply line to ensure the line is clear,
and connect water supply to the inlet connection of
the cistern.
The inlet connection requires sealing with a washer.
For hard pipe connection with compression nuts or
thread sealing, use a loose nut extension fitting -
IFOS-009 (Optional).
The inlet connection is flexible. Hold the inlet thread
on the hex with a spanner when making the thread
connection.
Do not use the toilet until the silicone bed has cured.
Let the silicone sealant dry for at least 24 hours before use.
6 Call 1300 369 273 www.enware.com.au
fresh odour cleaning tablets
This WC is prepared for Fresh WC function,
with a hygienic dosing of a tablet through the
flush button. The tablet is placed inside the
Cover Screw Rod by opening the flush button
and releasing the tablet in the blue Cover Screw
Rod, as illustrated.
The tablet produces a fresh odour and cleaning
effect on the whole bowl and colour.
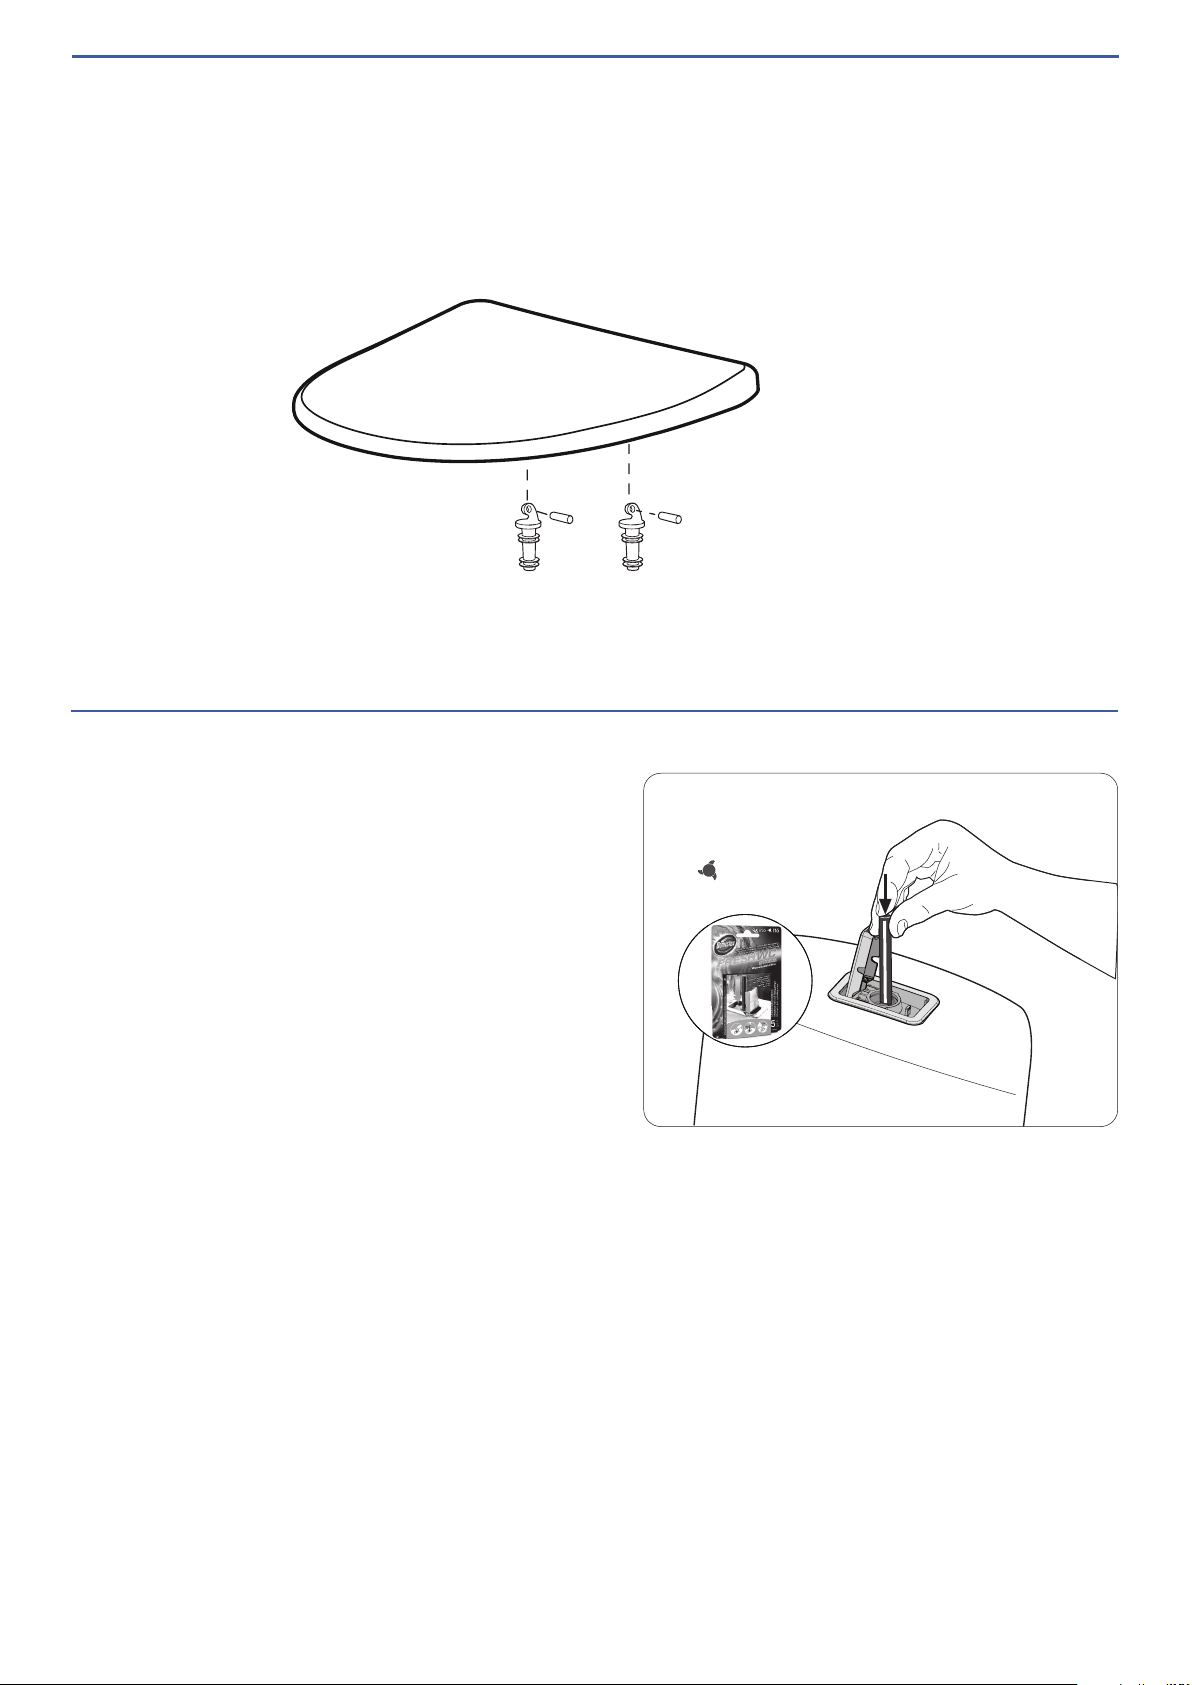
Install Toilet Seat
Attach pins to hinge. Clip hinge onto toilet seat. Feed hinges down to the holes on the pan,
and push down firmly until the fittings come to a stop.
IFO FRESH WC
ONLY
Max. 1

www.enware.com.au Call 1300 369 273 7
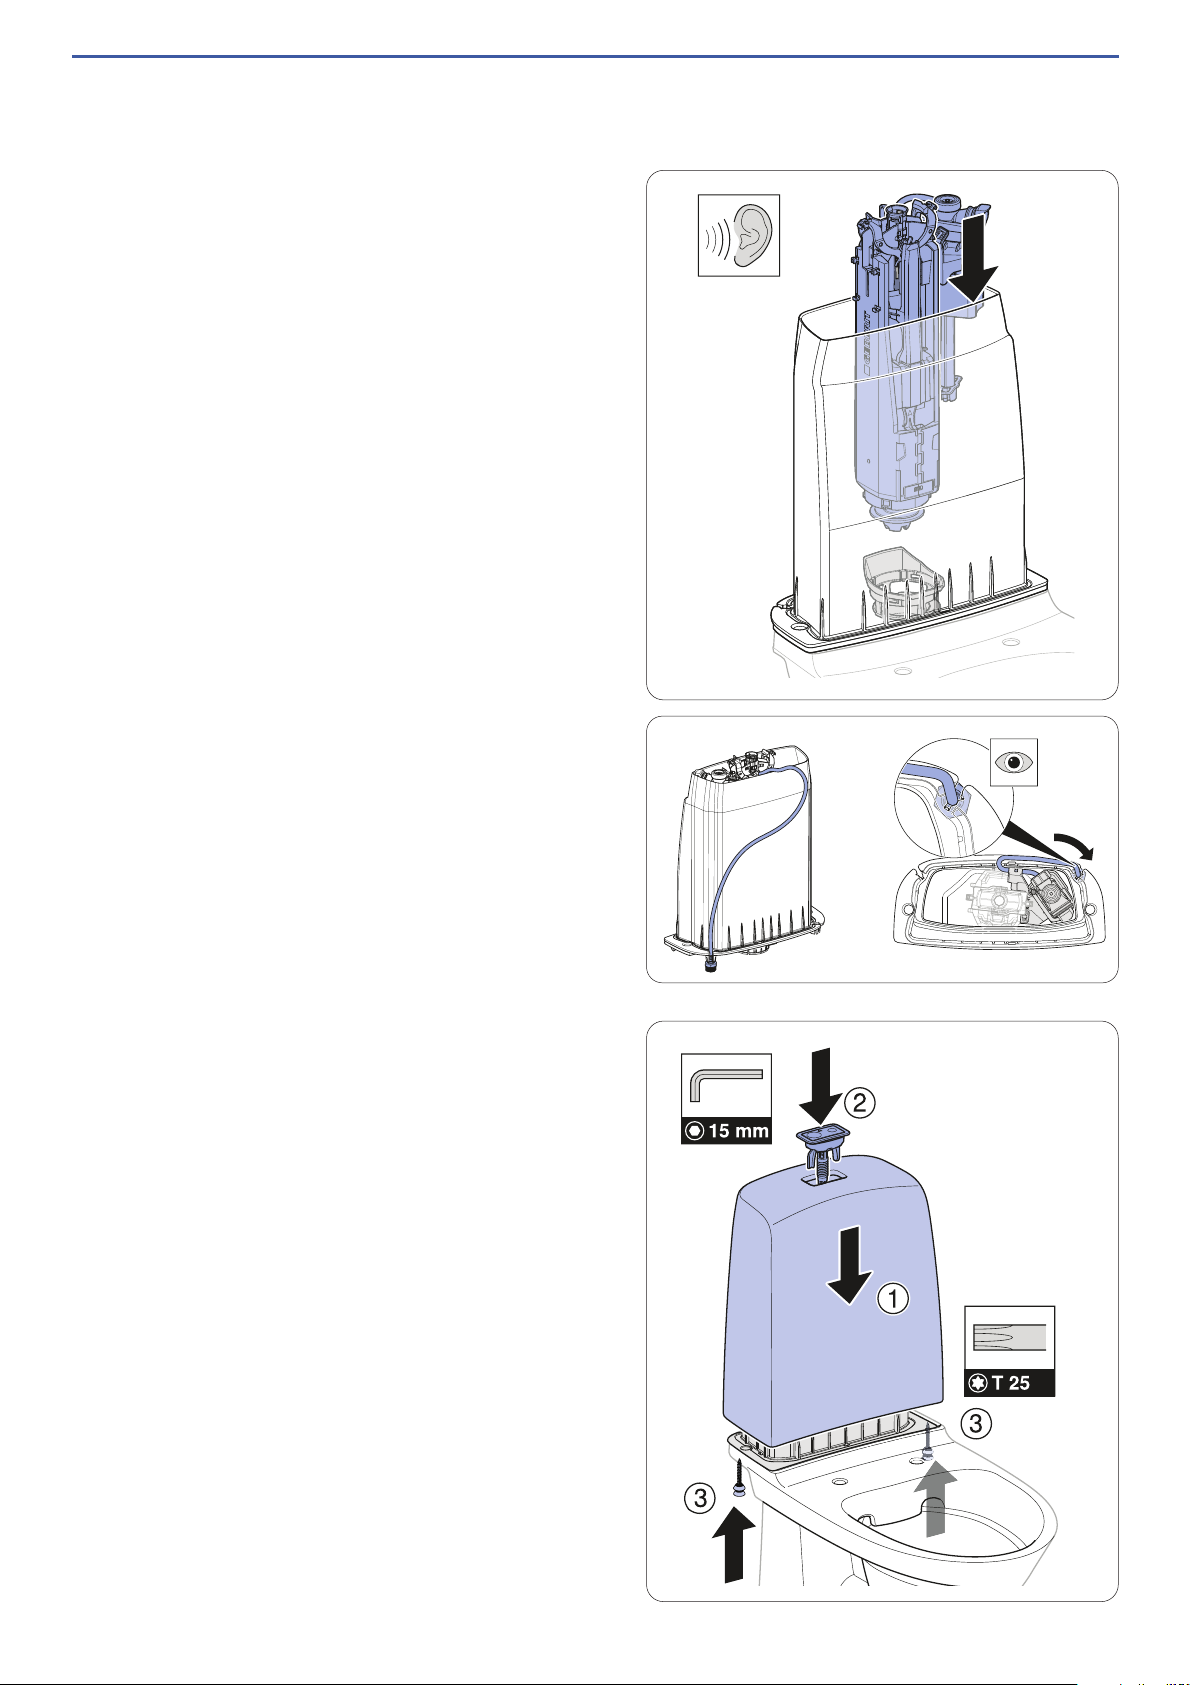
access to cistern internal components
To access the internal components of the cistern, first lift the flush button, then unscrew
Cover Screw Rod.
Next, unscrew the cistern fixing screws, and lift the ceramic shroud off the pan.

8 Call 1300 369 273 www.enware.com.au
maintenance
Outlet Valve
To access the outlet valve, twist and lift up
the valve assembly.
Inlet Valve
To access the inlet valve, first lift the
complete cistern up off the pan. Release the
inlet hose from cistern by pulling down and
out. Release the catch of the inlet valve on
the side of outlet valve, and lift up the inlet
valve assembly as shown.
Flush Volume
The flush volume is fixed at 4.5L for full
flush and 3.0.L for half flush. Flush volume
is not adjustable on this product.
www.enware.com.au Call 1300 369 273 9
Installing Inlet & Outlet Valve
Attach inlet valve onto outlet valve.
Take note of the direction of the valve to be
installed. (The right side is marked on outlet
valve. Inlet valve is on the right hand side.)
Fit outlet valve into the centre of cistern and
push down until it clicks into place.
Feed the inlet hose across the back of cistern
and attach the inlet fitting onto cistern.
Reinstalling Cistern Cover:
To reinstall the cistern cover, follow steps on
page 7 in reverse order.
The screws for the cistern mounting must be
tightened alternately to a maximum torque of
2.5 Nm.
The cover screw should be tightened to a
maximum torque of 1 Nm.

10 Call 1300 369 273 www.enware.com.au
cleaning
• WC units have a glazed surface. Glazed surfaces are easy to keep clean and are resistant
against most chemicals.
• Clean bowl regularly.
• Clean external surfaces regularly with a dry, soft cloth. Alternatively clean with hot water
and soap, using soft cloth or a sponge, and wipe dry with a cloth.
• Avoid using cleaning agents on the flush button, instead, use hot water and soap and
wipe dry with a cloth. This is because cleaning agents for porcelain are not intended for
chrome parts/plastics and can risk cracking the flush button if used frequently.
• Cleaning utensils, which contain abrasive agents, such as steelwool and green scouring
pads, must not be used. Strong abrasive materials can scratch the glaze and devoid it of
its original qualities.
• Strong acids such as hydrochloric acid or sulphuric acid, strong alkaline such as caustic
soda, and cleaning powders or pastes must not be used.
• Running WC units should be repaired immediately.
troubleshooting
PROBLEM CAUSE RECTIFICATION
Toilet not flushing away
Drain blockages
Offset pan collars are
used
Do not use offset pan collars
that can impede outlet flow.
Water constantly runs into
bowl
Inlet valve failure Replace inlet valve assembly or
inlet valve seal.
Outlet valve seal washer
is worn or damaged
Replace outlet seal washer.
Water leaks between
cistern and pan
Spreader is dislodged
from cistern or is missing
Take ceramic cistern cover off,
fit spreader back onto cistern,
re-install cistern onto pan.
Water leaks at water inlet
connection to cistern
Inlet connection is not
sealed properly
Use loose nut extension fitting
supplied (IFOS-009) on the inlet
connection.
For further assistance, call Enware on 1300 369 273.
www.enware.com.au Call 1300 369 273 11
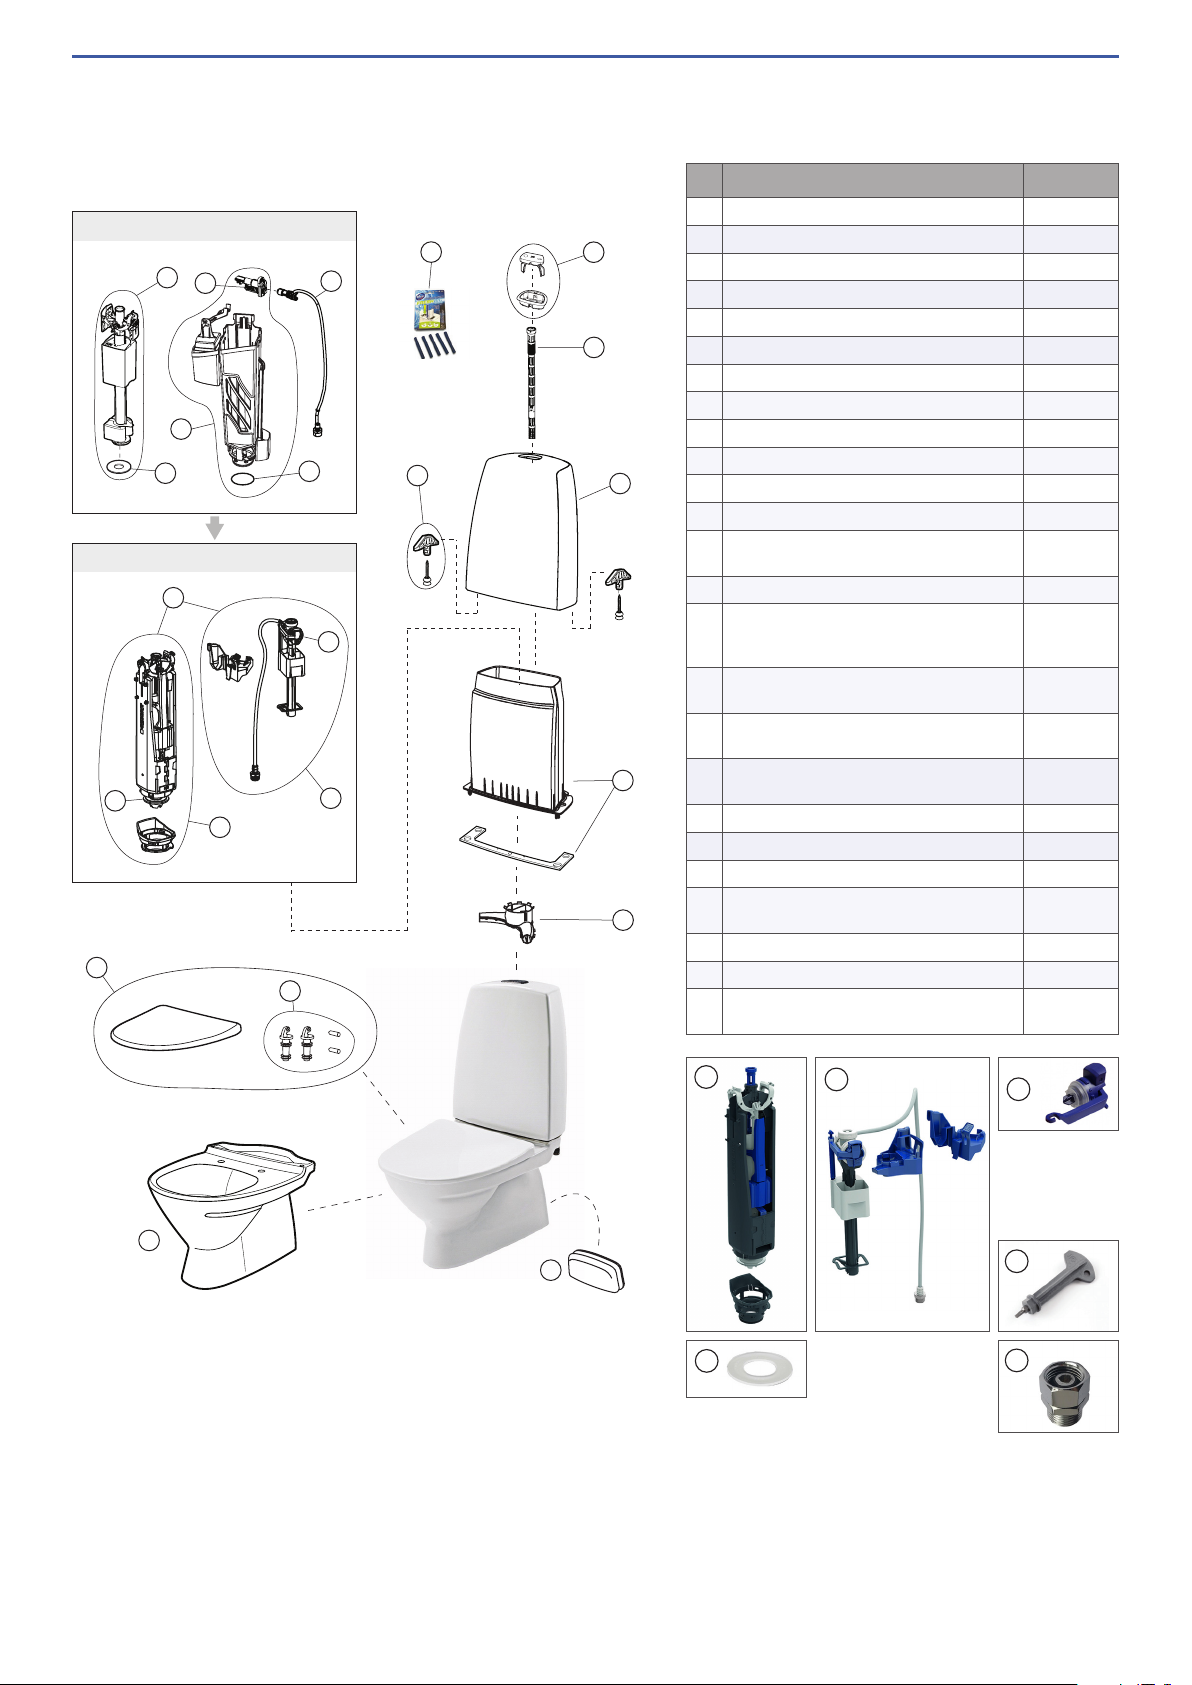
spare parts
Description
Sales Code
AInlet and outlet valve kit IFOS-105
BOutlet valve assembly IFOS-104
COutlet valve seal - 816.418.00.1 IFO245V
DInlet valve assembly IFOS-103
EInlet valve arm and seal - 243.801.00.1 IFO333V
1Sign Dual Flush Button - Chrome IFO98303
Sign Raised Dual Flush Button - Chrome IFO98308
2Cover Screw Rod IFO96763
3Cistern Cover White - Ceramic Shroud Only IFO90613
4Cistern Mounting Clip and Screw Kit (pair) IFO98949
5Inner Cistern - Tank only with seal IFO98960
6Flush Water Distributor / Spreader IFO91967
7Outlet Valve Assembly - IFO96769 replaced
by IFOS-105 IFOS-105
8Outlet Valve Seal (Cistern Seating Washer) IFO96765
9
Inlet Valve Assembly (Inlet valve body with
locking clip, shuttle piston and rubber seal)
- IFO96766 replaced by IFOS-105
IFOS-105
10 Inlet Pipe Assembly (Inlet tube with spigot
fitting) - IFO96761 replaced by IFOS-105 IFOS-105
11 Valve Frame Assembly - IFO96781 replaced
by IFOS-105 IFOS-105
12 O-ring seal for Valve Frame Assembly /
Cistern IFO96764
13 Sign Junior toilet seat (incl. hinge fixing kit) IFO99418
14 Hinge Fixing Kit for Sign Junior toilet seat IFO91041
15 Sign Junior Toilet Bowl S Trap, white IFO90423
16 Ifo S-Trap Pan Back Inspection Opening
Cover Plug -Soft IFO733
17 Fresh Sticks Blue (Pack of 5) IFO94690
18 Ifo Cistern Key with Hex and T25 Torx IFO91960
19 Loosenut Extension 1/2” BSP for inlet con-
nection IFOS-009
1
2
3
4
5
6
17
16
14
13
15
7
8
11
910
12
2011 - 2022
2022 -
A
B
CD
E
C
E
D
B
18
19

product warranty for Australia Effective 27 September 2021
Enware Australia Pty Limited (ACN 003 988 314)
(“we” or “us”) warrants that this product (also referred
to as “our goods”) will be free from all defects in
materials and workmanship for 12 months* from the
date of purchase. Our liability under this warranty
is limited at our option to the repair or replacement
of the defective product or part, the cost of repair
of the defective product or part or the supply of an
equivalent product or part, in each case if we are
satisfied the loss or damage was due to a defect in
the materials or workmanship of the product or part.
All products must be installed in accordance with the
manufacturer’s instructions, the Plumbing Code of
Australia (PCA), and AS/NZS3500 including any other
applicable regulatory requirements.
exceptions
This warranty does not apply in respect of any
damage or loss due to or arising from:
a) Failure by you or any other person to follow
any instructions for use (including instructions
and directions relating to the handling, storage,
installation, fitting, connection, adjustment or repair of
the product) published or provided by us;
b) Failure by you or any other person responsible for
the fitting, installation or other work on the product to
follow or conform to applicable laws, standards and
codes (including the AS/NZ 3500 set of Standards,
all applicable State and Territory Plumbing Codes,
the Plumbing Code of Australia and directions and
requirements of local and other statutory authorities);
or
c) Any act or circumstance beyond our control
including faulty installation or connection, accident,
abnormal use, acts of God, damage to buildings,
other structures or infrastructure and loss or damage
during product transit or transportation.
making a claim
To make a claim under this warranty you must
notify us in writing within 7 days of any alleged defect
in the product coming to your attention, provide us
with proof of your purchase of the product and have
completed the Online Product Service and Warranty
Form available on website:
www.enware.com.au/warranty-service-form
All notifications and accompanying forms must be
sent to us marked for the attention of the Enware
Australia Pty Limited, 9 Endeavour Road, Caringbah
NSW 2229. We can also be contacted by telephone
Your costs in making a claim under this warranty,
including all freight, collection and delivery costs, are
to be borne and paid by you. We also reserve the
right at our cost to inspect any alleged defect in the
product wherever it is located or installed or on our
premises.
* Ifo Toilet - Ceramics: 10 Years warranted against material
and manufacturing defects (parts only) | Flush Valves, WC
seats, Fittings and Accessories - 2 Years warranted against
material and manufacturing defects (parts only) | Pressalit
Toilet Seats (Non Care) - 10 years warranted against
material and manufacturing defects (parts only)
| Accessories & Spare Parts - 2 Years warranted against
material and manufacturing defects (parts only)
For more on warranty, see www.enware.com.au/warranty
other conditions
Except as provided or referred to in this document,
we accept no other or further liability for any
damages or loss (including indirect, consequential
or economic loss) and whether arising in contract,
tort or otherwise. Any benefits available to you under
this warranty are in addition to any non-excludable
rights or remedies you may have under applicable
legislation, including as a “consumer” under the
Australian Consumer Law. To that extent you need to
be aware that: our goods come with guarantees that
cannot be excluded under the Australian Consumer
Law. You are entitled to a replacement or refund for
a major failure and for compensation for any other
reasonably foreseeable loss or damage. You are also
entitled to have the goods repaired or replaced if the
goods fail to be of acceptable quality and the failure
does not amount to a major failure.
ADDRESS: 9 Endeavour Rd Caringbah NSW 2229 Australia
POSTAL ADDRESS: P.O. Box 2545, Taren Point NSW 2229 Australia
1300 369 273 (AUS) WWW.ENWARE.COM.AU INFO@ENWARE.COM.AU
ABN 23 003 988 314
Other enware Toilet manuals


Popular Toilet manuals by other brands


American Standard
American Standard CONCEPT Cube TF-2704 installation manual

BIOLAN
BIOLAN ECO Instructions for installation, use and maintenance

Thetford
Thetford C260 Series user manual

KELISS
KELISS T162A Series instruction manual

Silent Venus
Silent Venus SVP600 Installation & maintenance

Kohler
Kohler K-22241K Installation and care guide