ESAB EPR-X1 User manual

Powered Air-Purifying Respirator
User Instructions
Please read these instructions carefully before using the equipment!
Incorrect use can result in danger to life and health!
Manual Number: 0700500912
Revision Date: 03-08-2022
Revision Number: AB
Language: English

1. SAFETY
1.1 Meaning of symbols
!
Meaning of symbols - As used throughout this manual: Means Attention! Be
Alert! Your safety is involved.
DANGER Means immediate hazards which, if not avoided, will result
in immediate, serious personal injury or loss of life.
!CAUTION Means hazards which could result in minor personal in-
jury.
!WARNING Before use, read and understand the instruction manual
and follow all labels, employer´s safety practices and Material Safety Data
Sheets (MSDS).
NOTE!
An operation, procedure, or background information which requires additional
1.2 Safety precautions
!WARNING Before use, read and understand the instruction manual
and follow all labels, employer´s safety practices and Safety Data Sheets (SDSs).
!WARNING
repair this unit.
ARC RAYS -- Can injure eyes and burn skin.
The arc, likethe sun, emitsultraviolet (UV) andother radiation andcan injure
skin and eyes. Hot metal can cause burns. Training in the proper use of
the processes and equipment is essential to prevent accidents. Therefore:
1.
eyes when welding or watching.
2.Wear approved safety glasses with side shields under your helmet.
3.-
tion. Warn bystanders not to watch the arc and not to expose themselves to the rays
of the electric-arc or hot metal.
4.
apron may also be desirable as protection against radiated heat and sparks.
5.
partition or curtains.
6.Use goggles over safety glasses when chipping slag or grinding. Chipped slag may

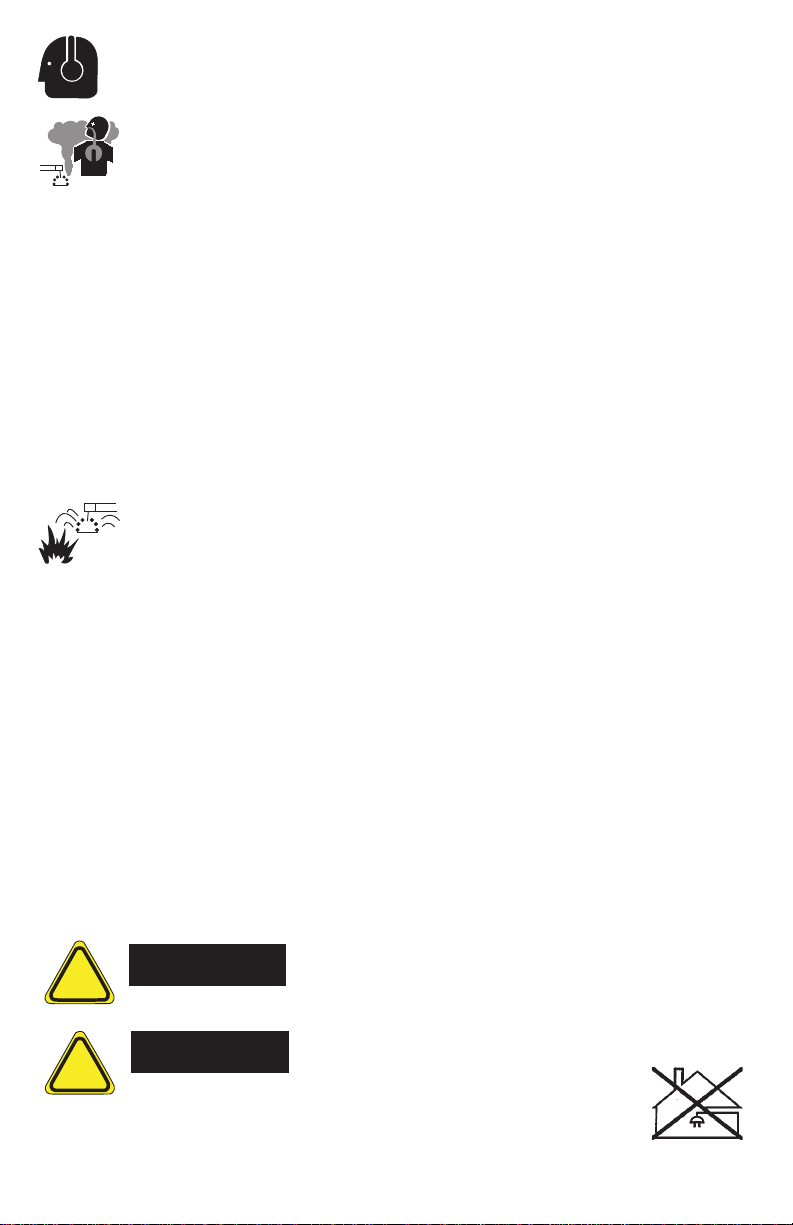
NOISE -- Excessive noise can damage hearing
Protect your ears. Wear approved ear protection if noise level is high.
FUMES AND GASES -- Fumes and gases can cause discomfort or harm,
particularly in conned spaces. Shielding gases can cause asphyxiation.
Therefore:
1.Keep your head out of the fumes. Do not breathe the fumes and gases.
2.Always provide adequate ventilation in the work area by natural or mechanical
means. Do not weld, cut or gouge on materials such as galvanized steel, stainless
steel, copper, zinc, lead beryllium or cadmium unless positive mechanical ventilation
is provided. Do not breathe fumes from these materials.
3.Do not operate near degreasing and spraying operations. The heat or arc can react
with chlorinated hydrocarbon vapors to form phosgene, a highly toxic gas and other
irritant gases.
4.If you develop momentary eye, nose or throat irritation while operating, this is an
indication that ventilation is not adequate. Stop work and take necessary steps to
improve ventilation in the work area. Do not continue to operate if physical discom-
fort persists.
5.
FIRES AND EXPLOSIONS -- Heat from ames and arcs can start res. Hot
slag or sparks can also cause res and explosions. Therefore:
1.
2.Remove all combustible materials well away from the work area or cover the materials
sawdust, liquid and gas fuels, solvents, paints and coatings paper, etc.
3.
openings are protected from hot sparks and metal.
4.Do not weld, cut or perform other hot work until the work piece has been completely
-
mable or toxic vapors. Do not do hot work on closed containers, they may explode.
5.-
6.Do not use equipment beyond its ratings. For example, an overloaded welding cable
7.After completing operations, inspect the work area to make certain there are no hot
!CAUTION
This product is solely intended for arc welding.
!CAUTION
ClassAequipment is not intended for use in residential locations
where the electrical power is provided by the public low-voltage
electromagnetic compatibility of class A equipment in those lo-
cations, due to conducted as well as radiated disturbances.

NOTE!
Dispose of electronic equipment at the recycling facility!
In observance of European Directive 2012/19/EC on Waste Electri-
cal and Electronic Equipment and its implementation in accordance
with national law, electrical and/or electronic equipment that has
reached the end of its life must be disposed of at a recycling facility.
As the person responsible for the equipment, it is your responsibility to obtain information
on approved collection stations.
For further information contact the nearest ESAB dealer.
2. INSTRUCTION
with this Instruction manual and the instructions supplied with the corresponding helmets.
Do not use the unit:
• When the blower unit is switched OFF. Little or no respiratory protection is to be ex-
pected. Rapid buildup of carbon dioxide and depletion of oxygen may occur in the
head unit.
• In an atmosphere that poses an immediate health or hygiene hazard and/or has less
than 19.5% oxygen content, or contains unknown substances.
•
•
• In areas with danger of explosion.
• In areas with high winds.
• If the blower unit malfunctions.
To ensure the unit is functioning properly please do not:
• Alter or modify in any way.
• Touch any of the moving parts.
• -
partment.
Make sure blower moving parts are not blocked and are free to move.
or facial hair is extending into the seal line.
Correct respiratory protection will not be provided if any part of the PAPR and approved air
Position the blower unit in a way that minimizes the risk of the air-equipped welding helmet
hose becoming caught up during use.
At elevations above 5,000’ (1500 meters), the PAPR will provide reduced air pressure of at
Leave the contaminated area immediately and if needed seek medical advice if:
• The Manufacturer’s Minimum Design Flow (MMDF) warning alarm sounds.
•
• Dizziness or distress occurs.
• Any part of the system becomes damaged.
•
• Contaminant can be smelled or tasted inside the head unit
• In the unlikely event of an allergic reaction to the air-helmet materials

3. APPROVALS
The system complies with the requirements of PPE Regulation 2016/425 and European
Standard EN 12941: 1998+A2:2008 class TH3 P R S L. The Respiratory System is de-
equipment can be used in any environment that requires a class TH3P breathing protection
device. It protects against particulate contamination.
All components used in Respiratory System must be ESAB approved parts and must be
used in accordance with the instructions in this manual.
1. The approval is valid only if the product is used together with approved
parts and lters.
2. Only listed particulate lter and pre-lter can be used together with this sys-
tem. Filters from other manufacturers shouldn’t be used under any circumstances,
and voids both the certication and warranty.
4. WARNING AND LIMITATIONS TO USE
Before each use, inspect the Respiratory System for damage and verify it operates properly.
verify it is providing an adequate volume of air.
Continuously wear the Respiratory System and do not remove the helmet or turn OFF the
-
tion of CO2 and oxygen level in the helmet will fall, resulting in little or no protection.
If you are not sure about the concentration of pollution, or about equipment performance,
consult an industrial safety engineer or EHS manager.
Users of this respiratory device should be properly in its correct wearing and use.

5. UNPACKING/ASSEMBLY
Check that correct number of components have been provided, as in Figure 1.
Check that the apparatus is complete, undamaged and correctly assembled. Any dam-
aged or defective parts must be replaced prior to use.
1
2
3
4
5
6
7
FIGURE 1
The package must include:
1. Waist belt and the shoulder harness
2. EPR-X1 blower assembly
3. Rechargeable lithium ion battery
4. Battery charger
5.
6.
7.
If any of the above components are not included in your kit, please contact ESAB immedi-
ately.
!WARNING The manufacturer is not responsible for personal injury
due to the incorrect usage or incorrect choice of equipment.

5.1 Filter installation and replacement
1
2
3
cover.
4
5
Clean the spark arrestor if necessary
6
-
tions in steps 3 and 4
If the lter is wet or heavily loaded with particles or damaged, it
should be replaced. Never attempt to clean the lter by any means, it can
damage the lter media easily. The pre-lter should be intact without any
tears or cuts. Please replace the pre-lter if it becomes wet or heavily loaded
with particulate.

5.2 Installing and charging the battery
1
Rotate the battery house cover knob
to “Unlock” position; Pull battery
house cover out.
2
Insert battery into battery house.
3
Close battery house cover and turn
the knob to “Lock” position
4
Take battery out from battery housing
and charge battery
The battery is partially charged when delivered. It is recommended to charge the
It is recommended to charge the batteries at 100% before each use.
The charger must not be used for anything else than it was designed for. Do not
charge the battery in a potentially explosive area. The charger must only be used indoors.
The charger regulates the charge automatically, once the battery is fully charged, it will
The charge time is 3 to 4 hours.
The battery will discharge itself after long storage periods. Always charge the bat-
tery if the device was stored for more than 15 days. When the battery is new or has been
stored for more than 3 months, charge it and discharge it at least twice in a row to resume
the nominal/rated charge capacity.
Battery charge:
1. Take battery out from battery housing
2. Connect the battery to the charger using the input located at the top of the battery.
3. Connect the charger to the main power source.
4. The state of charge is displayed via a red LED on the main power source charger.
5.
OFF and a green LED switches ON.
6. Disconnect the charger from the outlet (do not keep the charger plugged to the main
power source if it’s not in use).

5.3 Installing the respiratory system on the belt
1
Place belt and PAPR unit at correct
position
2
Unlock the hook and loop fastener
and pass through the blower assem-
bly’s belt loops;
3
Pass the fastening belt through the
gap on belt.
4
Attach the hook and loop fastener
onto the belt.
5
Attach the harness to the belt’s 4 plas-
tic rings.
Make sure the belt is securely fastened while wearing.

5.4 Connecting the tube
1
over hose
3
Connect the other end of the tube to
the headgear in the same way.
2
Connect the air tube to the Respira-
tory System and twist it clockwise to
lock its position.
1.Check that the respiratory tube is securely connected. If the tube is broken,
replace it.
!WARNING All components must be installed/ used in accordance with
this manual if the equipment is to oer the specied protection. If any component is
missing, or if anything is not clear, contact ESAB.

6. BEFORE USE / FITTING
6.1 Air ow test
1
Connect the breathing tube to the
blower unit and twist it clockwise to
lock it.
2
the tube.
3
Press the ON button and maintain
the tube in a vertical position at eye
height.
4
!WARNING 1. The airow must be tested before using.
2. If the ball can’t reach the minimum ow level, don’t use the system. Change
the lter or the battery and retest the air ow.

6.2 Air ow alarm test
1
Remove the tube from the helmet and
press the ON button.
2
Cover the air output with your hand
and wait approximately 45 seconds.
If the alarm does not work, please repair or change Respiratory System.
6.3 Fitting
Adjust the tightness of the face seal
and put on the head top.
2
Adjust the headgear to suitable tight-
ness (push and turn left to loosen,
turn right to tighten)
Make sure the face seal is positioned properly, otherwise, you will not get
sucient sealing needed to oer the correct protection factor.

7. Operation interface and Operation
7.1 Operation interface
Part 3
Part 4
Part 2
Part 1 3
4
2
1
1 ON/OFF Button.
2 shows the Status of battery.
3 shows the lter condition.
4 shows the airow level.
FIGURE 2
7.2 Operation
will be at level 1 (~170L/min).
Press the ON/OFF button and hold for 3 seconds, Device will be OFF.
The Respiratory System must be operated in the temperature range of -5°C to
+55°C and relative humidity less than 90%RH.

8. PARTS LIST
8.1 EPR-X1
Drawing No. Part No. Description
700500900 EPR-X1 PAPR system
1 700500901 EPR-X1 PAPR blower unit
2 700500902
3 700500903
4 700500904 EPR-X1 PAPR battery
5 700500905
6 700500906 EPR-X1 PAPR spark arrestor
7 700500907 EPR-X1 PAPR breathing tube
8 700500908 EPR-X1 PAPR FR fabric tube cover
9 700500909 EPR-X1 PAPR waist and shoulder harness
10 700500910 EPR-X1 PAPR universal battery charger
11 700002413 EPR-X1 PAPRAir Flow Tester
1
2
3
4
56
7
8
9
10
11

9. MAINTENANCE & STORAGE
Inspect the equipment daily and always check it for any sign of malfunction.
9.1 Maintenance
The Respiratory System unit must be checked regularly and must be changed if it is dam-
aged and cause leakage.
The breathing tube must be changed if it is broken or has creases.
The battery must be charged when the low battery alarm sounds.
Use a soft cloth to wipe the external surfaces. Do not use water or other liquids!
9.2 Storage
The Respiratory System must be stored in a dry, clean area, in the temperature range of -10
°C to +55°C and relative humidity less than 90%RH.
If the equipment is stored at temperature below 0°C, the battery must be allowed to warm
up to achieve full battery capacity. The equipment must be protected from dust, particles
and other contamination.
If the equipment is not used for a long time, the battery should be fully charged, removed
from Respiratory System unit and stored separately.
Transport the equipment with original packaging box and away from direct sunlight.

10. TROUBLE SHOOTING
Problem Probable cause Action
blinks + alarm sounds
1. Motor is stuck
2. Motor is damaged
3. Blower structure fail-
ure caused by outer
force
4. Circuit failure
Check and remove physical
obstruction and restart the
system. Return to dealer if
problem continues
Red blinks + alarm sounds
Low battery Charge the battery
blinks + alarm sounds
1. Filter blocked
2. Tube blocked Remove obstruction, change
Clean tube
Green blinks + alarm
sounds
Battery high temperature Power unit OFF and allow it
to cool.
1. No power
2. Battery contact dam-
aged
Charge the battery
Check battery contact
Battery run time is too short 1. Battery is not fully
charged
2. Filter blocked
3. Battery is damaged
Charge the battery
Remove obstruction, change
Replace battery
Air supply to hood smells
unusual 1. Filter broken
2. Tube broken
3. ADF helmet broken
Leave current area immedi-
ately.
2. Replace tube
3. Replace ADF helmet
hood 1. Breathing tube broken
2. Breathing tube broken
3. Filter is blocked
Check tube connection to
hood and Respiratory System
unit
Replace breathing tube
Remove obstruction, change

11. SPECIFICATION
Size 210*169*78mm (L*W*H)
Weight Complete unit <1.2 kg
Particle Filter 1*TH3 P R SL
Air Flow
Level 1: >170 L/min
Level 2: 190 L/min
Level 3: 210 L/min
Noise Level Max 75dBA
Operate Temperature 23°F to 131°F (-5°C~55°C)
Storage temperature 14°F to 131°F (-10°C~55°C)
Battery Type Rechargeable Li-ION 4000mAh
Expected Battery
Operation Time Level 1 > 10h
Level 2 > 8h
Level 3 > 6h
Battery Charging Time 3.5 Hours
Battery Life 500 Charges
Run Time Dependent On Air Flow Rate and Filter Load.
LED light
Battery capacity
Filter status
12. MARKING EXPLANATION
Powered ltering device:
•
a helmet or hood- Requirements, testing, marking.
• -
Warning indication
This EPR-X1 PAPR has both sound and vibration alarm function.
Each grid stands for a period of 100ms. Gray is the beep sound and blank grid is a quiet
period. If several continued grids are in gray then there is a continuous beep sound.
For example, when the current is overloaded, the system sounds like
beep~beep~beep~~~~~.

Filter jam
Low battery
Over heat
Air outlet jam
Current overload
Turn OFF the system
Change air ow speed
Turn ON the system
Install the battery
100ms per grid
109876543210
Symbols:
2797CE mark followed by number of notied body who carried
out module D surveillance.
Warranty:
The EPR-X1 Blower unit is guaranteed for a period of 12 months from date of purchase
against mechanical or electrical defects.
The EPR-X1 battery is guaranteed for a period of 6 months from the date of purchase.
The company undertakes to exchange or repair without charge, if any part found to be
defective within this period alternatively and at it’s discretion. The Company may replace.
This guarantee is subject to:
The EPR-X1 unit has been used solely for the purpose for which it is intended.
In the event of a claim, contact the retailer from which the EPR-X1 unit was purchased.
The guarantee does not cover normal wear and tear.

This page intentionally blank.

ESAB Group Inc.
2800 Airport Road,
Denton, TX 76207, USA
Table of contents
Other ESAB Respiratory Product manuals