ESI C-Plus User manual

ESI Phone
User’s Guide
FOR ESI C-Plus AND ESI C-Plus Executive
0450-1177
Rev. D
For on-line help, visit www.esi-estech.com/users.
About ESI
ESI (Estech Systems, Inc.) is a privately held corporation based in Plano, Texas. Founded in 1987, ESIdesigns and
builds innovative telecommunications products for businesses like yours. Because of their powerful combination of
value and features, ESI products are consistently recognized by industry publications and leaders.
Copyright © 2011 ESI (Estech Systems, Inc.).
Esi-Dex, Quick Groups, Quick Moves, Virtual Mailbox Key, AutoPage, Quick Page, and Verbal User Guide
are trademarks of ESI. Information contained herein is subject to change without notice. ESI products are protected
by various U.S. Patents, granted and pending. Visit ESI on the Web atwww.esi-estech.com.

Table of contents
Introduction.............................................................................A.1
ESI 40D Business Phone.......................................................A.2
48-Key Feature Phone...........................................................A.3
24-Key Feature Phone...........................................................A.4
12-Key Feature Phone (legacy product).................................A.5
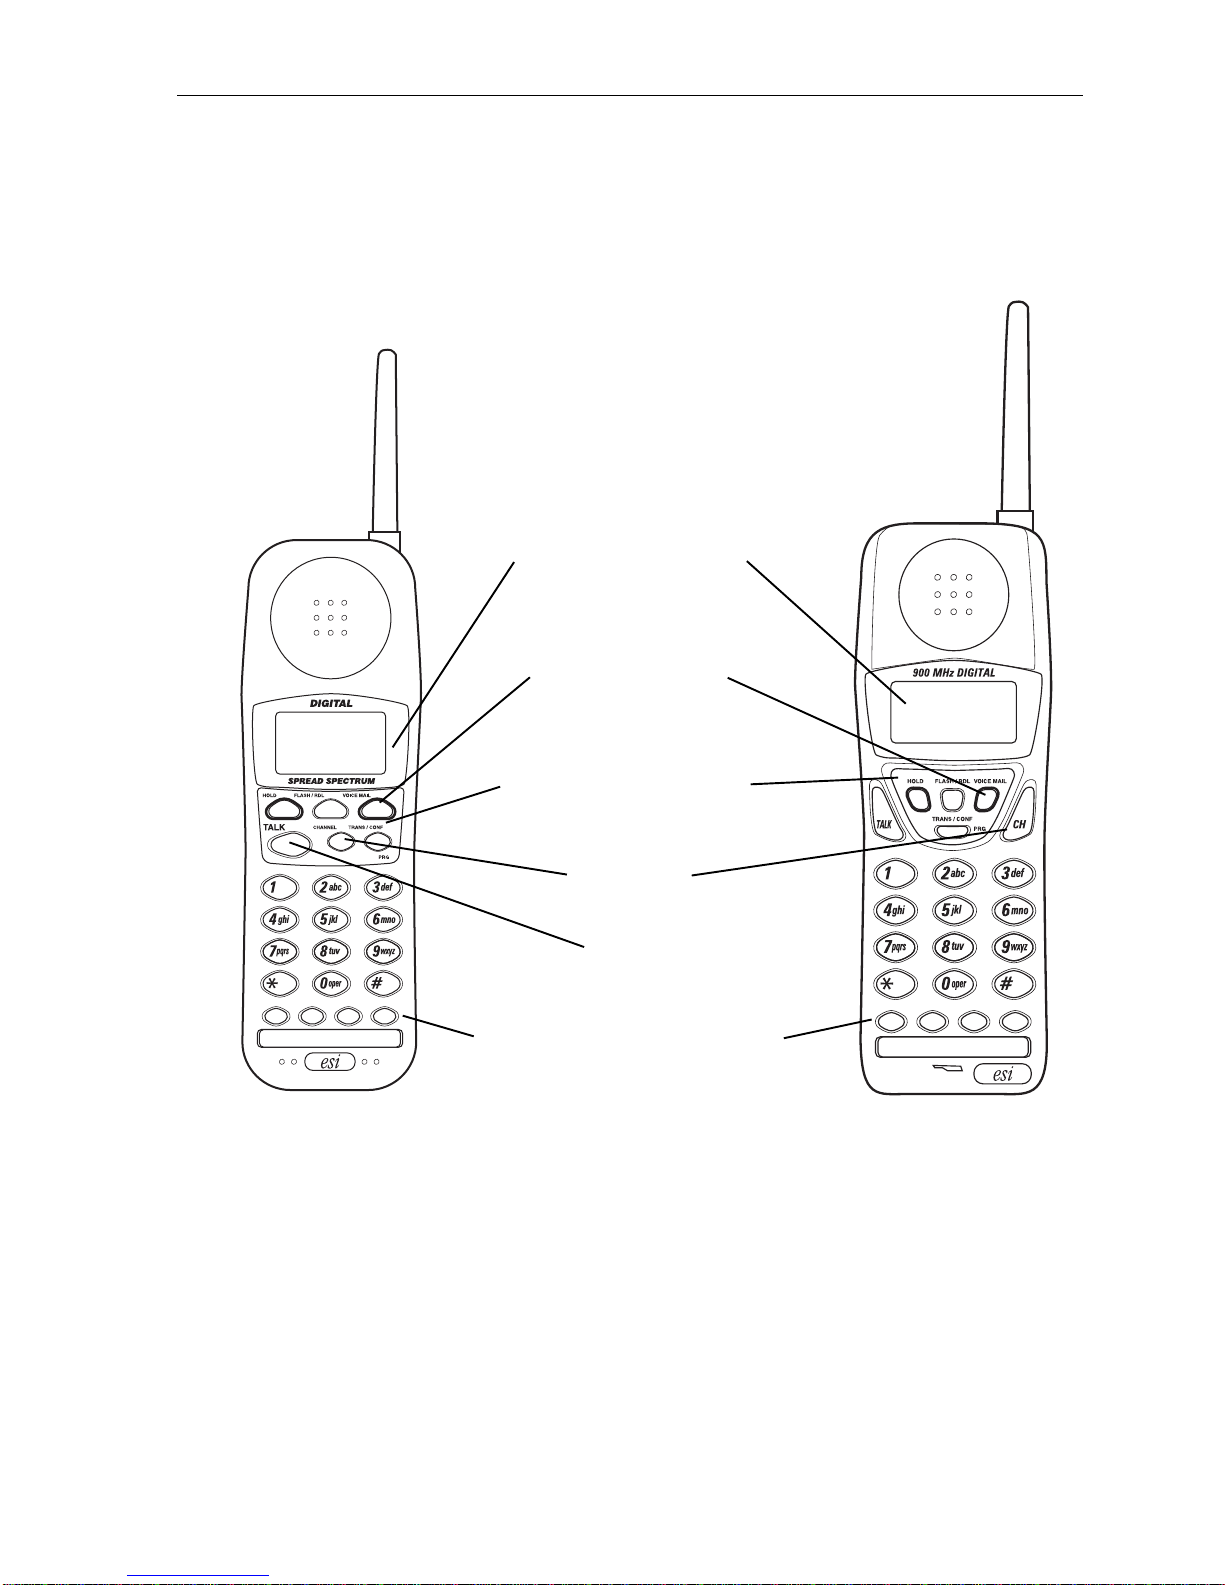
ESI Cordless Handsets..........................................................A.6
Connecting your ESI phone...................................................A.7
Help mode (Verbal User’s Guide)......................................B.1
User programming: An introduction................................C.1
User programming menu.......................................................C.1
Voice mail operation.............................................................D.1
VOICE MAIL key....................................................................D.1
Personal greetings.................................................................D.1
Leaving messages . . ............................................................D.2
Moving a message.................................................................D.2
Off-premises “reach me”........................................................D.3
Message retrieval...................................................................D.3
Live recording........................................................................D.6
Off-premises message delivery..............................................D.7
Message Recycle Bin(un-delete)..........................................D.8
Status indicator lamp.............................................................D.8
Optionalvoice mail feature: Guest mailboxes........................D.8
Optionalvoice mail feature: Broadcast mailbox (500)..........D.10
Optionalvoice mail feature: Cascade notification mailboxes D.11
ESI phone operation.............................................................E.1
Display...................................................................................E.1
Caller ID.................................................................................E.1
Keys....................................................................................... E.1
Dial tone.................................................................................E.3
Basic phone use.................................................................... E.4
Directstation selection...........................................................E.5
Transferring an outside call . . ...............................................E.6
Transferring an internal call . . ...............................................E.7
Conference calling................................................................. E.8
Call forwarding.......................................................................E.9
Call waiting .......................................................................... E.11
Hold/exclusive hold operation.............................................. E.12
Paging.................................................................................E.14
Call pickup........................................................................... E.14
Optional features.................................................................. E.15
Special keys............................................................................F.1
Esi-Dex...................................................................................F.2
Override ring...........................................................................F.9
Message monitor mode (live call screening).........................F.10
Personal greeting reminder..................................................F.10
Headset operation................................................................F.10
Outside dialtone preference.................................................F.11
Line keys..............................................................................F.11
Optional features..................................................................F.12
Analog stations .....................................................................G.1
Caller ID................................................................................G.1
Placing calls.......................................................................... G.1
Transferring calls................................................................... G.2
Conference calling................................................................. G.2
Call forwarding......................................................................G.3
Call waiting............................................................................G.3
Call hold................................................................................ G.3
Paging...................................................................................G.4
Call pick-up............................................................................G.4
Voice mail operation from an analog station..........................G.4
Analog station programming.................................................. G.7
Index

User’s Guide Introduction
A.1
Introduction
Accessing the rich ESI feature set is simple and easy through the straightforward design of ESI desktop phones
and the ESI Digital Cordless Handset. Each feature has been designed forease ofuse whileproviding
capabilities needed in an advanced business phone.
You will be able to learn many of the features by simply using your phone; and this User’s Guide will introduce
you to the wide variety of features offered by your ESI system and how to use your phone effectively to achieve
maximum benefits.
What it covers
This User’s Guide covers the use of the following with yourESI system:
• ESI 40D Business Phone
• 48-Key Digital Feature Phone
• 24-Key Digital Feature Phone
• ESI Digital Cordless Handset
• [Legacy] 12-Key Digital Feature Phone
• Analog station
How it’s arranged
• Section A — Introduction and phone illustrations
• Section B — User help
• Section C — User programming
• Section D — Voice mail operation
• Section E — Phone operation
• Section F — Special keys and features
• Section G —Analog stations
• Index
Important: If you’re using a 48-Key Feature Phone, please note that this phone has separate PROGRAM and HELP
keys, rather than the combo PROG/HELP key found on the other models supported by your ESI system.
Therefore, you should press PROGRAM if programming your phone and the instructions tell you to press
PROG/HELP; or, similarly, you should press HELP if the instructions tell you to press PROG/HELP to obtain
assistance from the Verbal User Guide described herein (see page B.1).
Voice mail options
Your ESI C-Plus phone system comes with ESI’s award-winning voice mail, including an automated attendant
and a dedicated mailbox for each station.
The automated attendant provides up to 18 branches that conveniently route callers to their desired extensions
or departments, or even destinations outside the system.
Some features are enabled by the Installer or System Administrator. Consult your System Administrator if you
are unsure aboutwhat ESI features are available.

User’s Guide Introduction
A.2
ESI 40D Business Phone
Available for the ESI C-Plus Executive system, the ESI 40D Business Phone has a variety of programmable and
built-in features. The ESI 40D Business Phone’s built-in voice mail features and voice prompts make it easy to
program and use. Up to two ESI 40D Business Phones (or two 48-Key Feature Phones, orone of each) may be
installed on an ESI C-Plus Executive system.
Items referenced elsewhere
Item Page
Item Page
PROG/HELP soft feature key C.2
Verbal User Guide and tutorial B.1
P/UP (pickup) key E.14
Status indicator lamp D.8
Fixed feature keys E.1
ESI-DEX soft feature key F.2
VOICE MAIL key D.1
RECORD key D.6
Programmable feature keys C.2
PAGE key E.14
Hint: On any of these ESI phone varieties, you can perform direct programming by holding down a
programmable feature key for at least two seconds (similar to how you might program a car radio button).
This isn’t applicable to the fixed-feature keys which, as their name implies, are already programmed.

User’s Guide Introduction
A.3
48-Key Feature Phone
The 48-Key Feature Phone has a variety of programmable and built-in features.The48-Key Feature Phone’s built-
in voice mail features and voice prompts make it easy to programand use. Up to two 48-Key Feature Phones (or two
ESI 40D Business Phones, or one of each) may be installed on an ESI C-Plus Executive system.
Items referenced elsewhere
Item Page
Item Page
PROGRAM soft feature key C.2
HELP key for Verbal User Guide and tutorial B.1
P/UP (pickup) key E.14
Status indicator lamp D.8
Fixed feature keys E.1
ESI-DEX soft feature key F.2
VOICE MAIL key D.1
RECORD key D.6
Programmable feature keys C.2
PAGE key E.14
Hint: On any of these ESI phone varieties, you can perform direct programming by holding down a
programmable feature key for at least two seconds (similar to how you might program a car radio button).
This isn’t applicable to the fixed-feature keys which, as their name implies, are already programmed.

User’s Guide Introduction
A.4
24-Key Feature Phone
Available for all ESI C-Plus systems, the 24-Key Feature Phone has a variety of programmable and built-in
features.The 24-Key Feature Phone’s built-in voice mail features and voice prompts make it easy to program
and use.
Items referenced elsewhere
Item Page
Item Page
PROG/HELP soft feature key C.2
Verbal User Guide and tutorial B.1
P/UP (pickup) key E.14
Status indicator lamp D.8
Fixed feature keys E.1
ESI-DEX soft feature key F.2
VOICE MAIL key D.1
RECORD key D.6
Programmable feature keys C.2
PAGE key E.14
Hint: On any of these ESI phone varieties, you can perform direct programming by holding down a
programmable feature key for at least two seconds (similar to how you might program a car radio button).
This isn’t applicable to the fixed-feature keys which, as their name implies, are already programmed.

User’s Guide Introduction
A.5
12-Key Feature Phone (legacy product)
The legacy 12-Key Feature Phone, still in use on many installed ESI systems, includes the basic, most
commonly used phone features. This simplified model supports neither speakerphone operation1nor Esi-Dex.
Items referenced elsewhere
Item Page
Item Page
PROG/HELP soft feature key C.2
HELP key for Verbal User Guide and tutorial B.1
P/UP (pickup) key E.14
Status indicator lamp D.8
Fixed feature keys E.1
PAGE key E.14
Programmable feature keys D.1
Note: The following features aren’t available on a 12-Key Feature Phone:
• Certain special keys and features (see “Special keys,” page F.1).
• Esi-Dex.
Additionally: to use voice mail, conference calling and mute/DND on a 12-Key Feature Phone, you must
program these features into programmable feature keys (see “Programmable feature keys,” page C.3, and
“Optional features,” page F.12).
Hint: On any of these ESI phone varieties, you can perform direct programming by holding down a
programmable feature key for at least two seconds (similar to how you might program a car radio button).
This isn’t applicable to the fixed-feature keys which, as their name implies, are already programmed.
1The 12-Key Feature Phone lacks a hands-free microphone, and thereforecan’t serve as a true two-way speakerphone. Its speaker plays pages.

User’s Guide Introduction
A.6
ESI Cordless Handsets
Available forall ESI C-Plus systems, ESI’s digital Cordless Handsets come in two models — compact and
heavy-duty — but each offers the same features. Note that they do not have the following features found on
some ESI desktop phones: speakerphone, Esi-Dex support (or ESI-DEX key), Caller ID key, Virtual Mailbox Key
support, or Verbal User Guide (or PROG/HELP key).Each model comes with a charger/AC adapter, base station,
belt clip, battery pack, and wall mount.
Two-line, 32-character display;
third line contains status icons
VOICE MAIL key (pg. D.1)
Other fixed feature keys (pg. E.1)
CHANNEL key
TALK key
Four programmable feature keys (pg. C.2)
Compact model Heavy-duty model

User’s Guide Introduction
A.7
Connecting your ESI phone
Depending on which ESI phone you have,use the appropriate diagram (below) to connect it. Each diagram
represents the panel on the phone’s underside.
Notes: The “Top of phone” and “Bottom of phone” references in these diagrams show the correct vertical
orientation of the phone — i.e., the part with the display is the top.
When the phone is in the highest upright position, use the wall-mount hook located under the handset to
secure the handset when you’re not using the phone.
24-Key Feature Phone
12-Key Feature Phone(legacy product)
• Connects like a basic phone.
• Handset plugs into right-side jack.
• Line cord plugs into left-side jack.
ESI 40D Business Phone
Connects in a similar addition to the 24-Key Feature
Phone mentioned above.
Note: The ESI 40D Business Phone can accept an
optional Expansion Console when used on
most other ESI systems, but this functionality
is unavailable on an ESI C-Plus or ESI
C-Plus Executive system.
48-Key Digital Feature Phone
Connects in a similar addition to the 24-Key Feature
Phone mentioned above.
Note: The 48-Key Digital Feature Phone can accept
an optional Expansion Console when used
on most other ESI systems, but this
functionality is unavailable on an ESI C-Plus
or ESI C-Plus Executive system.

User’s Guide Introduction
A.8
ESI Cordless Handset connection
Each ESI Cordless Handset comes with:
• A charger/cradle to charge the Handset.
• An AC adapter for use with only the charger.
• A base station to provide a digital interface between the ESI phone system and ESI Cordless Handset.
This base station is line-powered and thus needs no AC power.
• Wall-mount(s), a belt clip, and a Quick Reference Guide.
Base station installation
Due to each site’s unique characteristics, the range and distance information we’ll provide herein is
only approximate.
Characteristics thatpositively affect performance:
• The base station should be installed so it has a clear line-of-sight with the Cordless Handset.
• The base station antenna should always be pointed in its uppermost vertical position.
Characteristics thatnegatively affect performance:
• Large amounts of metal shelving (such as in manufacturing or warehouse areas).
• Close proximity to (within one mile of) a radio tower.
• Concrete walls that divide spaces where Cordless Handsets are used (assuming the base stations are in
one location).
Don’t install the base station:
• Close to a wall with metal studs.
• On a metal wall.
• Next to a device that emits RFI or EMI1— e.g., a television, radio, computer, computer printer,
fluorescent light fixture,or fax machine.
• Next to any other 900 MHz device — e.g., a hand-held inventory control device.
• In a ceiling that has foil-backed insulation.
• Behind doors that typically are closed, tinted windows, one-way glass,or otherareas that limit or
cut off transmission to the Cordless Handset.
Base stations must be installed at least 10 feet apart, regardless of whether the base station is for the
small-model or large-model Cordless Handset. Don’t install more than six base stations in one area
(such as a network room). Choose a location at least 30 feet away if more than six base stations are needed
in a building.
A Digital Cordless Handset base station requires only a line cord to the phone system;AC powerisn’t
needed because the base station receives power from the phone system via the line cord.
Once the base stations are installed and the Cordless Handsets charged, change each Handset’s channel by
pressing its CH key. Each Handset should have its own channel. There are 30 available channels on the
small Cordless Handset and 10 on the large Cordless Handset.
Note: Feedback may result if the Cordless Handset is within three inches of an ESI desktop phone.
1RFI is radio frequency interference. EMI is electromagnetic interference.

User’s Guide Help mode (Verbal User’s Guide)
B.1
Help mode (Verbal User’s Guide)
Your ESI system’s Help mode (also called the Verbal User’s Guide) — a carefully conceived combination of
spoken information, display readouts and even key illumination when appropriate — is a powerful tool to help
you learn how to use the system’s many features.
Notes: As explained on page A.1, your ESI phone has a combo PROG/HELP key unless it is a 48-Key Feature
Phone (which has separate PROGRAM and HELP keys). Under the circumstances described in this
section, the PROG/HELP key will invoke Help mode.
The ESI Cordless Handsets have no access to the Verbal User Guide (and, thus, no key to invoke it).
Tutorial
When your station is idle, press PROG/HELP, and then follow the spoken Help menu to:
• Learn how to use the phone • Hear a description of how any key is used
• Learn how to use voice mail features • Hear a complete tutorial on phone operation
Help during station programming
To hear a detailed description of a function you wish to program, press PROG/HELP while programming it.
Help during a call
Press PROG/HELP while on a call and this will place the call on hold, whereupon you can use Help mode to
hear a description of the function you wish to perform. When you exit Help mode, you will be reconnected to
the call.
While you are either in Help mode or programming your phone, your station will be temporarily placed in DND
(see “MUTE/DND,” page E.3). Anyone calling your station while you are in DND will be forwarded to your
mailbox (or other destination set by the installer).
Exiting Help mode
To exit Help mode, simply hang up.
Visit www.esi-estech.com/users for up-to-date help.

User’s Guide User programming: An introduction
C.1
User programming: An introduction
Voice prompts will play menu and sub-menu options to access the desired feature. You don't have to wait for the
entire prompt to be played. Therefore, once you’ve become familiar with the prompts (consult “User
programming menu” on the next page), you can quickly set any frequently used feature.
Programming help
During any of the programming steps, press PROG/HELP to heara more detailed description of the feature
and related programming options.
Exiting programming mode
To exit programming mode, simply hang up.
User programming menu
Overview
1 Select personal greeting
1 Record
2 Delete
3 Hear
2 Programmable feature keys
(Station keys, line keys, speed-dial keys,
other feature keys)
3 Station options
1 Call waiting/background announce
2 Personal greeting reminder
4 Outside dial tone preference
5 Hands-free answer
6 Message monitor
7 Power-saving mode1
4 Station audibles
1 Station ring tone
2 Station ring volume
3 Message ring
5 Password
1 Enter
2 Delete
3 Hear
4 Security level
6 External message notification
1 Delivery options
2 Phone delivery
3 Pager notification
9 Un-delete
Note: Background announce and selections 5 and 6 under Station Options are not available on the
legacy 12-Key Feature Phone. Option 7 is available on only the ESI Cordless Handset.
1For use with only ESI Cordless Handsets.

User’s Guide User programming: An introduction
C.2
1 Select personal greeting
Select the desired greeting — 1, 2 or 3. The system will play the current greeting, followed by prompts to re-
record, delete or hear again — or select the current greeting by pressing #.
1 Record personal greeting
Begin recording at the tone. Press 1to stop. The new personal greeting automatically replaces the
previous greeting.
2 Delete personal greeting
When prompted, press 2again to confirm deletion.
Warning: Your mailbox is disabled if no personal greeting exists. Never delete all of your existing personal
greetings before you record at least one new one.
3 Hear current personal greeting
2 Programmable feature keys
There are two methods for programming ofyour phone:
• Direct programming — Select the key you want to program, and hold it down for at least twoseconds.
This not only initiates programming but also lets you immediately program that specific key.
• Traditional programming — Press PROG/HELP. The Verbal User’s Guide will speak to you, walking
you through the full menu, during which you can choose the appropriate option.
Direct programming example:
You wish to set one of the keys to dial a co-worker, whose extension is 105. Hold down the key for at
least two seconds. This automatically puts you in feature key programming. Follow the prompts to enter
1 0 5. (This has allowed you to skip two steps — pressing PROG/HELP and selecting a menu option —
that you’d have had to perform if using traditional programming.)

User’s Guide User programming: An introduction
C.3
How the programmable feature keys can be set
•Line keys — Programming a line number (1 through 8) into a programmable feature key makes ita line
key, which provides the appropriate lamp information and manual outside-line access.
•Station keys — If the digits entered constitute a three-digit number, the programmable feature key will
become a station key, providing the appropriate lamp information and easy access or transfer. Three-
digit numbers entered can be:
— User extensions (100–115) — Cascade mailboxes (520–529)
— Department numbers (290–299) — System speed-dial numbers (600–699)
— Guest/info mailboxes (300–489)
•Speed-dial keys — In addition to programming a programmable feature key with a system speed-dial
number, you can create personal speed-dial keys for automatic dialing of frequently called outside
numbers. If you program 9(or 8or 7) plus a phone number, the programmable feature key becomes a
speed-dial key. When you program a speed-dial key, there's no need to insert a pause after the 9(or 8
or 7).The speed-dial number can be up to 24 characters long. Use the up scroll key () to enter
special characters in a dial string.
•Other feature keys — If you enter a feature code, the programmable feature key will serve as an
enable/disable key for that feature. The Installer may have programmed certain stations for accessing
additional features (see “Optional features,” page F.12); consult your SystemAdministrator to determine
your access.
Keys’ LED activity during programming
Key type and LED indication
Mode Station key or
Virtual Mailbox Key
Line key Feature key
or speed-dial key
Currently being programmed and
previously assigned Flashing red Flashing green Flashing amber
Currently being programmed and
previously unassigned Flashing red Flashing red Flashing red
Programming mode — Was assigned or viewed
in current session Blinking red Blinking green Blinking amber
Assigned in a previous programming session and
not yet viewed in current session Solid red Solid green Solid amber
Never assigned and not yet viewed in
current session Off Off Off
Note: Each ESI Cordless Handset has only one LED color — red — with similar blinking rates.

User’s Guide User programming: An introduction
C.4
3 Station options
The station options sub-menu (PROG/HELP 3) lets you activate or deactivate several features your station
can provide.At each option sub-menu, 1enables the option and 0disables it. (Each option listed below is
explained elsewhere in this manual, as noted.)
1 Call waiting/background announce
See page E.11 for call waiting and page E.12 for background announce.
Note: Background announce is not available on a 12-Key Feature Phone.
2 Personal greeting reminder
See page F.10.
4 Outside dial tone preference
See page F.11.
5 Hands-free answer
Note: With an ESI Cordless Handset, use of this feature requires a headset.
See page E.2.
Note: Not available on a legacy 12-Key Feature Phone.
6 Message monitor
See page F.10.
Note: Not available on a legacy 12-Key Feature Phone.
7 Power-saving mode
Note: Applicable to only an ESI Cordless Handset.
Allows you to enable or disable an ESI Cordless Handset’s power-saving mode. Enabling this mode helps
achieve full battery life. However, if full-time status monitoring is required, you can disable this mode. In
power-saving mode, the phone system blocks all status updates1to the Cordless Handset when the
Handset has been idle for30 seconds. Pressing the Cordless Handset’s keys or receiving an incoming call
on it will discontinue power-saving mode.
Note: When the handset has received no calls or status updates1for five minutes, the Cordless Handset
enters deep-sleep mode. During it, the display is blank and the LEDs don’t light up. If the system
sends any updates to the Cordless Handset, it will discontinue deep-sleep mode.
1For example: If you have a programmable feature key set as a station key for someone’s extension, the system updates your Cordless Handset
based on that extension’s current status (busy, idle, or do-not-disturb).

User’s Guide User programming: An introduction
C.5
4 Station audibles
The station audibles programming provides control of the following audible items:
Notes: Only the third setting, message ring, is applicable to the ESI Cordless Handset.
Your phone has a secondary ring tone you’ll hear (if your phone system has been programmed
accordingly by your Installer) when call waiting occurs — i.e., a second call rings in for you while
you’re already on another one — on live-ring calls.
1 Station ring tone
You can select from six possible tones to help distinguish it from other nearby ringing phones.
Press
or to select a tone, then press #to accept it.
2 Station ring volume
Press
and to set the desired ringer volume (range: off to high), then press #to accept it.
Note: (Not applicable to ESI Cordless Handset or legacy 12-Key Feature Phone)
If the ringer volume is turned off, the status indicator lamp will not “flutter” when an incoming or
recalled call is presented to the phone (see “Status indicator lamp,” pageD.8).
3 Message ring
When enabled, this feature will periodically generate a short ring tone at your station as an additional alert
thatyou have new messages.
5 Password
1 Enter new password
Your password may consist of 2–8 digits followed by #(0cannot be the first digit). Entering only 0as the
password will turn off the password requirement.
2 Delete current password
Resets the password to the default password.
3 Hear current password
Displays and plays back the current password.
4 Password security level
Selection Result
0 No password required for access from any phone
1 Password required only for remote access, either off-premises or from other stations within the system
2 Password always required

User’s Guide User programming: An introduction
C.6
6 External message notification
1 Delivery options
1 Delivery to phone number only
2 Notify pager only
0 No off-premises delivery
2 Phone delivery
1 Enter phone number
Enter the phone number (24 digits, maximum) followed by#. Do not include an outside line access
code (i.e., don’t add 9, 8, or 7) before the number.
Use the scroll key to enter special characters; use the
scroll key to backspace. You also can use
the scroll keys to view the number after it’s saved. To change the number, you must delete it and then
re-enter it as desired.
2 Delete phone number
Deletes the currently programmed phone number.
3 Display current phone number
Displays the currently programmed phone number.
3 Pager notification
1 Enter pager number
Enter the pager number (24 digits, maximum) followed by#. Do not include an outside line access code
(i.e., don’t add 9, 8, or 7) before the number.
Use the scroll key to enter special characters; use the
scroll key to backspace. You also can use
the scroll keys to view the number after it’s saved. To change the number, you must delete it and then
re-enter it as desired.
2 Delete pager number
Deletes the currently programmed pager number.
3 Display current pager number
Displays the currently programmed pager number.
9 Message Recycle Bin (un-delete)
Your 10 most recently deleted messages will be played first. Press 9to move to the next message.
Press 8to restore the message to your mailbox as an old message.

User’s Guide Voice mail operation
D.1
Voice mail operation
Your phone system provides accurate and timely messages. Others will become more comfortable leaving you
voice messages ifyou promptly retrieve and respond to your messages.
VOICE MAIL key
For direct access to all voice mail features, such as picking up messages or transferring directly to mailboxes:
• On an ESI 40 Business Phone, 48-Key Feature Phone, or 24-Key Feature Phone — Use the blue
VOICE MAIL key. It will blink wheneveryou have one or more new messages, and the display will show you
how many new and old messages are stored foryou on the ESI system.
• On a legacy 12-Key Feature Phone — Assign key code 579 to a programmable feature key (see
“Programmable feature keys,” page C.2, and “Optional features,” page F.12). Until this has been done for
your phone, your mailbox is disabled. (When you try to access a disabled mailbox, the system will notify
you that it’s disabled.) You still can retrieve previously left messages and access user programming, but the
mailbox won’tbe able to receive new voice messages. Therefore, to enable the mailbox, assign key code
579 to a programmable feature key.
• On an ESI Cordless Handset, use the blue-outlined VOICE MAIL key. The display, directly above the
VOICE MAIL key, will show an “envelope” icon when you have one or more new messages.
Personal greetings
Initially, your mailbox has a generic greeting: “You have reached the mailbox for extension xxx. Dial 0to reach
the operator or begin recording at the tone.” You can record up to three differentpersonal greetings in your own
voice indicating your availability to return calls.
Examples
Sample greeting 1: Hi, this is [name]. I’m away from my desk or on the phone right now; so please either dial zero to
reach our operator, or leave me your name, number and message at the tone and I’ll get back
to you as soon as I can.
Sample greeting 2: Hi, this is [name]. I’m out of the office. You may dial 1 2 2 for my assistant or, if you prefer, you
may leave me a voice message at the tone — I’ll check in regularly — or, if it’s important, dial 4
to reach me on my cell phone.1
Sample greeting 3: Hi, this is [name]. I’m away from my desk at the moment. To reach the operator, dial zero.
Otherwise, leave your name and phone number at the beep so I can return your call.
Depending on auto attendant usage and your personalpreferences, you may wish to include one or more of
these options in your personal greetings:
Option Instruction
0 To reach the operator
1 To skip directly to the record tone (or “beep”)
4 To perform off-premises “reach-me” (see “Off-premises ‘reach-me,’” page D.3)
8 To the main greeting (if your system is using the auto attendant)
XXX An extension number of another user
Note: Option 4 is available only when personal greeting 2 has been recorded.
You can change any personal greeting as often as necessary, by just recording over a previously recorded
personal greeting.
Warning: Do not delete all of your personal greetings; make sure at least one always remains. Deleting all the
greetings will turn off your mailbox.
1These sample greetings refer to certain features which may not be activated for your extension; consultyour System Administrator for additional
information, if necessary.

User’s Guide Voice mail operation
D.2
Personal greeting keys
You can program a programmable feature key as a personal greeting key for any one of the three personal
greetings (see page F.14). Once created, this shortcut can then be used to activate the associatedpersonal
greeting (the key’s LED will glow green and the greeting played as confirmation).
Note: (Not applicable to ESI Cordless Handset or legacy 12-Key Feature Phone)
Press RECORD while the confirmation is playing and follow the prompts to record the greeting. Otherwise,
listen to the greeting to the end and follow the prompts.
Leaving messages . . .
If you callanotherstation that is DND,busy or does not answer— or if you call a specialmailbox (such as a
guest mailbox) — you will be transferred to the mailbox. You can skip the mailbox’s personal greeting by
pressing 1; this takes you directly to the record tone.
. . . directly in another user’s mailbox
The procedure forgoing directly to another user’s mailbox without ringing his/her extension depends upon
whether you have that user’s extension set as one of yourstation keys:
• If you do, press VOICE MAIL and then the person’s station key.
• If you don’t, press VOICE MAIL and TRANSFER and then dialthe extension number.
Either will connect you directly to that user’s personal greeting.
. . . in several users’ mailboxes using a Quick Group
You can leave a direct message in several users' mailboxes at the same time by pressing VOICE MAIL and
the desired station keys — thus creating a Quick Group. You can also move messages or recordings to a
Quick Group in the same manner.
Notes: You can use only station keys to select the additional mailboxes for Quick Groups.
If you have a department programmed as a station key, pressing VOICE MAIL and then the
department’s station key will leave a message for all members of the department.
Moving a message
When you move a message (by pressing 6), a prompt will ask whether you wish to move the message with or
withoutan introduction. Once you’ve moved the message,you’ll be given the normal options to handle the
message in your mailbox: save,delete, etc.

User’s Guide Voice mail operation
D.3
Off-premises “reach me”
After a caller has been forwarded to your voice mailbox and is listening to your personal greeting, this feature allows
the caller to be forwarded to a number outside the system— i.e., a regular phone number rather than an extension.
Note: This feature is activated only if your System Administrator enables it on your station.
You must have personal greeting 2 selected and it must tell callers to press 4 for this feature.
To use this feature, follow these steps:
1. From your ESI desktop phone,press PROG/HELP 6 2 1 and enter the telephone number to which you
want calls forwarded when you’re off-premises.1
2. Record and activate personalgreeting 2.Be sure to tell the caller to press4during the greeting to be
connected to youralternate phone. (See the sample greeting,below.)
When you receive a call forwarded in this fashion, you’ll be prompted to “press any key” to accept the call.
If you don’t answer the call, the caller is returned to your voice mailbox on the ESI system. Off-premises “reach-
me” is available on guest mailboxes, as well. Sample personal greeting 2 for off-premises “reach me”:
“Hello. This is Rick. I’m currently out of the office. To attempt to reach me on my mobile phone, please press4
now. Otherwise, please leave me a message after the tone and I will return your call as soon as possible.”
Message retrieval
Message(s) waiting display
If you have at least one new message, your ESI desktop phone’sVOICE MAIL key will blink (except on a legacy
12-Key Feature Phone) and your display will show the number of new and old messages in your mailbox.2
On an ESI Cordless Handset, an “envelope” icon on the display also appears when you have at least one
new message.
Note: Message status information (shown in the example above as NEW 3 OLD 1) appears on an ESI
desktop phone (except on a legacy 12-Key Feature Phone) only when new messages exist.
Retrieving voice mail messages from your ESI phone
1. Press VOICE MAIL.
2. Enter your password if required (you may change the requirement for a password in user programming
menu 5; see "Password,” page C.5).
3. The ESI system will start playback of messages with the oldest new message and continue until all
messages are played. The display will show the origination of the message, the countdown duration of
the message, whether new or old, and the time/date of when the message was left.
ESI phone with two-line display
ESI phone with three-line display (also shows
running playback time in reverse)
(Continued)
1This is also the same number used for message notification phone delivery (see “Off-premises message delivery,” page D.7).
2A 12-Key Feature Phone will display only the date and time.
This manual suits for next models
7
Table of contents
Other ESI IP Phone manuals