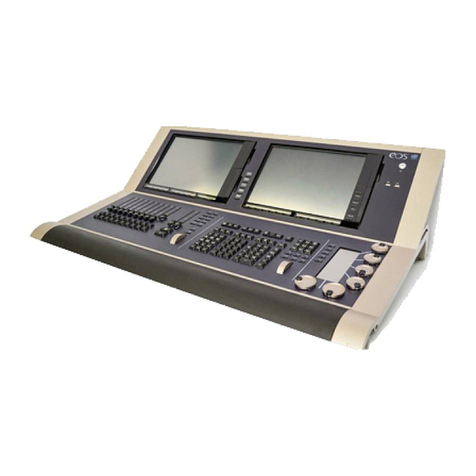
ETC Expression Show Control System User manual

Table of Contents i
expression show control system
User manual
January 1992
Copyright Electronic Theatre Controls 1992
ETC intends this document, whether pr i n t e d o r e l ectronic, to b e p r ovide d i n i t s en t i r e ty.

ii Expression 2.0
Electronic Theatre Controls (ETC)
warrants to the original owner or retail
customer that for a period of one year
from date of delivery of a portable
system or energization of a perma-
nently installed system (up to a
maximum of 18 months from delivery)
its products will be free from defects in
materials and workmanship under
normal use and service. Warranty is
limited to 90 days for rental equipment.
Warranty does not cover any product or
part of a product subject to accident,
negligence, alteration, abuse or misuse
or any accessories or parts not supplied
by ETC. Warranty does not cover
“consumable” parts such as fuses,
lamps, color media or components
warranted directly to the owner by the
original manufacturer. ETC’s warranty
does not extend to items not manufac-
tured by us. Freight terms on warranty
repairs are FOB ETC factory or desig-
nated repair facility. Collect shipments
or freight allowances will not be
accepted.
ETC’s sole responsibility under this
warranty shall be to repair or replace
at ETC’s option such parts as shall be
determined to be defective on ETC’s
inspection. ETC will not assume any
responsibility for any labor expended or
materials used to repair any equipment
without ETC’s prior written authoriza-
tion. ETC shall not be responsible for
any incidental, general or consequential
damages, damages to property,
damages for loss of use, time, profits or
income, or any other damages.
Limited warranty
The owner’s obligations during the
warranty period under this warranty are
to notify ETC at ETC’s address within
one week of any suspected defect, and
to return the goods prepaid to ETC at
their factory or authorized service
center.
THIS WARRANTY IS CONTINGENT ON
THE CUSTOMER’S FULL AND TIMELY
COMPLIANCE WITH THE TERMS OF
PAYMENT SET FORTH IN THE
“TERMS AND CONDITIONS”. THIS
WARRANTY IS EXPRESSLY IN LIEU
OF ANY AND ALL OTHER WARRAN-
TIES EXPRESSED OR IMPLIED
INCLUDING THE WARRANTIES OF
MERCHANTABILITY AND FITNESS
FOR A PARTICULAR PURPOSE AND
OF OTHER OBLIGATIONS AND
LIABILITIES ON OUR PART. THE
OWNER ACKNOWLEDGES THAT NO
OTHER REPRESENTATIONS WERE
MADE TO HIM OR RELIED UPON HIM
WITH RESPECT TO THE QUALITY AND
FUNCTION OF THE GOODS SOLD.
This written warranty is intended as a
complete and exclusive statement of
the terms thereof. Prior dealings or
trade usage shall not be relevant to
modify, explain or vary this warranty.
Acceptance of, or acquiescing in, a
course of performance under this
warranty shall not modify the meaning
of this agreement even though either
party has knowledge of the perform-
ance and a chance to object.
table of contents
Chapter 1
Introduction␣ .....................................................................................................................1
Expression Show Control System
features ..........................................................2
PSC
features ...................................................................................................2
RSC
features...................................................................................................2
Using this manual..................................................................................................3
Text conventions ...................................................................................................4
Customer service ..................................................................................................4
Chapter 2
Hardware and installation␣..................................................................................5
Internal clock mode ...............................................................................................5
Programmable Show Controller (PSC) ..................................................................
6
Front panel ......................................................................................................7
Back panel ......................................................................................................7
Setting up the
PSC
, monitor and Designer’s Worksheet digitizer .................. 8
Installing two monitors .............................................................................9
Entering system configuration ......................................................................10
Monitor selection ...................................................................................10
Boot option selection .............................................................................10
Connecting to dimmers ................................................................................11
Connecting parallel printer ............................................................................11
Remote Show Controller (RSC)...........................................................................
12
Maintenance panel ..............................................................................................13
Manual SMPTE controls ...............................................................................13
Indicator LEDs ..............................................................................................14
Chapter 3
Entering softpatch and
system settings␣ ...........................................................................................................15
Entering softpatch ...............................................................................................16
Entering one-to-one softpatch ......................................................................16
Creating custom softpatch ...........................................................................17
Using channel zero .................................................................................17
Entering numbers of channels and dimmers .........................................17
Patching dimmers to channels ...............................................................18
Additional patching features................................................................................19
Proportional patching ....................................................................................19
Dimmer profiles ............................................................................................20
Resetting factory dimmer profiles and all dimmers to default setting..........20
Capturing channels in softpatch ...................................................................21
Unpatching individual dimmers.....................................................................21

Entering system settings ....................................................................................22
Setting default full level ................................................................................23
Setting default up and down fade times.......................................................23
Setting default fader clear times...................................................................24
Chapter 4
Basic operations␣ .........................................................................................................25
Lesson 1: Using the digitizer ...............................................................................26
Programming regions ...................................................................................27
Deleting regions............................................................................................28
Lesson 2: Display, channel and record modes....................................................29
Display modes ..............................................................................................29
Stage, Blind and Fader screens..............................................................30
Channel modes .............................................................................................32
Record functions...........................................................................................33
Lesson 3: Working with cues..............................................................................34
Creating cues ................................................................................................34
Cue 1: Creating a cue in Stage ...............................................................35
Cue 2: Creating a cue in Blind ................................................................36
Cue 3: Modifying up and down fade times ............................................37
Cue 4: Linking cues ................................................................................39
Cue 5: Creating a cue using Solo ...........................................................41
Inserting cues.........................................................................................43
Deleting cues .........................................................................................44
Copying cues ..........................................................................................45
Viewing cues ..........................................................................................45
Lesson 4: Playing back cues ...............................................................................46
Selecting cues ..............................................................................................46
Playing back cues ......................................................................................... 47
Using [Group Hold] to play back multiple cues .............................................47
Playing back an unselected cue ....................................................................48
Modifying cues on stage .............................................................................. 48
Update cue ...................................................................................................49
Playing back the previous cue ...................................................................... 50
Clearing faders ..............................................................................................50
Lesson 5: Saving your show on disk ...................................................................51
Formatting disks ...........................................................................................52
Recording a show on disk.............................................................................53
Verifying a show on disk ...............................................................................54
Lesson 6: Working with SMPTE ......................................................................... 55
Creating SMPTE programs ...........................................................................56
SMPTE Edit ............................................................................................56
Learn mode ............................................................................................58
Editing SMPTE programs..............................................................................59
SMPTE block edit ...................................................................................60
Deleting all SMPTE events ...........................................................................61

Viewing recorded SMPTE events .................................................................62
Viewing SMPTE events with the digitizer and internal clock ................. 62
Viewing SMPTE events manually with the digitizer ...............................62
Viewing SMPTE events without the digitizer .........................................63
Downloading a SMPTE program to the Remote Show Controller (RSC)......64
Uploading a SMPTE program from the Remote Show Controller (RSC) ......64
Using the ESCS to play back SMPTE events................................................64
Chapter 5
Advanced techniques␣ ............................................................................................65
Lesson 1: Working with multipart cues ..............................................................67
Wait times in multipart cues .........................................................................67
Creating a multipart cue................................................................................68
Editing a multipart cue ..................................................................................69
Adding, deleting and modifying channels ..............................................69
Modifying fade and wait times...............................................................70
Converting a standard cue to a multipart cue ...............................................71
Converting a multipart cue to a standard cue ...............................................71
Lesson 2: Track record function ..........................................................................72
Using record to create tracks........................................................................73
Recording modified cues ..............................................................................74
Inserting cues ...............................................................................................76
Blackout cues and tracking ...........................................................................78
Lesson 3: Track Sheet.........................................................................................80
Track Sheet screen .......................................................................................80
Working with Track Sheet ............................................................................82
Lesson 4: Using Group........................................................................................83
Creating groups ............................................................................................83
Displaying groups .........................................................................................83
Modifying groups ..........................................................................................84
Modifying groups in Blind ......................................................................84
Modifying groups in Stage .....................................................................84
Modifying groups using Update .............................................................85
Deleting groups ............................................................................................86
Copying groups .............................................................................................87
Using groups to modify cues in Blind ...........................................................88
Lesson 5: Working with effects ..........................................................................89
Creating an effect .........................................................................................90
Inserting and deleting steps .........................................................................93
Editing steps .................................................................................................93
Effects shortcuts ..........................................................................................94
Lesson 6: Working with subroutines ..................................................................95
Styles ............................................................................................................95
Creating subroutines.....................................................................................96
Deleting a step..............................................................................................98
Inserting a step .............................................................................................98

Lesson 7: Working with macros .......................................................................100
Creating or modifying a macro....................................................................101
Running a macro .........................................................................................103
Putting a macro on hold ..............................................................................103
Cancelling a macro......................................................................................103
Seleting a macro .........................................................................................103
Sample macros ...........................................................................................104
Chapter 6
Printer options and
disk management␣ ....................................................................................................105
Print options ......................................................................................................106
Cues............................................................................................................107
Cue sheet ...................................................................................................108
Designer’s Worksheet ................................................................................109
Groups ........................................................................................................110
Macros ........................................................................................................111
Real time programs ....................................................................................112
SMPTE ........................................................................................................113
Softpatch ....................................................................................................114
Stage display...............................................................................................115
Disk management .............................................................................................116
Storing disks ...............................................................................................116
Formatting disks .........................................................................................116
Recording a show on disk...........................................................................117
Reading a show from disk ..........................................................................119
Verify show on disk ....................................................................................120
Chapter 7
Accessories␣ ␣ .................................................................................................................121
Remote Focus Unit (RFU) .................................................................................122
Real Time Clock ................................................................................................123
Chapter 8
Reference␣ ␣ .......................................................................................................................125
And ....................................................................................................................126
At.......................................................................................................................127
Back ..................................................................................................................128
Black out ...........................................................................................................129
Blind ..................................................................................................................130
Captured channels ............................................................................................131
Chan ..................................................................................................................132
Clear ..................................................................................................................133
Clear faders .......................................................................................................135
Clear show from memory .................................................................................136
Clear SMPTE time programs.............................................................................137
Clock disable .....................................................................................................138
Cue ....................................................................................................................139
Delay time .........................................................................................................141
Delete................................................................................................................142

Diagnostic system clear ....................................................................................143
Dim....................................................................................................................144
Dimmer profiles ................................................................................................145
Effects keys ......................................................................................................148
Enter..................................................................................................................149
Except ...............................................................................................................150
Fader display .....................................................................................................152
Flash ..................................................................................................................153
Full.....................................................................................................................154
Go......................................................................................................................155
Grand Master ....................................................................................................156
Group ................................................................................................................157
Group Hold ........................................................................................................158
Help ...................................................................................................................159
Hold ...................................................................................................................160
Insert time .........................................................................................................161
Internal clock mode ...........................................................................................162
Learn .................................................................................................................163
Level control strip..............................................................................................164
Link....................................................................................................................165
Macros ..............................................................................................................167
Maintenance panel ............................................................................................168
Manual ..............................................................................................................170
Minus (-) ............................................................................................................171
Page Up/Page Down .........................................................................................172
Patch .................................................................................................................173
Pause ................................................................................................................174
Plus ...................................................................................................................175
Rec ....................................................................................................................176
Rel .....................................................................................................................177
Reset (SMPTE) ..................................................................................................178
Set Up ...............................................................................................................179
SMPTE ..............................................................................................................180
Solo ...................................................................................................................181
Stage .................................................................................................................182
Step (SMPTE) ....................................................................................................183
Step/Part ...........................................................................................................184
System Settings ................................................................................................185
Thru ...................................................................................................................186
Time ..................................................................................................................187
Time (SMPTE) ...................................................................................................188
Timed faders .....................................................................................................189
Track..................................................................................................................190
Track Sheet .......................................................................................................191
Type ..................................................................................................................192
Update...............................................................................................................193

Index␣ ␣␣ ..................................................................................................................................194
Appendix A
Connector information␣ ........................................................................................... i
Appendix B
Error messages␣ ␣ ␣ ....................................................................................................... v
Appendix C
dip switch settings␣ ␣ ␣ ............................................................................................ vii
Appendix D
Specifications␣ ␣␣ ............................................................................................................. ix
Schematics␣ ␣␣ ................................................................................................................... xiii

chapter one
introduction
The
Expression Show Control System
(ESCS)
allows you to program and run
complex, automated lighting effects controlled by SMPTE (Society of Motion
Picture and Television Engineers) time code received by the system.
An
ESCS
consists of at least one
Programmable Show Controller (PSC)
and may
also include any number of
Remote Show Controllers (RSCs)
. Both units contain
the same control electronics, but the
RSC
cannot be programmed directly. When
you are creating or editing a show,
RSC
show information must be created and
recorded on a
PSC
, then downloaded to the
RSC.
A
Designer’s Worksheet
digitizer tablet and video monitor allow you to program the
PSC
. In addition, the
PSC
allows you to save the shows you create on 3.5-inch disks and print show
information on an optional parallel printer. Once you have programmed a
PSC
(or
downloaded show information to an
RSC)
, its lighting effects run automatically,
with timing control provided either by externally generated SMPTE time code, or
by the
ESCS’s
internal clock.
Each
ESCS
unit outputs 512 DMX512 control signals. It also contains a mainte-
nance panel that allows you to perform some operations without connecting the
digitizer and monitor.
This chapter includes information to orient you to the system and the manual
.
It
includes the following sections:
• Features
• Using this manual
• Text conventions
• Customer support

2 Expression Show Control System
Expression Show Control System features
The components of the
ESCS
are the
Programmable Show Controller
(PSC)
and
the
Remote Show Controller
(RSC)
PSC features
The
PSC
provides the following features:
• 200 control channels
• Proportional control channel softpatch that accommodates up to 512
dimmers
• 400 cue capacity per show
• SMPTE control input to activate up to 500 SMPTE events
• Internal SMPTE clock assumes control if SMPTE input is interrupted
• SMPTE learn mode
• Maintenance panel allows limited manual operation
• Disk drive stores shows on 3.5-inch disks
• Four independent, timed faders play back recorded cues
• Macros, subroutines and effects to help automate complex tasks and
sequences
• Support for optional accessories: Remote Focus Unit and Real Time Clock.
RSC features
• 200 control channels control up to 512 dimmers
• 400 cue capacity per show
• SMPTE control input activates up to 500 SMPTE events
• Internal SMPTE clock assumes control if SMPTE input is interrupted
• SMPTE learn mode
• Maintenance panel allows limited manual operation
• Macros, subroutines and effects automatically play back complex tasks
and sequences

Chapter 1 Introduction 3
Using this manual
This manual provides instructions for the console’s features and optional acces-
sories
.
The following sections are included:
Chapter 1
System overview, manual conventions
and customer
Introduction
support.
Chapter 2
Instructions for installing the components of the
Hardware and Expression Show
Control System,
including monitor and
Installation
Designer’s Worksheet digitizer.
Chapter 3
Instructions for entering system settings that you are
Entering softpatch
likely to change before using the
PSC
for the first time,
and system settings
or before you
record a new show.
Chapter 4
Tutorial on working with cues, includes an overview of
Basic operation
display, channel and control modes.
Chapter 5
Tutorial on working with more advanced
PSC
features,
Advanced
including: multipart cues, track record function, Track
techniques
Sheet, groups, autoloads, effects, subroutines, and
macros.
Chapter 6
Instructions on using the
PSC’s
disk drive and optional
Using printer
printer.
and disk drive
Chapter 7
Instructions on using the
PSC’s
optional accessories.
Accessories
Chapter 8
Description of console keys and menu options listed in
Reference
alphabetical order.
Appendix A
Lists
PSC
and
RSC
connector types and pinout
Connector
information.
Information
Appendix
B
Lists
PSC
and
RSC
error messages with an explanation
Error messages
of each.
Appendix C
Lists
PSC
and
RSC
DIP switch settings
.
DIP switches
Appendix D
Technical specifications for the
Expression Show
Specifications Control System.

4 Expression Show Control System
Text conventions
In this manual, keys and buttons are indicated by square brackets such as,
[Enter]
.
System messages are printed in boldface, such as Select channel
.
References to other sections of the manual are printed in italics, such as
Chapter 1, Introduction.
Customer service
To reach Electronic Theatre Controls’ customer service department, call (608)
831-4116 Monday through Friday, from 9:00 AM to 5:00 PM Central Standard
Time. For emergency service after hours and weekends, call (608) 831-4773.
Your call will be answered electronically and automatically forwarded to a service
representative who will contact you as soon as possible.

chapter two
hardware and
installation
The
Programmable Show Controller (PSC)
is a modified ETC
Expression
control
console configured with a Designer’s Worksheet digitizer tablet in place of the
Expression
keyboard, and four, rather than two, faders. The system
enables you
to use SMPTE time code to control cues and other effects.
Internal clock mode
During playback operation,
the system
(either the
PSC
or
RSC)
processor
continuously compares incoming SMPTE time code with time data from its own
internal clock. If the system
detects time variations of plus or minus two frames,
it automatically adjusts the execution of cues to resynchronize itself with the
SMPTE time code it is receiving. If it detects variations of more than two
seconds, it
automatically switches to Internal Clock mode. In this operating
mode, the system
executes cues based on its own internal timing information.
When SMPTE input is restored, the
ESCS
resynchronizes operation to the new
SMPTE time, and cues are once again controlled by incoming SMPTE time code.
This takes place when 30 consecutive, valid SMPTE frames are received. If the
flow of SMPTE code to the system
is stopped, it continues to run cues based on
its own internal timing until SMPTE input is restored.

6 Expression Show Control System
Programmable Show Controller (PSC)
The
PSC
can be used either as a self-contained lighting control system or can be
used to download prerecorded show information to
Remote Show Control
(RSC)
units. To program a show on the
PSC
you need either one or two monitors, a
Designer’s Worksheet digitizer and the
PSC
itself. If you want to print show
information you may do so using an optional parallel printer.
Note: Once the show has been recorded, you may disconnect and remove the
monitor and digitizer. They are not required to run the show.
Limited manual operation is provided via the Maintenance panel on the front of
the
PSC
.
Note: The PSC supports both an RGB color monitor and a monochrome monitor.
If you choose to use only one monitor, ETC strongly recommends that you use a
color monitor to best take advantage of the information displayed in the PSC’s
screen displays.

Chapter 2 Hardware and installation 7
Front panel
Back panel
on
show control
program
serial data
SMPTE
SMPTE fault
CPU
power
expression
on
power
off
PRESS
FUSE
STEP M636 M637 M638 M639 M640
MANUAL
PAUSE
PUSH
PUSH
MIDI
thru in
DWS Parallel printer
Remote go
SMPTE
IN
SMPTE
THRU
DMX2DMX1RFU
CRT DISPLAY
color monochrome
RSC
PUSH PUSH

8 Expression Show Control System
Setting up the PSC, monitor and Designer’s Worksheet
digitizer
This section includes installation instructions for the
PSC
unit, monitor and
Designer’s Worksheet digitizer. If you need additional technical information on
the Designer’s Worksheet, refer to the documentation you received with it.
Pinout and connector information is included in
Appendix A, Connector
information
.
Follow these steps to install the
PSC
, monitor and Designer’s Worksheet:
1. Mount the
PSC
in a rack or place it on a hard, stable, flat surface with at
least six inches of space behind it for ventilation and cable clearance. The
unit should be at least six feet away from dimmers and high-current AC
lines.
2. Place the digitizer and color monitor on a table, desk or other work area
within ten feet of the
PSC
.
3. Use grounded AC power cords to connect all three units to 120 VAC
power sources.
4. Insert the video cable in the monitor. Connect the other end of the cable in
the appropriate
PSC
connector listed below:
Digital RGB color monitor DB9 connector
Composite monochrome monitor BNC connector
5. Insert the 6-pin XLR connector of the interface cable assembly into the
PSC’s
connector labeled DWS and the 9-pin mini DIN connector into the
digitizer connector labeled Interface.
6 Insert the plug end of the pointing device (pen or stylus) in the digitizer
connector labeled Pen/Cursor
.
7. Attach the pen holder to the upper left or right corner of the digitizer by
removing the protective paper from the base and pressing the adhesive to
the tablet.

Chapter 2 Hardware and installation 9
8. Place a printed template sheet under the clear plastic flap on the digitizer.
9. Set the voltage selection switch to match your electrical outlet
.
In the US,
set the voltage switch to 110
.
10. Set the three sets of DIP switches on the digitizer as indicated in the chart
below.
Switch A
12345678
Off Off On On On On On Off
Switch B
12345678
Off On Off On Off Off On On
Switch C
12345678
On On Off Off Off Off On Off
11. Turn on the
PSC
, turn on the monitor(s), then turn digitizer power on by
pressing the on/off switch on the digitizer back panel
.
The LED labeled
Indicator is lit when power is on
.
If the LED blinks four times after you
turn the power on, the interface cable is not connected correctly.
Note: It is very important that you turn the digitizer on only after first
turning on the PSC.
12. The
PSC
displays the message DWS ON on the monitor when the
digitizer is properly installed and turned on.
Installing two monitors
You may want to install two monitors at the same time, one next to the
PSC
and one at a remote location. Install one monitor using the color video connector
and the other using the monochrome video connector.
The color monitor should be located next to the console because the color cable
is limited to a length of about 10 feet. The monochrome cable (RG59U) can be
as long as 150 feet. Therefore, use the monochrome monitor at the remote
location.
When you install both a monochrome and a color monitor, select monochrome
monitor from the System Settings menu as described on page 10.

10 Expression Show Control System
Entering system configuration
When you install the
PSC
, you must set two system configuration options:
monitor type and boot option selection
.
The
PSC
retains these settings unless
you change them, you perform a diagnostic system clear, or the memory is
corrupted.
Monitor selection
To configure your system for the type of monitor you have, follow these steps:
1. Press [Set Up] to display the Set Up menu.
2. Select 6, System Settings, and press [Enter].
3. Select 10, Color/monochrome monitor, and press [Enter]
.
4. Select either 0 for a monochrome or grayscale monitor, or 1 for a color
monitor.
5. Press [Enter].
When you install both a monochrome and a color monitor, select monochrome
monitor from the System Settings menu as described above.
Boot option selection
Two system boot options are available, fast and full boot. The full boot performs
a series of hardware tests
.
If the tests find any hardware problems, the
PSC
displays a message indicating so
.
The fast boot option skips the hardware test
and therefore boots faster
.
Both boot options test the memory that holds show information
.
The
PSC
displays a message during either boot option if it detects that the memory has
been corrupted.
You will probably want to run the
PSC
with the fast boot option for convenience
.
However, you should select the full boot option periodically to run the
PSC’s
hardware tests.
The boot option you select will perform its tests the next time you turn the
PSC
on
.
To select a boot option, follow these steps:
1. Press [Set Up] to display the Set Up Menu.
2. Select 6, System Settings, and press [Enter].
3. Select 11, Full/fast boot test, and press [Enter].
4. Enter 0 for full boot test or 1 for fast boot test. Then press [Enter].

Chapter 2 Hardware and installation 11
Connecting to dimmers
The
PSC
allows you to control up to 512 DMX512 dimmers. To connect dim-
mers insert the dimmer cable in the connector labeled DMX1. Dimmer cable
pinout information is contained in
Appendix A, Connector information.
Connecting parallel printer
The PSC supports an optional parallel printer
.
Printer functions are described
beginning on page 106
.
Pinout and connector information is contained in
Appen-
dix A, Connector information.
Follow these steps to install a printer:
1. Insert parallel printer cable into connector labeled Parallel printer
on the back panel of the
PSC
.
2. Insert opposite end of printer cable into printer.

12 Expression Show Control System
Remote Show Controller
The
RSC
is a self-contained show control unit that runs a wide range of lighting
effects in response to SMPTE (Society of Motion Picture and Television Engi-
neers) time code. It does not offer a programming interface and does not
support peripheral equipment such as monitors or printers.
RSC
show informa-
tion must be recorded on a
Programmable Show Controller (PSC)
, then down-
loaded to the
RSC
via an umbilical cord. Limited manual operation is provided via
the Maintenance panel on the front panel of the
RSC
.
Note: Once you have downloaded a show to the RSC, the only way to modify it
is to upload it from the RSC to the PSC, make the desired modifications, then
download it again.
RSC
connector and pinout information is contained in
Appendix A, Connector
information
.
This manual suits for next models
1
Table of contents
Other ETC Control System manuals

ETC
ETC Emphasis Lighting Control System User manual

ETC
ETC Gio User manual

ETC
ETC Obsession II User manual

ETC
ETC Insight 2x User manual

ETC
ETC Echo Inspire Station Operating instructions

ETC
ETC Cem 3 User manual

ETC
ETC Eos Apex 5 User manual

ETC
ETC Emphasis Lighting Control System User manual

ETC
ETC IRIDEON User manual

ETC
ETC Echo User manual

ETC
ETC Response Mk2 One-Port Instruction sheet

ETC
ETC sensor+ CEM+ User manual

ETC
ETC Obsession II User manual

ETC
ETC Sensor3 CEM3 User manual

ETC
ETC Sensor IQ 500kcmil Kit User manual

ETC
ETC EOS User manual

ETC
ETC QuickTouch+ 4 User manual

ETC
ETC Unison User manual

ETC
ETC CEM3 User manual

ETC
ETC sensor+ CEM+ Instruction sheet