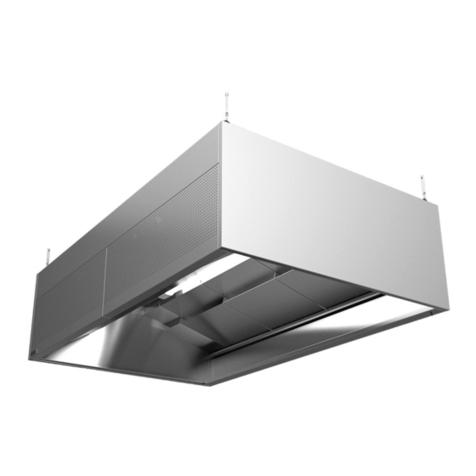
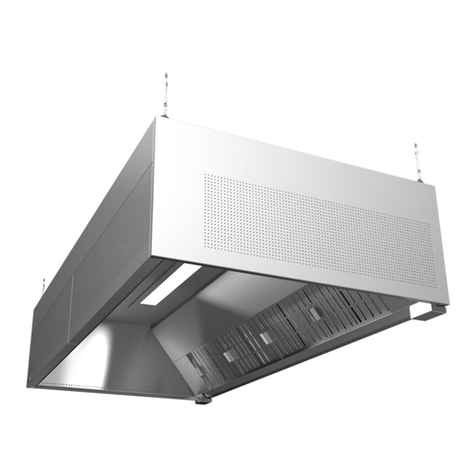
ETS NORD NORDcanopy User manual

NORDcanopy
UV-C Cleaning System Installation Guide

www.etsnord.com
2RDM-064-0722
®NORDcanopy |UV 1.0 installation guide
Table of contents
General 3
Product safety instructions 5
Check your product 5
WARNINGS! 6
System overview 6
1. Installation of the Control Unit 7
2. Installation of UV-C lamps 10
3. Remote Access Device connection 12
4. Installation of the Control Panel 13
5. Electrical connections of Control Unit 15
6. Maintenance 19
Facts about UV and ozone 21

Images are for illustrative purposes.
We reserve the right to make changes. RDT-064-0722 3
®NORDcanopy |UV 1.0 installation guide
General
This guide contains information for the safe installation of an integrated Control Unit into an ETS NORD kitchen
canopy with UV cleaning. Read the guide carefully before installing, setting up or performing maintenance!
Check that the packaged products do not have visible damage. Immediately notify the supplier and manufacturer
of the products of damage or missing components.
12
5
9 13
64
15
21
14
7
171610
83
11
1 – Supply air adjustment plate
2 – Supply air connection
3 – UV control unit
4 – Lighting
5 – Exhaust air adjustment plate
6 – Exhaust air connection
7 – UV lamps
8 – Suspension points
9 – Front panel
10 – Front panel lock
11 – Auxilliary air supply
12 – “AirGrip” air nozzle system
13 – UV shield
14 – UV shield safety switch
15 – HFK grase filters
16 – Airflow measuring nozzle
17 – Grease collection containers

www.etsnord.com
4RDM-064-0722
®NORDcanopy |UV 1.0 installation guide
The UV cleaning system consists of three separate components:
- One or more Control Unit(s)
- UV-C lamp(s) to support the exhaust airflow
- LCD Control Panel
- Remote Access Device*
* Allows the user to access and manage the UV cleaning system remotely, from the LAN or Internet.
The Control Unit packaging includes:
- Control Unit
- Pressure measurement hose (2x30cm)
- Pressure measurement hose (1x1.5m)
- Power cable IEC C13 with plug (3m)
The LCD Control Panel packaging includes:
- Control Panel
- Device address identification stickers
Each kitchen is equipped with one Control Panel, which can provide access to and oversight over up to ten UV
cleaning systems.

Images are for illustrative purposes.
We reserve the right to make changes. RDT-064-0722 5
®NORDcanopy |UV 1.0 installation guide
Product safety instructions
Failure to comply with these instructions or incorrect use of this device may cause serious bodily injury.
The UV cleaning system is designed to treat kitchen exhaust air with UV light and ozone only as described in
this manual.
Use of this UV technology reduces odors and reduces fat, mold and bacteria to water vapor and dry minerals.
ETS NORD AS assumes no liability if the product is not used in accordance with the manufacturer’s instructions
in this guide.
The installation of the Control Unit may only be carried out by persons trained and authorized by ETS NORD in
accordance with international standards and regulations.
It is forbidden to use replacement lamps or any other spare parts that are not supplied by ETS NORD Customer
Service.
Ultraviolet radiation and ozone are harmful to health. Prolonged exposure can cause the following damage:
• Skin rashes and burns
• Eye irritation, retinal burn and loss of vision
• Respiratory irritation and breathing problems
When removing grease filters from a UV-canopy, ensure that the UV system is powered o at the main
electrical closet or safety breaker.
When installing servicing or servicing the lamps, always wear goggles and protective gloves to protect against
quartz fragments in case of UV-C lamp breakage.
Check your product
Make sure that all components are received, matching both the order and delivery confirmation letters. Incorrect
delivery and transport damage must be immediately reported to both the cargo carrier and ETS NORD Customer
Service.
The time for filing a complaint or shipment discrepancy is 5 days after delivery. ETS NORD is not responsible
for defects that have occurred after goods have been handed over to the buyer.
If goods purchased from ETS NORD have defects for which ETS NORD is responsible, ETS NORD will repair
or replace the defective goods. If the goods cannot be repaired or replaced, ETS NORD will refund to the buyer
all fees for such items resulting from the sales contract.
If you have any problems, please contact ETS NORD Customer Service!

www.etsnord.com
6RDM-064-0722
®NORDcanopy |UV 1.0 installation guide
WARNINGS!
System overview
This device emits ultraviolet radiation and ozone!
Prolonged exposure to ozone and ultraviolet radiation can cause bodily injury.
When removing grease filters, always make sure that the UV system is powered o at
the main electrical closet or safety breaker.
Risk of falling!
Make sure installation and service personnel have stable work platforms when installing
the device.
When removing grease filters, always make sure that the UV system is powered o at
the main electrical closet or safety breaker.
Risk of electric shock!
Electrical connections to the system may only be made by an authorized electrician.
Always power o the system before any maintenance work!
Always make sure that the UV system is powered o at the main electrical closet or safety
breaker.
Only original spare parts and UV-C lamps purchased from ETS NORD may be used in
the UV 1.0 Control Unit!
UV-C lamps can be ordered from ETS NORD Customer Service.
7
4
6
5
3
2
1
1 – Control Unit
2 – Light
3 – UV-C lamp
4 – UV shield
5 – UV shield switch
6 – HFK grease filters
7 – LCD Control Panel

Images are for illustrative purposes.
We reserve the right to make changes. RDT-064-0722 7
®NORDcanopy |UV 1.0 installation guide
1. Installation of the Control Unit
*Depending on the size of the kitchen canopy, there may be 1-4 “L” lamp power sockets.
1.1 Opening the front panel
To install the Control Unit, the right supply air panel of the canopy must be removed using a small screwdriver
or Allen wrench, as shown in the picture. Press upward to release the internal latch.
6
2
3
4
1
5
8
9
10
7
1 – UV-C lamp “L” power sockets*
2 – Control Unit fastening clamps
3 – On/O switch
4 – Power socket with automatic circuit breaker for
IEC C13 plug
5 – Control Panel RJ45 socket
6 – Indicator LED
7 – Exhaust pressure measurement nozzle
8 – Ambient pressure measurement nozzle
9 – Remote Access Device RJ45 socket
10 – Input socket (ModBus, building automation I/O)

www.etsnord.com
8RDM-064-0722
®NORDcanopy |UV 1.0 installation guide
1.2 Mounting the Control Unit to the supply chamber
Next, fasten the Control Unit up against the ceiling of the supply chamber using its four fastening clamps.
4x

Images are for illustrative purposes.
We reserve the right to make changes. RDT-064-0722 9
®NORDcanopy |UV 1.0 installation guide
1.3 Installation of pressure measurement hoses
Next, two pressure measurement hoses shall be connected between the nipples protruding from the Control Unit
to their respective nipples on the ceiling of the supply chamber. Connect the rightmost hose to the rightmost
nipple (picture 1). This hose provides the system with the static pressure of the surrounding environment. Attach
the left hose to the left pressure nipple (picture 2). Ensure that these connections are made correctly and that
the hoses are firmly attached to each nipple.
Next, the long exhaust pressure measurement hose must be connected above the canopy. Connect the hose
from the nipple closest to the center of the canopy to the nipple above the exhaust chamber. Ensure that the
hose is firmly attached to each nipple.
NOTE! To prevent dirt or debris from entering the Control Unit or pressure measurement hoses, cap
them o until installation is ready to be performed.
1. 2.

www.etsnord.com
10 RDM-064-0722
®NORDcanopy |UV 1.0 installation guide
2. Installation of UV-C lamps
2.1 Removing UV shield and grease filters
2.2 Mounting UV-C lamps to the exhaust chamber
Carefully attach each UV-C lamp to the ceiling of the exhaust chamber so that the blue plastic part at the ends
of the lamp, not the glass portion, remains between the clamps. Tighten the clamp with its fixing screw.
NOTE! Before installing UV-C lamps, make sure that the system is turned o.
2x

Images are for illustrative purposes.
We reserve the right to make changes. RDT-064-0722 11
®NORDcanopy |UV 1.0 installation guide
Connect each lamp power cord “quick plug” to a connector on the exhaust chamber ceiling and twist its locking
ring clockwise.
2.3 Mounting safety UV shield and grease filters
NB! When replacing the UV shield, make sure that it is in place correctly.

www.etsnord.com
12 RDM-064-0722
®NORDcanopy |UV 1.0 installation guide
3. Remote Access Device connection
To install the Remote Access Device, attach the DIN rail to the control panel in the prescribed place. Next, mount
the device securely to the Control Unit.
A – Ethernet port for network connection
B – LAN cable connection between the device and the Control Unit
A
B

Images are for illustrative purposes.
We reserve the right to make changes. RDT-064-0722 13
®NORDcanopy |UV 1.0 installation guide
4. Installation of the Control Panel
4.1 Mounting LCD frame and LAN cable connection
Remove the LCD frame from the screen and connect the LAN cable to the LCD frame. Then attach the frame
with two screws to the wall as shown in the picture.
NOTE! Always install the Control Panel in a visible location easily accessible to the sta, or in the
immediate vicinity of it. Avoid placing it above kitchen appliances.
48mm
25mm
22,50 mm

www.etsnord.com
14 RDM-064-0722
®NORDcanopy |UV 1.0 installation guide
4.2 Attaching and removing the LCD screen
4.3 Connecting the LAN cable to the Control Unit
Next, route the cable into the canopy supply air chamber and insert the connector into the Control Unit RJ45
socket.

Images are for illustrative purposes.
We reserve the right to make changes. RDT-064-0722 15
®NORDcanopy |UV 1.0 installation guide
5. Electrical connections of Control Unit
5.1 Power connection for UV-C lamps with Control Unit
Depending on the Control Unit installed, there could be 1-4 UV-C lamp power plugs that need to be connected.
Connect each lamp according to their respective connector L1-L4 on the of the Control Unit.
5.2 Connecting safety switch to the control panel
NOTE! The Control Unit shall be electrically interlocked with the exhaust ventilation system so that the
entire system powers o when the ventilation is switched o.
Pin 4 and 5

www.etsnord.com
16 RDM-064-0722
®NORDcanopy |UV 1.0 installation guide
5.3 Connecting the power cable to the control panel
5.4 Data connector connections
*Empty canopy – canopy that does not have Control Unit, but it has UV-C lamp(s), pressure sensor and UV
shield safety switch.
1 - 3 – Modbus, interconnection of Control Units
4 - 5 – UV shield safety switch
6 - 10 – Empty canopy*
11 - 14 – Building automation

Images are for illustrative purposes.
We reserve the right to make changes. RDT-064-0722 17
®NORDcanopy |UV 1.0 installation guide
5.5 Compatibility with building automation
UV cleaning system is compatible with building automation. The following table shows the functions of the data
connector pins.
Data connection IO name Terminological name
1 A Modbus data (A)-
2 B Modbus data (B)+
3 GND Modbus GND
4Safety switch
feedback
UV shield safety switch
cable
5 GND GND (safety switch)
6 24V Empty canopy dierential
pressure sensor 24V
7 GND Empty canopy dierential
presure sensor ground
8 Y
Empty canopy dierential
presure sensor 0...10V
measured value
9 24V Empty canopy UV shield
safety switch cable
10 GND Empty canopy UV shield
safety switch ground
Output status signal for building automation
TC1 OUFLEX MBA outputs
REALY 3: terminal 11 = bit 0
REALY 4: terminal 12 = bit 1
REALY 5: terminal 13 = bit 2
Status Bit 0 Bit 1 Bit 2
System OFF 0 0 0
System ON – operation mode 1 0 0
Service – 10000 h 1 1 0
Service – 16000 h 1 0 1
Protection switch open 0 1 0
Pressure error < 20 Pa 0 0 1
UV lamp error 0 1 1

®NORDcanopy |UV 1.0 installation guide
Images are for illustrative purposes.
We reserve the right to make changes. RDT-064-0722 18
Electric scheme of terminal block

Images are for illustrative purposes.
We reserve the right to make changes. RDT-064-0722 19
®NORDcanopy |UV 1.0 installation guide
6. Maintenance
In the case of a soiled but functioning lamp, cleaning is required. In the case of a defective lamp, it must be
replaced. Only replacement parts supplied by ETS NORD Customer Service may be used when servicing ETS
NORD equipment. The defective lamp shall be delivered to the appropriate waste treatment site.
6.1 UV shield and grease filter removal
Power o the UV system and verify the device is o at the Control Panel before removing UV shield and grease
filters. Use UV-protective glasses as a safety precaution. After the system and lamp have been powered o,
wait 3 minutes until the lamp has cooled for safe handling.
Remove the shield, and then the grease filters.
NOTE! After 10,000 working hours, the intensity of the lamps decreases by 20% at 185nm. It is
recommended to replace all UV-C lamps in the system after this time.
NB! Before UV-C lamps are serviced, make sure that the system is turned o and, after
switching o, wait 3 minutes until the lamps have cooled down for safe handling.
NB! Use safety goggles and gloves during maintenance!
NB! Risk of falling! Make sure that the device is installed with adequate support.

www.etsnord.com
20 RDM-064-0722
®NORDcanopy |UV 1.0 installation guide
6.2 UV-C lamp electrical disconnection
Disconnect the lamp from the power circuit by first twisting the locking rings counterclockwise, then pulling the
connectors downward. Never pull on the cables themselves, only the connectors.
6.3 UV-C lamp removal from exhaust chamber
Release the lamp from the clamp attachments by unscrewing the screw.
2x
To install a new UV-C lamp, see chapter 2 “Installation of UV-C lamps”. After installing new lamp start the
system and ensure that it functions properly by observing the Control Panel.
NB! In the case of a running device, UV shields and filters must never be
removed due to the risk of ultraviolet radiation!
NB! Lamps should only be handled with protective gloves and eyewear.
Other manuals for NORDcanopy
5
Table of contents
Other ETS NORD Fan manuals
Popular Fan manuals by other brands

Inspire
Inspire Shamal Assembly, Use, Maintenance Manual

Minka Group
Minka Group minkaAire DELANO II Instruction manual warranty certificate

Fanimation
Fanimation BLITZ LP8377LBL manual

Kichler Lighting
Kichler Lighting Starkk 330180MWH instruction manual

Tornado
Tornado HI-FAN-12HVWM- WR-1P instruction manual

Hunter
Hunter Castleton 55044 owner's manual