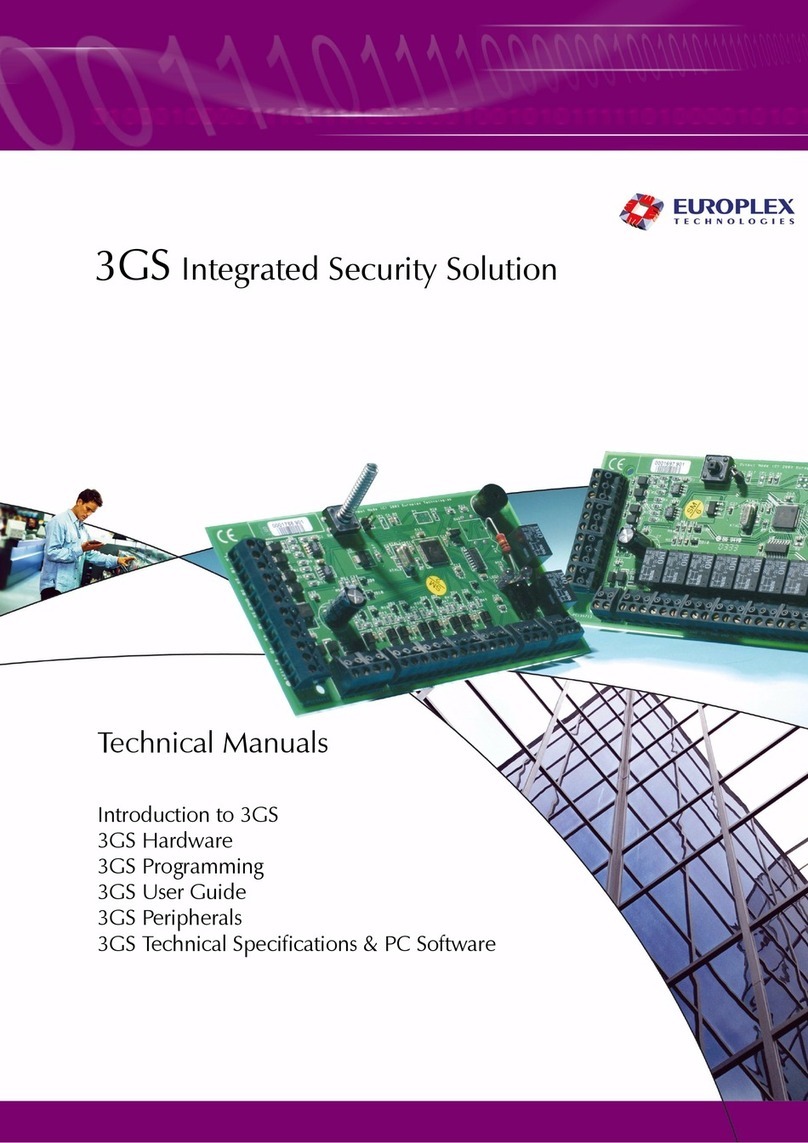
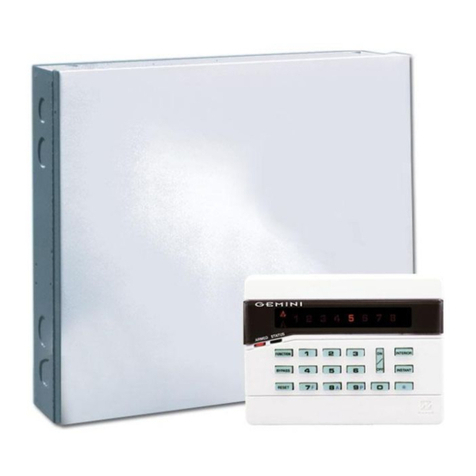
Europlex SUITEPLEX 3850 User manual

INTRAMERICA SECURITY TECHNOLOGIES
SCARBOROUGH, ONTARIO, CANADA
M1B 3L6
TEL (416) 754-4313
FAX (416) 754-8992
E-MAIL [email protected]
INSTALLATION AND OPERATION MANUAL FOR
SUITEPLEX MODEL 3850
CONCIERGE CONTROL PANEL
(C) COPYRIGHT EUROPLEX LIMITED 1986
REVISED: JANUARY 1998

SUITEPLEX SYSTEM OPTIONS
DRAFT ISSUE NO: 1
SOFTWARE REVISIONS:
CONCIERGE.SPL REV 1.32 - CONCIERGE PANEL APPLICATIONS PROGRAM
SPLXAUT3.LIT - CONCIERGE PANEL LITERAL FILE
DATE: 30-04-92
CONTENTS:
- HOW TO INITIALIZE THE SUITES
- SYSTEM OPTIONS NOTE
- CONCIERGE PANEL USER OPTIONS
- CONCIERGE PANEL SINGLE KEY FUNCTIONS
- SUITE PANEL USER OPTIONS
- SUITE PANEL SINGLE KEY FUNCTIONS
FUNCTION:
This document lists the options available to the Concierge panel and Suite panel users. It lists the
keys required to access each option. It also provides a functional description of each option.

1
SUITE INITIALIZATION
To initialize the suites, open the Concierge panel door, and press the CPU reset button. The
panel will restart the program. Alternatively, you may effect a Soft Start without having to open
the control panel. Enter User Number 2's code (default 1015 or 1020 depending on release date
of software), and press the PREV key. Display will show SET DATE & TIME ?. Press the
NO key and display will show DAYLIGHT SAVING TIME?. Press the YES key and
display will show ARE YOU SURE ?. Press the YES key and the panel will effect a Soft
Start.
After a few seconds, when the panel display shows CONC 1.32 or similar, press the YES key.
The display will show INITIALIZE SUITES ?.
Press the YES key again and the panel will show SUITE INITIALIZATION.
Press the YES key and the panel will show DEBUG MODE ?.
Press the YES key and the panel will show MAX RETRIES 3. Press the ENTER key. The
panel will show LOG RETRIES ?.
Press the NO key. The panel will show HIGH SPEED COMMS ?.
Press the YES key. The panel will show OVERWRITE SUITE IDS ?. If the panel has not
been cold start zapped (thus removing the IDS from the panel) press the YES key. This will
transfer the IDS from the panel to the suite plates. If, however, the panel has been cold started
with zap then press the NO key and the ids stored in the suite plates will be transferred back to
the concierge panel. The panel will display MAX SUITE NO. = 255.
Enter the number of the highest keypad address and press the ENTER key. The panel will now
start scanning for suites and any suite number that it finds will have an *displayed after it. This
means that suite is now on-line.
When the maximum suite number is reached the panel will display ON LINE O ----> N where
the O is the old suite number count and the N is the new suite number count. Press the YES key
to accept the count or the NO key to repeat the process.
The panel will now display a number of messages to which you may press the ENTER key and
finally the panel will end with BUSY ... RESCHEDULING.
The initialization of the suites is complete.

2
SYSTEM OPTIONS
The following functions may only be accessed by the users whose options have been set
accordingly.
Default Master User, user 1 code (Concierge & Suite): 1010
Default Service User, user 2 code (Concierge & Suite): 1020 on panels dated after July 1/98
or 1015 on panels before July 1/98.
Users 3-5: No default codes.
CONCIERGE USER OPTIONS
These are the options available to the CONCIERGE users and are accessed by entering the
USER CODE + the OPTION KEY on the Concierge Panel keypad.
ITEM KEY OPTION
1 <DISARM> DISARM Functions: 3 options.
1.1 Disarm Concierge: to accept alerts or Disarm the Concierge Panel.
1.2 Disarm Suite: to accept alerts or Disarm specified suites.
1.3 Acknowledge Alarms: to accept individual alerts on the Concierge
panel and the suite plates.
2 <HOME> Remote HOME ARM
Remote arming of specified suites.
3 <SLEEP> Remote SLEEP ARM
Remote arming of specified suites.
4 <FULL> Remote FULL ARM
Remote arming of specified suites.
5 <PREV> TIME OPTION Menu: 2 options.
5.1 Set Date & Time
5.2 Daylight Saving: 2 options.
5.2.1 Set-up for automatic hour change
5.2.2 Soft Start
6 <NEXT> IMMEDIATE Functions: 2 options.
6.1 Immediate Literal Execute
6.2 Immediate Literal Edit
ITEM KEY OPTION

3
7 0 SET-UP Test Option: 5 options:
7.1 Sub-menu USER SET-UP: Permits the master user to change it's own user
name and user code. The master user can change the names, codes
and options of any user on any suite. The service user can change
it's own name and code, and the name and code of the other users
(except the master user) on any suite. The other 4 users on the
Concierge Panel are allowed to change their own names, codes and
options but only the name of a user lower in status and may not
alter the set-up of any higher status user, e.g. the master.
7.2 Sub-menu SYSTEM SET-UP: 2 options
7.2.1 SET ZONES
7.2.2 SET VARIABLES
7.3 Sub-menu SERIAL SET-UP: Allows set-up of the serial channel 1 & serial
channel 2 parameters:
7.3.1 Baud Rate
7.3.2 Data Bits
7.3.3 Parity
7.3.4 Filter Byte 1
7.3.5 Filter Byte 2
7.3.6 System ID
7.3.7 Access Control
7.4 Sub-menu UP/DOWNLOAD DATA: 2 options:
7.4.1 UPLOAD DATA TO PC: This allows the user to upload
data from the panel to a PC.
7.4.2 DOWNLOAD DATA FROM PC: This allows the user to
download data from a PC to the panel.
N.B. Once selected, this routine surrenders control to an external master program and normal
panel operation is suspended until the upload/download has completed.
7.5 Sub-menu SUITE MONTIOR: Checks for a suite on-line.

4
ITEM KEY OPTION
8 1 CHANGE OPTIONS: Allows change of the options available to users
2,3,4 & 5.
9 2 LOG FUNCTION: 3 options:
9.1 VIEW LOG: Displays the log which contains zone change, user
function, status, output and date change event information for each
suite in the system.
9.2 PRINT LOG: Print the System Log in reverse chronological order.
9.3 PRINT SUITES LIST: Print a list of initialised suites and their
on-line/off-line status.
10 3 MAINTENANCE Functions: 2 options
10.1 SET MAINTENANCE CODE
10.2 SET MAINTENANCE OPTIONS
11 4 BATTERY Test.
Alerts the user that a battery test has been done, and causes an alarm if the
battery is faulty.
12 5 SPARE MODE.
Literal available for mode command.
13 6 SPARE MODE.
Literal available for mode command.
14 7 MESSAGE Function: 3 options:
14.1 Set Message Options: permits the Concierge panel user to send a
20 character message to a specified range of suites.
14.2 Clear Message Option: allows the Concierge Panel user to clear
the messages which were sent to a range of suites.
14.3 Clear Suite Message Option: allows the Concierge Panel user to
clear messages sent to it by a specified range of suites.
15 8 SUITE NAME CHANGE: Allows the user to change the Concierge Panel
name, or the name of any suite.
16 9 SPARE Mode.
Literal available for mode command.

5
CONCIERGE USER OPTIONS - DETAIL
1. Disarm Function
This routine offers 3 options to the user, each prompted by a question mark and selected by
pressing the <ENTER> key or the <YES> key. Pressing the <NEXT> key ro the <PREV> key
moves forwards or backwards respectively through the 3 option available. The <QUIT> key
exits the routine.
1.1 Disarm Concierge
Selection of this option executes the Disarm literal on the Concierge panel. If the panel is in
Disarm mode this will clear all alerts. The panel automatically exits the options.
1.2 Disarm Suite
Selection of this option prompts the user to enter the number of the suite to be disarmed. Once
the suite number has been selected the Disarm literal is executed on that suite if it is on-line.
Press the <QUIT> key to exit the option.
1.3 Alert Accept
Selection of this option checks the entire system for alerts and prompts the user to individually
accept each one found. The panel automatically exits the option.
2. Remote Home Arm
This routine allows the user to Home arm any on-line suite by prompting the user to enter the
suite number and then executing the Evening Arm literal on that suite. The <QUIT> key exits.
3. Remote Sleep Arm
This routine allows the user to Sleep Arm any on-line suite by prompting the user to enter the
suite number and then executing the Sleep Arm literal on that suite. The <QUIT> key exits.
4. Remote Full Arm
This routine allows the user to FULL Arm any on-line suite by prompting the user to enter the
suite number and then executing the Away Arm literal on that suite. The <QUIT> key exits.
5. Time Option Menu
Pressing the <NEXT> key or the <PREV> key moves forwards or backwards respectively
through the 2 options available, and the <ENTER> key or the <YES> key selects the option. The
<QUIT> key exits the routine.
5.1 Set Date & Time
On entry to this option the prompt "YEAR" the range of values which may be entered and the
default year or the current year are displayed in the form "YEAR[0 - 99] 90". The value can
then be changed by entering thedesired number followed by <ENTER>. Pressing the <NEXT>
key, the <PREV> key or the <ENTER> key displays the next value to be set e.g. "MONTH [1 -
12] 1". The <QUIT> key exits from Time Set-up and the panel then reschedules. The new date
and time will be displayed if the panels are in the correct mode.

6
5.2 Daylight Saving
This option contains two elements:
5.2.1 Hour Adjustment
If the user number is 1 (master user), 3,4,5 or 6 then this routine causes Hour Change on
Sunday. Reselection of this routine toggles the Hour Adjustment.
5.2.2 Soft Start
If the user is the service user (i.e. user 2) the panel prompts "ARE YOUR SURE?". Pressing
the <YES> key will cause a reset of the panel.
6. Immediate Functions
Pressing the <NEXT> key or the <PREV> key moves forwards or backwards respectively
through 2 options available and the <ENTER> key or the <YES> key selects the option. The
<QUIT> key exits the routine.
6.1 Immediate Literal Execute
This routine allows the user to enter a literal string to be executed immediately. Type the
literal string and press the <ENTER> key (with the cursor in th normal orientation) when
finished.
6.2 Immediate Literal Edit
This routine allows the user to edit a literal. Selection of this option prompts the user to enter
the literal number to be edited and then displays the literal in edit mode. Change the literal as
required and press the <ENTER> key (with the cursor in normal orientation) when finished. The
revised literal will now be stored in memory.
7. Set-up Test Option
Pressing the <NEXT> key or the <PREV> key moves forwards or backwards respectively
through the 5 options available, and the <ENTER> key or the <PREV> key selects the option.
The <QUIT> key exits the routine.
7.1 User Set-up
(i) The panel displays "SET USER CODES" followed by the prompt "ENTER SUITE NO.0".
Press the <NEXT> key to display the desired number or enter it directly. Press the <ENTER>
key to select this number.
(ii) The panel prompts "ENTER USER NO.". The default user number is 1 but another can be
selected by using the <NEXT> key or by entering the number directly. The valid selections are
1,2,3,4,5. If the user name is to be changed then press the <CHANGE> key and read (iii).
Otherwise press the <ENTER> key and go to (iv).
(iii) The previous name, which may be the default name, is displayed in edit mode. This name
may be changed by first deleting it using the <SHIFT> key (maximal length restriction) and then
re-entering it.
On completion, press the <ENTER> key with the cursor in the normal orientation.
(iv) The prompt "ENTER USER CODE ----" is now displayed. Pressing the <ENTER> key
leaves the code unchanged. (In the case of users 3,4, and 5, the <ENTER> key will not be
accepted if no previous value exists.) Otherwise a 4 digit code may be entered. This code

7
must not conflict with another user code for that suite.
(v) The panel will now display "ENTER USER NO. X " where X is the next user number for
that suite. The procedure (ii) - (iv) may be repeated or press the <QUIT> key to exit the option.
7.2 System Set-up:
Pressing the <NEXT> key or the <PREV> keys moves forwards or backwards respectively
through the 2 options available, and the <ENTER> key or the <YES> key selects the option. The
<QUIT> key exits the routine.
7.2.1 Set Zones:
This routine starts with the prompt "ENTER SUITE NO. 1 "
Selection of suite number follows the same procedure as that of USER-SET-UP for the
Concierge Panel and once this is complete a message of the following form is displayed:
<zone no.> "TYPE IS ..." <zone type> .
Pressing the <CHANGE> key allows the zone description (e.g. "HALL DOOR") to be
changed in the edit mode described in 7.1. Pressing the <NO> key displays the next zone type
and pressing the <YES> key displays the previous zone type. Pressing the <NEXT> key selects
the next zone number and pressing the <PREV> key selects the previous zone number.
Press the <QUIT> key to exit the option.
7.2.2 Set Variables:
The user is prompted with the variable and it's default value. The new value should be entered.
To select the next variable the <NEXT> key should be pressed. Press the <QUIT> key to exit the
option.
7.3 Serial Set-up
The <NEXT> key or the <PREV> key moves through the serial channels available and the
<ENTER> key or the <YES> key selects the currently displayed channel, whose parameters may
then be changed. 7.3.1 Baud Rate This displays the current value of the selected channel baud
rate. Pressing the <YES> key or the <ENTER> key selects this displayed value and goes on to
display the next seial parameter that may be changed. Pressing the <NO> key or the <NEXT>
key will display the next legal value of the baud rate which may then be selected.
Pressing the <PREV> key will display the previous legal baud rate value which may then be
selected. Pressing the <QUIT> key will exit the serial parameter selection, and stores the baud
rate currently displayed.
The available selections are: 150,300,1200,2400,4800.
7.3.2.Data Bits
This displays the current value of the selected channel data bit selection.
Pressing the <YES>,<ENTER>,<NO>,<NEXT>,<PREV>, or <QUIT> key
has the effect described in 7.3.1.
The available selections are: 7 data bits, 8 data bits.

8
7.3.3 Parity
This displays the current value of the selected channel parity.
Pressing the <YES>,<ENTER>,<NO>,<NEXT>,<PREV> or <QUIT> key has
the effect described in 7.3.1. The available selections are: ODD, EVEN, NONE.
7.3.4 Filter Byte 1
This dsiplays the current filter byte 1 for the selected serial channel as a decimal number.
Enter the value as a decimal number using the number keys. Pressing the <YES>, <ENTER>
or <QUIT> key has the effect described in 7.3.1.
Any integer less than 256 will be accepted.
7.3.5 Filter Byte 2
As 7.3.4.
7.3.6 System ID
This displays the current system id for the selected serial channel. Enter the value as a decimal
number using the numeric keys. Pressing the <YES>, <ENTER> or <QUIT> key has the effect
described in 7.3.1. Any integer less than 256 will be accepted.
7.3.7 Access Control
This displays the current access control value for the selected serial channel as a decimal
number. Enter the value as a decimal number using the numeric keys.
Pressing the <YES>, <ENTER> or <QUIT> key has the effect described in 7.3.1
Any integer less than 256 will be accepted.
7.4 Up/Download Data
7.4.1 Upload Data
(i) Once selected, the panel will suspend normal operation as soon as the data communication
segment is called and the panel has stopped communicating on serial channel 2. The panel may
therefore display "UPLOAD DATA?", or the date & time or an alert message etc. when it
suspends. The user may attempt to Disarm the panel. If the panel does not acknowledge the key
depressions then it has suspended.
(ii) The user must now run a program running on a PC connected to the panel via serial
channel 2. The program will act as the Master in an ESCO-type protocol and can initiate the
dialogue
to upload data from the panel. This data may comprise maintenance codes, user options, user
names, user codes, suite names and changed literals.
(iii) The panel will revert to normal operation when instructed by the PC Master program.
7.4.2 Download Data
(i) As 7.4.1 (i) but displays "DOWNLOAD DATA ?"
(ii) As 7.4.1.(ii), downloading the same data. In this case the
correct data file must be available for the PC master program
to access.
(iii) As 7.4.1 (iii).

9
7.5 Suite Monitor
This routine prompts the user to enter the suite number to be monitored. Use the <NEXT>,
<PREV> or numeric keys to display the suite number and press the <ENTER> key to select it.
The suite will beep and "SUITE MONITOR" will flash 4 times on the Suite panel display. The
Concierge panel will display "SUITE ON -LINE" if the suite is on-line. Otherwise "SUITE
OFF-LINE" will be displayed at the Concierge Panel. Select another suite number using the
same method or press the <QUIT> key to quit the option.
8. Change Options
The user is prompted to enter the suite number and then the user number. These may be
selected using the procedure of 7.1. The panel now displays the first option followed by "YES"
or "NO". Pressing the "YES" key or the "NO" key or the "CHANGE" key to change this. The
selected user will have this option if the display reads "YES". The <NEXT> key or the
<ENTER> key will cause the panel to display the next option and the corresponding "YES" or
"NO". The <QUIT> key will exit to the "ENTER USER NO." prompt. Enter another user
number and select it's options or press the <QUIT> key to exit the routine.
N.B: The user number 1 (master) options may be changed to "NO" on the display but will still
be stored as "YES", i.e. they cannot be changed.
9. Log Function
Pressing the <NEXT> key or the <PREV> key moves forwards or backwards respectively
through the 3 options available, and the <ENTER> key or the <YES> key selects the option.
The <QUIT> key exits the routine.
9.1 View Log
This causes all events logged by the Concierge panel and each Suite panel to be displayed on
the Concierge Panel displayed in reverse chronological order. The <QUIT> key aborts the log
scrolling. The <PREV> key causes the previous logged event to be redisplayed and then
continue scrolling. "FINISHED" is displayed at the end of the log.
9.2 Print Log
Three situations arise:
(a) If the panel is currently printing the log in forwards chronological order, selecting this
option causes the panel to suspend that operation and print the System Log. This comprises
a header and all events logged by the Concierge panel and each Suite panel in reverse
chronological order. On completion the panel will revert to printing the current logged events in
forward chronological order.
(b) If the panel is currently printing the System Log (9.2) in reverse chronological order then
the user will be prompted with "ABORT PRINT LOG?".
(i) Pressing the <YES> key will cause the System Log printout to halt and the panel will print
the list if initialised suites and their current on-line/off-line status. On completion the panel will
revert to printing the current log events in forward chronological order.
(ii) Pressing the <NO> key, the <ENTER> key or the <QUIT> key will let the printer
continue with it's current task. On completion the panel will revert to printing the current logged
events in forward chronological order, without printing the list of initialised suites.
(c) If the panel is currently printing the report of initialised suites, the panel prompts with

10
"ABORT PRINT SUITES?".
(i) Pressing the <YES> key will cause the report printout to halt and the printer will revert to
printing the current logged events in forward chronological order.
(ii) Pressing the <NO> key, the <ENTER> key or the <QUIT> key will let the printer
continue with it's current task. When finished the panel will revert to printing the current logged
events in forward chronological order.
10. Maintenance Function
Pressing the <NEXT> key or the <PREV> key moves forwards or backwards respectively
through the 2 options available, and the <ENTER> key or the <YES> key selects the option. The
<QUIT> key exits the routine.
10.1 Set Maintenance Code
This routine allows the Concierge Panel user to set the maintenance code to enable
maintenance options. In this routine the user is prompted with "ENTER USER CODE ---". A
four digit code should be entered. This code is checked for validity and if it is not valid a new
code must be entered. Once this has been done SET MAINTENANCE OPTIONS must be
selected to select the suites with which this code will work.
10.2 Set Maintenance Options
The user is prompted with "FROM SUITE NO.". When this is entered the next prompt is "TO
SUITE NO.". When this has been entered check is carried out to ensure that the maintenance
code has been set (10.1) and if that is the case then the maintenance option is allowed for the
specified range of suites. The options available to the maintenance user are fixed.
Maintenance user arming is of one-arm nature, i.e. the maintenance user may only arm a suite
once. The maintenance user regains the right to arm a suite when set maintenance option is
recalled.
11. Battery Test
Selecting this option executes the Battery Test literal. This alerts the user that a battery test has
been done and causes an alarm if the battery is faulty.
12. Spare Mode
13. Spare Mode
14. Message Function
Pressing the <NEXT> key or the <PREV> key moves forwards or backwards respectively
through the 3 options available, and the <ENTER> key or the <YES> key selects the option. The
<QUIT> key exits the routine.
14.1 Set Message Option
Selecting this option prompts the user with "ENTER MESSAGE" followed by a blank screen.
A message of length 20 characters may be typed in. Press <ENTER> key (with the cursor in
normal orientation) when finished. The panel displays "DISPLAY MESSAGE" and the user is
then prompt with "FROM SUITE NO 1". The default value of the suite number is 1. The suite

11
number can be changed by pressing the <NEXT> key, or by entering the number required
followed by the <ENTER> key. The next prompt is "TO SUITE NO. 255". The default end suite
number is 255. The end suite number can be changed in the same manner as the start suite
number. By accepting the default values, the message will be displayed on all on-line suites.
otherwise it is displayed on the range of suites selected. The <QUITE> key aborts this routine.
14.2 Clear Message Option
The panel displays "CLEARING MESSAGE" and then prompts the user with "FROM SUITE
NO. 1". The default start value is 1 and the default end value is 255. These can be changed as in
14.1. By accepting the default values, the message which was sent to all suites will be cleared,
otherwise the message will be cleared from the displays of the suites in the specified range. The
<QUIT> key aborts this routine.
14.3 Clear Suite Message Option
This option is similar to the Clear Message option. It clears messages being displayed on the
Concierge panel which were sent by suites. As before all or a range of messages may be cleared.
The <QUIT> key aborts this routine.
15. Suite Name Change
Changing or editing the names of Suite units follows the same procedure outlined above (7.1
User Set-up) for changing the user name.
16. Spare Mode
SINGLE KEY FUNCTIONS
KEY OPERATION
* <FIRE> Causes alarm and sets relays.
* <PANIC> Causes alarm.
* <EMERG> Causes alarm.
* These keys have to be depressed for 3 second or pressed 3 times
in succession.

12
SUITE USER OPTIONS
Options available to the SUITE user are as follows, and are
accessed by entering the USER CODE + the OPTION KEY on the suite
keypad.
ITEM KEY OPTION
1 <DISARM> Disarms the suite panel by executing the disarm literal on the suite.
2 <HOME> Home Arm suite panel.
3 <SLEEP> Sleep Arm suite pnael.
4 <FULL> Full Arm suite pnael.
<PREV> Access Denied
<NEXT> Access Denied
5 0 User Set-up: User 1 can change the names, codes and options of any user
on the suite. The service user can change it's own name and code, and the
name and the code of other suite users (except user 1). The other suite
users are allowed to change their own names and codes but only the name
of a user of lower status and may not alter the set-up of any higher status
users, e.g. user 1.
6 1 Change Options: NOT AVAILABLE
7 2 View Log: NOT AVAILABLE
8 3 Domestic Function: NOT AVAILABLE
4 Access Denied.
9 5 Spare Mode
10 6 Spare Mode
11 7 Suite Message Function: NOT AVAILABLE
12 8 Suite Name Change.
Allows the user to change it's own suite name.
13 9 Spare Mode.

13
SUITE USER OPTIONS - DETAIL
1. Disarm
Executes the Disarm literal accepting all alerts on the suite.
Disarming in Disarm mode clears all alerts.
2. Home Arm
Executes the Home Arm literal to Home Arm the suite.
3. Sleep Arm
Executes the Sleep Arm literal to Sleep Arm the suite.
4. Full Arm
Executes the Full Arm literal to Full Arm the suite.
5. User Set-up
(i) The panel prompts "ENTER USER NO.". The default user number
is 1 but another can be selected by using the <NEXT> key or by
entering the number directly. The valid selections are 1,2,3,4,5.
If the user name is to be changed then press the <CHANGE> key and
read (ii). Otherwise press the <ENTER> key and go to (iii).
(ii) The previous name, which may be the default name, is displayed
in the edit mode. This name may be changed by first deleting it
using the <SHIFT> key (maximal length restriction) and then
re-entering it. On completion, press the <ENTER> key with the cursor
in the normal orientation.
(iii) The prompt "ENTER USER CODE ---- " is now displayed. Pressing
the <ENTER> key leaves the code unchanged. (In the case of users
3,4 and 5, the <ENTER> key will not be accepted if no previous
value exists.) Otherwise a 4 digit code may be entered. This code
must not conflict with another user code for that suite.
(iv) The panel will now display "ENTER USER NO. X" where X is the
next user number for that suite. The procedure (i) - (iii) may be
repeated or press the <QUIT> key to exit the option.

14
SINGLE KEY FUNCTIONS
KEY OPERATION
* <FIRE> Causes alarm and sets relay on suite.
* <PANIC> Alarm and relay.
* <EMERG> Alarm, relay and buzzer.
* These keys have to be depressed for 3 seconds or pressed
3 times in succession.
Table of contents
Other Europlex Control Panel manuals
Popular Control Panel manuals by other brands
Maple Systems
Maple Systems cMT3092X Series Installation instruction
VRinsight
VRinsight MCP Combo II - Airbus FCU operating manual

Honeywell
Honeywell SLC installation manual
GMTCNT
GMTCNT GOP70-101WP installation instructions
GOK
GOK SmartBox 4 BASIC PRO Assembly and operating manual
Mircom
Mircom FA-300 Series Installation and operation manual
