Everflourish EFP700ET User manual
Instruction manual for wall-in digital timer
Item nr: EFP700ET
A. Function
1. 20 programs per day, 15 configurations of weekly settings
2. Countdown period, 1min. to 99hrs and 59 minutes
3. Random function
4. ON/OFF mode and clock mode changing
5. Daylight Saving Time
6. It is ideal for energy saving and home security purposes, it is also a great choice for
smart home
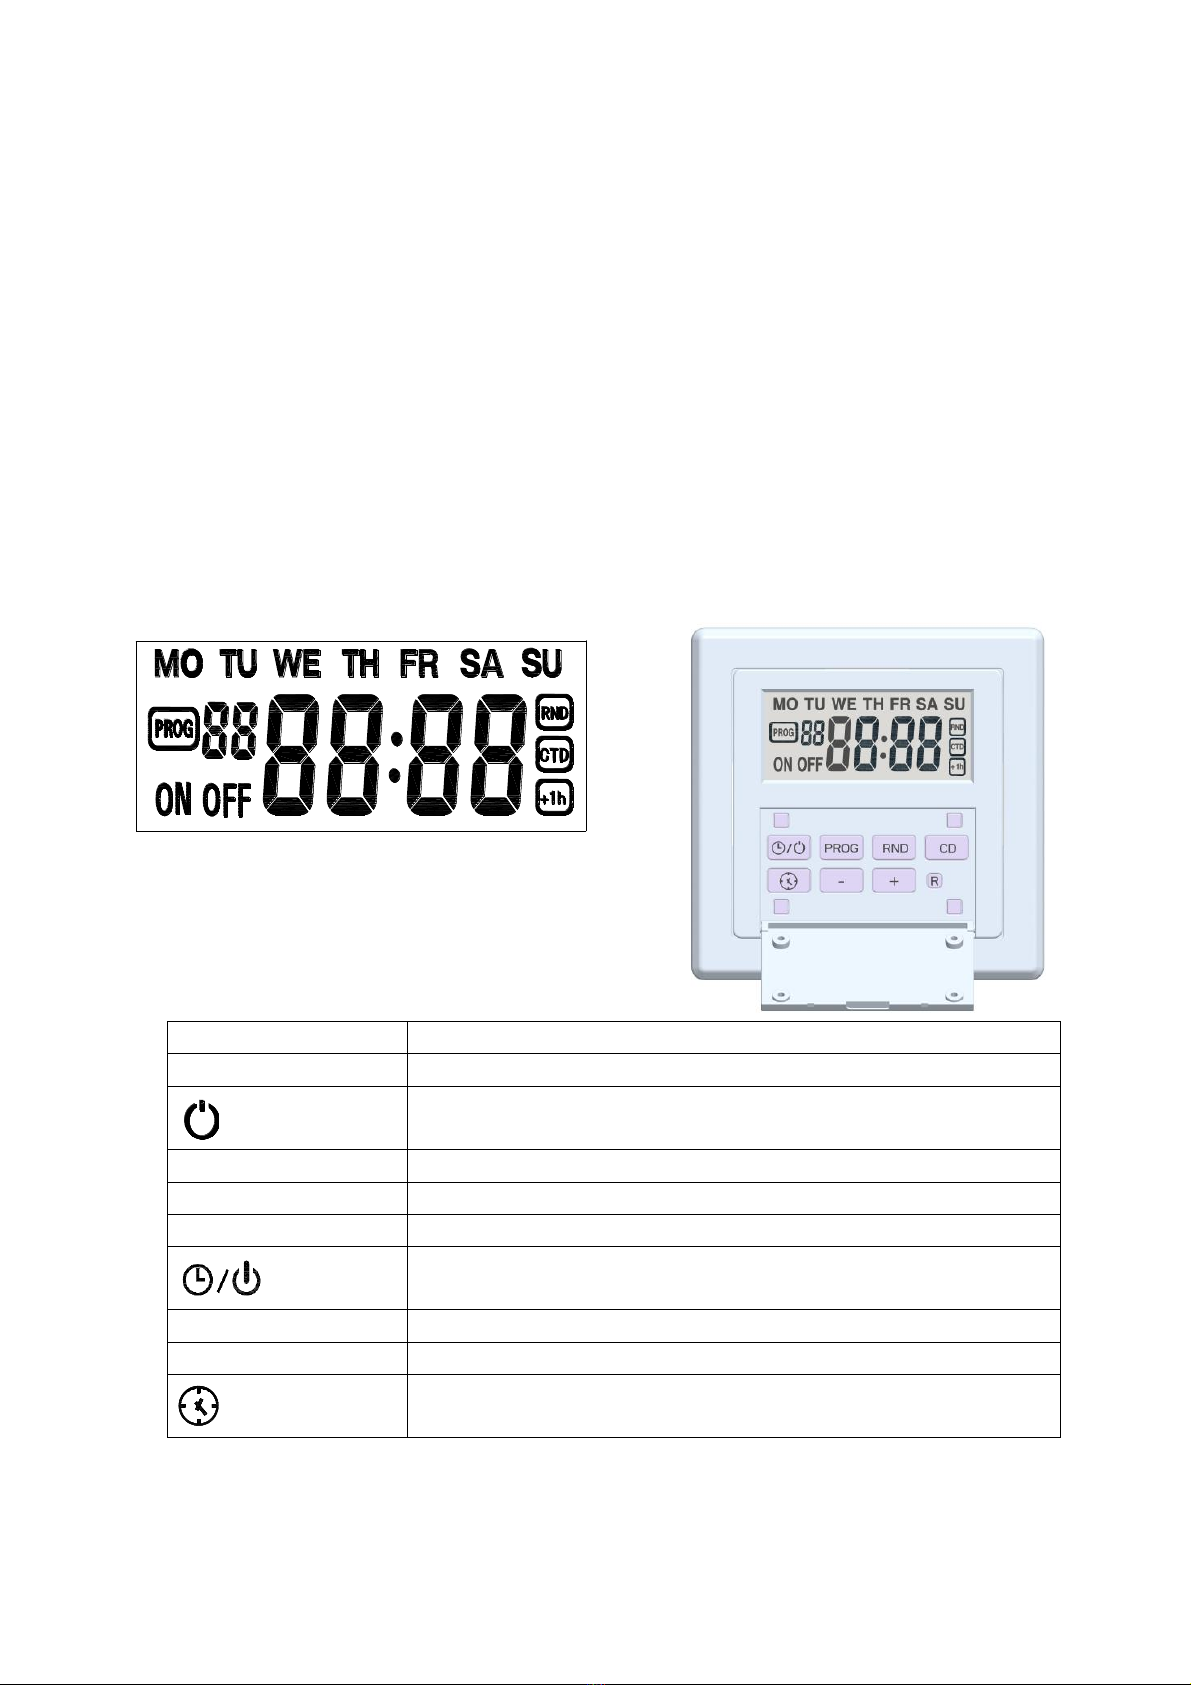
B. LCD display and input buttons’ function
Buttons
Functions
R
Press to reset
Manual ON/OFF button, change the current power status
Also can clear and resume the setting during programming
PROG
Press to program setting/browse
RND
Press to set Random function
CD
Press to set countdown OFF
ON/OFF mode and clock mode change
+
Adjust button, press for setting of Daylight Saving time
-
Adjust button
Clock setting
C.Operation Procedure
1) Clock setting

1. Press to set the clock. Day on LCD flashes.
2. Press + or –to set the day. Press ‘ ’ to confirm. Hours on LCD flashes.
3. Press + or –to set hour. Press ‘ ’ to confirm. Minute display will now flash.
4. Press + or –to select the minute. Press ‘ ’ to confirm and exit current clock setting
mode.
2) Program setting
In clock mode, when the ‘PROG’ button is pressed, the timer enters the timer setting mode,
which can provide up to 20 ON/OFF settings per day. The ON/OFF settings can be programmed
at your choice of 15 different weekly setting as listed here:
1. MO TU WE TH FR SA SU 9. MO WE FR
2. MO (Only) 10. TU TH SA
3. TU (Only) 11. SA SU
4. WE (Only) 12. MO TU WE
5. TH (Only) 13. TH FR SA
6. FR (Only) 14. MO TU WE TH FR
7. SA (Only) 15. MO TU WE TH FR SA
8. SU (Only)
Programming procedure:
PROGRAM 1 ON:
When PROG is pressed, ‘1 ON’ will flash, then it comes to following operations
a. DAYS OF WEEK –Press ‘PROG’ button. The LCD will flash the week day(s) selection
options as noted above. Press + or –to select your choice of week days –or
individual day.
b. HOUR - Press ‘PROG’ again. The LCD will now flash the hour. Press +or –to
select the hours. It is 24 hrs display.
c. MINUTE –Press ‘PROG’. The LCD will now flash the minute. Press +or –to set
the minute. You have now chosen your first program ON time.
Repeat the above procedure to set the PROGRAM 1 OFF and other programs.
NOTE:
If, while programming, there is no activity (pressing buttons) for over 10 seconds,
timer will automatically exit the setting mode. Or you can choose to press to
exit the setting.
To accelerate selection, press and hold the +or –button.
When in ‘PROG’ mode, other settings will be disabled.
During setting, you can use any one of the 4 small buttons at the corner to
clear/resume your current program setting
If the timer running under your timer setting, a ‘ ’ logo will appear on the
LCD screen
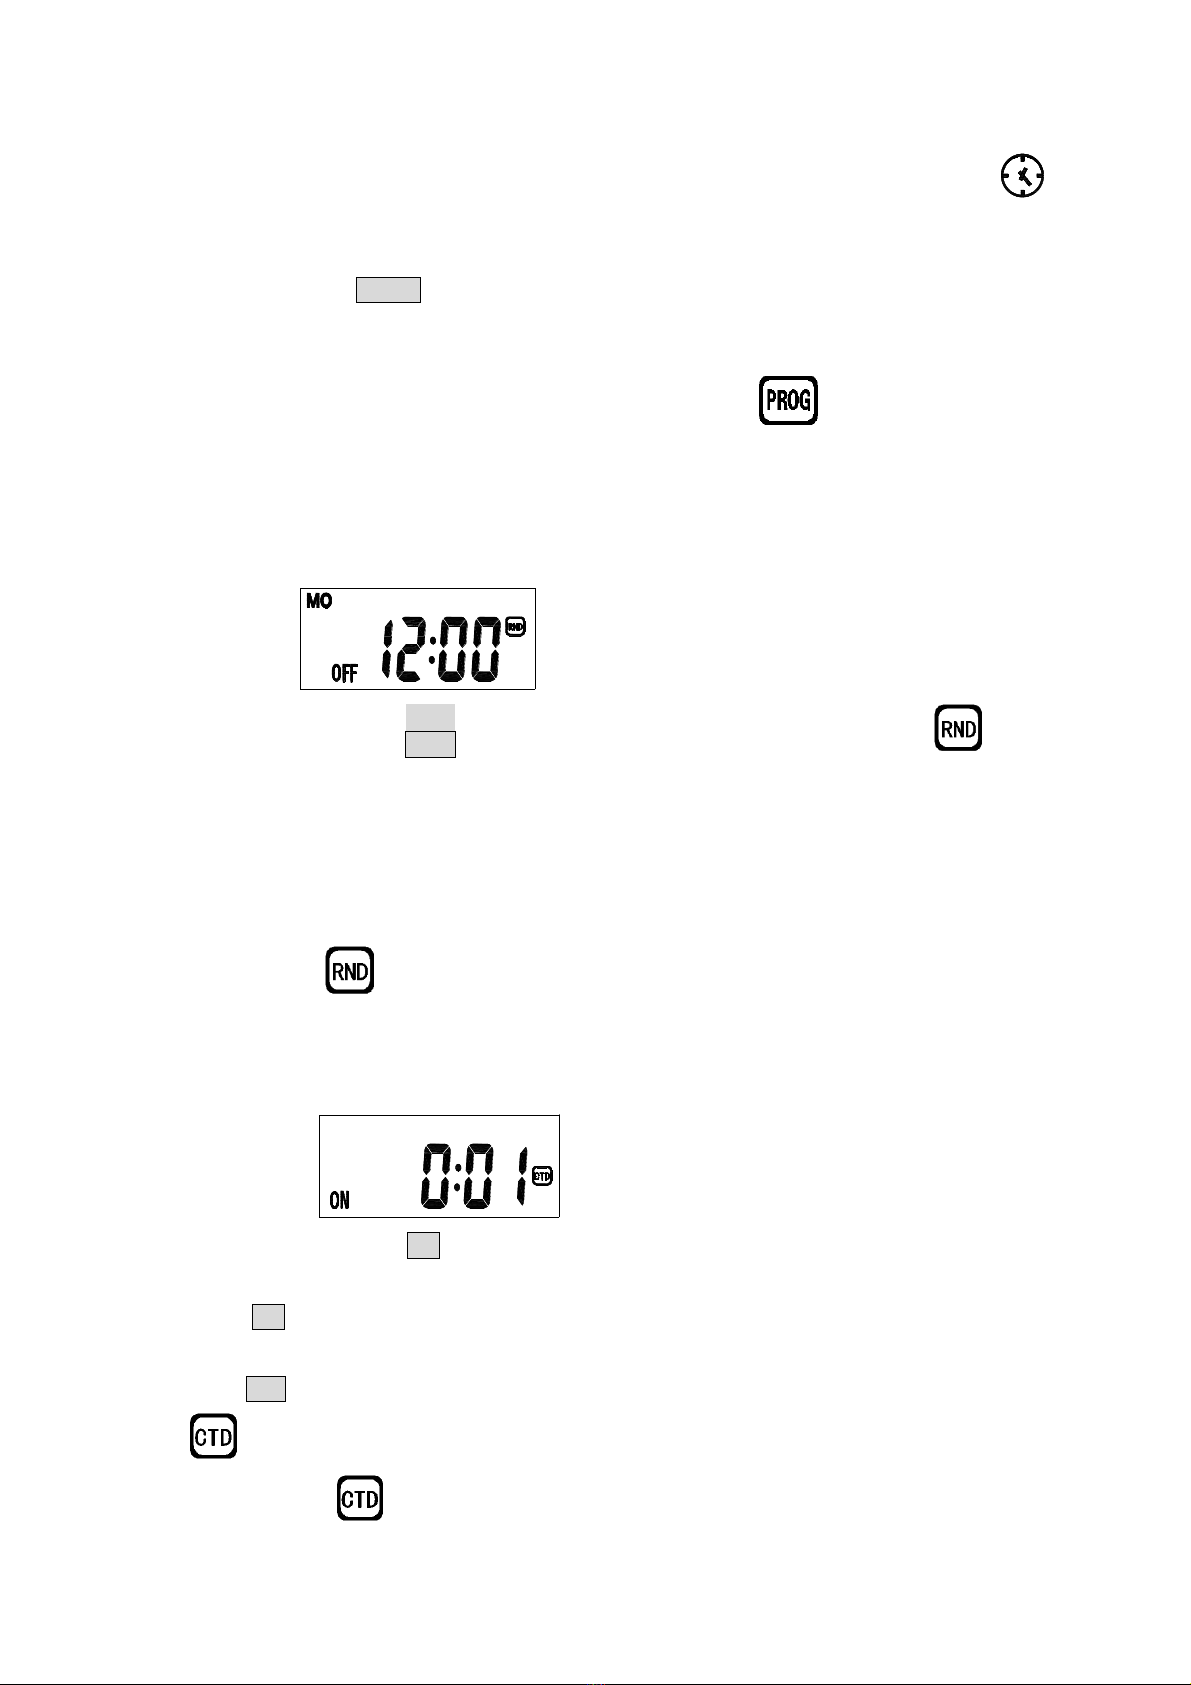
3) Random setting
1. In clock mode, press ‘RND’button to activate the random function. The ‘ ’ logo will
appear on the LCD screen. Your timer is now set for a random ON/OFF.
2. This function allows for a random ON and OFF during 18:00PM to 6:00AM the next day.
The OFF period will be 26-42 minutes.; and ON period will be 10-26minutes randomly
NOTE:
When in ‘ ’ mode, other settings will be disabled.
It repeats daily.
4) Countdown Setting
1. In clock mode, Press ‘CD’ button to set countdown, minute will be flashing on the LCD
screen. Press the +or –button to increase or decrease your countdown timer selection.
2. Press ‘CD’ button again, hour will be flashing on the LCD. Press the +or –button to
increase or decrease your countdown timer selection.
3. Press ‘CD’ button again to exit the countdown setting and start countdown function. The
logo will be flashing on the LCD screen. Your device will go off after time is counted
down and the logo will disappear.

4. To pause countdown, press ‘CD’, and the logo stops flashing until you press CD
again to continue countdown.
NOTE:
1. Countdown: from 1minute minimum and 99hrs and 59minutes maximum.
2. When in ‘CD’ mode, other settings will be disabled.。
3. When Countdown is finished, logo will disappear on the LCD screen, Power status
shows OFF. You can Press button (or any 4 small buttons at the corner) to finish
the countdown manually and back to clock mode.
5) ON/OFF mode and function mode change
Press button to change the manual ON/OFF mode and clock mode. Product is
default set by clock mode.
Press button once, timer changes to manual ON/OFF mode, ON or OFF will be
appeared on the LCD according to the current status, no clock shows. Press button
(or any 4 small buttons at the corner) to switch ON/OFF manually ONLY. Press
again, it will return to clock mode. If you want to change to Timer mode, press “PROG “. If
you want Random mode, press “RND”to activate.
Clock mode Timer mode
Random mode Countdown mode
Above pictures shows the different function modes
Above pictures:LCD display in manual ON/OFF mode.
6) Daylight Saving Time (DST) setting
In clock mode, press “+”button to turn on or off the Daylight Saving time mode
LCD will shows icon at screen if DST activated.
7) RESET
When the timer is malfunctioned, or need to completely remove the original settings, press
and hold the Rbutton to the factory default mode shows as below:
E. Specifications
1. Power Rating :230V~, 50Hz, 8A,
2. Resistive load: 1800W max.
3. Timer setting interval: 1 minutes
4. Battery: LR44, 1.5VDC, 2pcs,
F. Cautions
1. Devices to be connected to the timer MUST NOT exceed the voltage and frequency ratings as
in “Specifications”.
2. Please ensure good connection of electrical appliances and timer.
3. If the LCD shows nothing, change the battery
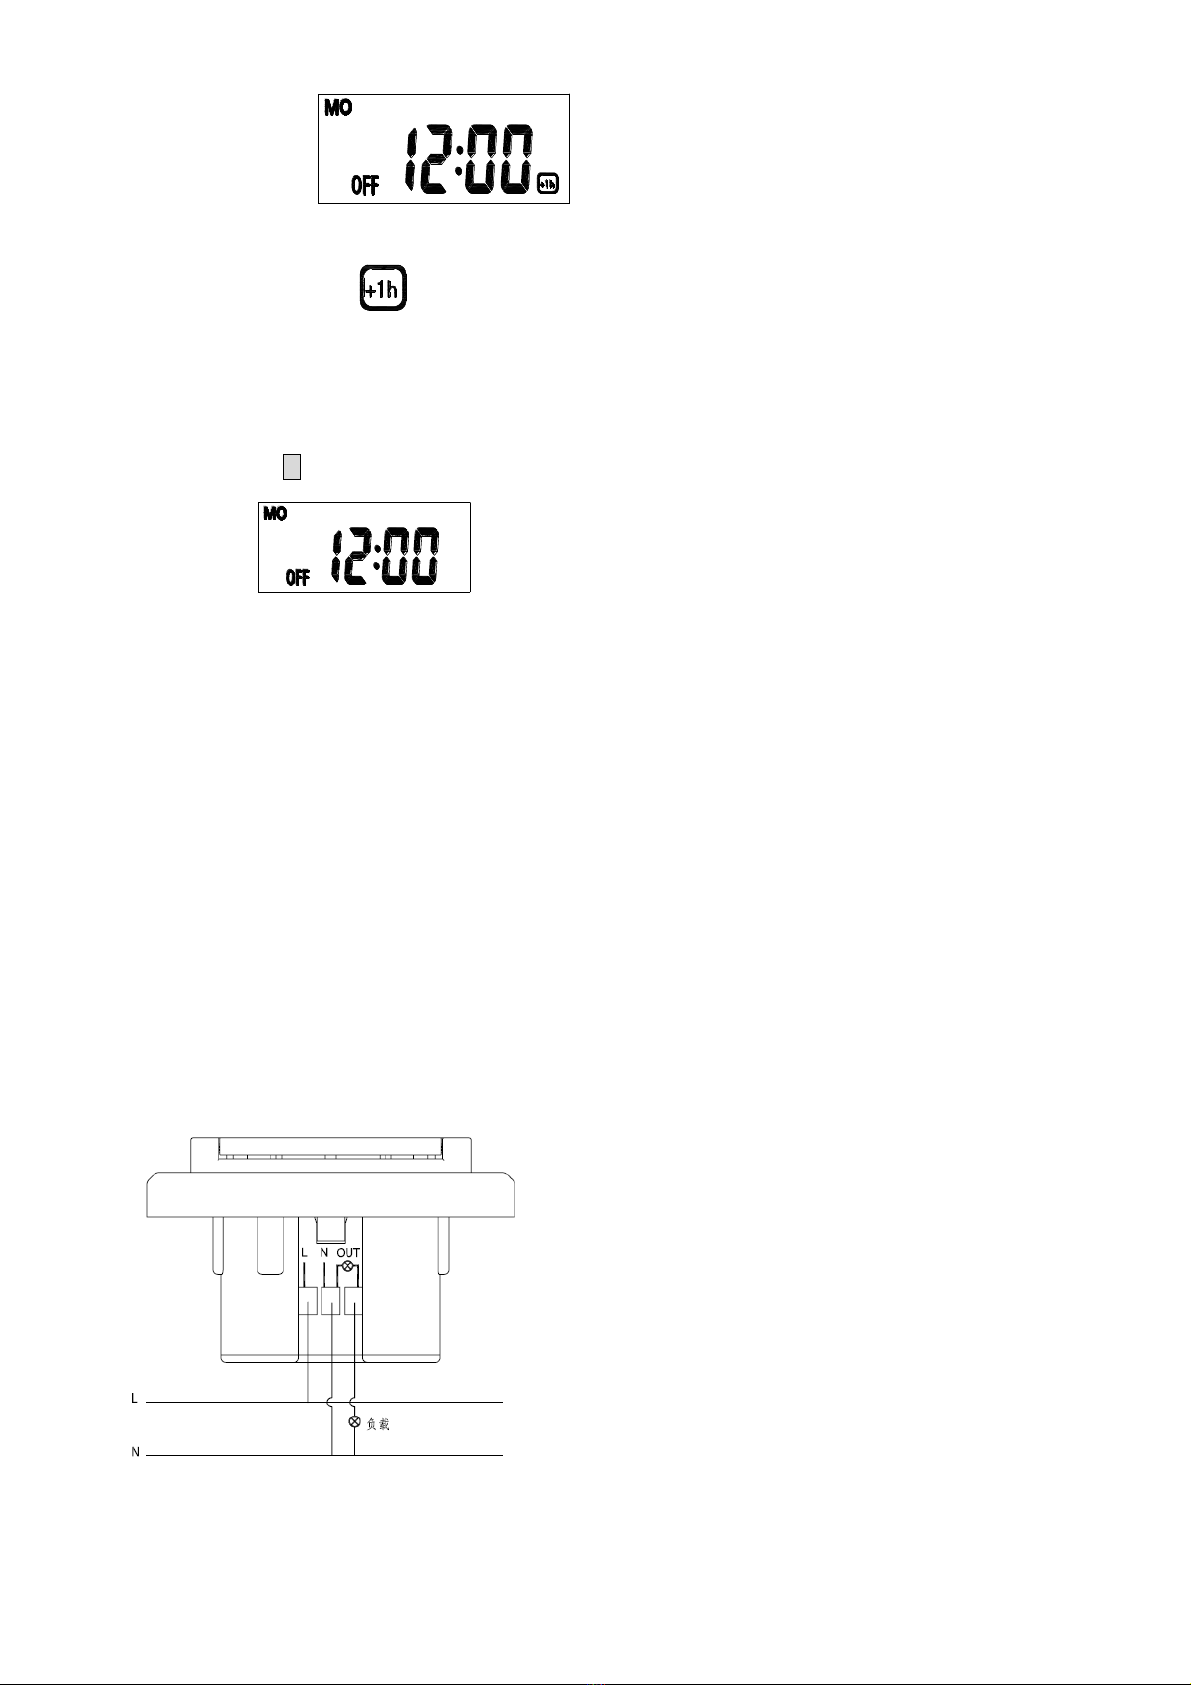
G. Wire diagram

H. Disassembling
Clutch the frame and Pull out
I. Assembling
Put operation panel and the frame together;
Aim the pin to the hole of the module then press in
J. Battery changing
Change the new battery here, be aware of polarity
Correct disposal of the products
Within the European Union, this symbol indicates that the products must not be disposed in the
household waste. Devices contain valuable recyclable materials that should be recycled for reuse

and uncontrolled waste disposal may cause harm to the environment and human health. Please
dispose the old products via suitable collection systems or send the unit to the office where you
bought it. This will make the product recycling.
G. Discarding batteries is an environmentally conscious manner and should be in
accordance with applicable regulations.
1) Please insert the batteries correctly according to the polarity (+ and -) connected to the
Battery and the device being characterized.
2) Fully discharge the battery by operating this apparatus to a standstill.
3) Remove the battery from the device.
3) Dispose the batteries at an official collection point for chemical waste.
G. Manufacturer
Everflourish Electrical Co., Ltd.
Renjiu Village, Wuxiang Town, Yinzhou Ningbo 315111 P.R. China
Table of contents
Other Everflourish Timer manuals


