Information is subject to change without prior notication.
© Copyright. Evervue USA Inc.
www.oceatv.com
Evervue USA Inc.
5020 Campus Drive,
#121, Newport Beach, CA 92660, U.S.A. 2
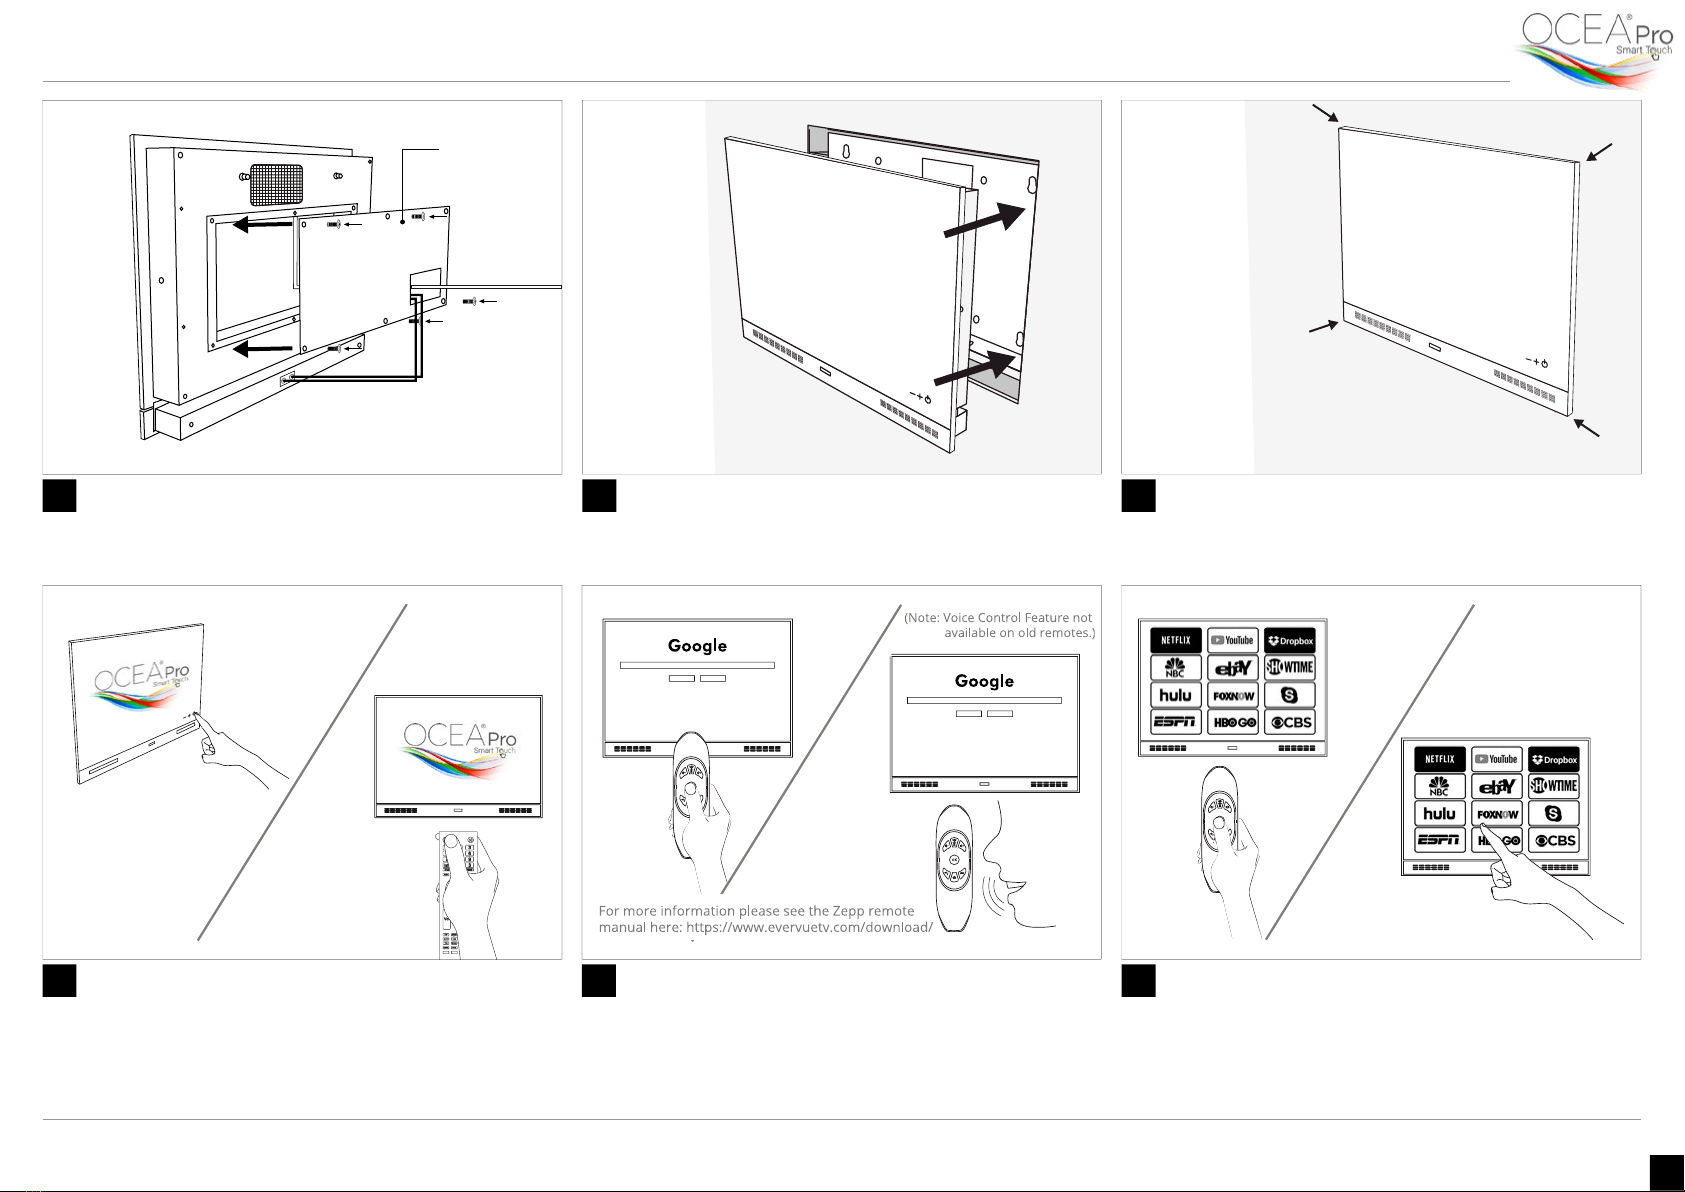
Cover the Compartment Insert the Ocea Pro to the wall Glue the Ocea Pro to the Wall
Re-attach the compartment cover. Tighten the
surrounding screws to make sure that they don’t fall during
the rest of the installation process.
First, insert the sound bar in the wall box followed by the
TV unit. The special magnet inside them will keep the TV
unit and sound bar in place.
Before fully inserting the Ocea Pro onto the wall, the glass
needs to be sealed with silicon glue to the tiles or wall.
7 8 9
Ocea Pro Recessed Mount - Installation Manual
Compartment
Cover
Audio Cord goes
through
Control your TV Personalize your Ocea Pro
On the Zepp remote included in the package, press the
mic/mouse button for 5 seconds to turn the remote on.
You can either use the remote as a mouse to control
the cursor on the screen (old remotes) or use the voice
command with the built-in microphone in the remote
(new remotes).
Your Ocea Pro is ready. Use the Touch screen or the Zepp
remote to navigate the TV, install and manage apps,
and personalize your Ocea Pro.
11 12
Turn on via
Touch Screen
Turn on via
Evervue Remote
Turn on Ocea Pro TV
You can either turn your Ocea Pro TV on by simply touching
the power icon on the screen or by clicking the power
button on your Evervue remote.
10


