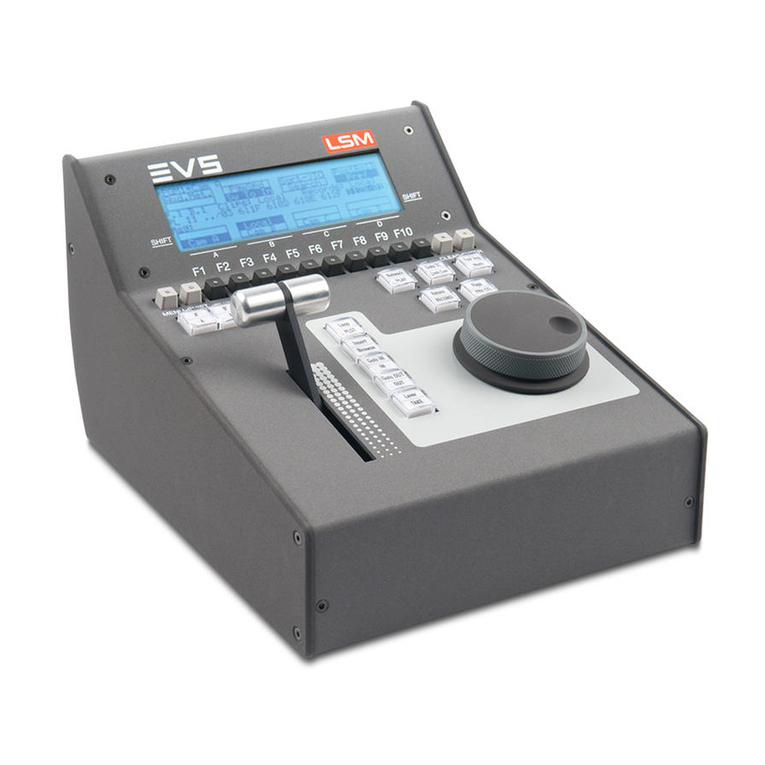
EVS LSM-VIA Manual

LSM-VIA
Version1.4|January2022
INSTALLATION AND CONFIGURATION MANUAL


Disclaimer
This manual and the information contained herein are the sole property of EVS Broadcast Equipment SA
and/or its affiliates (EVS) and are provided “as is” without any expressed or implied warranties, including,
but not limited to, the implied warranties of merchantability and fitness for a particular purpose. In
particular, EVS makes no warranty regarding the use or the consequences of use of this manual and the
information contained herein. Furthermore, EVS may not be held liable for any direct or indirect,
incidental, punitive or consequential loss, damage, cost or expense of any kind whatsoever and
howsoever resulting from the normal or abnormal use of this manual and the information contained
herein, even if advised of the possibility of such loss, damage, cost or expense.
While every effort has been made to ensure that the information contained in this manual is accurate,
up-to-date and reliable, EVS cannot be held liable for inaccuracies or errors that may appear in this
publication. The information in this manual is furnished for informational purpose and use only and
subject to change without notice.
This manual cancels and replaces any previous versions thereof.
Copyright
Copyright © 2018-2022 EVS Broadcast Equipment SA. All rights reserved.
This manual may not be reproduced, transcribed, stored (in a database or a retrieval system), translated
into any language, computer language, transmitted in any form or by any means – electronically,
mechanically, printed, photocopied, optically, manually or otherwise – in whole or in part without the
prior written consent of EVS.
Trademarks
All product and brand names are registered trademarks and trademarks of EVS or of their respective
owners.
Improvement Requests
Your comments will help us improve the quality of the user documentation. Please send improvement
Regional Contacts
You will find the full list of addresses and phone numbers on the following webpage:
https://evs.com/contact/offices.
User Manuals on EVS Website
The latest version of the user manual, if any, and other user manuals on EVS products can be found at
the EVS download center, on the following webpage: https://download-area.evs.com.
INSTALLATION AND CONFIGURATION MANUAL
LSM-VIA |Disclaimer| I
Contents
Disclaimer I
Contents III
What'sNew V
1. ProductOverview 1
2. Prerequisites 3
2.1. Overview 3
2.2. Disabling or Enabling Port 80 Forwarding 4
2.3. Setting up the Monitor Connectivity on LSM-VIA Workstation 6
2.4. Configuring an Active Directory on an XClient-VIA 6
3. UpgradingLSM-VIA 9
4. DeployingLSM-VIAonSeveralWorkstations 14
5. ManagingLicenses 17
6. ConfiguringLSM-VIA 18
6.1. Introduction 18
6.2. Infrastructure Settings 20
6.3. System Settings 23
7. StartingLSM-VIA 34
8. RecoveryProcessoftheRemotePanel 37
9. UpgradingtheRemotePanelOperatingSystem(FactoryInstall) 38
10.DeployingXClient-VIA 40
INSTALLATION AND CONFIGURATION MANUAL
LSM-VIA |Contents| III

ICONOGRAPHY
Note Tip Warning
IV| January 2022 | Issue 1.4.G

What'sNew
In the Installation and Configuration Manual the icon has been added next to the text to
highlight information on new or updated features.
The changes linked to new and updated features in version 1.4 are listed below.
Prerequisites
The EVS server shall run at least Multicam 20.2.
•See section "Overview" on page 3.
System settings
By default, the configuration tool opens in Chrome.
•See section "Configuring LSM-VIA" on page 18.
New system settings are available for Clip Loop Mode, Second Lever Range, PGMSpeed / VarMax.
•See section "System Settings" on page 23.
Possibility to use a network keyword file on the local workstation.
•See section "Keywords Settings" on page 30.
A setting is available to disable the pop-up display for Info and Success notifications.
•See section "Remote Settings" on page 31.
Installation
At installation, a warning message shows you the required Multicam version.
•See section "Upgrading LSM-VIA" on page 9.
INSTALLATION AND CONFIGURATION MANUAL
LSM-VIA |What's New| V


1. ProductOverview
Description
LSM-VIA is an IP-based solution that streamlines your live slow motion replay and highlights operations
thanks to its usability, flexibility, speed and control.
It works with the XT-VIA server and relies on EVS VIA microservices ecosystem, opening up new
workflows and providing faster and direct access to all the content on the live production network.
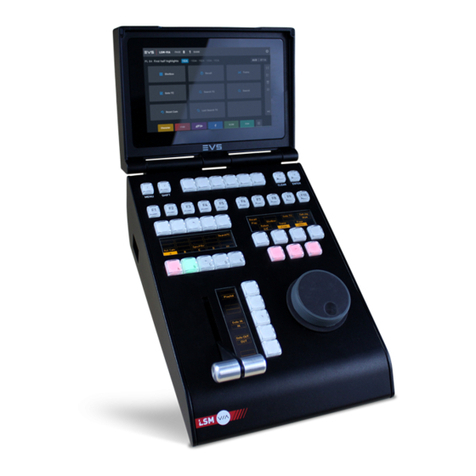
The LSM-VIA Remote Panel offers a streamlined ergonomics. The console layout remains familiar to the
LSMoperators.
Its console and its integrated touchscreen provide a direct access to basic and advanced functions.
Both the console key display and the touchscreen are automatically adapted according to the mode you
are working in or the action you are doing, giving you what you need, just when you need it.
The LSM-VIAViewer is mainly used for content management. It gives access to the list of clips and the
list of playlists from the whole network, as well as to a visual representation of the active playlist.
Compared to the legacy LSMRemote, the LSM-VIA solution provides the following features, among
others:
•faster access to content: direct access by entering the LSMID; access to all the record trains on the
whole XNet network.
•faster metadata tagging
•new or improved ways of organizing content:
◦The Shotbox tool allows users to map media items to buttons, with a set of playout options.
◦The Trains screen gives the possibility to define filters on a selection of record trains on the
whole XNet network.
•assignable shortcut buttons: possibility to map predefined functions, media or Dyvimacros to 6
buttons for a quick access or action triggering.
Setup
On a standard LSM-VIA setup, the operator works with LSM-VIA using the LSM-VIA Remote Panel and
the LSM-VIAViewer on a dedicated LSM-VIA workstation.
The LSM-VIAViewer and the LSM-VIA Remote Panel both communicate and control the XT-VIA server
via an Ethernet connection.
The user can access any EVS video server (XT3, XT4K) on the same XNet network as the XT-VIA server
connected to LSM-VIA.
The operator relies on the Multiviewer of the XT-VIA server to view the requested IN and/or OUT
channels.
INSTALLATION AND CONFIGURATION MANUAL
LSM-VIA |1. Product Overview| 1

2| January 2022 | Issue 1.4.G

2.Prerequisites
2.1. Overview
Prerequisites on the Network
The operator service, installed on the XClient-VIA, manages communication between the Remote Panel
and the LSM-VIAViewer. It also communicates with the VIA services on the XT-VIA server.
The LSM-VIA configuration tool can be accessed through a browser by entering the IP address of the
XClient-VIA.
The following prerequisites apply regarding the network.
•The XClient-VIA and the Remote Panel should be on the same VLAN.
•When the EVS video servers are in the same VLAN, no additional configuration is needed.
When the EVS video servers are deployed in a different VLAN (MTPC) than the Remote Panel and the
XClient-VIA, then the following ports must be open to allow the XClient-VIA to communicate with the
server:
◦TCP 8088 (for XT Operations).
◦TCP 80 (to access the LSM-VIA configuration tool from a browser).
Routing must be set accordingly (IT).
•The ports TCP 9002 and 9004 must be open to allow LSM-VIA to communicate with VIA Xsquare.
•The ports TCP6668 and 6669 must be open to be able to use the search functions from the LSM-
VIAViewer.
•To make the device more secure, the port 80 forwarding should be disabled.
◦With LSM-VIA versions prior to 1.2, the port forwarding was enabled by default during the
installation.
◦On workstations upgraded with LSM-VIA version 1.2, the installation does not disable the port
forwarding.
◦On workstations where the first LSM-VIA version installed is the 1.2, the port forwarding is
disabled by default.
See section "Disabling or Enabling Port 80 Forwarding" on page 4 for more information on how to
proceed.
Prerequisites on the Controlled EVS Server
Most prerequisites to set up a functional environment for LSM-VIA are required on the EVS server side.
•The controlled EVS servers have to be XT-VIA servers.
•The EVS server shall run at least Multicam 20.2.
INSTALLATION AND CONFIGURATION MANUAL
LSM-VIA |2. Prerequisites| 3

•The LSM-VIA option must have been selected in the VIAController Settings area during the Multicam
configuration (Channels tab):
•2 EVS Remote must have been assigned to RS422 ports from the Port settings area during the
Multicam configuration.
Prerequisites on the LSM-VIA Workstation
Some prerequisites are applicable to the LSM-VIA workstation.
•The appropriate configuration for the monitor connectivity has to be defined on the LSM-VIA
workstation.
See section "Setting up the Monitor Connectivity on LSM-VIA Workstation" on page 6.
•To use LSM-VIA with Active Directory, the approprite configuration must be set.
See section "Configuring an Active Directory on an XClient-VIA" on page 6.
2.2.DisablingorEnablingPort80
Forwarding
Context of Use
•To make the device more secure, the port 80 forwarding should be disabled.
◦With LSM-VIA versions prior to 1.2, the port forwarding was enabled by default during the
installation.
◦On workstations upgraded with LSM-VIA version 1.2, the installation does not disable the port
forwarding.
◦On workstations where the first LSM-VIA version installed is the 1.2, the port forwarding is
disabled by default.
If you need to edit the LSM-VIA configuration from another workstation, the port 80 must be
open.
4| January 2022 | Issue 1.4.G

How to Check if the Port Forwarding is Enabled or Disabled
From the LSM-VIA workstation, run the following command:
sudo firewall-cmd --list-all
If the port 80 forwarding is enabled, you will get the following results:
evs-lan (active)
target: default
icmp-block-inversion: no
interfaces: eno1
sources:
services: ssh samba-client dhcpv6-client evs-docker-infra evs-avahi evs-
consul
ports: 5093/tcp 5093/udp 5938/tcp 5556-5557/tcp
protocols:
masquerade: no
forward-ports: port=80:proto=tcp:toport=8080:toaddr=
source-ports:
icmp-blocks:
rich rules:
How to Disable the Port Forwarding
From the LSM-VIA workstation, run the following command:
sudo firewall-cmd --zone=evs-lan --remove-forward-
port=port=80:proto=tcp:toport=8080 --permanent
sudo firewall-cmd --reload
How to Enable the Port Forwarding
From the LSM-VIA workstation, run the following command:
sudo firewall-cmd --zone=evs-lan --add-forward-
port=port=80:proto=tcp:toport=8080 --permanent
sudo firewall-cmd --reload
INSTALLATION AND CONFIGURATION MANUAL
LSM-VIA |2. Prerequisites| 5

2.3.SettinguptheMonitorConnectivityon
LSM-VIAWorkstation
The required CentOS configuration differs depending on whether the monitor is plugged to the LSM-VIA
workstation using a Mini-DP cable or a KVM switch.
The file xorg.conf stored in the folder Computer/etc/X11 on the LSM-VIA workstation contains the
display configuration of CentOS.
By default, the configuration is set for Mini-DP display.
To set the configuration for use with a KVM switch, proceed as follows:
1. On the LSM-VIAworkstation, open a Linux command line by selecting Applications >
Favorites > Terminal.
2. Log in with administrator rights (sudo) on the workstation
3. Execute the script enable-kvm.sh stored in /opt/evs/scripts/
The configuration required for KVMconnection is applied.
If you need to restore the initial configuration for Mini-DP use, execute the script disable-
kvm.sh stored in the folder /opt/evs/scripts/.
2.4.ConfiguringanActiveDirectoryonan
XClient-VIA
Prerequisites
•The date and time must be the same on the XClient-VIA and on the Active Directory.
•There must be an entry for the XClient-VIA IPaddress in the DNS.
How to Configure the Active Directory on an XClient-VIA
1. Configure your network interface to access your DNS.
a. Open the file /etc/sysconfig/network-scripts/ifcfg-YOUR_NETWORK_INTERFACE_NAME
and add these lines:
DNS1=IP_ADDRESS_OF_YOUR_DNS
DOMAIN=YOUR_DOMAIN_ADDRESS_NAME
6| January 2022 | Issue 1.4.G

b. Open the file /etc/hosts and add
IP_ADDRESS_OF_YOUR_DNS YOUR_NAME YOUR_DOMAIN_ADDRESS_NAME (e.g.:
192.168.0.151 adserver)
c. Restart the network service so that it considers the changes:
systemctl restart network
d. Check if the configuration is correct by pinging your DNS or by typing the command:
nslookup YOUR_DNS_NAME
2. Join the Active Directory
a. Now you can join the Active Directory:
realm join -–user=USER_NAME DOMAIN_NAME
b. Check if you can join correctly the active directory by typing:
realm list
c. You can also see the information of your user with the command:
id USER_NAME@DOMAIN_NAME
3. Give privileges to the Active Directory user:
a. Add the user in the evs-lsm-via-services group:
sudo usermod -aG evs-lsm-via-services USER_NAME@DOMAIN_NAME
b. For sudo add the user in the “wheel” group:
sudo usermod -aG wheel USER_NAME@DOMAIN_NAME
You may need to log out or to restart the XClient-VIA in order to apply the new membership of
the user to a group.
The command groups USER_NAME@DOMAIN_NAME should display the new group of the
user once the membership is properly applied.
4. Delete EVSusers
a. Connect to your new user.
b. Execute these commands:
sudo userdel evs
sudo userdel evsadmin
INSTALLATION AND CONFIGURATION MANUAL
LSM-VIA |2. Prerequisites| 7

Options
Do Not Specify the Domain Name during the Login
You can configure sssd not to use the full username with the domain name.
1. Open /etc/sssd/sssd.conf.
2. Modify the following lines:
use_fully_qualified_names = True
fallback_homedir = /home/%u@%d
with
use_fully_qualified_names = False
fallback_homedir = /home/%u
3. Restart the sssd service:
systemctl restart sssd
Copy the LSM-VIA Shortcuts to the Desktop
If you want the LSM-VIA shortcuts to be available on your desktop execute these commands :
•cp -p /usr/share/applications/evs-lsm-via-viewer.desktop /home/user-name/Desktop/
•cp -p /usr/share/applications/evs-gemalto-manager.desktop /home/user-name/Desktop/
•cp -p /usr/share/applications/evs-lsm-via-configuration-gio.desktop /home/user-name/Desktop/
8| January 2022 | Issue 1.4.G

3.UpgradingLSM-VIA
Upgrade Process
The LSM-VIA upgrade is executed in two steps:
1. Upgrading LSM-VIA on the workstation
This first step installs the LSM-VIA application and the VIA Licensing Manager.
2. Upgrading the LSM-VIA Remote Panel connected to the LSM-VIA workstation
This second step is performed automatically when you switch on the Remote Panel and associate it
with the upgraded LSM-VIA application. It first checks the Operating System version on the Remote
Panel, then it checks the version of LSM-VIA on the Remote Panel.
Considerations
•You do not need to remove the previous version before upgrading.
•When an OS upgrade is required on the LSM-VIA Remote Panel, which rarely occurs, this is
automatically performed before the upgrade of the LSM-VIA version during step 2.
•After upgrading LSM-VIA, the parameters defined in the LSM-VIA configuration tool are kept. See
section "Configuring LSM-VIA" on page 18.
Step 1 - Installing / Upgrading LSM-VIA Application on the Workstation
1. Copy the installer archive on the XClient-VIA:
LSM_VIA_Installer-<LSM-VIA version number>.tar.gz
where <LSM-VIA version number> is the full version number of LSM-VIA included in the package.
This can be done in one of the following ways:
◦a USB key (formatted in FAT32)
◦TeamViewer
◦FTPtransfer (e.g. FileZilla)
The full path of the RPMfile (RPMfilename and folder name) may not include any space
character.
2. Unzip the file.
3. Double-click the extracted file:
LSM_VIA_Installer-<LSM-VIA version number>-x86_64.AppImage
INSTALLATION AND CONFIGURATION MANUAL
LSM-VIA |3. Upgrading LSM-VIA| 9

The LSM-VIA Installer window opens.
A warning message shows you the required Multicam version.
4. Click Install LSM-VIA.
The installation process starts
10| January 2022 | Issue 1.4.G

5. Wait until the installation is done and the following message is displayed:
6. Click Restart now.
When the LSM-VIA application is installed, three shortcut icons are added on the desktop:
•LSM-VIA Configuration shortcut to access the LSM-VIA configuration tool.
•LSM-VIA shortcut to open the LSM-VIA application.
•VIALicensing Manager shortcut to manage the required license key.
Step 2 - Upgrading LSM-VIA Remote Panel
Once you have upgraded the LSM-VIA application on the workstation, proceed as follows to upgrade the
LSM-VIA Remote Panel.
1. Double-click the LSM-VIA Configuration shortcut to open the LSM-VIA configuration tool.
2. In the Infrastructure tab, define the IPaddress of the EVS server to work with as described in the
section "XT-VIAIPAddress (PCLAN)" on page 20.
3. Double-click the LSM-VIA shortcut to start the LSM-VIA application on the workstation.
A valid license must have been installed. See section "Managing Licenses" on page 17.
4. Switch on the Remote Panel.
The Network Configuration screen is displayed on the touchscreen.
INSTALLATION AND CONFIGURATION MANUAL
LSM-VIA |3. Upgrading LSM-VIA| 11

5. On the Remote Panel touchscreen, in the IPAddress field, enter the IP address of the LSM-VIA
workstation.
When you enter three digits for an octet, the focus shifts directly to the next octet. Otherwise, you
can tap the octet you want to edit.
6. In the same way, enter the IPaddress, subnet mask and default gateway for the LSM-VIA Remote
Panel.
7. Tap Connect on the Remote Panel touchscreen.
When the connection is being initialized, the version of the Operating System is checked.
◦If the version of the Operating System in the LSM-VIA rpm file does not correspond to the version
on the Remote Panel, the following message is displayed:
Proceed with step 8.
◦If the version of the Operating System on the Remote Panel is up-to-date, the version of LSM-VIA
on the Remote Panel is checked.
Proceed with step 10.
12| January 2022 | Issue 1.4.G
Other manuals for LSM-VIA
3
Table of contents
Other EVS Recording Equipment manuals

EVS
EVS LSM 3 Cameras User manual

EVS
EVS Synapse GMD100 User manual

EVS
EVS LSM-VIA Manual

EVS
EVS Synapse 2XG100 User manual

EVS
EVS Synapse 2GF100 User manual

EVS
EVS Multicam LSM User manual

EVS
EVS Synapse GED100 User manual

EVS
EVS Synapse 2GF100/110 Instruction sheet

EVS
EVS GFS010 Instruction sheet

EVS
EVS EPSIO LIVE User manual
Popular Recording Equipment manuals by other brands

Dictaphone
Dictaphone Olympus DS-4000 quick reference

Lutron Electronics
Lutron Electronics RadioTouch RTA-RS232 Setup and installation guide

FONESTAR
FONESTAR M-203 instruction manual

Sound Devices
Sound Devices 744T User guide and technical information

H3C
H3C LSWM2ZSP8P user manual

Revox
Revox B77 MKII Operating instruction and cook book