Excel Outback User manual

User Manual
Excel Outback

2
Introduction
General introduction 4
1. Identication 6
2. General information 6
2.1 Components and construction of your scooter 7
2.1.1 Components and constrction of your scooter 7
2.2 General explanation about your scooter 7
3. Safety regulations 8
3.1 General safety instructions 8
3.2 Safe use warnings 8
4. Specications of your Excel Outback 9
5. Components of your Excel Outback 9
5.1 The dashboard 9
5.2 The steering column 11
5.3 The armrests 11
5.4 The battery 12
5.5 The seat 12
5.6 The freewheel 13
5.7 The wheels 14
5.7.1 Pneumatic tyres 14
5.8 The lumbar support 14
6. User instructions 15
6.1 The balance 15
6.1.1 Getting in and out 15
6.2 Bending and or reaching 15
6.3 Going up or down elevations 16
6.3.1 Going up an elevation and or slopes 16
6.3.2 Going o an elevation and or slopes 16
6.4 Control 17
6.4.1 Steering in dierent situations 17
6.5 EMI / RFI 17
6.5.1 EMI / RFI recommendations 18
7. Maintenance 19
7.1 The tyres 19
7.1.1 Pneumatic tyres 19
7.2 Body 19
7.3 The upholstery 19
7.4 Cleaning your scooter 20
7.5 Periodic maintenance of your scooter 20

3
7.6 Maintenance schedule 20
8. Problem analysis and solutions 21
9. Warranty 22
9.1 Warranty application 22
9.2 Warranty conditions 22

4
General introduction
Before using your new Excel Outback, you and any attendant should read and understand this user manual completely.
By reading and understanding this user manual, you also agree to the terms and conditions stated in this user manual.
At this moment you are introduced to a quality product oered by Van Os Medical B.V. We would like to thank you for
your condence in our Excel Mobility ® brand. An Excel Outback is a real quality product. The policy of Van Os Medical
B.V. is focused on continuously developing the quality and reliability of all products in our range. We therefore reserve the
right to make changes to this user manual without prior notice.
It is important that you read this user manual carefully before using your scooter. The user manual contains important
information about the safe use and maintenance of your scooter. We recommend that you keep this user manual for safe
as it is also proof of your warranty.
The safety instructions in this user manual are general instructions that should be regarded as general guidelines.
You may develop your own ways of doing common actions. However, we would advise you to call on an expert for
assistance in developing safe and eective techniques related to your daily activities and your physical capabilities.
Your new scooter needs frequent and scheduled maintenance. You can do much of this maintenance yourself. However,
we would like to recommend that you have your scooter checked by an expert at least once a year. If you do not have
the scooter checked and maintained in time, the warranty will become null and void.
Pay attention!
You will also nd tips and warnings in this user manual. These are clearly recognizable by the symbols used and the
presentation of the text, as shown below.
Warnings
The warnings mentioned in this user manual should always be followed to avoid damage to the Excel Outback or injury
to yourself.
Tips
The tips mentioned in this user guide are intended to help you make even better use of your Excel Outback.

5
Enter the details of your authorised dealer and product below:
Company Name: ……………………………………………………………………………………………………………
Address: ……………………………………………………………………………………………………………
Telephone number: ……………………………………………………………………………………………………………
Fax number: …………………………………………………………………………………………………………....
Email address: …………………………………………………………………………………………………………....
Website: ……………………………………………………………………………………………………………
Date of purchase: ……………………………………………………………………………………………………………
If applicable, stamp or sticker from your authorised dealer:
If, in addition to the frame label on the product, there is a second separate frame label with your product, you can place
it below so that you can consult it more easily later:

6
1. Identication
Your scooter has a frame label, which is located on the seat column (under the seat) of your scooter. The frame
label contains information about your scooter, such as the product name, manufacturer name, European authorised
representative name, (UDI) Unique Device Identier and technical data of your scooter. An example of a frame label is
shown below for illustration. Your scooter’s frame label may dier from the illustration. Your scooter’s actual data varies
by product. The information on the label of your scooter corresponds to your scooter.
Van Os Medical B.V. is the importer of this Excel Mobility product. The product is manufactured by Quality Life
Technologies. and European represented by Wellkang LTD.
SN
LOT
MD
EC REP
UDI
Quality Life Technologies Co. Ltd.
No. 5, Lao Fu Wu Road, Huang Wu
Industrial District, Dongkeng Town
Dongguan, Guangdong, China
Wellkang LTD, Enterprise Hub
NW Business Complex 1, Beraghmore Rd.
Derry, BT48 8SE, Northern Ireland
Van Os Medical B.V.
Koperslagerij 3, 4651 SK Steenbergen
The Netherlands
Excel Outback (QS1347XL)
Mobility scooter for outdoor use
REF 06080160

7
2. General information
2.1. Components and construction of your scooter
1. Canopy
2. Armrest
3. Seat
4. Steering column
5. Dashboard
6. Steering head lever
7. Ignition switch
8. Basket
9. LED front lights
10. Front wheel
11. Mudguards
12. Footrest
13. Rear wheel
14. Rear light
15. Seat column
Your scooter is equipped with various components and parts. Get to know them before continuing to study this user
guide. Designs and specications are subject to change without notice.
2.2 General explanation about your scooter
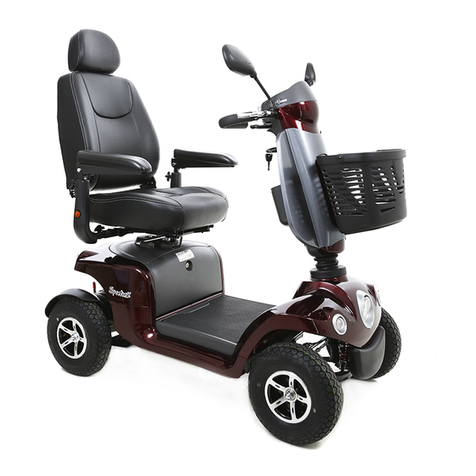
Your new Excel Outback is a scooter designed to oer maximum comfort. The comfortable chair can be adjusted
as desired and contributes to optimal seating comfort. The scooter is equipped with LED lighting and brake lights.
Furthermore, the steering column is innitely adjustable and the armrests are foldable and adjustable in width and height.
Please read this user manual completely to get the most from your scooter.
1
2
4
6
5
7
3
8
9
10
11 11
12
13
14 15

8
3. Safety regulations
If the rules of handling as described in this user manual are followed, the Excel Outback is an extremely safe and stable
product. However, it is possible that dangerous situations can arise if the scooter is not used correctly. Van Os Medical
B.V. is not responsible for injury to person(s) and or damage to property if the recommendations and warnings in this
user manual are not followed when using the scooter.
3.1 General safety instructions
Protect your purchase by having your scooter checked regularly. When part of your
Excel Outback does not function properly, it is possible that a dangerous situation arises. You should keep your scooter
in good condition to ensure safety. Periodic inspection, correct adjustment of your scooter and timely replacement of
broken and worn parts will contribute positively to the life of the product. A qualied Excel dealer, who will only use Excel
replacement parts, will ensure that the long life is guaranteed through good and preventative maintenance.
3.2. Safe Use Warnings
To prevent damage to your property, the product itself, or injury to the user, please observe the warnings below. Van Os
Medical B.V. is not liable in any way. After reading these warnings, you agree to the terms and conditions stated in this
user manual. Transporting the scooter in any vehicle is at your own risk. Van Os Medical B.V. accepts no liability for this.
Any changes made to the scooter that are not described in this user manual will void the warranty.
4.
Warning
Making adjustments to the Excel Outback, whereby structural changes are made, will always be at the expense of the
warranty. The product liability also lapses and the risks are for the end user.
• Upon receipt, always check that all components
of the scooter are present and that they are not
damaged. If any components are missing or
damaged, contact your dealer immediately.
• Before driving, check that the brakes are working
properly.
• Sudden change of direction will cause the scooter
to become unbalanced. You should avoid this by
steering smoothly, keeping the same direction as
much as possible when using the scooter and
reduce your speed when taking (sharp) turns.
• You must stop the scooter completely before
changing from forward to backward driving.
• Make sure that the scooter is on a at surface when
getting in and out.
• Before driving, the scooter seat should always be
facing forward.
• Always use a elevator to move the scooter to a
higher level.
• Never drive backward down a slope.
• Preferably never drive on uneven surfaces such as
sand, gravel or rough terrain and not on wet.
• slippery surfaces where you have no grip.
• Never go up and or down a slope at an angle.
• Never take passengers on your scooter
• Never use your scooter if it is not working properly
or if parts of it are not working properly or are
missing.
• Do not ride on slopes or kerbs that exceed the
scooter’s capacity. The maximum safe angle of
inclination is 10 degrees.
• Never drive up/down a kerb if it is higher than 4 cm.
• Never load the scooter more than the specied
maximum user weight. This maximum user weight
includes bags and any other load for your scooter.
• Do not use your scooter on stairs or escalators.
• Do not use the scooter if you are under the inuence
of alcohol, drugs or heavy medication that may
aect your operation of the scooter.
9
4. Specications of your Excel Outback
5. Components of your Excel Outback
This chapter describes the various components of the Excel Outback. The scooter has a number of components that
are adjustable and adjustable. If you want to install, remove, adjust or move any of the components, always follow the
instructions described in this user manual.
5.1 The dashboard
The Excel Outback is equipped with a well-arranged dashboard. As you can see, the dashboard consists of dierent
components, each of which has its own function. The various components are explained in more detail below:
1. Speed Buttons
With these two buttons you can set the desired speed. By pressing the right button, with the hare icon, you increase the
speed. This can be seen by the increasing dashes on the right side of the display, press 1 dash at a time. To decrease
the speed, press the left button with the turtle icon. Then the dashes on the right of the display decrease, press 1 dash
at a time.
*= indicative, measured under ideal conditions.
11
2
4
5 5
6
Totale length
147 cm
Maximum
user weight
200 kg
Total width
78 cm
Total weight
192/208 kg
Seat height
44 cm
Seat depth
48 cm
Total height
169 cm
Seat width
53 cm
Batteries
90/120 Ah
Charger
8 Ah
Range
tot 54 km*
Max, speed
15/20 km/u*
2
3
7 7
8
9
9

10
2. Horn
You can sound the horn by pressing one of these buttons. When you use the horn, you will hear a beep sound. The
Excel Outback has a horn button on both the left and right side of the dashboard, so that you can press it with either the
left and right hand.
3. Lighting
The Excel Outback is also equipped with lighting. Use this button to turn on your lighting. The main purpose of the
lighting, in addition to getting a better view, is to be clearly seen by other road users, so that no dangerous situations
arise. Pressing the button again turns o the lighting. The use of lighting is never superuous, but certainly use it in
darker conditions and bad weather conditions.
4. Hazard lights
When you want to draw the attention of other road users to danger, you can use the hazard lights. By pressing the
button, all hazard lights will ash and a beep will sound. To turn the lights o, press the button again.
5. Wig-wag system
The Excel Outback is operated by means of a wigwag system. To drive forward with your scooter, pull the right lever
toward you, as shown in photo 1. Driving backwards with the Excel Outback is of course also possible. You do this
by pulling the left lever towards you (Photo 2). The Excel
Outback is equipped with automatic braking system. This
ensures that when you release the forward or reverse lever,
the scooter brakes automatically.
6. Battery indicator
Just as the selected speed is indicated by dashes on the
right side of the screen, you will nd a similar display on the
left side of the screen, but for the battery capacity. 10 bars
indicate that the battery is full and fewer bars indicate the
battery is drained. It is important to never run your batteries
completely down to empty. By recharging the batteries
at about 20 percent, indicated by 2 of the 10 lines, the
batteries will last longer.
7. Indicator
These buttons turn the turn signals on and o. This way you can indicate which way you are going to travel if you need
to turn somewhere. When you press one of the buttons, the turn signal lights will ash on the side you pressed and a
chime will sound to indicate that the turn signal is on. By pressing the same button again, the light and sound signal will
stop.
8. Higher / lower speed
On the display you can see that there are 10 speed settings that can be set with the hare and tortoise buttons. With the
H/L button you can switch between Higher and Lower speed. So if you want to be a little more careful, switching to the
L position cuts the speed in half. This way you don’t have to push the speed all the way down every time. When the low
setting is set, an L will appear on your display. When the high setting is turned on, you will see a H on the screen.
9. Mode and set buttons
Settings of the display can be changed with the Mode and Set buttons. Allows you to change the units of speed,
distance travelled and temperature (Kilometres/Miles and degrees Celsius/Fahrenheit), and change the clock display from
24 hour format or AM/PM. By pressing mode, one of these options will ash on the screen to indicate that it can now be
changed. With the H/L button you can then switch between kilometres or miles display, or Celsius or Fahrenheit. Also, if
the clock is selected and therefore ashes, the time can be changed. With the turn signal buttons, the hours (left arrow)
or the minutes (right arrow) can be increased by 1 step at a time. You cannot decrease these numbers, so if the number
needs to be lower, you must increase it until the number jumps back to 0. With the Set button, you conrm the chosen
setting and the option on the screen will stop ashing.
EXCEL OUTBACK | Photo 1 EXCEL OUTBACK | Photo 2

11
5.2 The steering column
The steering column of the Excel Outback can be easily adjusted in angle. Adjusting the steering column to the desired
angle improves driving comfort. You can adjust the angle of the steering column by following the steps below;
• You should always return the steering column to its up most position to get out. This makes getting out easier (see
chapter 6).
• On the left side of the handlebar, in front of the handle, is a black lever (see photo 3). You have to pull the lever
towards you (photo 4) and with your right hand pull the steering column towards you or push it away from you to
adjust the angle.
• Once the desired
position is reached,
release the black
lever.
You can also adjust the angle of the upper part of the steering column, where the dashboard is located. You can read
below how to do this;
• On the right side, under the ‘head’ of the steering column, you will nd a lever with a red end (Photo 6). Pulling this
lever toward you unlocks the head.
• You can now pull the handles up or down (Photo 7) to change the angle of the steering column head to the
desired angle.
• Is the head at the desired angle? Now push the lever with the red end forward again until you feel it engage
(Photo 9). If necessary, pull the handles a little more until you notice that the head is locked in the chosen angle.
5.3 The armrests
The Excel Outback is equipped with height-adjustable, foldable and removable armrests. You can easily fold up the
armrests by pulling the armrest up, as shown in Photo 11. Folding up the armrests makes getting in and out of your
scooter a lot easier, see section 6.1.1.
EXCEL OUTBACK | Photo 11
EXCEL OUTBACK | Photo 10 EXCEL OUTBACK | Photo 12
EXCEL OUTBACK | Photo 3 EXCEL OUTBACK | Photo 4 EXCEL OUTBACK | Photo 5
EXCEL OUTBACK | Photo 6 EXCEL OUTBACK | Photo 7 EXCEL OUTBACK | Photo 8 EXCEL OUTBACK | Photo 9

12
Height setting
In addition to being foldable, the armrests of the Excel Outback are also adjustable in
height. To adjust the height of the armrest, loosen the black knob on the back of the
armrest and at the same time pull it out slightly (Photo 13). You can then move the
armrest (while pulling the knob) up or down. Once the armrest is in the desired position,
let the knob spring back (so you don’t pull it out again) and tighten the knob again.
Width setting
The Excel Outback is also equipped with a width
adjustment. A black button is attached under the seat
(Photo 14). To adjust the width, loosen this knob and then
lightly pull the armrest. Then move the armrest in or out for
the desired width (Photo 15). Once the armrest is in the
desired width, re-tighten the knob. It is also possible to
completely remove the armrests. If you want to remove the
armrests completely, you must slide the armrest completely
out of the tube it is in when you have loosened the width
adjustment knob.
5.4 The battery
The Excel Outback is equipped with a closed battery pack. Excel Mobility recommends
that you fully charge the batteries before using your scooter. We recommend that you
do this continuously for at least 12 hours.
• You should charge the batteries as follows to extend their life;
• Turn o the scooter.
• Slide the cover open on the charging point (see Photo 16). The charging point is
located on the steering column.
• Connect the battery charger to this and place the charging plug in the socket.
• The battery indicator shows how far the battery is charged.
• If you will not be using your scooter for a week or more, fully charge the batteries
and disconnect them from the scooter.
5.5 The seat
The Excel Outback features a comfortable, height-
adjustable, 360-degree swivel seat with headrest. The
headrest mainly serves to protect your head and neck.
The headrest must be set to the correct height to prevent
neck complaints. To place the headrest in the correct
position, press the black button (Photo 17). Whilst holding
the button, move the headrest up or down. Once the
headrest is in the desired position, release the black
button. At that point, the system is locked.
EXCEL OUTBACK | Photo 16
Warning
Only use the charger supplied by Excel Mobility. Using any other charger will void the warranty. A dierent charger can
also damage the batteries of your scooter.
EXCEL OUTBACK | Photo 18EXCEL OUTBACK | Photo 17
EXCEL OUTBACK | Photo 13
EXCEL OUTBACK | Photo 14 EXCEL OUTBACK | Photo 15

13
The 360-degree rotating seat
has the advantage that you
can easily get in and out.
Under the seat on the right
side is a lever (Photo 19, lever
A) with which you can rotate
the chair. By pushing the lever
down (Photo 20), the seat is
unlocked and you can rotate
the seat. Releasing the lever
locks the seat.
You can slide the seat of
the Excel Outback forwards or backwards. You can do this using the lever. The lever is
mounted on the right side of the seat (Photo 19, lever B). You need to pull the lever up
towards you (Photo 22) and then you can slide the seat forwards or backwards. Once the
desired position is reached, you can release the lever.
The backrest of the chair
is adjustable in angle. On
the right side of the seat is
a black lever between the
chair and armrest (Photo
23). To adjust the angle of
the backrest, pull up on this lever while seated in the seat.
You can choose the angle you want by pushing with your
back or tilting forward while keeping the handle pulled up.
Now you can adjust the angle of the backrest. As soon as
the backrest is in the desired position, release the lever.
It is possible to adjust the height of the seat. However, you cannot do this yourself. For this you should contact your
authorised Excel Mobility dealer.
5.6 The freewheel
The Excel Outback has two positions, namely the driving position and the freewheel position. On the sticker next to the
freewheel lever, the driving position is indicated by a picture of a person riding the scooter (A). The freewheel position
is indicated by a picture of a person walking next to the scooter and pushing it forward (B). The scooter must always
be in the driving position when you want to use the scooter. The freewheel position makes it possible to move the
scooter without the scooter being switched on. This makes it possible to push the scooter. You must push the lever to
the desired position to engage the freewheel or drive position. In the driving position, the electromagnetic brakes are
activated. At that moment the scooter can no longer be pushed and you can drive your scooter.
EXCEL OUTBACK | Photo 19 EXCEL OUTBACK | Photo 20 EXCEL OUTBACK | Photo 21
EXCEL OUTBACK | Photo 22
EXCEL OUTBACK | Photo 23 EXCEL OUTBACK | Photo 24
EXCEL OUTBACK | Photo 25 EXCEL OUTBACK | Photo 26
A
B
AB

14
5.7 The wheels
Front and rear wheels are attached to the Excel Outback. You should check it regularly
on wear.
5.7.1 Pneumatic tyres
Your scooter is equipped with four pneumatic tyres. You should check the tyre pressure regularly. You can do this using
a (digital) tyre pressure gauge. Excel Mobility uses a tyre pressure of 2.5 bar per tyre. More information about maintaining
the pneumatic tyres can be found in paragraph 7.1.1
5.8 Lumbar support
On the left side of the backrest, between the armrest and backrest, there is a lever (see Photo 27) for adjusting the
lumbar support. By moving this ‘ratchet’, alternately clockwise and counterclockwise, similar to a pumping action, a
reinforcement emerges in the lower part of the back support that provides extra support to the lower back. By continuing
to ‘pump’ the ratchet handle, it moves further and further forward and then returns to a neutral position. So you can
gradually determine the amount of lsupport needed for your lower back.
Warning
Never put your scooter in neutral while the scooter is on a slope. This prevents the risk of your scooter driving down
unexpectedly.
Warning
Before using the Excel Outback, make sure that the freewheel has been returned to the driving position.
EXCEL OUTBACK | Photo 27

15
6. User instructions
It is important that you educate yourself on the correct, safe user instructions. To do this, you must be familiar with all the
scooter components described in this user manual. Always consult a professional for assistance in developing proper,
safe methods of use in relation to your physical ability to operate the scooter.
6.1 The balance
Daily actions such as getting in and out, reaching and bending in the scooter will aect the balance of the scooter. This
has to do with the weight distribution and the change in the centre of gravity. To prevent you or the scooter from tipping
over or creating other dangerous situations from arising, follow the actions described below;
6.1.1 Getting in and out
Getting in and out of the scooter is a common act. Diculty getting in and out depends on your physical capabilities,
among other things. In this user manual we describe the actions that must be followed, assuming that you can get in
and out of the scooter without assistance. If you can no longer do this independently, we recommend that you discuss
your options with an occupational therapist and determine how best to get in and out.
To get in
Before getting in, make sure the scooter is on a level surface. The scooter must always be turned o and in the drive
position before getting in. When the scooter is in the driving position, the engine brake is automatically active. When the
ignition is o, you prevent accidental driving of the scooter. So always check that the scooter is turned o. You do this
by looking at the LED lights on the dashboard, and the position of the ignition key. The LED lights should not be lit and
the ignition key should be in the o (vertical) position. When the scooter is turned o, it prevents the possible action of
accidentally hitting the levers, which could cause the scooter to move unintentionally, causing accidents. You should
make sure that the steering column is as straight and forward as possible. If you want to get in, you have two options.
You can turn the seat (see section 5.5) and then get in or fold up one of the armrests (see section 5.3) and then get
in. Before driving, always fold down the armrests again. Make sure you place your foot approximately in the middle of
the foot platform when you get into the scooter. If there is a seat belt, you must fasten it before driving. To assume the
ideal driving position, you can adjust the steering column to the desired angle (see section 5.2). Place the key in the
ignition and turn it a quarter turn to the right until it is in the horizontal position. The LED lights on the dashboard will now
illuminate and you are ready to go.
To get o
When disembarking, follow the same instructions as when boarding in reverse order. Make sure that the scooter is
always turned o and the key is out of the ignition when you get out. Return the steering column to the straightest
position. You can now turn the seat and get out or fold up the armrest and get out. Always try to get o the scooter as
close to the end destination as possible.
6.2 Bending and or reaching
There may be times when you are in your scooter and need to grab something. Always try to stand with your scooter
next to what you want to grab. To avoid falling out of your scooter, the best way to bend and or reach out of your
scooter is described below;
• Make sure you are as close to the object as possible with your scooter. You can only grab objects from the scooter
if they are at least at waist height and at most at head height, for example on a table or in a cupboard.
• Make sure the handlebars of your scooter are pointing straight ahead.
• Switch o the scooter so that you do not accidentally drive by hitting the levers.
• If your scooter is equipped with a seat belt, keep it on.
• You can now carefully reach and grab the object next to your scooter.

16
6.3 Going up and down elevations
It may happen that you have to go up or down a elevation with your scooter. In this user manual we rst describe how
you can do this independently.
6.3.1 Going up an elevation and or slope
If you want to go up an elevation and or incline, do so in a forward motion. Make sure you take the ramp and or incline
in a controlled manner. This means that you should not take the incline and or incline in the slowest position, but at an
average speed. So keep the scooter moving when going up a slope. If you do come to a stop on a slope, restart and
accelerate slowly. When stationary and restarting, the scooter may reverse a little bit before moving forward again.
The anti-tip wheels that are always attached to the scooter provide a bit of safety when you go up an elevation and
or slope. In addition, it is important not to add extra weight such as bags on to your scooter. As a result, the centre of
gravity is in a dierent place than what the design of the scooter is designed for.
6.3.2 Going o an elevation and or incline
If you want to go up and or down an incline, always go forward. In addition, you should always go down the elevation
and or slope in a straight line. To maintain control of your scooter, it is important that you do not descend too quickly.
You can control the speed using the speed knob, how far you pull the lever towards you and optionally also use the turtle
knob.
Warning
Never drive up/down an elevation and or slope that is covered with snow, ice, mowed or wet grass, leaves, or other
potentially hazardous material.
Warning
If your scooter is going faster than you can safely handle while descending a slope, slowly release the throttle. By giving
less throttle, the scooter will automatically lower to a lower speed. This ensures that the scooter will brake. When you feel
you have regained control of the scooter, hold the control lever in this position.
Tip
Make sure you have properly inspected the slope before going up and down. That way you know what to expect and
you can go up or down the slope safely.

17
6.4 Control
The most important action when riding a scooter is steering. Below is a description of how best to steer in dierent
situations;
Before you can start driving, you must switch on the scooter. You do this using the ignition lock. The ignition switch is
located on the steering column, a little below the dashboard. Use the key to turn the scooter on and o. You should put
the key in the ignition and turn the key a quarter turn clockwise, so that the key is in a horizontal position. This is how
you turn on the scooter. To turn the Excel Outback o, for example when you want to get o, turn the key a quarter turn
counterclockwise, which brings the key into a vertical position.
You should always place both hands on the handles of the steering column to be able to steer to the left and or right. It is
important that you do not assume a riding position in which your arms are stretched, but that your arms are slightly bent.
This promotes driving comfort. When turning into a bend, you should always reduce your speed. This prevents you from
falling over with your scooter.
6.4.1 Steering in dierent situations
Your scooter is designed to increase your mobility. While driving, you encounter various situations. In order to be able to
manage properly in these situations, we have listed a number of situations below and described how you can best deal
with the situation. By following the recommendations below, you will avoid dangerous situations.
Steering in small spaces
• Completely stop your scooter.
• Set the speed to the lowest setting.
• Steer in the desired direction.
• Gently squeeze the throttle.
Steer backwards
• Set the speed to the lowest setting.
• Pull the lever with your left hand.
• Turn the handlebars to the left to go with the rear to the left. If you want to turn right, turn the steering wheel to the
right.
• If mirrors are present, use the mirrors when backing up.
Uneven surfaces
• Your scooter performs excellently on at surfaces. However, it is possible to drive on uneven surfaces such as
grass, gravel and sand. The scooter can also be used on slippery surfaces, such as snow and ice. But we advise
you to avoid such surfaces as much as possible;
• If you drive on uneven or slippery surfaces, you must adjust the speed to the situation.
• You must ensure that the scooter does not come to a stop on these surfaces. You can prevent this by setting the
speed of the scooter to the lowest position.
6.5 EMI / RFI
The rapid development of electronics, especially in the eld of communication, has permeated our environment with
electromagnetic (radio) waves emitted by television transmitters, mobile phones, radios, laptops, microwave ovens and
pacemakers. These electromagnetic waves are invisible and get stronger the closer you get to the source. When these
electromagnetic waves cause electrical devices to stop functioning or function in an uncontrolled manner, it is called
Electromagnetic Interference (EMI) or Radio Frequency Interference (RFI).

18
All electric vehicles, including mobility scooters, are susceptible to Electromagnetic Interference / Radio Frequency
Interference (RFI). This can result in abnormal and unexpected movement of your scooter. If unintentional movement
occurs or the brake does not work properly, turn your scooter o as soon as possible. The FDA has determined that
every scooter must be able to withstand EMI/RFI to a certain level. The higher this level, the greater the protection
against EMI / RFI - measured in volts per meter (V/m). The minimum resistance level to EMI / RFI should be 20 V/m. This
product has been tested and has a resistance level of 20 V/m.
6.5.1. EMI / RFI recommendations
• Do not use personal electronic means of communication such as a mobile telephone when using your scooter.
• Be extra careful around cell towers and radio/television towers.
• Switch o your scooter if you are not going to be standing still for an extended period of time.

19
7 Maintenance
Your Excel Outback requires periodic maintenance. This is necessary for a long product life and optimal for user comfort.
A poorly maintained scooter is more likely to cause technical problems, will run less smoothly and will not be covered
by the warranty. Preventative maintenance is therefore very important. We recommend that you have your scooter
checked by a qualied Excel Mobility dealer at least once a year. This dealer will only use Excel replacement parts where
necessary. This annual inspection will contribute to a long life for your scooter.
You can also do a lot yourself to keep your scooter in optimal condition. If you regularly check the scooter yourself and
where necessary, carry out minor maintenance, this will extend the life of your scooter and increase your ease of use.
This minor maintenance is further described in the following paragraphs.
7.1 The tyres
You should regularly check the scooter’s tyres for wear. If the wear is at an advanced stage, you should replace the tyres.
7.1.1 Pneumatic tyres
Pneumatic tyres should be checked weekly for pressure. The correct pressure is indicated on the tyre itself. You can
measure the pressure of the pneumatic tyres yourself with a general pressure gauge. If the tyre pressure is not set
correctly, the scooter will tilt. As a result, the tyre wears faster, the scooter is less easy to steer and moving forward
becomes more dicult.
You should clean the tyres with car shampoo and a damp cloth. Do not use solvents on the tyres. Solvents can damage
the material of the tyres or make them too soft.
7.2 Body
Proper maintenance of the body is important, because the mechanical parts such as the engine nowadays last longer
than an unmaintained body. The purpose of maintenance is therefore to postpone the formation of rust as long as
possible. To properly maintain the bodywork, check the following points;
• The purpose of washing your scooter is to prevent the dirt from settling and damaging the paintwork. Excel
Mobility recommends that you wash the scooter once a week.
• Keep the body of your scooter clean with car shampoo and a damp cloth. Do not spray your scooter! Dry the
bodywork with a soft cloth.
• Use cold water with mild soap to remove dirt and oil.
7.3 The upholstery
The upholstery of your scooter is also an important part. Dangerous situations can arise due to torn or worn upholstery.
Regular inspection of your upholstery is therefore very important. Therefore, check the upholstery of your scooter for the
following points:
• Check whether the textile cover has holes, tears or worn spots.
• Check the upholstery holes in the trim and make sure they are all tight and free of wear.
If one of the above points shows deviations, you should contact the dealer where you bought the scooter. Only your
dealer is allowed to make any repairs to the upholstery.

20
7.4 Cleaning your scooter
Cleaning your scooter is important and should be done regularly. It is best to clean your scooter as described below.
• Cleaning the upholstery, chassis and plastic components is best done with mild soap and water. Never use
aggressive abrasives. These abrasives can damage the paint. Also, never use a high pressure or steam cleaner.
• Treat the paintwork of your chassis regularly with wax. However, never use dissolving or abrasive wax, harmful
chemicals or silicone spray.
• Always dry the scooter thoroughly after cleaning. In addition, make sure that your scooter is dried if it has become
wet due to a rain shower, for example.
7.5 Periodic maintenance of your scooter
Preventative maintenance on your scooter is very important and many of these things you can do yourself (or have your
attendant do it). Below we give you a summary of the interval of the above-described check of the parts, which you can
perform yourself.
Every week
• Check the tyre pressure.
Every month
• Check the upholstery for damage or wear;
• Check whether folding up the armrests still goes smoothly. Spray the kink points regularly with silicone spray;
• Check that the seat still rotates smoothly. If not, grease it with silicone spray as well.
Every quarter
• Check the tread of the tyres for any wear.
7.6 Maintenance schedule
For an optimal lifespan of your scooter, we recommend that you have your scooter checked by an authorised Excel
Mobility dealer at least once a year. The maintenance schedule in the supplied maintenance booklet must be used. The
intensity of use of the scooter can vary greatly from person to person. Therefore, your scooter may require a check-up
several times a year. In addition, maintenance is not covered by the warranty. Periodic maintenance according to the
maintenance booklet is mandatory to maintain the warranty. If it appears that the maintenance instructions and the
maintenance schedule have not been followed, the warranty will become void.
Table of contents
Other Excel Scooter manuals

Excel
Excel Galaxy II User manual

Excel
Excel Entice User manual

Excel
Excel Navigator 4 User manual

Excel
Excel Entice 4 User manual

Excel
Excel Excite 4 Galaxy User manual

Excel
Excel Travelux Infineon3 User manual

Excel
Excel Galaxy II User manual

Excel
Excel Roadster DX8 Deluxe User manual

Excel
Excel Sportrek User manual

Excel
Excel Yoga User manual
Popular Scooter manuals by other brands

Pride Mobility
Pride Mobility Celebirty The Ultimate In Style &... owner's manual

APRILIA
APRILIA SPORTCITY CUBE 250 2010 manual

KYMCO
KYMCO Mini LS user manual

Hyper
Hyper Rip Rail owner's manual

APRILIA
APRILIA SCARABEO 50 I.E-100 4T - 2001 Workshop manual

AIRTUG
AIRTUG EL3-s Assembly & operating instructions