manuals.online logo
Brands
  1. Home
  2. •
  3. Brands
  4. •
  5. Exmark
  6. •
  7. Lawn Mower Accessories
  8. •
  9. Exmark Phazer PHZ19KA343CA Manual

Exmark Phazer PHZ19KA343CA Manual

Other Exmark Lawn Mower Accessories manuals

Exmark Ultra Vac Laser Z Programming manual

Exmark

Exmark Ultra Vac Laser Z Programming manual

Exmark ULTRAVAC BAGGER User manual

Exmark

Exmark ULTRAVAC BAGGER User manual

Exmark ULTRAVAC BAGGER 126-6954 Manual

Exmark

Exmark ULTRAVAC BAGGER 126-6954 Manual

Exmark COMMERCIAL 21 EC21KAY Manual

Exmark

Exmark COMMERCIAL 21 EC21KAY Manual

Exmark 109-6250 User manual

Exmark

Exmark 109-6250 User manual

Exmark Ultra Vac Laser Z User manual

Exmark

Exmark Ultra Vac Laser Z User manual

Exmark ULTRAVAC BAGGER 126-6954 Manual

Exmark

Exmark ULTRAVAC BAGGER 126-6954 Manual

Exmark NAVIGATOR Manual

Exmark

Exmark NAVIGATOR Manual

Exmark ULTRAVAC LZUV2B Manual

Exmark

Exmark ULTRAVAC LZUV2B Manual

Exmark Quest Bagger Manual

Exmark

Exmark Quest Bagger Manual

Exmark Ultra Vac QDS Frontrunner User manual

Exmark

Exmark Ultra Vac QDS Frontrunner User manual

Exmark Quest 42 User manual

Exmark

Exmark Quest 42 User manual

Exmark 116-8547 User manual

Exmark

Exmark 116-8547 User manual

Exmark 135-2604 User manual

Exmark

Exmark 135-2604 User manual

Exmark Ultra Vac QDS Lazer Z HP User manual

Exmark

Exmark Ultra Vac QDS Lazer Z HP User manual

Exmark Ultra Vac QDS Lazer Z HP User manual

Exmark

Exmark Ultra Vac QDS Lazer Z HP User manual

Exmark ULTRAVAC 126-6122 Manual

Exmark

Exmark ULTRAVAC 126-6122 Manual

Exmark Ultra Vac QDS Laser Z User manual

Exmark

Exmark Ultra Vac QDS Laser Z User manual

Exmark OCD01 Programming manual

Exmark

Exmark OCD01 Programming manual

Exmark 135-5271 User manual

Exmark

Exmark 135-5271 User manual

Exmark 116-8431 User manual

Exmark

Exmark 116-8431 User manual

Exmark STANDON User manual

Exmark

Exmark STANDON User manual

Exmark 126-6085 User manual

Exmark

Exmark 126-6085 User manual

Exmark ULTRACAV LZUV2B User manual

Exmark

Exmark ULTRACAV LZUV2B User manual

Popular Lawn Mower Accessories manuals by other brands

Toro 147-1660 manual

Toro

Toro 147-1660 manual

Toro 03484 installation instructions

Toro

Toro 03484 installation instructions

Ariens 891008 Operator's manual

Ariens

Ariens 891008 Operator's manual

Rover 108 - 109 owner's manual

Rover

Rover 108 - 109 owner's manual

Toro 112-5803 installation instructions

Toro

Toro 112-5803 installation instructions

Snapper 1690047 Operator's manual

Snapper

Snapper 1690047 Operator's manual

RHINO 800 Operator's manual

RHINO

RHINO 800 Operator's manual

Snapper 1685167 installation instructions

Snapper

Snapper 1685167 installation instructions

Cub Cadet 19B70029100 installation manual

Cub Cadet

Cub Cadet 19B70029100 installation manual

Stihl AMK 043.1 instruction manual

Stihl

Stihl AMK 043.1 instruction manual

MTD 753-0873 Service kit manual

MTD

MTD 753-0873 Service kit manual

Toro 30810 installation instructions

Toro

Toro 30810 installation instructions

Bush Hog RG60 Operator's manual

Bush Hog

Bush Hog RG60 Operator's manual

Scag Power Equipment GC-F4 Operator's manual

Scag Power Equipment

Scag Power Equipment GC-F4 Operator's manual

Land Pride RCF2760 Operator's manual

Land Pride

Land Pride RCF2760 Operator's manual

Peco SPARTAN RZ Series Operator's manual

Peco

Peco SPARTAN RZ Series Operator's manual

Peco 28621206 Operator's manual

Peco

Peco 28621206 Operator's manual

Toro 31212 installation instructions

Toro

Toro 31212 installation instructions

manuals.online logo
manuals.online logoBrands
  • About & Mission
  • Contact us
  • Privacy Policy
  • Terms and Conditions

Copyright 2025 Manuals.Online. All Rights Reserved.

PHAZER™ ™
™
SetupInstructions
ForSerialNos.820,977&Higher
LooseParts
Usethechartbelowtoverifythatallpartshavebeenshipped.Partnumbersnotshownareavailableonthedealer
extranet.
DealerPack
Part#DescriptionQty.Use
103-2106Key,ExmarkLogo1
1-603511Key,Standard1
Fillouttheonlinewarrantyregistration
formandplacethekeysintoliterature
pack.
LiteraturePack
Part#DescriptionQty.Use
—Manual,Operator’s1
—Manual,Parts1Readbeforeoperatingthemachine.
—DVD,ExmarkSafetyVideo1Viewbeforeoperatingthemachine.
CheckingTirePressure
1.Checkthetirepressureinthedrivetires.Proper
inationfordrivetiresis13psi(90kPa).
2.Adjustifnecessary.
FasteningtheSeat
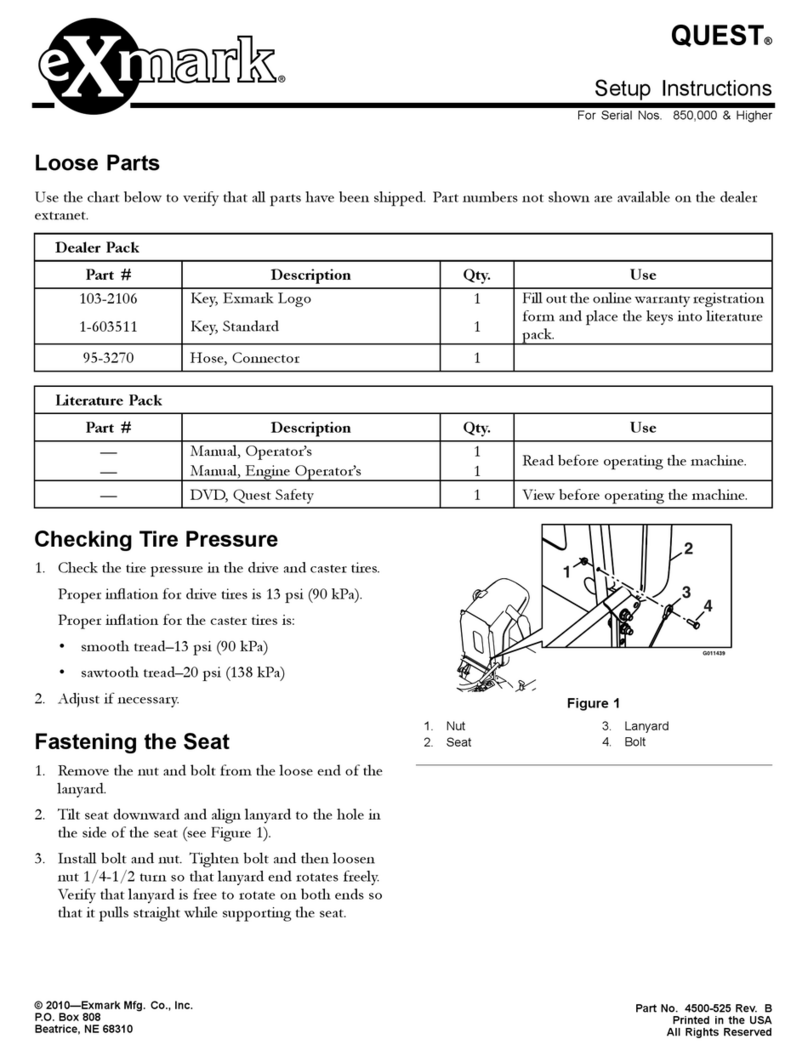
1.Removethenut,washerandboltfromthelanyard.
2.Tiltseatdownwardandalignlanyardtotheholein
thesideoftheseat(Figure1).
3.Installwasher,boltandnut.
Figure1
1.Nut3.Lanyard
2.Washer4.Bolt
©2010—ExmarkMfg.Co.,Inc.
P .O.Box808
Beatrice,NE68310
PartNo.4500-503Rev.C
PrintedintheUSA.
AllRightsReserved
ServicingtheBattery
WARNING
CALIFORNIA
Proposition65Warning
Batteryposts,terminals,andrelated
accessoriescontainleadandleadcompounds,
chemicalsknowntotheStateofCalifornia
tocausecancerandreproductiveharm.
Washhandsafterhandling.
Important:Themachineisshippedwithalled
leadacidbattery.
1.Tiltseatuptogainaccesstothebattery.
DANGER
Chargingorjumpstartingthebatterymay
produceexplosivegases.Batterygasescan
explodecausingseriousinjury.
•Keepsparks,ames,orcigarettesawayfrom
battery.
•Ventilatewhenchargingorusingbatteryin
anenclosedspace.
•Makesureventingpathofbatteryisalways
openoncebatteryislledwithacid.
•Alwaysshieldeyesandfacefrombattery.
DANGER
Batteryelectrolytecontainssulfuricacid,which
ispoisonousandcancausesevereburns.
Swallowingelectrolytecanbefatalorifit
touchesskincancausesevereburns.
•Wearsafetyglassestoshieldeyes,andrubber
glovestoprotectskinandclothingwhen
handlingelectrolyte.
•DoNotswallowelectrolyte.
•Intheeventofanaccident,ushwithwater
andcalladoctorimmediately.
2.Checkthevoltageofthebatterywithadigital
voltmeter.Locatethevoltagereadingofthebattery
inthetablebelowandchargethebatteryforthe
recommendedtimeintervaltobringthechargeup
toafullchargeof12.6voltsorgreater.
Important:Makesurethenegativebattery
cableisdisconnectedandthebatterycharger
usedforchargingthebatteryhasanoutputof
16voltsand7ampsorlesstoavoiddamaging
thebattery(seechartforrecommendedcharger
settings).
Voltage
Reading
Percent
Charge
Maximum
Charger
Settings
Charging
Interval
12.6or
greater
100%16volts/7
amps
NoCharging
Required
12.4–12.675–100%16volts/7
amps
30Minutes
12.2–12.450–75%16volts/7
amps
1Hour
12.0–12.225–50%14.4volts/4
amps
2Hours
11.7–12.00–25%14.4volts/4
amps
3Hours
11.7orless0%14.4volts/2
amps
6Hoursor
More
CAUTION
Iftheignitionisinthe“ON”positionthere
ispotentialforsparksandengagementof
components.Sparkscouldcauseanexplosion
ormovingpartscouldaccidentallyengage
causingpersonalinjury
Besureignitionswitchisinthe“OFF”position
beforechargingthebattery.
3.Connectthenegativebatterycable.
Note:Ifthepositivecableisalsodisconnected,
connectthepositive(red)cabletothepositive
batteryterminalrst,thenthenegative(black)cable
tothenegativebatteryterminal.Slipinsulatorboot
overthepositiveterminal.
Note:Iftimedoesnotpermitchargingthebattery,
orifchargingequipmentisnotavailable,connect
thenegativebatterycableandrunthevehicle
continuouslyfor20to30minutestosufciently
chargethebattery.
InstallingtheMotionControl
Levers
1.Removethebottom3/8-16x1inchscrewand
springdiscwasherfromthemotioncontrollever.
Loosentheupper3/8-16x1inchscrewandspring
discwasherthatarescrewedintothecontrolarm
shafts(seeFigure2).
2.Positiontheleversothebottomholealignswith
holeinthecontrolarmshaft.Installspringdisc
washerandbolt.
2
3.Repeatonoppositesideofunit.
Note:Besurethespringdiscwasherconeis
installedtowardstheheadofthebolts.
Note:Therearetwoleverheightoptionsavailable.
Placetheleversinthetoptwoholestoincrease
heightofthelevers,orinthebottomtwoholesto
decreasetheheightofthelevers.
Figure2
1.Motioncontrollever3.Springdiscwashers(cone
towardsbolthead)
2.Controlarmshaft4.3/8-16x1inchbolts
4.Aligntheleversfront/rearposition.Withthelevers
intheneutralposition,loosenthehardwareand
adjusttheleversslidingand/ortiltingthelever(s)
forwardorbackwarduntilproperlyaligned.Tighten
hardware.
5.Iftheendsofthelevershitagainsteachother,
whileinthedriveposition(leversrotatedinasfaras
possible),makeadjustmentsbymovingthelevers
outwardstotheneutrallockpositionandcarefully
bendingthemoutward.Movethembacktothedrive
positionandcheckforclearance.Repeatifnecessary.
6.Ifthemachineturnsrightorleftwhenhandlesare
pushedforwardtogether,adjustthestopontheside
oppositethedirectionofturn(seeFigure3).Move
thestopbackuntiltheunitdrivesstraight.Readjust
handlesifnecessary.
Figure3
1.Adjuststop
ServicingtheEngine
RefertoEngineOwner’sManual.
ServicingtheHydraulicOil
Themachineisshippedwithhydraulicoilinthe
reservoir.VerifylevelonExpansionTank(Figure4).
1.Startengineanddrivethemachineforwardand
backwardforafewminutestoallowanyextraairto
purgeoutofthehydraulicsystem.
2.Stopengineandwaitforallmovingpartstostop.
Removekeyandengageparkingbrake.
3.CheckexpansiontankandifnecessaryaddExmark
PremiumHydrooiltotheFULLCOLDline.
4.Replacehydraulicreservoircapandtightenuntil
snug.DoNotovertighten.
Figure4
(Fueltankremovedforclarity.)
1.Expansiontank
3
FillingOuttheProduct
Registration
Fillouttheonlinewarrantyregistrationformandplace
keysintoliteraturepack.
4