manuals.online logo
Brands
  1. Home
  2. •
  3. Brands
  4. •
  5. Exmark
  6. •
  7. Lawn Mower Accessories
  8. •
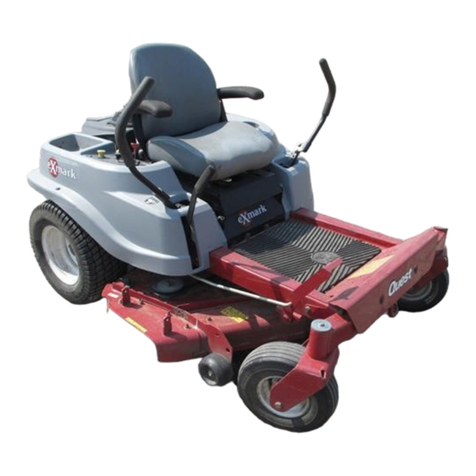
  9. Exmark Quest 42 User manual

Exmark Quest 42 User manual

This manual suits for next models

1

Other Exmark Lawn Mower Accessories manuals

Exmark TURF TRACER TT23KAEP Manual

Exmark

Exmark TURF TRACER TT23KAEP Manual

Exmark STANDON User manual

Exmark

Exmark STANDON User manual

Exmark Ultra Vac Laser Z User manual

Exmark

Exmark Ultra Vac Laser Z User manual

Exmark 109-6250 User manual

Exmark

Exmark 109-6250 User manual

Exmark 116-1751 User manual

Exmark

Exmark 116-1751 User manual

Exmark ULTRA VAC 103-5629 Manual

Exmark

Exmark ULTRA VAC 103-5629 Manual

Exmark Ultra Vac QDS Lazer Z HP User manual

Exmark

Exmark Ultra Vac QDS Lazer Z HP User manual

Exmark 116-8431 User manual

Exmark

Exmark 116-8431 User manual

Exmark Phazer PHZ19KA343CA Manual

Exmark

Exmark Phazer PHZ19KA343CA Manual

Exmark ULTRAVAC E Series Manual

Exmark

Exmark ULTRAVAC E Series Manual

Exmark LAZER Z E Series Manual

Exmark

Exmark LAZER Z E Series Manual

Exmark ULTRAVAC BAGGER User manual

Exmark

Exmark ULTRAVAC BAGGER User manual

Exmark ULTRAVAC E Series Manual

Exmark

Exmark ULTRAVAC E Series Manual

Exmark PIONEER BAGGER User manual

Exmark

Exmark PIONEER BAGGER User manual

Exmark Turf Tracer TT24KAECA Manual

Exmark

Exmark Turf Tracer TT24KAECA Manual

Exmark QUEST QTS691KA502 Manual

Exmark

Exmark QUEST QTS691KA502 Manual

Exmark ULTRAVAC LZUVQD7 User manual

Exmark

Exmark ULTRAVAC LZUVQD7 User manual

Exmark ULTRACAV LZUV2B User manual

Exmark

Exmark ULTRACAV LZUV2B User manual

Exmark Ultra VAC QDS LAZER Z Manual

Exmark

Exmark Ultra VAC QDS LAZER Z Manual

Exmark ULTRAVAC LZUV2B Manual

Exmark

Exmark ULTRAVAC LZUV2B Manual

Exmark Ultra Vac QDS Laser Z User manual

Exmark

Exmark Ultra Vac QDS Laser Z User manual

Exmark exmark 30" Manual

Exmark

Exmark exmark 30" Manual

Exmark Ultra Vac QDS Lazer Z HP Manual

Exmark

Exmark Ultra Vac QDS Lazer Z HP Manual

Exmark Ultra Vac Laser Z User manual

Exmark

Exmark Ultra Vac Laser Z User manual

Popular Lawn Mower Accessories manuals by other brands

Toro 147-1660 manual

Toro

Toro 147-1660 manual

Toro 03484 installation instructions

Toro

Toro 03484 installation instructions

Ariens 891008 Operator's manual

Ariens

Ariens 891008 Operator's manual

Rover 108 - 109 owner's manual

Rover

Rover 108 - 109 owner's manual

Toro 112-5803 installation instructions

Toro

Toro 112-5803 installation instructions

Snapper 1690047 Operator's manual

Snapper

Snapper 1690047 Operator's manual

RHINO 800 Operator's manual

RHINO

RHINO 800 Operator's manual

Snapper 1685167 installation instructions

Snapper

Snapper 1685167 installation instructions

Cub Cadet 19B70029100 installation manual

Cub Cadet

Cub Cadet 19B70029100 installation manual

Stihl AMK 043.1 instruction manual

Stihl

Stihl AMK 043.1 instruction manual

MTD 753-0873 Service kit manual

MTD

MTD 753-0873 Service kit manual

Toro 30810 installation instructions

Toro

Toro 30810 installation instructions

Bush Hog RG60 Operator's manual

Bush Hog

Bush Hog RG60 Operator's manual

Scag Power Equipment GC-F4 Operator's manual

Scag Power Equipment

Scag Power Equipment GC-F4 Operator's manual

Land Pride RCF2760 Operator's manual

Land Pride

Land Pride RCF2760 Operator's manual

Peco SPARTAN RZ Series Operator's manual

Peco

Peco SPARTAN RZ Series Operator's manual

Peco 28621206 Operator's manual

Peco

Peco 28621206 Operator's manual

Toro 31212 installation instructions

Toro

Toro 31212 installation instructions

manuals.online logo
manuals.online logoBrands
  • About & Mission
  • Contact us
  • Privacy Policy
  • Terms and Conditions

Copyright 2025 Manuals.Online. All Rights Reserved.

FormNo.4501-514RevA
InstallationInstructions
MulchKitQuest®42
KitNo.116-9414
ForSerialNos.313,000,000&Higher
WARNING
CALIFORNIA
Proposition65Warning
ThisproductcontainsachemicalorchemicalsknowntotheStateofCaliforniato
causecancer,birthdefects,orreproductiveharm.
SafetyAlertSymbol
ThisSafetyAlertSymbol(Figure1)isusedbothinthis
instructionsheetandonthemachinetoidentifyimportant
safetymessageswhichmustbefollowedtoavoidaccidents
Thissymbolmeans:ATTENTION!BECOMEALERT!
YOURSAFETYISINVOLVED!
Figure1
SafetyAlertSymbol
Thesafetyalertsymbolappearsaboveinformationwhich
alertsyoutounsafeactionsorsituationsandwillbefollowed
bythewordDANGER,WARNING,orCAUTION.
DANGER:Whitelettering/Redbackground.Indicatesan
imminentlyhazardoussituationwhich,ifnotavoided,Will
resultindeathorseriousinjury.
WARNING:Blacklettering/Orangebackground.Indicates
apotentiallyhazardoussituationwhich,ifnotavoided,Could
resultindeathorseriousinjury.
CAUTION:Blacklettering/Yellowbackground.Indicates
apotentiallyhazardoussituationwhich,ifnotavoided,May
resultinminorormoderateinjury.
Thismanualusestwootherwordstohighlightinformation.
Importantcallsattentiontospecialmechanicalinformation
andNoteemphasizesgeneralinformationworthyofspecial
attention.
WARNING
Whilemaintenanceoradjustmentsarebeingmade,
someonecouldstarttheengine.Accidentalstarting
oftheenginecouldseriouslyinjureyouorother
bystanders.
Removethekeyfromtheignitionswitch,engage
parkingbrake,andpullthewire(s)offthespark
plug(s)beforeyoudoanymaintenance.Alsopush
thewire(s)asidesoitdoesnotaccidentallycontact
thesparkplug(s).
Note:Determinetheleftandrightsidesofthemachine
fromthenormaloperatingposition.
©2012—ExmarkMfg.Co.,Inc.
IndustrialParkBox808
Beatrice,NE68310
www.Exmark.comOriginalInstructions(EN)
PrintedintheUSA
AllRightsReserved*4501-514*A
LooseParts
Usethechartbelowtoverifythatallpartshavebeenshipped.
ItemPartNo.DescriptionQtyItemPartNo.DescriptionQty
1121-5691-03Asm-Bafe143230-1Bolt-Carriage5/16-18x3/41
2106-2247-03Blade25104-8300Nut-Nyloc5/16-18Flg6
3121-5690-03Asm-Kicker1
Figure2
2
InstallationInstructions
1.Makesureallmovingpartshavestopped,parkingbrake
isengaged,andthekeyhasbeenremoved.
2.Raisethefrontendofthemachineandsupportwith
jackstands.
CAUTION
Raisingthemowerforserviceormaintenance
relyingsolelyonmechanicalorhydraulic
jackscouldbedangerous.Themechanicalor
hydraulicjacksmaynotbeenoughsupport
ormaymalfunctionallowingtheunittofall,
whichcouldcauseinjury.
DoNotrelysolelyonmechanicalorhydraulic
jacksforsupport.Useadequatejackstands
orequivalentsupport.
3.Ifthemowerhasbeenused,scrapetheundersideof
themowerdeckclean.
4.Removeandretaintheexistingbladesfromtheunit.
Keepthehardwaretoinstallthemulchblades.
5.Removeandretaintheexistingdischargebafeand
mountinghardwareasshowninFigure3.
Note:Retainthedischargebafeforreuseifthe
mulchkitisremoved.
G01801 1
1
Figure3
1.Existingdischargebafe
6.Reinstallthemountinghardware,fromstep5,into
theholesinthedeckwherethedischargebafewas
installed.
WARNING
Openholesinthemowerexposeyouand
otherstothrowndebriswhichcancause
severeinjury.
•Neveroperatethemowerwithouthardware
mountedinallholesinthemowerhousing.
•Installthehardwareinthemountingholes
whenyouremovethemulchingbafe.
7.LooselyinstallthebafeassemblytotheRHsideof
themowerdeckusing5/16-18x3/4inchcarriagebolt
andtwo5/16inchangenutsasshowninFigure2and
Figure4.
G018012
12
3
4
1
Figure4
Dischargedeectorremovedforclarity
1.5/16inchangenut3.5/16-18x3/4inchcarriage
bolt
2.Bafeassembly4.Weldedpost
8.Removethetwoplugboltsandnutsfromthedeckas
showninFigure5.
G018650
1
2
3
Figure5
1.Kickerplate3.Removeplugboltsand
nuts
2.5/16inchangenut
9.SecurethekickerplatetotheLHsideofthemower
deckusingfour5/16inchangenutsasshownin
Figure2andFigure5.
10.Tightenallhardware.
3
11.InstallthemulchingbladesasstatedintheOperator’s
manual.
WARNING
Incorrectinstallationofthebladeor
componentsusedtoretainthebladecan
bedangerous.Failuretousealloriginal
componentsandassembledasshowncould
allowabladeorbladecomponenttobethrown
outfromunderthedeckresultinginserious
personalinjuryordeath.
AlwaysinstalltheoriginalExmarkblades
andbladeretaininghardwareasshowninthe
Operator’smanual.
Note:RefertotheOperator’smanualforblade
maintenance.
12.Carefullyremovethejackstandsandlowertheunit
totheground.Reinstallthesparkplugcable(s)and
ignitionkey.YourExmarkunithassuccessfullybeen
convertedtoamulchingmower.
ConvertingBacktoSide
Discharge
1.Safelyremovethekickerplateandbafeassembly.
2.Reinstallthedischargebafe.
3.Plugallopenholesinthedeck.
4.Replacethemulchbladeswithstandardbladesasstated
intheOperator’smanual.
4