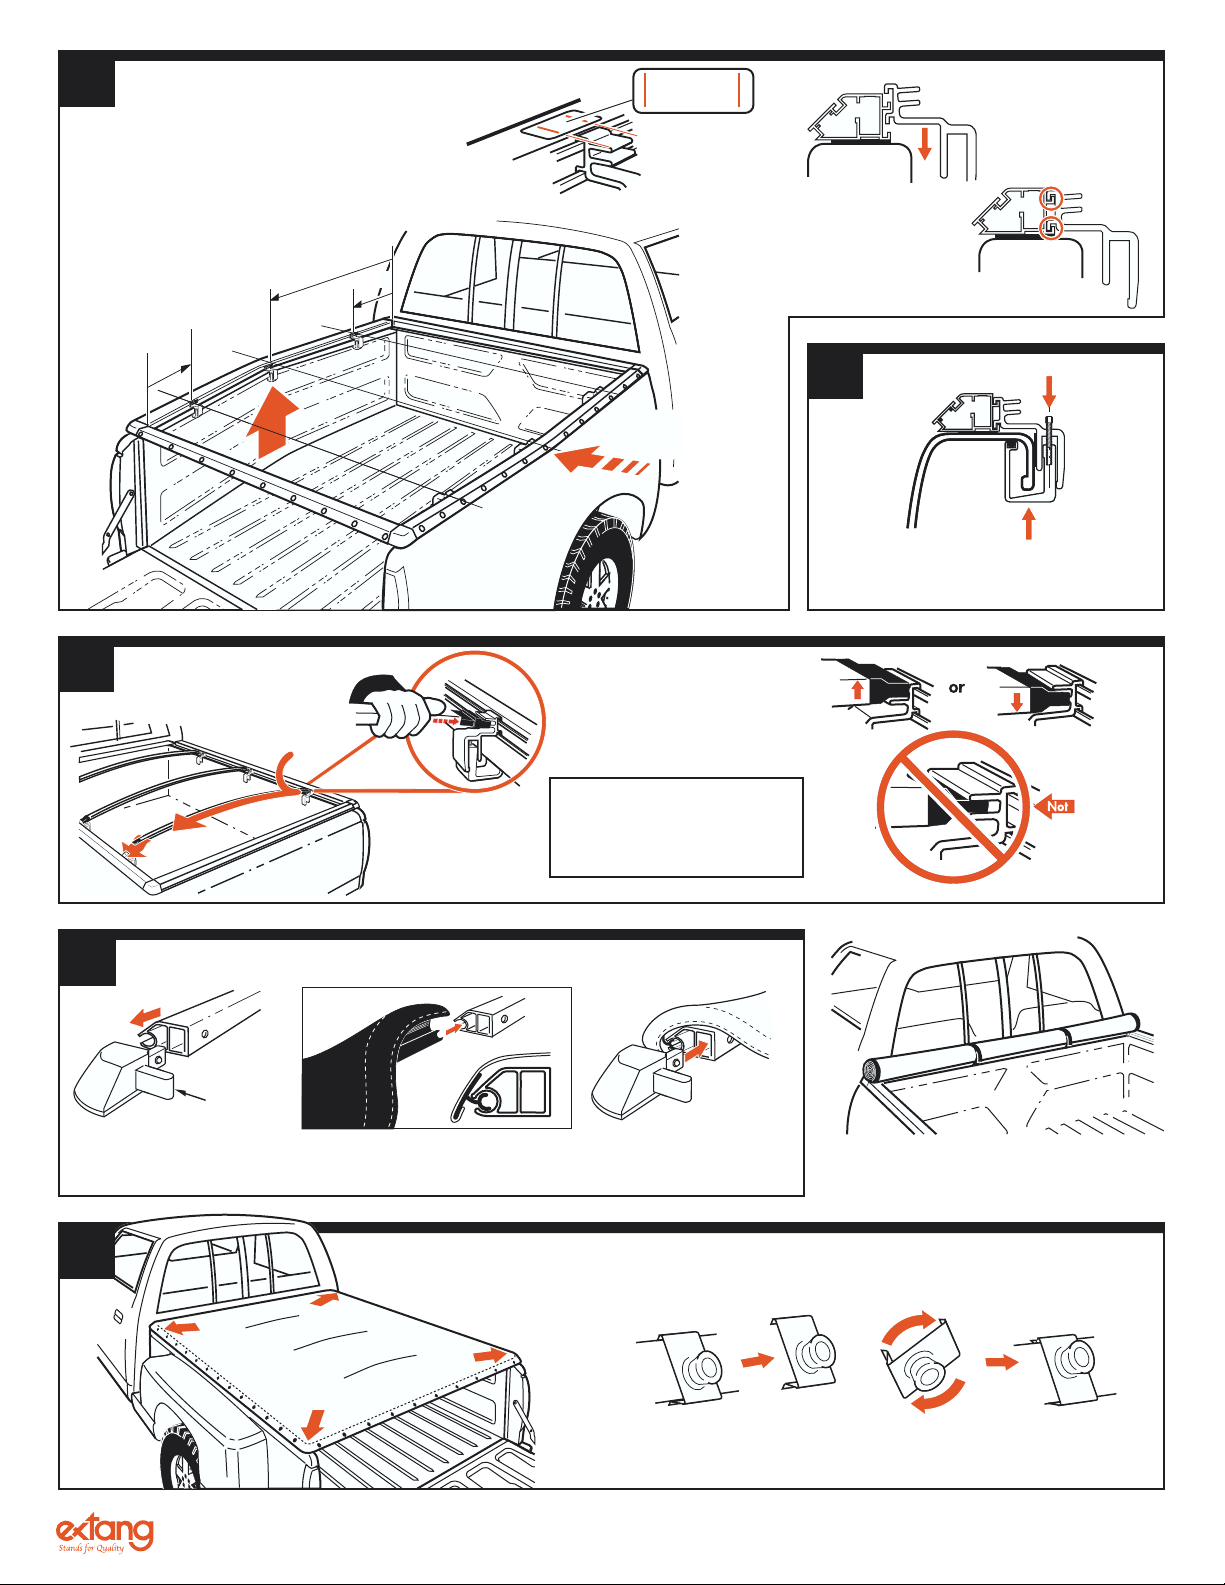
Extang CLASSIC PLATINUM Assembly instructions
Other Extang Automobile Accessories manuals

Extang
Extang Solid Fold 2.0 Assembly instructions

Extang
Extang Classic Platinum User manual

Extang
Extang CLASSIC PLATINUM & BLACKMAX 7920 Assembly instructions

Extang
Extang Trifecta 2.0 User manual

Extang
Extang CLASSIC PLATINUM BLACKMAX TUFF TONNO III & Saber TONNO... Assembly instructions

Extang
Extang e-MAX TONNO Assembly instructions

Extang
Extang Trifecta Assembly instructions

Extang
Extang Classic Platinum Assembly instructions

Extang
Extang Trifecta 2.0 Assembly instructions

Extang
Extang Express Tonno Assembly instructions
Popular Automobile Accessories manuals by other brands


ULTIMATE SPEED
ULTIMATE SPEED 279746 Assembly and Safety Advice

SSV Works
SSV Works DF-F65 manual

ULTIMATE SPEED
ULTIMATE SPEED CARBON Assembly and Safety Advice

Witter
Witter F174 Fitting instructions

WeatherTech
WeatherTech No-Drill installation instructions

TAUBENREUTHER
TAUBENREUTHER 1-336050 Installation instruction