manuals.online logo
Brands
  1. Home
  2. •
  3. Brands
  4. •
  5. Extech Instruments
  6. •
  7. Thermometer
  8. •
  9. Extech Instruments 445715-NIST User manual

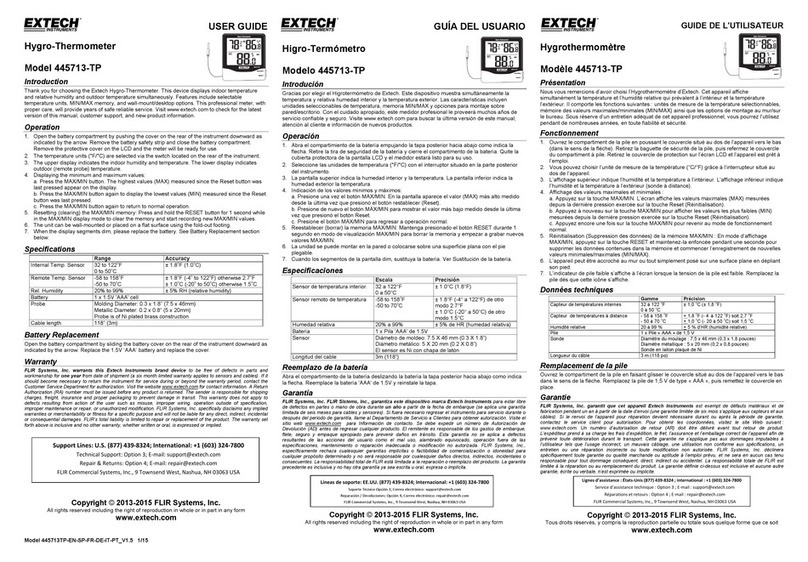
Extech Instruments 445715-NIST User manual

Model445715‐EN‐SP‐FR‐DEv1.69/13

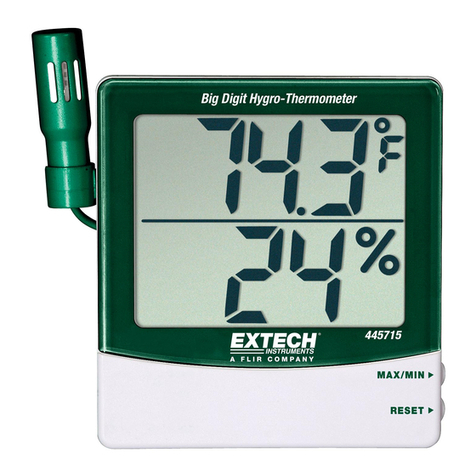
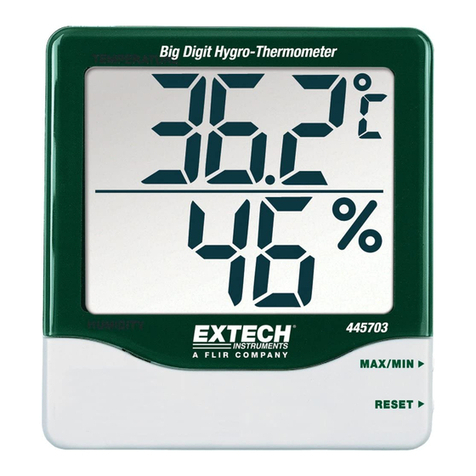
445715BigDigit
RemoteProbe
Hygro‐Thermometer
Introduction
CongratulationsonyourpurchaseoftheExtechBigDigitRemoteProbeHygro‐Thermometer.It
featuresHumidityandTemperaturereadoutsandcanbecalibratedusingtheoptionalcalibration
saltbottles(orderno.445580‐C).Theremoteprobeconvenientlymountsonthemeter(1)or
extendsformeasurementsinductsorotherremotelocations.
Operation
1. Openthebatterycompartment(7)bypushingthecover(11)ontherearofthe
instrumentdownwardasindicatedbythearrowandremovebatterysafetystrip.
2. RemovetheprotectivecoverontheLCDdisplay(2)andtaketheProbeoutof
theprobecompartment(6).Themeterisnowreadyforuse.
3. Thetemperatureunits(oF/oC)canbeselectedviatheswitch(9)locatedinthe
batterycompartment.
4. Theupperdisplayindicatesthetemperature.Thelowerdisplayindicates
humidity.
5. Displayingtheminimumandmaximumvalues:
a.PresstheMAX/MINbutton(3).ThehighestvaluemeasuredsincetheReset
button(4)waslastpressedappearsonthedisplay.
b.PresstheMAX/MINbuttonagaintodisplaythelowestvaluemeasuredsince
theResetbuttonwaslastpressed.
c.PresstheMAX/MINbuttonagaintoreturntonormaldisplayoperation.
6. Resetting(clearing)theMAX/MINmemory.PressandholdtheRESETbutton(4)
for1secondwhileintheMAX/MINdisplaymodetoclearthememoryandstart
recordingnewmax/minvalues.
7. Usercanselectwall‐mounting(5)orflatsurfaceusewithfold‐outfooting(7).
8. Thelowbatteryiconwillappearonthedisplaywhenthebatteryvoltageislow.
Replacethebatterywhenthisoccurs.
BatteryReplacement
Slidetherearbatterycover(11)downwardasindicatedbythearrow.Replacethe
1.5V‘AAA’batteryandreplacethecover.
Calibration
Thefollowingverificationandcalibrationprocedurerequiresahumiditychamberor
theoptional33%and75%RHreferencebottles(orderno.445580‐C).
RHAccuracyVerification(Checkingthe33%or75%RHCalibration)
1. Insertmeter’ssensor(1)intothe33%or75%saltbottleorhumiditychamber.
Note:Slowlyrotatingthebottlewillassistinplacingitoverthesensor.
2. Allowthemetertostabilizefor1houratthereferenceRHandthenverifythat
thereadingiswithintheaccuracyspecification.
RHCalibration
1. Insertmeter’ssensorintoa75%saltreferencebottleorhumiditychamber.
2. Checkthereadingafter1hour.
3. AdjusttheRHcalibrationpot(8)in½turnincrements,waitingforthedisplayto
updateaftereachadjustment,untilthereadingiswithinspecification.
4. RepeattheRHaccuracyverificationprocedure.
Note:Replacebottleifthesaltatthebottomofthecalibrationbottleappearsdry.
TemperatureCalibration
1. Placethesensorinastabilizedenvironmentofapproximately70°F(21°C).
2. Checkthereadingafter1hour.
3. Adjustthetemperaturecalibrationpot(10)in½turnincrements,waitingforthe
displaytoupdateaftereachadjustment,untilthereadingiswithinspecification.
Specifications

RangeAccuracy
Temperature14to140oF
‐10to60oC
+1.8oFwithin14oFto122oF
+1.0oCwithin‐10oCto50oC
Humidity10%to99%+4%RHwithin25%to85%RHand32to122oF(0to50oC)
Battery1.5V'AAA'cell
You,astheenduser,arelegallybound(Batteryordinance)toreturnallusedbatteries
andaccumulators;disposalinthehouseholdgarbageisprohibited!
Youcanhandoveryourusedbatteries/accumulatorsatcollectionpointsinyourcommunityor
whereverbatteries/accumulatorsaresold!
Disposal:Followthevalidlegalstipulationsinrespectofthedisposalofthedeviceattheendof
itslifecycle

Copyright©2013FLIRSystems,Inc.
Allrightsreservedincludingtherightofreproductioninwholeorinpartinanyform
ISO‐9001Certified
www.extech.com

Higro‐Termómetro
deGrandesDígitos
Modelo445715
Introducción
AgradecemossucompradelHigro‐TermómetrodegrandesdígitosconsondaremotadeExtech.
Humedadytemperaturaajustablesmásbotellasdesalopcionalesparacalibración(445580‐C).
Sensorremoto(concablede45cm)conmontajeenelmedidoroextendidoparamedidasen
conductosositiosalejados.Conelcuidadoapropiado,estemedidorprofesionalleproveerá
muchosañosdeservicioconfiableyseguro
Descripcióndelmedidor
1.Sensordetemperatura‐humedad 2.PantallaLCD
3.MÁX/MIN 4.RestablecerMáx./Mín.
5.Montajeenpared 6.Repositoriodelcabledelsensor
7.Soporte   8.Humedadajustedecalibración
9.Conmutadorunidadesdetemp.10.Ajustedecalibracióndetemperatura
11.Tapadelcompartimientodelabatería
Operación
1. Abraelcompartimientodelabateríaempujandolatapaposteriorhaciaabajo
comoindicalaflecha.Retirelatiradeseguridaddelabateríaylacubierta
protectoradelapantallaLCD.Elinstrumentoestáhabilitado.
2. Puedeseleccionarlasunidadesdetemperatura(oF/oC)pormediodel
conmutadorubicadoenelcompartimientodelabatería.
3. Lapantallasuperiorindicalatemperatura.Lapantallainferiorindicahumedad.
4. Indicacióndelosvaloresmínimosymáximos.
a. PresioneelbotónMAX/MIN.Enlapantallaapareceelvalormásaltomedido
desdelaúltimavezqueoprimióelbotónReset.
b. PresionedenuevoelbotónMÁX/MINparamostrarelvalormásbajomedido
desdelaúltimavezquepresionóelbotónReset.
c. PresionedenuevoelbotónMAX/MINpararegresaraoperaciónnormal.
5. 5.Restablecer(borrar)lamemoriaMAX/MIN.
6. PresioneysostengaelbotónRESETdurante1segundoenmodoMÁX/MINdel
indicadorparaborrarlamemoriaycomenzararegistrarlosvaloresnuevosde
máximosymínimos.
7. 6.Puedemontarlaunidadsobrelaparedocolocarlasobreunasuperficieplana
conelsoporteplegable.
8. 7.Cuandoelvoltajedelabateríaestábajo,enpantallaapareceráunindicador
debateríadébil.Cuandoestosuceda,reemplacelabatería.
Reemplazodelabatería
Abraelcompartimientodelabateríaempujandolatapaposteriorhaciaabajocomoindicalaflecha.Reemplace
labatería'AAA'de1.5Vyreinstalelatapa.
Usted,comousuariofinal,estálegalmenteobligado(Reglamentodebaterías)aregresartodaslas
bateríasyacumuladoresusados;¡eldesechoeneldesperdicioobasuradelacasaestáprohibido!Usted
puedeentregarlasbateríasoacumuladoresusados,gratuitamente,enlospuntosderecolecciónde
nuestrassucursalesensucomunidadodondeseaquesevendenlasbateríasoacumuladores.
Desecho:Cumplalasestipulacioneslegalesvigentesrespectoaldesechodeldispositivoalfinaldesuvidaútil.
Calibración
Elprocedimientodeverificaciónycalibraciónrequiereunacámaradehumedadolasbotellasoptativasde
referencia33%y75%RH(445580‐C).
VerificacióndeprecisiónHR
RevisarlacalibracióndeHR33%ó75%
1. Inserteelsensordelmedidorenlabotelladereferenciadesalal33%ó75%ocámaradehumedad.
Nota:Girelentamentelabotellaparafacilitarlacolocaciónsobreelsensor.
2. Permitaqueelmedidorseestabilicedurante1horaenlaHRdereferenciayenseguidaverifiquequela
lecturaestédentrodelaespecificacióndeprecisión.
CalibraciónHR
1. Inserteelsensordelmedidorenlabotelladereferenciadesalal75%ocámaradehumedad.
2. Reviselalecturadespuésde1hora.
3. AjusteelpotdecalibraciónHRenincrementosde½vuelta,espereaquelapantallaseactualicedespuésde
cadaajuste,hastaquelalecturaestédentrodelaespecificacióndeprecisión.
4. RepitaelprocesodeverificacióndeprecisiónHR.
Nota:Silasalenelfondodelasbotellasdecalibraciónpareceseca,deberáreemplazarlasbotellas.
Calibracióndetemperatura
1. Coloqueelsensorenunambienteestabilizadoaprox.a21°C(70°F).
2. Reviselalecturadespuésde1hora.
3. Ajusteelpotdecalibracióndetemperaturaenincrementosde½vuelta,espereaquelapantallase
actualicedespuésdecadaajuste,hastaquelalecturaestédentrodelaespecificacióndeprecisión.
Especificaciones
EscalaPrecisión
Temperatura‐10a60°C
14a140oF
+1.0°Cdentrode‐10°Ca50°C
+1.8°Fdentrode14°Fa122°F
Humedad10%a99%+4%RHdentrode25%a85%RHy
0a50°Có32a122°F
BateríaPila1.5V'AAA'

Copyright©2013FLIRSystems,Inc.
Reservadostodoslosderechos,incluyendoelderechodereproduccióntotaloparcialencualquiermedio.
CertificadoISO‐9001
www.extech.com
Model445715‐EN‐SP‐FR‐DEv1.69/13

Hygro‐Thermometer
mitgroßerDigitalanzeige
undexternerMesssonde
Modell445715
Einleitung
WirgratulierenIhnenzumKaufdesExtechHygro‐ThermometersmitgroßerDigitalanzeigeund
externerMesssonde.DiesesMessgerätzeigtLuftfeuchtigkeits‐undTemperaturmesswertean
undkannmitoptionalenKalibrierungssalzflaschen(Best.‐Nr.445580‐C)kalibriertwerden.Die
externeMesssondekanneinfachamGerätangeschlossenoderkannfürMessungeninRöhren
oderananderenabgelegenenOrtenverlängertwerden.
Bedienung
1. ÖffnenSiedasBatteriefach(7),indemSiedieDeckel(11)aufderRückseitedesMessgeräts
inPfeilrichtungherunterschieben.EntfernenSieauchdasBatteriesicherheitsband.
2. EntfernenSiedieSchutzabdeckungvomLCD‐Display(2)undnehmenSiedieSondeausdem
Sondenfach(6)heraus.DasMessgerätistnuneinsatzbereit.
3. DieTemperatureinheiten(°F/°C)könnenmithilfedesSchalters(9)imBatteriefachgewählt
werden.
4. DieobereDisplayhälftezeigtdiegemesseneTemperaturunddieunterezeigtdie
Luftfeuchtigkeitan.
5. AnzeigenderminimalenundmaximalenWerte:
a.DrückenSieMAX/MIN(3).DashöchsteMessergebnisseitletztemDrückenvonRESET(4)
wirdaufdemDisplayangezeigt.
b.ZeigenSiemiteinemerneutenTastendruckaufMAX/MINdenniedrigstenMesswertseit
demletztenDrückenvonRESET(4)an.
c.KehrenSiemiteinemerneutenTastendruckaufMAX/MINzurnormalenDisplayanzeige
zurück.
6. Rücksetzen(Löschen)desMAX/MIN‐Speichers.HaltenSiewährendderMAX/MIN‐Anzeige
RESET(4)für1Sekundegedrückt,umdenSpeicherzulöschenundumneueMAX/MIN‐
Messwerteaufzuzeichnen.
7. DasMessgerätkannmitderWandbefestigung(5)aneinerWandmontiertodermitdem
ausklappbarenStandfußaufebenenFlächenaufgestelltwerden.
8. WenndieBatteriespannungniedrigist,wirdaufdemDisplaydasSymbolfüreineerschöpfte
Batterieangezeigt.TauschenSieindiesemFalledieBatterieaus.
AustauschderBatterie
SchiebenSiedenBatteriefachdeckel(11)aufderRückseiteinPfeilrichtungnachunten.Ersetzen
Siedie1,5V‘AAA’BatterieundschließenSiedenDeckelwieder.
Kalibrierung
DiefolgendenVerifizierungs‐undKalibrierungsverfahrenbenötigeneineFeuchtigkeitskammer
oderdieoptionalenReferenzflaschenmiteinerrelativenLuftfeuchtigkeitvon33%und75%
(Best.‐Nr.445580‐C).
RH‐Genauigkeitsverifizierung(relativeLuftfeuchtigkeit)(Überprüfungder33%oder75%RH‐
Kalibrierung)
1. HaltenSiedenMessgerätesonde(1)ineine33%oder75%Salzreferenzflascheoder
Feuchtigkeitskammer.
Hinweis:DurchlangsamesDrehenderFlaschekanndiesemühelosüberdemSensor
platziertwerden.
2. WartenSie1Stunde,biseinstabilesMessergebnisinnerhalbderReferenz‐RHerreicht
wurde.ÜberprüfenSieanschließend,obderMesswertinnerhalbderGenauigkeitsgrenzen
liegt.
RH‐Kalibrierung(relativeLuftfeuchtigkeit)
1. HaltenSiedenMessgerätesondeineine75%Salzreferenzflascheoder
Feuchtigkeitskammer.
2. LesenSiedenMesswertnach1Stundeab.
3. StellenSiedasRH‐Kalibrierungspotentiometer(8)schrittweiseumeinehalbenDrehungein.
WartenSienachjederDrehung,bisdieBildschirmanzeigeaktualisiertwurde.FührenSiedie
Einstellungsolangedurch,bissichderMesswertinnerhalbderSpezifikationenbefindet.
4. WiederholenSiedasRH‐Genauigkeits‐Verifizierungsverfahren.
Hinweis:FallsdasSalzamBodenderKalibrierungsflascheeingetrocknetist,ersetzenSiedie
Flasche.
Temperatur‐Kalibrierung
1. BringenSiedieSondeineineUmgebungmiteinerkonstantenTemperaturvonungefähr70
°F(21°C).
2. LesenSiedenMesswertnach1Stundeab.
3. StellenSiedasTemperatur‐Kalibrierungspotentiometer(10)schrittweiseumeinehalben
Drehungein.WartenSienachjederDrehung,bisdieBildschirmanzeigeaktualisiertwurde.
FührenSiedieEinstellungsolangedurch,bissichderMesswertinnerhalbder
Spezifikationenbefindet.
TechnischeDaten

MessbereichGenauigkeit
Temperatur14bis140oF
‐10bis60oC
+1,8oFimBereichvon14oFbis122oF
+1,0oCimBereichvon‐10oCbis50oC
Feuchtigkeit10%bis99%+4%RHimBereichvon25%bis85%RHund32bis122oF(0bis50oC)
Batterie1,5V'AAA'Zelle
AlsEndbenutzersindSiegesetzlichdazuverpflichtet(Batterieverordnung)alleverbrauchtenBatterienundAkkus
zurückzugeben;EntsorgungimHausmüllistverboten!
SiekönnenIhreverbrauchtenBatterien/AkkusandenSammelstelleninIhrerGemeindeoderüberalldortabgeben,woBatterien/
Akkusverkauftwerden!
Entsorgung:BefolgenSiediegültigenrechtlichenVorschriftenbezüglichderEntsorgungdesGerätesamEndeseinerLebensdauer.

Copyright©2013FLIRSystems,Inc.
AlleRechtevorbehalten,einschließlichdesRechtsaufVervielfältigungimGanzenoderinTeileninjeglicherForm.
ISO‐9001zertifiziertwww.extech.com
Hygro‐thermomètre
avecsondeàdistanceet
grandschiffres,modèle445715
Présentation
Toutesnosfélicitationspourvotreacquisitiondel’hygro‐thermomètreavecsondeàdistanceetgrandschiffres
deExtech.Ilprésenteunaffichagedel'humiditéetdelatempératureetpeutêtrecalibréàl’aidedebouteillesde
solutionsalinedecalibrage(445580‐C)enoption.Lasondeàdistancesemontefacilementsurl’appareil(1)ou
surdesrallongespoureffectuerdesmesuresdansdesconduitesoutousautresendroitséloignés.
Fonctionnement
1. Ouvrezlecompartimentàpile(7)enpoussantlecouvercle(11)situéaudosdel’appareil
verslebasdanslesensdelaflèche,puisretirezlalanguettedesécuritédelapile.
2. Retirezlecouvercledeprotectiondel’écranLCD(2),puissortezlasondedeson
compartiment(6).L’appareilestàprésentprêtàl’emploi.
3. Lesunitésdetempérature(°F/C°)peuventêtresélectionnéesàl’aideducommutateur(9)
situédanslecompartimentàpile.
4. L’affichagesupérieurindiquelatempérature.L’affichageinférieurindiquel’humidité.
5. Affichagedesvaleursmaximalesetminimales:
a.AppuyezsurleboutonMAX/MIN(3).L’écranaffichelavaleurmaximaleenregistrée
depuisladernièrepressionexercéesurleboutonReset(4).
b.AppuyezànouveausurleboutonMAX/MINpourafficherlavaleurminimalerelevée
depuisladernièrepressionexercéesurleboutonReset(Réinitialisation).
c.AppuyezdenouveausurleboutonMAX/MINpourreveniràl’affichagenormal.
6. Réinitialisation(Suppressionducontenu)delamémoireMAX/MIN.Enmoded’affichage
MAX/MIN,appuyezsurleboutonRESET(4)etmaintenez‐leenfoncépendantuneseconde
poursupprimerlecontenudelamémoireetcommencerl’enregistrementdenouvelles
valeursmaximales/minimales.
7. L’utilisateurpeutchoisird’utiliserlemontagemural(5)ouunesurfaceplaneàl’aidedu
supportescamotable(7).
8. L’indicateurdepilefaibles’afficheàl’écranlorsquelatensiondelapileestfaible.
Remplacezlapiledèsquecetteicônes’affiche.
Remplacementdelapile
Faitescoulisserlecouvercleducompartimentàpile(11)verslebasdanslesensdelaflèche.
Remplacezlapilede1,5Vdetype«AAA»,puisremettezlecouvercleenplace.
Calibrage
Laprocéduredevérificationetdecalibragesuivantenécessiteunechambred’humiditéoules
bouteillesderéférenceà33%et75%d’HRenoption(445580‐C).
Vérificationdelaprécisiond’HR(Vérificationducalibraged'HRà33%ou75%)
1. Insérezlecapteurdel’appareil(1)danslabouteillederéférencedesolutionsalineà33%ou
75%oudanslachambred’humidité.
Remarque:Larotationlentedelabouteillevousaideàlaplacerau‐dessusducapteur.
2. Laissezl’appareilsestabiliserpendant1heuresurl’HRderéférence,puisvérifiezsila
lecturesesituedansleslimitesdesspécificationsdeprécision.
Calibraged’HR
1. Insérezlecapteurdel’appareildanslabouteillederéférencedesolutionsalineà75%ou
danslachambred’humidité.
2. Vérifiezlalectureauboutd’uneheure.
3. Ajustezlepotdecalibraged’HR(8)parincrémentsd’½tour,enattendantlamiseàjourde
l’affichageaprèschaqueajustement,jusqu’àcequelalecturesesituedanslagammedes
spécificationsdeprécision.
4. Répétezlaprocéduredevérificationdelaprécisiond’HR.
Remarque:Remplacezlabouteillesilasolutionsalineaufonddelabouteilledecalibrage
sembleêtresèche.
Calibragedetempérature
1. Placezlecapteurdansunenvironnementstabiliséd’environ70°F(21°C).
2. Vérifiezlalectureauboutd’uneheure.
3. Ajustezlepotdecalibraged’HR(10)parincrémentsd’½tour,enattendantlamiseàjourde
l’affichageaprèschaqueajustement,jusqu’àcequelalecturesesituedanslagammedes
spécificationsdeprécision.
Donnéestechniques

Gamme Précision
Température 14à140oF
‐10à60oC
+1,8oFdanslagammede14à122
°
F
+1,0oCdanslagammede‐10à50oC
Humidité 10à99%+4%d’HRdanslagammede25à85%d’HRetde32à122oF(0à50oC)
Pile Pile«AAA»de1,5V
Vous,entantqu’utilisateurfinal,êteslégalementtenu(Ordonnancerelativeàl’éliminationdespiles
usagées)deretournertouspilesetaccumulateursusagés.Ilestinterditdelesjeteraveclesordures
domestiques!
Vouspouvezremettrevospiles/accumulateursusagésauxpointsdecollectedevotrequartierouàtoutpointde
ventedepiles/accumulateurs!
Miseaurebut:Suivezlesdispositionslégalesenvigueurrelativesàlamiseaurebutdecetappareilàlafinde
soncycledevie.

Copyright©2013FLIRSystems,Inc.
Tousdroitsréservés,ycomprislareproductionpartielleoutotalesousquelqueformequecesoit
CertifiéISO‐9001
www.extech.com
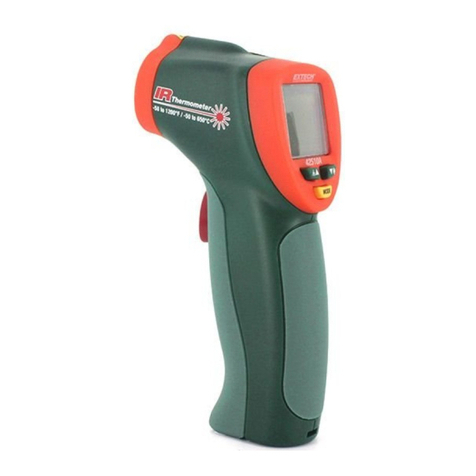
This manual suits for next models

1

Other Extech Instruments Thermometer manuals

Extech Instruments MO295 User manual

Extech Instruments

Extech Instruments MO295 User manual

Extech Instruments 42540 User manual

Extech Instruments

Extech Instruments 42540 User manual

Extech Instruments IR250 User manual

Extech Instruments

Extech Instruments IR250 User manual

Extech Instruments IR200 User manual

Extech Instruments

Extech Instruments IR200 User manual

Extech Instruments 445715  User manual

Extech Instruments

Extech Instruments 445715  User manual

Extech Instruments RHT510-NIST User manual

Extech Instruments

Extech Instruments RHT510-NIST User manual

Extech Instruments 42500 User manual

Extech Instruments

Extech Instruments 42500 User manual

Extech Instruments TM40 User manual

Extech Instruments

Extech Instruments TM40 User manual

Extech Instruments RH210 User manual

Extech Instruments

Extech Instruments RH210 User manual

Extech Instruments IR100 User manual

Extech Instruments

Extech Instruments IR100 User manual

Extech Instruments RH200W User manual

Extech Instruments

Extech Instruments RH200W User manual

Extech Instruments IR320 User manual

Extech Instruments

Extech Instruments IR320 User manual

Extech Instruments 42530 User manual

Extech Instruments

Extech Instruments 42530 User manual

Extech Instruments TM200 User manual

Extech Instruments

Extech Instruments TM200 User manual

Extech Instruments 445580 User manual

Extech Instruments

Extech Instruments 445580 User manual

Extech Instruments EA15-NIST User manual

Extech Instruments

Extech Instruments EA15-NIST User manual

Extech Instruments 42555 User manual

Extech Instruments

Extech Instruments 42555 User manual

Extech Instruments EA11 User manual

Extech Instruments

Extech Instruments EA11 User manual

Extech Instruments RH101 User manual

Extech Instruments

Extech Instruments RH101 User manual

Extech Instruments 42580 User manual

Extech Instruments

Extech Instruments 42580 User manual

Extech Instruments RH490-NIST User manual

Extech Instruments

Extech Instruments RH490-NIST User manual

Extech Instruments HD200 User manual

Extech Instruments

Extech Instruments HD200 User manual

Extech Instruments RH200W User manual

Extech Instruments

Extech Instruments RH200W User manual

Extech Instruments 42570 User manual

Extech Instruments

Extech Instruments 42570 User manual

Popular Thermometer manuals by other brands

Vicks VNT275CA owner's manual

Vicks

Vicks VNT275CA owner's manual

Ebro TFI 550 user manual

Ebro

Ebro TFI 550 user manual

Xylem ebro TFI 650 manual

Xylem

Xylem ebro TFI 650 manual

TEL-TRU QT4242L operating instructions

TEL-TRU

TEL-TRU QT4242L operating instructions

MOB MO8603 user manual

MOB

MOB MO8603 user manual

ATD Tools ATD-700 instruction manual

ATD Tools

ATD Tools ATD-700 instruction manual

optris CT video series Operator's manual

optris

optris CT video series Operator's manual

Black & Decker TLD100 manual

Black & Decker

Black & Decker TLD100 manual

Fluke 561 HVACPro user manual

Fluke

Fluke 561 HVACPro user manual

Maverick Industries ET-632 REDI CHEK instruction manual

Maverick Industries

Maverick Industries ET-632 REDI CHEK instruction manual

Swiss dr Frei T-30 instructions

Swiss

Swiss dr Frei T-30 instructions

Medicare Infrared MC-306 manual

Medicare

Medicare Infrared MC-306 manual

Withings Thermo Quick installation guide

Withings

Withings Thermo Quick installation guide

Microlife MT 710 user manual

Microlife

Microlife MT 710 user manual

Traceable 4482 instructions

Traceable

Traceable 4482 instructions

MABIS Flex Tip manual

MABIS

MABIS Flex Tip manual

EMPORIA EMP-THERMO-22 quick start guide

EMPORIA

EMPORIA EMP-THERMO-22 quick start guide

ZyTemp TN01U Operation instructions

ZyTemp

ZyTemp TN01U Operation instructions

manuals.online logo
manuals.online logoBrands
  • About & Mission
  • Contact us
  • Privacy Policy
  • Terms and Conditions

Copyright 2025 Manuals.Online. All Rights Reserved.