manuals.online logo
Brands
  1. Home
  2. •
  3. Brands
  4. •
  5. Extech Instruments
  6. •
  7. Thermometer
  8. •
  9. Extech Instruments 445715  User manual

Extech Instruments 445715  User manual

Model445715‐EN‐SP‐FR‐DEv1.69/13

445715BigDigit
RemoteProbe
Hygro‐Thermometer
Introduction
CongratulationsonyourpurchaseoftheExtechBigDigitRemoteProbeHygro‐Thermometer.It
featuresHumidityandTemperaturereadoutsandcanbecalibratedusingtheoptionalcalibration
saltbottles(orderno.445580‐C).Theremoteprobeconvenientlymountsonthemeter(1)or
extendsformeasurementsinductsorotherremotelocations.
Operation
1. Openthebatterycompartment(7)bypushingthecover(11)ontherearofthe
instrumentdownwardasindicatedbythearrowandremovebatterysafetystrip.
2. RemovetheprotectivecoverontheLCDdisplay(2)andtaketheProbeoutof
theprobecompartment(6).Themeterisnowreadyforuse.
3. Thetemperatureunits(oF/oC)canbeselectedviatheswitch(9)locatedinthe
batterycompartment.
4. Theupperdisplayindicatesthetemperature.Thelowerdisplayindicates
humidity.
5. Displayingtheminimumandmaximumvalues:
a.PresstheMAX/MINbutton(3).ThehighestvaluemeasuredsincetheReset
button(4)waslastpressedappearsonthedisplay.
b.PresstheMAX/MINbuttonagaintodisplaythelowestvaluemeasuredsince
theResetbuttonwaslastpressed.
c.PresstheMAX/MINbuttonagaintoreturntonormaldisplayoperation.
6. Resetting(clearing)theMAX/MINmemory.PressandholdtheRESETbutton(4)
for1secondwhileintheMAX/MINdisplaymodetoclearthememoryandstart
recordingnewmax/minvalues.
7. Usercanselectwall‐mounting(5)orflatsurfaceusewithfold‐outfooting(7).
8. Thelowbatteryiconwillappearonthedisplaywhenthebatteryvoltageislow.
Replacethebatterywhenthisoccurs.
BatteryReplacement
Slidetherearbatterycover(11)downwardasindicatedbythearrow.Replacethe
1.5V‘AAA’batteryandreplacethecover.
Calibration
Thefollowingverificationandcalibrationprocedurerequiresahumiditychamberor
theoptional33%and75%RHreferencebottles(orderno.445580‐C).
RHAccuracyVerification(Checkingthe33%or75%RHCalibration)
1. Insertmeter’ssensor(1)intothe33%or75%saltbottleorhumiditychamber.
Note:Slowlyrotatingthebottlewillassistinplacingitoverthesensor.
2. Allowthemetertostabilizefor1houratthereferenceRHandthenverifythat
thereadingiswithintheaccuracyspecification.
RHCalibration
1. Insertmeter’ssensorintoa75%saltreferencebottleorhumiditychamber.
2. Checkthereadingafter1hour.
3. AdjusttheRHcalibrationpot(8)in½turnincrements,waitingforthedisplayto
updateaftereachadjustment,untilthereadingiswithinspecification.
4. RepeattheRHaccuracyverificationprocedure.
Note:Replacebottleifthesaltatthebottomofthecalibrationbottleappearsdry.
TemperatureCalibration
1. Placethesensorinastabilizedenvironmentofapproximately70°F(21°C).
2. Checkthereadingafter1hour.
3. Adjustthetemperaturecalibrationpot(10)in½turnincrements,waitingforthe
displaytoupdateaftereachadjustment,untilthereadingiswithinspecification.
Specifications

RangeAccuracy
Temperature14to140oF
‐10to60oC
+1.8oFwithin14oFto122oF
+1.0oCwithin‐10oCto50oC
Humidity10%to99%+4%RHwithin25%to85%RHand32to122oF(0to50oC)
Battery1.5V'AAA'cell
You,astheenduser,arelegallybound(Batteryordinance)toreturnallusedbatteries
andaccumulators;disposalinthehouseholdgarbageisprohibited!
Youcanhandoveryourusedbatteries/accumulatorsatcollectionpointsinyourcommunityor
whereverbatteries/accumulatorsaresold!
Disposal:Followthevalidlegalstipulationsinrespectofthedisposalofthedeviceattheendof
itslifecycle

Copyright©2013FLIRSystems,Inc.
Allrightsreservedincludingtherightofreproductioninwholeorinpartinanyform
ISO‐9001Certified
www.extech.com

Higro‐Termómetro
deGrandesDígitos
Modelo445715
Introducción
AgradecemossucompradelHigro‐TermómetrodegrandesdígitosconsondaremotadeExtech.
Humedadytemperaturaajustablesmásbotellasdesalopcionalesparacalibración(445580‐C).
Sensorremoto(concablede45cm)conmontajeenelmedidoroextendidoparamedidasen
conductosositiosalejados.Conelcuidadoapropiado,estemedidorprofesionalleproveerá
muchosañosdeservicioconfiableyseguro
Descripcióndelmedidor
1.Sensordetemperatura‐humedad 2.PantallaLCD
3.MÁX/MIN 4.RestablecerMáx./Mín.
5.Montajeenpared 6.Repositoriodelcabledelsensor
7.Soporte   8.Humedadajustedecalibración
9.Conmutadorunidadesdetemp.10.Ajustedecalibracióndetemperatura
11.Tapadelcompartimientodelabatería
Operación
1. Abraelcompartimientodelabateríaempujandolatapaposteriorhaciaabajo
comoindicalaflecha.Retirelatiradeseguridaddelabateríaylacubierta
protectoradelapantallaLCD.Elinstrumentoestáhabilitado.
2. Puedeseleccionarlasunidadesdetemperatura(oF/oC)pormediodel
conmutadorubicadoenelcompartimientodelabatería.
3. Lapantallasuperiorindicalatemperatura.Lapantallainferiorindicahumedad.
4. Indicacióndelosvaloresmínimosymáximos.
a. PresioneelbotónMAX/MIN.Enlapantallaapareceelvalormásaltomedido
desdelaúltimavezqueoprimióelbotónReset.
b. PresionedenuevoelbotónMÁX/MINparamostrarelvalormásbajomedido
desdelaúltimavezquepresionóelbotónReset.
c. PresionedenuevoelbotónMAX/MINpararegresaraoperaciónnormal.
5. 5.Restablecer(borrar)lamemoriaMAX/MIN.
6. PresioneysostengaelbotónRESETdurante1segundoenmodoMÁX/MINdel
indicadorparaborrarlamemoriaycomenzararegistrarlosvaloresnuevosde
máximosymínimos.
7. 6.Puedemontarlaunidadsobrelaparedocolocarlasobreunasuperficieplana
conelsoporteplegable.
8. 7.Cuandoelvoltajedelabateríaestábajo,enpantallaapareceráunindicador
debateríadébil.Cuandoestosuceda,reemplacelabatería.
Reemplazodelabatería
Abraelcompartimientodelabateríaempujandolatapaposteriorhaciaabajocomoindicalaflecha.Reemplace
labatería'AAA'de1.5Vyreinstalelatapa.
Usted,comousuariofinal,estálegalmenteobligado(Reglamentodebaterías)aregresartodaslas
bateríasyacumuladoresusados;¡eldesechoeneldesperdicioobasuradelacasaestáprohibido!Usted
puedeentregarlasbateríasoacumuladoresusados,gratuitamente,enlospuntosderecolecciónde
nuestrassucursalesensucomunidadodondeseaquesevendenlasbateríasoacumuladores.
Desecho:Cumplalasestipulacioneslegalesvigentesrespectoaldesechodeldispositivoalfinaldesuvidaútil.
Calibración
Elprocedimientodeverificaciónycalibraciónrequiereunacámaradehumedadolasbotellasoptativasde
referencia33%y75%RH(445580‐C).
VerificacióndeprecisiónHR
RevisarlacalibracióndeHR33%ó75%
1. Inserteelsensordelmedidorenlabotelladereferenciadesalal33%ó75%ocámaradehumedad.
Nota:Girelentamentelabotellaparafacilitarlacolocaciónsobreelsensor.
2. Permitaqueelmedidorseestabilicedurante1horaenlaHRdereferenciayenseguidaverifiquequela
lecturaestédentrodelaespecificacióndeprecisión.
CalibraciónHR
1. Inserteelsensordelmedidorenlabotelladereferenciadesalal75%ocámaradehumedad.
2. Reviselalecturadespuésde1hora.
3. AjusteelpotdecalibraciónHRenincrementosde½vuelta,espereaquelapantallaseactualicedespuésde
cadaajuste,hastaquelalecturaestédentrodelaespecificacióndeprecisión.
4. RepitaelprocesodeverificacióndeprecisiónHR.
Nota:Silasalenelfondodelasbotellasdecalibraciónpareceseca,deberáreemplazarlasbotellas.
Calibracióndetemperatura
1. Coloqueelsensorenunambienteestabilizadoaprox.a21°C(70°F).
2. Reviselalecturadespuésde1hora.
3. Ajusteelpotdecalibracióndetemperaturaenincrementosde½vuelta,espereaquelapantallase
actualicedespuésdecadaajuste,hastaquelalecturaestédentrodelaespecificacióndeprecisión.
Especificaciones
EscalaPrecisión
Temperatura‐10a60°C
14a140oF
+1.0°Cdentrode‐10°Ca50°C
+1.8°Fdentrode14°Fa122°F
Humedad10%a99%+4%RHdentrode25%a85%RHy
0a50°Có32a122°F
BateríaPila1.5V'AAA'

Copyright©2013FLIRSystems,Inc.
Reservadostodoslosderechos,incluyendoelderechodereproduccióntotaloparcialencualquiermedio.
CertificadoISO‐9001
www.extech.com
Model445715‐EN‐SP‐FR‐DEv1.69/13

Hygro‐Thermometer
mitgroßerDigitalanzeige
undexternerMesssonde
Modell445715
Einleitung
WirgratulierenIhnenzumKaufdesExtechHygro‐ThermometersmitgroßerDigitalanzeigeund
externerMesssonde.DiesesMessgerätzeigtLuftfeuchtigkeits‐undTemperaturmesswertean
undkannmitoptionalenKalibrierungssalzflaschen(Best.‐Nr.445580‐C)kalibriertwerden.Die
externeMesssondekanneinfachamGerätangeschlossenoderkannfürMessungeninRöhren
oderananderenabgelegenenOrtenverlängertwerden.
Bedienung
1. ÖffnenSiedasBatteriefach(7),indemSiedieDeckel(11)aufderRückseitedesMessgeräts
inPfeilrichtungherunterschieben.EntfernenSieauchdasBatteriesicherheitsband.
2. EntfernenSiedieSchutzabdeckungvomLCD‐Display(2)undnehmenSiedieSondeausdem
Sondenfach(6)heraus.DasMessgerätistnuneinsatzbereit.
3. DieTemperatureinheiten(°F/°C)könnenmithilfedesSchalters(9)imBatteriefachgewählt
werden.
4. DieobereDisplayhälftezeigtdiegemesseneTemperaturunddieunterezeigtdie
Luftfeuchtigkeitan.
5. AnzeigenderminimalenundmaximalenWerte:
a.DrückenSieMAX/MIN(3).DashöchsteMessergebnisseitletztemDrückenvonRESET(4)
wirdaufdemDisplayangezeigt.
b.ZeigenSiemiteinemerneutenTastendruckaufMAX/MINdenniedrigstenMesswertseit
demletztenDrückenvonRESET(4)an.
c.KehrenSiemiteinemerneutenTastendruckaufMAX/MINzurnormalenDisplayanzeige
zurück.
6. Rücksetzen(Löschen)desMAX/MIN‐Speichers.HaltenSiewährendderMAX/MIN‐Anzeige
RESET(4)für1Sekundegedrückt,umdenSpeicherzulöschenundumneueMAX/MIN‐
Messwerteaufzuzeichnen.
7. DasMessgerätkannmitderWandbefestigung(5)aneinerWandmontiertodermitdem
ausklappbarenStandfußaufebenenFlächenaufgestelltwerden.
8. WenndieBatteriespannungniedrigist,wirdaufdemDisplaydasSymbolfüreineerschöpfte
Batterieangezeigt.TauschenSieindiesemFalledieBatterieaus.
AustauschderBatterie
SchiebenSiedenBatteriefachdeckel(11)aufderRückseiteinPfeilrichtungnachunten.Ersetzen
Siedie1,5V‘AAA’BatterieundschließenSiedenDeckelwieder.
Kalibrierung
DiefolgendenVerifizierungs‐undKalibrierungsverfahrenbenötigeneineFeuchtigkeitskammer
oderdieoptionalenReferenzflaschenmiteinerrelativenLuftfeuchtigkeitvon33%und75%
(Best.‐Nr.445580‐C).
RH‐Genauigkeitsverifizierung(relativeLuftfeuchtigkeit)(Überprüfungder33%oder75%RH‐
Kalibrierung)
1. HaltenSiedenMessgerätesonde(1)ineine33%oder75%Salzreferenzflascheoder
Feuchtigkeitskammer.
Hinweis:DurchlangsamesDrehenderFlaschekanndiesemühelosüberdemSensor
platziertwerden.
2. WartenSie1Stunde,biseinstabilesMessergebnisinnerhalbderReferenz‐RHerreicht
wurde.ÜberprüfenSieanschließend,obderMesswertinnerhalbderGenauigkeitsgrenzen
liegt.
RH‐Kalibrierung(relativeLuftfeuchtigkeit)
1. HaltenSiedenMessgerätesondeineine75%Salzreferenzflascheoder
Feuchtigkeitskammer.
2. LesenSiedenMesswertnach1Stundeab.
3. StellenSiedasRH‐Kalibrierungspotentiometer(8)schrittweiseumeinehalbenDrehungein.
WartenSienachjederDrehung,bisdieBildschirmanzeigeaktualisiertwurde.FührenSiedie
Einstellungsolangedurch,bissichderMesswertinnerhalbderSpezifikationenbefindet.
4. WiederholenSiedasRH‐Genauigkeits‐Verifizierungsverfahren.
Hinweis:FallsdasSalzamBodenderKalibrierungsflascheeingetrocknetist,ersetzenSiedie
Flasche.
Temperatur‐Kalibrierung
1. BringenSiedieSondeineineUmgebungmiteinerkonstantenTemperaturvonungefähr70
°F(21°C).
2. LesenSiedenMesswertnach1Stundeab.
3. StellenSiedasTemperatur‐Kalibrierungspotentiometer(10)schrittweiseumeinehalben
Drehungein.WartenSienachjederDrehung,bisdieBildschirmanzeigeaktualisiertwurde.
FührenSiedieEinstellungsolangedurch,bissichderMesswertinnerhalbder
Spezifikationenbefindet.
TechnischeDaten

MessbereichGenauigkeit
Temperatur14bis140oF
‐10bis60oC
+1,8oFimBereichvon14oFbis122oF
+1,0oCimBereichvon‐10oCbis50oC
Feuchtigkeit10%bis99%+4%RHimBereichvon25%bis85%RHund32bis122oF(0bis50oC)
Batterie1,5V'AAA'Zelle
AlsEndbenutzersindSiegesetzlichdazuverpflichtet(Batterieverordnung)alleverbrauchtenBatterienundAkkus
zurückzugeben;EntsorgungimHausmüllistverboten!
SiekönnenIhreverbrauchtenBatterien/AkkusandenSammelstelleninIhrerGemeindeoderüberalldortabgeben,woBatterien/
Akkusverkauftwerden!
Entsorgung:BefolgenSiediegültigenrechtlichenVorschriftenbezüglichderEntsorgungdesGerätesamEndeseinerLebensdauer.

Copyright©2013FLIRSystems,Inc.
AlleRechtevorbehalten,einschließlichdesRechtsaufVervielfältigungimGanzenoderinTeileninjeglicherForm.
ISO‐9001zertifiziertwww.extech.com
Hygro‐thermomètre
avecsondeàdistanceet
grandschiffres,modèle445715
Présentation
Toutesnosfélicitationspourvotreacquisitiondel’hygro‐thermomètreavecsondeàdistanceetgrandschiffres
deExtech.Ilprésenteunaffichagedel'humiditéetdelatempératureetpeutêtrecalibréàl’aidedebouteillesde
solutionsalinedecalibrage(445580‐C)enoption.Lasondeàdistancesemontefacilementsurl’appareil(1)ou
surdesrallongespoureffectuerdesmesuresdansdesconduitesoutousautresendroitséloignés.
Fonctionnement
1. Ouvrezlecompartimentàpile(7)enpoussantlecouvercle(11)situéaudosdel’appareil
verslebasdanslesensdelaflèche,puisretirezlalanguettedesécuritédelapile.
2. Retirezlecouvercledeprotectiondel’écranLCD(2),puissortezlasondedeson
compartiment(6).L’appareilestàprésentprêtàl’emploi.
3. Lesunitésdetempérature(°F/C°)peuventêtresélectionnéesàl’aideducommutateur(9)
situédanslecompartimentàpile.
4. L’affichagesupérieurindiquelatempérature.L’affichageinférieurindiquel’humidité.
5. Affichagedesvaleursmaximalesetminimales:
a.AppuyezsurleboutonMAX/MIN(3).L’écranaffichelavaleurmaximaleenregistrée
depuisladernièrepressionexercéesurleboutonReset(4).
b.AppuyezànouveausurleboutonMAX/MINpourafficherlavaleurminimalerelevée
depuisladernièrepressionexercéesurleboutonReset(Réinitialisation).
c.AppuyezdenouveausurleboutonMAX/MINpourreveniràl’affichagenormal.
6. Réinitialisation(Suppressionducontenu)delamémoireMAX/MIN.Enmoded’affichage
MAX/MIN,appuyezsurleboutonRESET(4)etmaintenez‐leenfoncépendantuneseconde
poursupprimerlecontenudelamémoireetcommencerl’enregistrementdenouvelles
valeursmaximales/minimales.
7. L’utilisateurpeutchoisird’utiliserlemontagemural(5)ouunesurfaceplaneàl’aidedu
supportescamotable(7).
8. L’indicateurdepilefaibles’afficheàl’écranlorsquelatensiondelapileestfaible.
Remplacezlapiledèsquecetteicônes’affiche.
Remplacementdelapile
Faitescoulisserlecouvercleducompartimentàpile(11)verslebasdanslesensdelaflèche.
Remplacezlapilede1,5Vdetype«AAA»,puisremettezlecouvercleenplace.
Calibrage
Laprocéduredevérificationetdecalibragesuivantenécessiteunechambred’humiditéoules
bouteillesderéférenceà33%et75%d’HRenoption(445580‐C).
Vérificationdelaprécisiond’HR(Vérificationducalibraged'HRà33%ou75%)
1. Insérezlecapteurdel’appareil(1)danslabouteillederéférencedesolutionsalineà33%ou
75%oudanslachambred’humidité.
Remarque:Larotationlentedelabouteillevousaideàlaplacerau‐dessusducapteur.
2. Laissezl’appareilsestabiliserpendant1heuresurl’HRderéférence,puisvérifiezsila
lecturesesituedansleslimitesdesspécificationsdeprécision.
Calibraged’HR
1. Insérezlecapteurdel’appareildanslabouteillederéférencedesolutionsalineà75%ou
danslachambred’humidité.
2. Vérifiezlalectureauboutd’uneheure.
3. Ajustezlepotdecalibraged’HR(8)parincrémentsd’½tour,enattendantlamiseàjourde
l’affichageaprèschaqueajustement,jusqu’àcequelalecturesesituedanslagammedes
spécificationsdeprécision.
4. Répétezlaprocéduredevérificationdelaprécisiond’HR.
Remarque:Remplacezlabouteillesilasolutionsalineaufonddelabouteilledecalibrage
sembleêtresèche.
Calibragedetempérature
1. Placezlecapteurdansunenvironnementstabiliséd’environ70°F(21°C).
2. Vérifiezlalectureauboutd’uneheure.
3. Ajustezlepotdecalibraged’HR(10)parincrémentsd’½tour,enattendantlamiseàjourde
l’affichageaprèschaqueajustement,jusqu’àcequelalecturesesituedanslagammedes
spécificationsdeprécision.
Donnéestechniques

Gamme Précision
Température 14à140oF
‐10à60oC
+1,8oFdanslagammede14à122
°
F
+1,0oCdanslagammede‐10à50oC
Humidité 10à99%+4%d’HRdanslagammede25à85%d’HRetde32à122oF(0à50oC)
Pile Pile«AAA»de1,5V
Vous,entantqu’utilisateurfinal,êteslégalementtenu(Ordonnancerelativeàl’éliminationdespiles
usagées)deretournertouspilesetaccumulateursusagés.Ilestinterditdelesjeteraveclesordures
domestiques!
Vouspouvezremettrevospiles/accumulateursusagésauxpointsdecollectedevotrequartierouàtoutpointde
ventedepiles/accumulateurs!
Miseaurebut:Suivezlesdispositionslégalesenvigueurrelativesàlamiseaurebutdecetappareilàlafinde
soncycledevie.

Copyright©2013FLIRSystems,Inc.
Tousdroitsréservés,ycomprislareproductionpartielleoutotalesousquelqueformequecesoit
CertifiéISO‐9001
www.extech.com
Other Extech Instruments Thermometer manuals

Extech Instruments 421508 User manual

Extech Instruments

Extech Instruments 421508 User manual

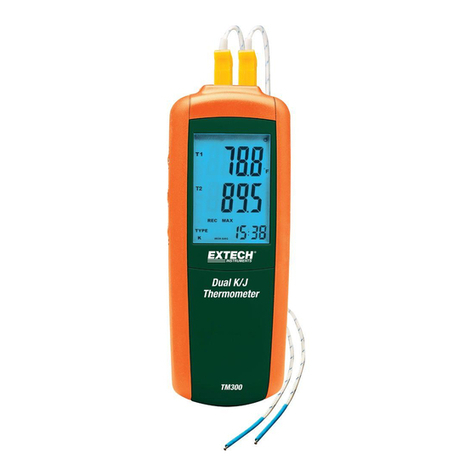
Extech Instruments TM300 User manual

Extech Instruments

Extech Instruments TM300 User manual

Extech Instruments 445713-TP User manual

Extech Instruments

Extech Instruments 445713-TP User manual

Extech Instruments 403265 User manual

Extech Instruments

Extech Instruments 403265 User manual

Extech Instruments 42570 User manual

Extech Instruments

Extech Instruments 42570 User manual

Extech Instruments SL250W User manual

Extech Instruments

Extech Instruments SL250W User manual

Extech Instruments IR400 User manual

Extech Instruments

Extech Instruments IR400 User manual

Extech Instruments 42510A User manual

Extech Instruments

Extech Instruments 42510A User manual

Extech Instruments SDL500 User manual

Extech Instruments

Extech Instruments SDL500 User manual

Extech Instruments 42515 User manual

Extech Instruments

Extech Instruments 42515 User manual

Extech Instruments 42512 User manual

Extech Instruments

Extech Instruments 42512 User manual

Extech Instruments 401014A User manual

Extech Instruments

Extech Instruments 401014A User manual

Extech Instruments RH10 User manual

Extech Instruments

Extech Instruments RH10 User manual

Extech Instruments IR300UV User manual

Extech Instruments

Extech Instruments IR300UV User manual

Extech Instruments TM20 User manual

Extech Instruments

Extech Instruments TM20 User manual

Extech Instruments EA25 User manual

Extech Instruments

Extech Instruments EA25 User manual

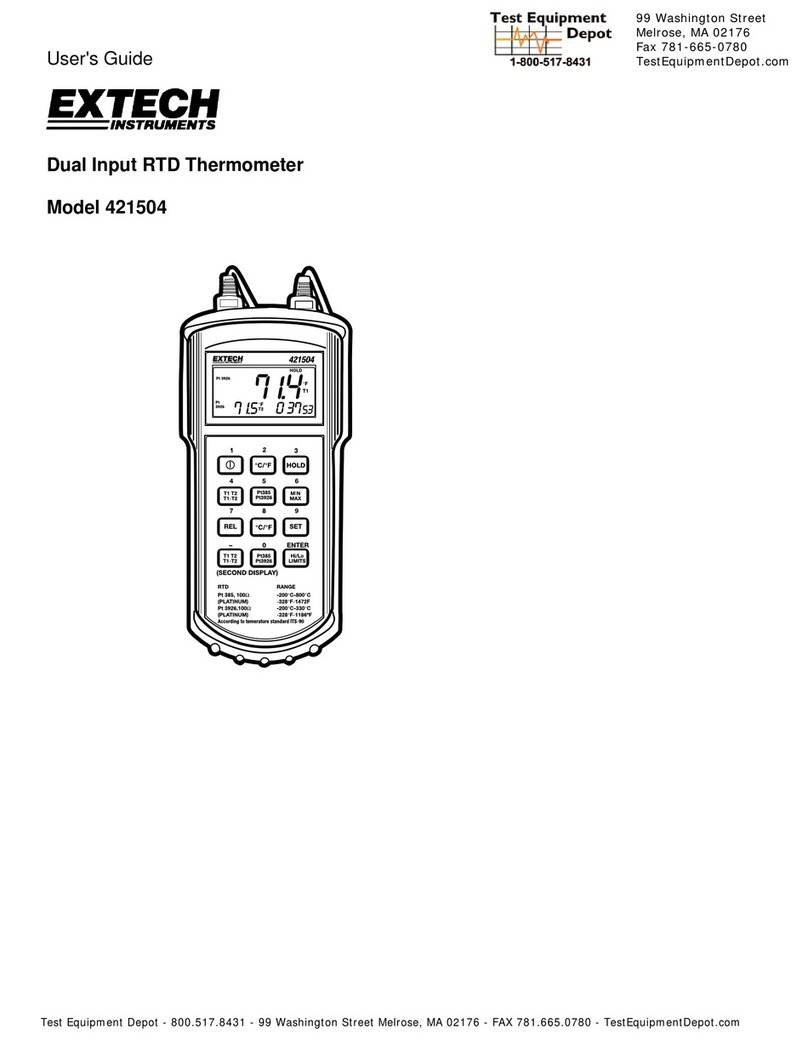
Extech Instruments 421504 User manual

Extech Instruments

Extech Instruments 421504 User manual

Extech Instruments RH35 User manual

Extech Instruments

Extech Instruments RH35 User manual

Extech Instruments 407445 User manual

Extech Instruments

Extech Instruments 407445 User manual

Extech Instruments 42570 User manual

Extech Instruments

Extech Instruments 42570 User manual

Extech Instruments RH200W User manual

Extech Instruments

Extech Instruments RH200W User manual

Extech Instruments EA11 User manual

Extech Instruments

Extech Instruments EA11 User manual

Extech Instruments 407907 User manual

Extech Instruments

Extech Instruments 407907 User manual

Extech Instruments 42510 User manual

Extech Instruments

Extech Instruments 42510 User manual

Popular Thermometer manuals by other brands

TwoZone THERMWTZ instruction manual

TwoZone

TwoZone THERMWTZ instruction manual

MRC PTM-816 Operation manual

MRC

MRC PTM-816 Operation manual

TFA 14.1552 instruction manual

TFA

TFA 14.1552 instruction manual

Microlife GoldTemp MT 1622 instruction manual

Microlife

Microlife GoldTemp MT 1622 instruction manual

Amprobe IR608A user manual

Amprobe

Amprobe IR608A user manual

Radiantek TH23F user manual

Radiantek

Radiantek TH23F user manual

Luxtron FOT Lab Kit user manual

Luxtron

Luxtron FOT Lab Kit user manual

TESTO 0560 8352 instruction manual

TESTO

TESTO 0560 8352 instruction manual

Fluke 572 Getting started

Fluke

Fluke 572 Getting started

Medisana FTG instruction manual

Medisana

Medisana FTG instruction manual

Sper scientific 800108 instruction manual

Sper scientific

Sper scientific 800108 instruction manual

Microlife VT 1831 quick start guide

Microlife

Microlife VT 1831 quick start guide

Oregon Scientific EMR812A user manual

Oregon Scientific

Oregon Scientific EMR812A user manual

GREISINGER GTH 2448/3 operating manual

GREISINGER

GREISINGER GTH 2448/3 operating manual

Omega Engineering HH82A instruction manual

Omega Engineering

Omega Engineering HH82A instruction manual

weewell WTB130 user manual

weewell

weewell WTB130 user manual

Omega HH66U user guide

Omega

Omega HH66U user guide

GREISINGER LEISTER G 1200 Compact manual

GREISINGER

GREISINGER LEISTER G 1200 Compact manual

manuals.online logo
manuals.online logoBrands
  • About & Mission
  • Contact us
  • Privacy Policy
  • Terms and Conditions

Copyright 2025 Manuals.Online. All Rights Reserved.