ezdupe Media Maven User manual

Copyright 2015. All right reserved

I. INTRODUCTION......................................................................................3
1. Features................................................................................................................................ 3
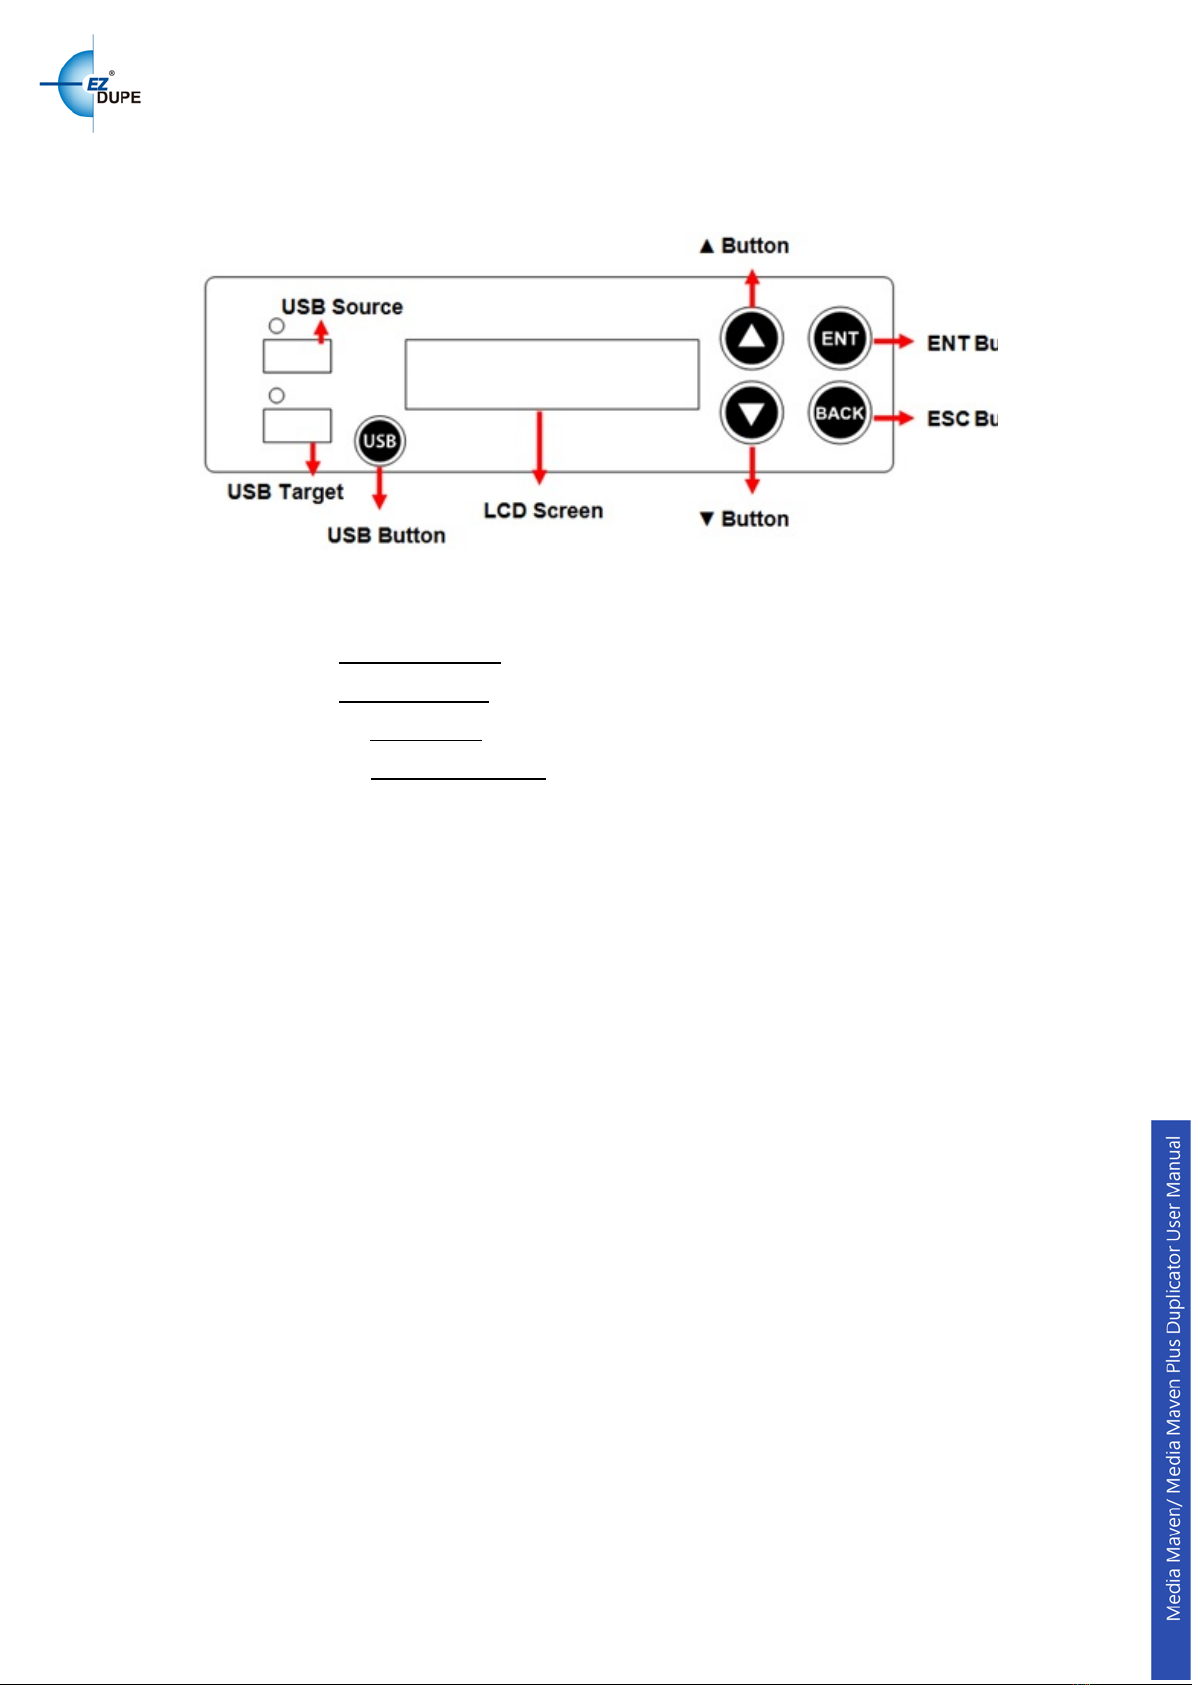
2. LCD Front Panel Overview.................................................................................................3
II. WARNING.................................................................................................6
III. MENU OVERVIEW ...................................................................................6
1. Copy...................................................................................................................................... 6
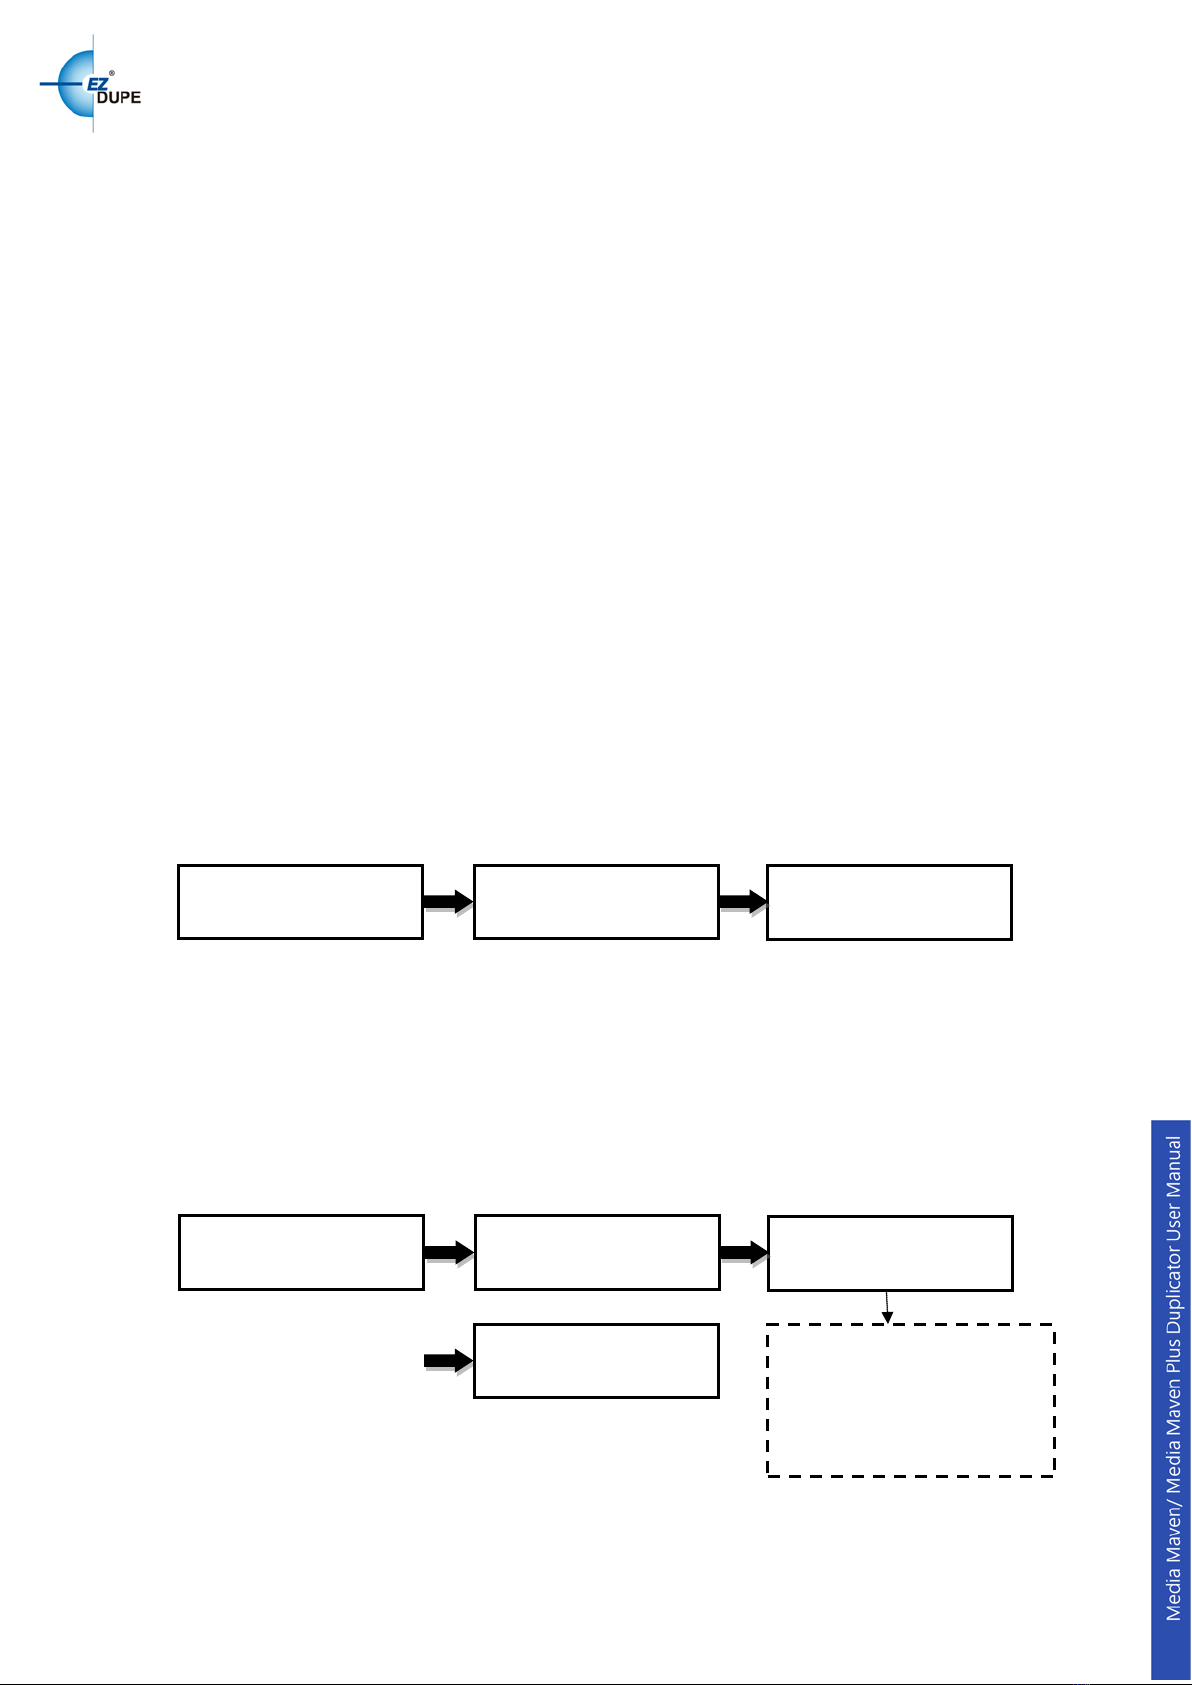
1.1 Disc to Disc.......................................................................................................................... 6
1.2 USB to Disc.......................................................................................................................... 7
1.3 Disc to USB.......................................................................................................................... 7
1.4 USB to USB.......................................................................................................................... 8
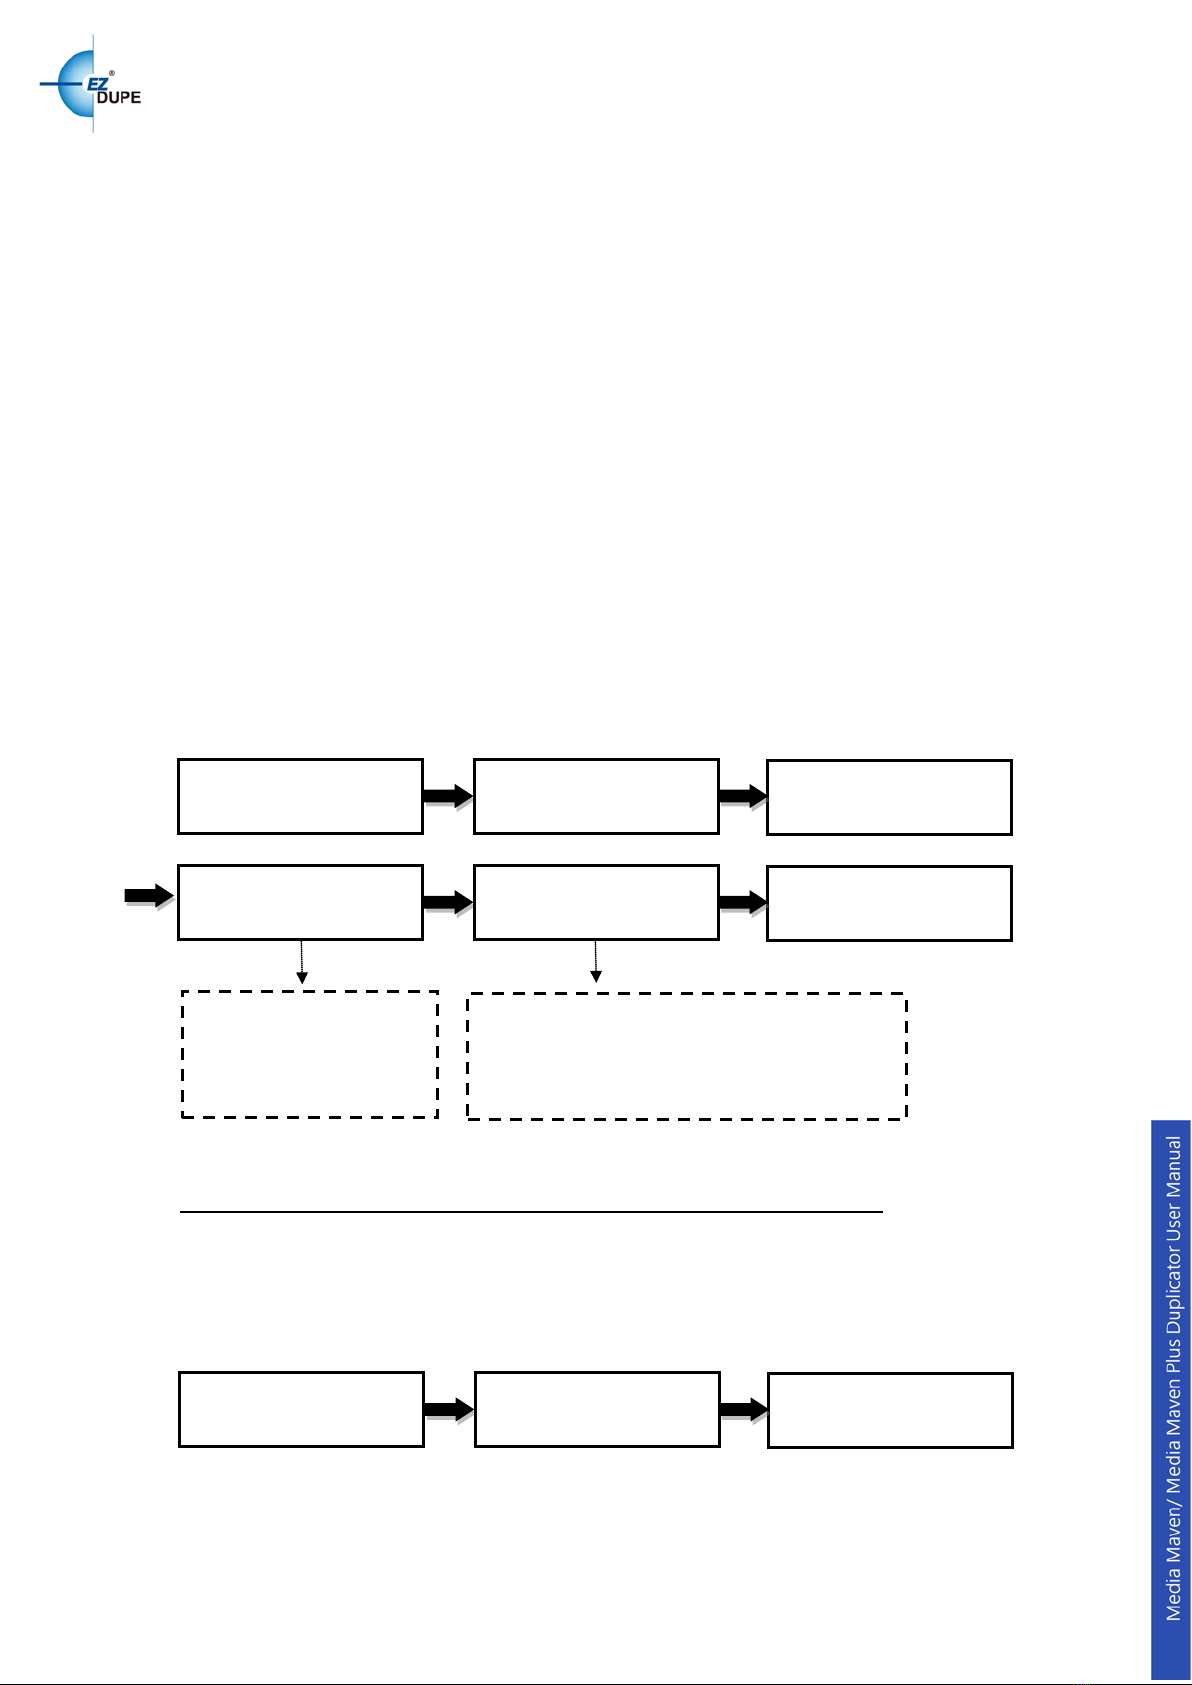
2. Test ....................................................................................................................................... 8
3. Copy + Verify .......................................................................................................................8
4. Copy + Compare .................................................................................................................9
5. Verify..................................................................................................................................... 9
6. Compare............................................................................................................................... 9
7. Set Burn Speed ................................................................................................................. 10
8. Source Select..................................................................................................................... 10
9. Track Edit........................................................................................................................... 10
9.1 Copy Track......................................................................................................................... 10
9.2 Close Disc.......................................................................................................................... 11
9.3 Disc info.............................................................................................................................. 11
10. Utility............................................................................................................................... 12
10.1 PreScan .............................................................................................................................. 12
10.2 Quick Erase ....................................................................................................................... 12
10.3 Full Erase ........................................................................................................................... 12
10.4 Eject All Trays................................................................................................................... 12
10.5 Disc Information............................................................................................................... 12
10.6 Drive Information ............................................................................................................. 13
10.7 System Information......................................................................................................... 13
10.8 Update BIOS...................................................................................................................... 13
10.9 Copy Counter.................................................................................................................... 14
11. Setup............................................................................................................................... 14
11.1 Start-up Menu.................................................................................................................... 14
11.2 Auto Start........................................................................................................................... 15
11.3 Display Mode..................................................................................................................... 15
11.4 Beep..................................................................................................................................... 15
11.5 Power on Eject.................................................................................................................. 15
1

11.6 Reader Speed.................................................................................................................... 16
11.7 Compare Speed................................................................................................................ 16
11.8 Skip Read Error ................................................................................................................ 16
11.9 Language............................................................................................................................ 17
11.10 Clear Setup.................................................................................................................... 17
11.11 Advance Setup............................................................................................................. 17
12. HDD Manager................................................................................................................. 21
12.1 Select Image...................................................................................................................... 21
12.2 Disc => Image.................................................................................................................... 21
12.3 Image Information............................................................................................................ 21
12.4 Rename Image .................................................................................................................. 22
12.5 Delete Image...................................................................................................................... 22
12.6 HDD Information............................................................................................................... 22
12.7 Format HDD....................................................................................................................... 22
12.8 HDD Setup.......................................................................................................................... 23
IV.BASIC TROUBLESHOOTING..................................................................24
2

I. Introduction
Thank you for purchasing the Media Maven and or Media Maven Plus
Blu-ray/DVD/CD Duplicator. This duplicator is specifically engineered to run
stand-alone without additional computer. With a simple four-button interface
and a USB shortcut button, the Media Maven/Media Maven Plus Duplicator
provides a fast and reliable solution for CD, DVD and Blu-ray duplication up to
11 targets (10 targets for Media Maven Plus) from one single source disc or
USB flash drive.
1. Features
∙Serial ATA (SATA) interface: Faster transfer rate, more reliable error check.
∙5-button control panel: Functional and user-friendly design
∙USB-to-disc duplication: Transfer important data from erasable USB drive to
standardized Blu-ray/DVD/CD disc.
∙Blu-Ray/DVD/CD duplication: Proven performance & compatibility
∙USB-to-USB duplication: Quickly copy from USB drive to USB drive
2. LCD Front Panel Overview
Media Maven:
▲Button: Up, Backward: To navigate backward in the menu.
▼Button: Down, Forward: To navigate forward in the menu.
ENT Button: Enter, OK: Execute the function.
ESC Button: Escape, Cancel: Go back to the previous level in the menu.
USB Button: A shortcut to copy from a USB flash drive to disc(s). Please
follow the on-screen instructions to continue the process after pressing the
One-Touch Button.
3

Media Maven Plus:
▼Button: Down, Forward: To navigate forward in the menu.
▲Button: Up, Backward: To navigate backward in the menu.
ENT Button: Enter, OK: Execute the function.
ESC Button: Escape, Cancel: Go back to the previous level in the menu.
USB Button: A shortcut to copy from a USB flash drive to disc(s). Please
follow the on-screen instructions to continue the process after pressing the
One-Touch Button.
4

3.
Specifications
Model Media Maven or Media Maven PLUS
Target Media Maven:up to 11 target
Media Maven PLUS:up to 10 (USB port
excluded)
Operation Standalone(No PC or Software is required)
Supported Format
for Disc
DVD ROM, DVD-R, DVD-RW, DVD+R,
DVD+RW, CD-DA, CD ROM, CD-R, CD-
RW,
Multi-session Photo CDT, CD-
I, Video CD,
CD ROM XA, & CD Extra (CD Plus)
Supported Media
for USB
USB Device 1.0/2.0/3.0
Control Button 5 buttons, including 1 USB shortcut button
Writing Speed for Disc
DVD-R: 24X, DVD+R: 24X, DVD-
RW: 6X,
DVD+RW: 8X, DVD+R DL: 8X, DVD-
R DL:
8X, CD-RW: 40X, CD-R: 52X(actual writing
speed depends
on media & drive
specifications)
Copy Speed for USB Up to 2GB per Minute
Supported File System
Format (for USB to USB )
Windows:FAT16/32, exFAT, NTFS
Linux:ext2/3/4
OSX:HFS/HFS+
Supported File System
Format (for USB to Disc,
and Disc to USB)
FAT16, FAT32, exFAT
Recording Discs
12cm 4.7GB DVD-
R/RW, 12cm 4.7GB
DVD+R/RW, 12cm 8.5GB DVD+R DL, 12cm
8.5GB DVD-
R DL, 12cm 80min / 700MB
CD-R, 12cm 74min / 650MB CD-
RW, 8cm
1.47GB mini DVD-
R, 8cm 24min / 210MB
mini CD-R, 8cm 50MB Business Card CD-R
Power Supply 115V or 230V (Selector Switch)
5

II. Warning
1. The Green LED flashes during the execution process of a task. After the
task is done, the Green LED will stay solid if the process is successful,
otherwise the Red LED will be on if the process is failed.
2. DO NOT turn off the duplicator machine or remove the optical drive when
the task is under process. It may damage the duplicator or the optical drive.
3. DO NOT plug in USB flash drive until the duplicator boots up. It may cause
abnormal results if a USB flash drive with quality issue is plugged in during
boot up.
4. It is strongly recommended that the capacities of the source and target
media are equal or similar.
5. The media plugged into the source drive or source USB port will not be
overwritten (it is read only), avoiding the erase of the original data by accident.
III. Menu Overview
1. Copy
There are four (4) copy modes: 1. Disc to Disc; 2. USB to Disc; 3. Disc to USB;
4. USB to USB (3 and 4 only available on Media Maven Plus model).
1.1 Disc to Disc
This copy mode will copy the source disc placed in the designated source drive
to all target discs in the writer drives. This process writes all data contained on
the source disc to the target discs so the copies are exact the duplicates of the
source disc.
ENT
1. Copy
# 0 : No Disc => 0
[ Copy ]
1. Disc To Disc
[ Copy ]
2. USB To Disc
Press ENT button and get into
the 1st copy mode by default
Press ▼or ▲Button to select
different copy mode
No Disc is inserted
ENT
1. Copy
# 0 : No Disc => 0
[ Copy ]
1. Disc To Disc
Copy x 5 2048M
10% 8.9X 204M
ENT
Result :
Pass 5 Fail 0
x 5: number of target discs
2048M: source data capacity
10%: rate of copy progress
8.9X: writing speed
204M: data copied so far
6

1.2 USB to Disc
This copy mode will copy the data from the source USB drive to all target discs
in the Writer Drives. Only the available data will be copied. Supported file
system formats are FAT16, FAT32, and exFAT.
In order to allow a large capacity USB drive to be copied across multiple target
discs, Disc Spanning technology is applied to the duplication. The system will
detect the source data capacity and calculate how many discs are needed.
For example, a USB pen drive with 7322MB data is to be copied to DVD discs.
After the USB pen drive and a DVD disc are placed into the duplicator, press
ENT, the system will show "Need 2 DVD Discs". Press ENT to continue the
process. Duplicator will automatically eject the DVD disc when 4262MB of data
has been copied, and wait for the next DVD disc. Take out the copied disc, put
in another blank DVD disc and close the tray, then press ENT to continue the
copy process. Duplicator will copy the remaining 3060MB of data from USB
pen drive to the second DVD disc.
1.3 Disc to USB
This function is only available on the Media Maven Plus model. It will copy
from the source Blu-ray/DVD/CD disc to a USB drive. Supported file system
formats are FAT16, FAT32 and exFAT. The original data content in the USB
drive will not be erased. Each disc copied is saved under a separate folder on
the USB drive.
ENT
[ Copy ]
2. USB To Disc
Need 2 DVD Discs
=> Continue
Write 1/2 4262M
TTL7322M 426M
ENT
2/2: present disc/total discs needed.
3060M: data to be copied
7322M: data on the source USB pen drive
306M: data copied to the present disc so far
The first disc has been
copied. Take it out and
put in the second disc
Write 1/2 4262M
Wait button . . .
Write 2/2 3060M
TTL7322M 306M
Result :
Pass 5 Fail 0
ENT
[ Copy ]
3. Disc To USB
Copy: 1 702M
P: 0 F:0 0%
Result :
Pass 1 Fail 0
7

1.4 USB to USB
This copy mode will copy the data from the source USB drive to the target USB
drive. Only the available data will be copied. Most of the file system formats
are supported, including Windows FAT16, FAT32, exFAT, NTFS; Linux ext2,
ext3, ext4; Mac HFS/HFS+.
Note:
1. This function is only available on the Media Maven Plus model.
2. The original data content of target USB drive will be erased after the copy
process. Please make sure the data can be erased before copy.
2. Test
This command will simulate the copy process and make sure all target discs
are usable. The test process does NOT write anything to the blank disc(s). A
built-in diagnostic algorism is used to verify the chance of successful copy for
each target disc.
Note: Test mode can only be done with BD-R, DVD-R and CD-R media.
3. Copy + Verify
This command will perform the copy process, and immediately follow with a
verification process on all target discs automatically. This command is useful
especially for audio CD duplication.
ENT
2. Test
# 0 : 2048MB => 0
Test x 3 2048M
50%8.9X 1024M
Result
Pass 3 Fail 0
ENT
Verify x 3 2048M
50%8.9X 1024M
Result
Pass 3 Fail 0
3. Copy + Verify
# 0 : 2048MB=> 0
Copy x 3 2048M
50%8.9X 1024M
Copy process is
finished
ENT
[ Copy ]
4. USB To USB
Data Will Be Erased!
Continue
Copy: 1 2048M
P : 0 F : 0 10%
ENT
Result :
Pass 1 Fail 0
Copy:1: 1 target USB
2048M: source data
P: number of copies passed
F: number of copies failed
10%: rate of copy progress
8

Note: The verification process uses a Disc Readability Check to individually
check the presence of data on each copy. This process does not compare the
contents of duplicated discs against that of the source. It only verifies that the
duplicated discs are readable.
4. Copy + Compare
This command will perform the copy process, and immediately follow with a
comparison between the source disc and the copied disc(s) automatically to
ensure the copies are the exact duplicates of the source disc. This command is
especially useful for BDs, DVDs, data CDs and video CDs.
Note:
1. The Compare process is a bit-by-bit comparison between the source disc
and the copied discs.
2. This operation ensures that all of the copies are completely identical to the
Source disc.
3. This command is not applicable to audio CDs.
5. Verify
This command verifies readability on the target discs. It is especially useful for
audio CD duplication.
6. Compare
This command compares copied disc(s) to the source disc and ensures that
the copies are the exact duplicates of the source disc. It is especially useful for
BDs, DVDs, data CDs and video CDs.
Compare x 3 2048M
50%8.9X 1024M
Result
Pass 3 Fail 0
4. Copy + Compare
# 0 : 2048MB=> 0
Copy x 3 2048M
50%8.9X 1024M
Copy process is
finished
ENT
5. Verify
# 0 : 2048MB => 0
Verify x 3 2048M
50%8.9X 1024M
Result
Pass 3 Fail 0
ENT
6. Compare
# 0 : 2048MB => 0
Compare x 3 2048M
50%8.9X 1024M
Result
Pass 3 Fail 0
9

7. Set Burn Speed
This command allows to set the burn speed for various types of disc: CDs
(data and VCDs), audio CDs, DVDs, dual-layer DVDs (DVD DL), and Blu-ray
(BD-R SL, BD-R DL, BD-RE SL, and BD-RE DL).
Selectable burn speeds:
CD: 1, 2, 4, 8, 10, 12, 16, 20, 24, 32, 36, 40 (default), 44, 48, 50, 52, 56, MAX.
Audio CD: 1, 2, 4, 8, 10, 12, 16, 20, 24 (default), 32, 36, 40, 44, 48, 50, 52, 56,
MAX.
DVD: 1, 2, 2.4, 4, 6, 8, 12, 16 (default), 18, 20, 24, MAX.
DVD DL: 1, 2 (default), 2.4, 4, 6, 8, 12, 16, 18, 20, 24, MAX.
Blu-ray: 1, 2 (default), 4, 6, 8, 10, 12, MAX.
Press ▲▼ to select the desired burn speed
8. Source Select
This command allows to change the source drive to any one of the drive(s)
built inside the duplicator, including the HDD if installed.
Press ▲▼ to select the source
Selectable source:
First Drive(default): Choose the device plugged into the first port of duplicator
as source.
HDD: Choose the Hard Disk Drive as source if installed.
Port [#]: Choose one duplicator port as source.
Auto: System will automatically detect the duplicator ports and set the one
with source disc as the source.
9. Track Edit
9.1 Copy Track
This command allows to select tracks from multiple audio CDs, combine and
burn the tracks to target CDs.
ENT
7. Set Burn Speed
[Set Burn Speed ]
CD = 40
[Set Burn Speed ]
Audio CD = 24
ENT
ENT
8. Source Select
[Source Select ]
First Drive
[Source Select ]
HDD
10

Press ▲▼ to select track Track 1 is selected
Press ▲▼ to select track Track 5 is selectedPress ▲▼ to select Start
Copy track 1 first Copy track 5 after track 1 is copied
Note:Press ▲▼ to check the disc information
1. The function can be executed again if the target disc has free space.
2. Please execute Close Disc when the target disc space is full, or no more
tracks will be added onto it.
9.2 Close Disc
This command will close audio CDs. After finishing Copy Track above, the
Close Disc is needed to finalize the disc. Without doing this process, the disc
cannot be played on some CD/DVD player.
9.3 Disc info
This command allows to look up the information for each disc
.
Press ▲▼ to select the disc
ENT
[ Track Edit ]
1. Copy Track
[ + ] none
1/12 03:03
[ + ] 1 : 1
+ 1/12 03:03
ENT
ENT
[ Track Edit ]
2. Close Disc
[ Track Edit ]
Finalizing…….
[ Track Edit ]
Finished!
ENT
[ Track Edit ]
3. Disc info
[ 1 ] 18Tracks
Audio CD 644MB
[ 2 ] 4Tracks
Audio CD 149MB
[ + ] tracks selected
A/B Length
[ + ] C : D
+ E/12 Length
C:total number of tracks selected
D
:
list of tracks selected
E:the present track selected
A:present track
B
:
total tracks
Track 1 03:03
Copy X 1 03:03
Track 5 03:26
Copy X 1 03:26
Finished!
ENT
[ + ] 1 : 1
5/12 03:26
[ + ] 2 : 1,5
+ 5/12 03:26
[ + ] 2 : 1,5
Start 2 / 06:29
ENT
ESC
[4] Used Free
2Tr 06:29 73:20
11

10. Utility
10.1 PreScan
It will pre-scan the source disc and verify the integrity and quality of the source
disc. Execute this function before the copy process starts, it will ensure the
source disc can be copied in the duplicator if the result is passed.
10.2 Quick Erase
Performs a quick erase of rewritable (RW) media for the next use
Note: Do NOT perform this function on recordable (R) media.
10.3 Full Erase
Performs a full erase of rewritable (RW) media for the next use.
Note: Do NOT perform this function with recordable (R) media
10.4 Eject All Trays
Performs ejection simultaneously of all the optical disk drive(s) on the
duplicator.
Note: Double press ESC at the first layer of the menu can also eject all trays.
10.5 Disc Information
This command checks the disc information inside of the drive(s), including the
USB flash drive.
ENT
[ Utility ]
1. PreScan
PreScan 512M
50% 256M
Result :
Pass 1 Fail 0
ENT
[ Utility ]
2. Quick Erase
[Quick Erase]
x 1 00 : 27
Result :
Pass 1 Fail 0
ENT
[ Utility ]
3. Full Erase
[Full Erase]
x 1 00 : 27
Result :
Pass 1 Fail 0
ENT
[ Utility ]
4. Eject All Trays
All trays are ejected.
12

Press ▲▼ to select the disc
10.6 Drive Information
Checks the make, model, and firmware of the drive(s) that are built in and
connected to the duplicator controller ports.
Press ▲▼ to select the drive
10.7 System Information
Checks the model number, buffer memory and firmware version of the
duplicator system (controller).
10.8 Update BIOS
This command allows to update the firmware of duplicator when necessary.
Please obtain proper update firmware file from manufacturer and burn the
un-zipped files to a CD or DVD disc supported by the duplicator. Once the
update process is completed, the duplicator will reboot automatically to
activate the new firmware.
Note: 1. Please insert the disc with firmware to the source drive.
2. DO NOT put the firmware files in a folder.
ENT
[Utility ]
5. Disc Information
[ 1 ] USB
FAT32 3523M
[ 2 ] 4Tracks
Audio CD 114M
A0111B: The controller model
128MB: System memory
v1.05.12: Version of firmware
ID number
: The controller’s ID
ENT
[Utility ]
7. System Information
A0111B 128M
v1.05.12
ID number
XXXXXXXXXXXXXXX
ENT
[ Utility ]
8. Update BIOS
Update BIOS
Searching....
[ Update BIOS ]
Complete! Reboot!
[ # 2 ]:Number of the drive.
P : 2: Number of the controller port
1.03: Version of the drive’s firmware
ASUS: The drive’s brand
DVD-E818A3T: Drive’s model
ENT
[Utility ]
6. Drive Information
[ # 1 ] P : 1 1.03
ASUS DVD-E818A3T
[ #2 ] P : 2 1.00
ASUS DRW-24B1ST
13

10.9 Copy Counter
It keeps track of the numbers of successful and failed copies made by the
duplicator for CDs and DVDs. There are three options: Show Count (to display
current copy counter), Enable Counter (to turn the counter on or off) and Clear
Counter (to clear counter).
10.9.1 Show Count
This command can display the numbers of successful and failed copies made
by the duplicator for CDs and DVDs. The counters will be reset automatically
when the duplicator is turned off.
10.9.2 Enable Counter
This command allows to choose if the counter is enabled or disabled.
Press▲▼to select the setting
10.9.3 Clear Counter
This command can clear counter.
11. Setup
11.1 Start-up Menu
It sets the command to be displayed first when the duplicator is powered up
and initialized. All primary commands are available to be set up as Start-up:
Copy, Test, Copy + Verify, Copy + Compare, Verify, Compare.
Press ▲▼ to select function
ENT
ENT
11. Setup
[ Setup ]
1. Start-up Menu
[ Start-up Menu ]
Copy
ENT
ENT
[ Utility ]
9. Copy Counter
[ Copy Counter ]
1. Show Count
Pass: 0
Fail: 0
ENT
ENT
[ Utility ]
9. Copy Counter
[ Copy Counter ]
2. Enable Counter
[Enable Counter ]
Enable
ENT
ENT
[ Utility ]
9. Copy Counter
[ Copy Counter ]
3. Clear Counter
Erasing Count
Complete!
14

11.2 Auto Start
It sets the amount of time before the duplicator automatically start the selected
command, ranging from OFF (no auto start) to 120 seconds.
Press ▲▼ to select time
11.3 Display Mode
It changes the display readout during the performance of various commands.
“Basic” mode displays a progress bar, along with the amount of total data in
MB on the source DVD (or in time for the source audio CD).
“Expert” mode displays the percentage of the process completed, the amount
of data transferred and the total amount of data on the source disc.
“Show Timer” mode shows progress time bar in the process.
“Show speed” mode shows the transfer speed in the process.
Press ▲▼ to select mode
11.4 Beep
Turns the audio signal (a beeping sound) ON or OFF when pressing the
operational buttons.
Button&Warning: The duplicator makes beep sound and warning when
pressing button or error occurred.
Warning Only: The duplicator makes warning only when error occurred.
OFF: The duplicator won’t make beep sound nor warning.
Press ▲▼ to select mode
11.5 Power on Eject
Allows the drive(s) to eject the disc tray(s) when the duplicator is power on and
initialized.
Eject All Discs: Duplicator will eject all disc trays with disc inside.
Eject All Trays: Duplicator will eject all disc trays no matter if a disc is inside.
Do Not Eject: Duplicator will not eject any trays.
ENT
ENT
11. Setup
[ Setup ]
2. Auto Start
[ Auto Start ]
Time : OFF
ENT
ENT
11. Setup
[ Setup ]
3. Display Mode
[ Display Mode ]
Basic
ENT
ENT
11. Setup
[ Setup ]
4. Beep
[ Beep ]
OFF
15

Eject Targets Only: Duplicator will only eject target drive trays.
Eject Source Only: Duplicator will only eject source drive trays.
Press ▲▼ to select option
11.6 Reader Speed
Sets the reader speed for the duplicator to read the source disc(s).
Selectable Reader speeds:
CD: 1, 2, 4, 8, 10, 12, 16, 20, 24, 32, 36, 40, 44, 48, 50, 52, 56(default), MAX.
DVD: 1, 2, 2.4, 4, 6, 8, 12, 16, 18, 20, 24(default), MAX.
Blu-ray: 1, 2, 4, 6, 8(default), 10, 12, MAX.
Press ▲▼ to select speed
11.7 Compare Speed
Sets the speed at which the source disc is compared with the copied disc(s).
Selectable Compare speeds:
CD: 1, 2, 4, 8, 10, 12, 16, 20, 24, 32, 36, 40(default), 44, 48, 50, 52, 56, MAX.
DVD: 1, 2, 2.4, 4, 6, 8, 12, 16(default), 18, 20, 24, MAX.
Blu-ray: 1, 2, 4(default), 6, 8, 10, 12, MAX.
Press ▲▼ to select speed
11.8 Skip Read Error
Allows the duplicator to skip uncorrectable read errors on the source disc.
ENT
ENT
11. Setup
[ Setup ]
5. Power on Eject
[ Power on Eject ]
Eject All Discs
ENT
ENT
11. Setup
[ Setup ]
6. Reader Speed
[ Reader Speed ]
CD: 56X
ENT
ENT
[ Reader Speed ]
DVD: 24X
[ Reader Speed ]
Blu-ray: 8X
Setup Completed!
ENT
ENT
11. Setup
[ Setup ]
7. Compare Speed
[ Compare Speed ]
CD: 40X
ENT
ENT
[ Compare Speed ]
DVD: 16X
[ Compare Speed ]
Blu-ray: 4X
Setup Completed!
ENT
ENT
11. Setup
[ Setup ]
8. Skip Read Error
[ Skip Read Error ]
Enable
Press ▲▼ to select option
16

11.9 Language
Selects the language for the display. Available languages are: English
(default), Spanish, Portuguese, and Japanese.
Press ▲▼ to select language
11.10 Clear Setup
Resets the duplicator back to factory default settings.
Press ▲▼ to select option
11.11 Advance Setup
11.11.1 Power on Time
Sets the amount of time the duplicator counts down before initializing the
system. The default is 10 seconds. The power on time can be set from 3to 120
seconds.
Press▲▼ to select time
11.11.2 CD Overburn
Allows duplication of a CD that has been burned over its maximum capacity.
The target disc(s) must be the same capacity as the source disc.
Press ▲▼ to select setting
11.11.3 Boot Password
Sets password protection for the duplicator before the boot-up process can be
started. The boot password prevents anyone unauthorized from using the
ENT
ENT
11. Setup
[ Setup ]
9. Language
[ Language ]
English
ENT
ENT
[ Setup ]
10. Clear Setup
Clear Parameter To Default?
No
Clear Parameter To Default?
All Parameters were cleared!
ENT
ENT
[ Setup ]
11. Advance Setup
[ Advance Setup ]
1. Power on Time
[ Power on Time ]
10
ENT
ENT
[ Setup ]
11. Advance Setup
[ Advance Setup ]
2. CD Overburn
[ CD Overburn ]
Disable
17

duplicator system. If Disable is selected, no password will be set and the
display will go back to the Setup sub-menu. If Enable is selected, a password
must be entered using the following guide lines: use ▲▼ to select the
character desired. There are total 6 characters (positions) for the password. To
enable the password, set all 6 positions. For space, press “ENT” without
choosing a character to leave the position empty. Press “BACK” to cancel the
process. The duplicator will ask for password when the unit is restarted.
Press ▲▼ to select
Press ▲▼ to select character
11.11.4 Setup Password
It creates password protection for the duplicator before the Setup settings can
be altered. The Setup password prevents unauthorized changes to the
system.
If disable is selected, no password will be set and the display will go back to
the Setup sub-menu.
Press ▲▼ to select
Press ▲▼ to select character
11.11.5 Copy CD Text
Allows to copy the CD-TEXT on the source disc to the target disc(s).
Press ▲▼ to select setting
ENT
ENT
[ Setup ]
11. Advance Setup
[ Advance Setup ]
3. Boot Password
[ Boot Password ]
Disable
ENT
ENT
[ Boot Password ]
Enable
[ Boot Password ]
==>_
[ Boot Password ]
==> M A S T E R OK?
ENT
ENT
[ Setup ]
11. Advance Setup
[ Advance Setup ]
4. Setup Password
[ Setup Password ]
Disable
ENT
ENT
[ Boot Password ]
Enable
[ Setup Password ]
==>_
[ Setup Password ]
==> M A S T E R OK?
ENT
ENT
[ Setup ]
11. Advance Setup
[ Advance Setup ]
5. Copy CD Text
[ Copy CD Text ]
Disable
18

11.11.6 Copy UPC/ISRC
Allows to copy the UPC/ISRC on the source disc to the target disc(s).
Press ▲▼ to select setting
11.11.7 Copy CD+G
Allows to copy CD+G files on the source disc to the target disc(s).
Press ▲▼ to select setting
11.11.8 Auto Erase
Allows to erase files on the rewriteable CD’s or DVD’s
Press ▲▼ to select setting
11.11.9 Pre-gap Scan
Pre-gap on audio CD is the gap between tracks. If user enables this function,
duplicator will scan all pre-gaps on source audio CD and make a copy by the
same result. If user disables this function, a fixed two seconds will be filled in
the gap between tracks.
Press ▲▼ to select setting
11.11.10 L0 Break Point
The layer 0 break point is the place to switch from the first layer (L0) to the
second layer (L1). Duplicator allows user to set option for this break point.
By Source: Duplicator will burn the break point to target disc(s), following the
break point place of source disc.
ENT
ENT
[ Setup ]
11. Advance Setup
[ Advance Setup ]
6. Copy UPC/ISRC
[ Copy UPC/ISRC ]
Disable
ENT
ENT
[ Setup ]
11. Advance Setup
[ Advance Setup ]
7. Copy CD+G
[ Copy CD+G ]
Disable
ENT
ENT
[ Setup ]
11. Advance Setup
[ Advance Setup ]
8. Auto Erase
[ Auto Erase ]
Disable
ENT
ENT
[ Setup ]
11. Advance Setup
[ Advance Setup ]
9. Pre-gap Scan
[ Pre-gap Scan ]
Disable
19
This manual suits for next models
1
Table of contents
Other ezdupe Disc Duplicator manuals

ezdupe
ezdupe hdmini User manual

ezdupe
ezdupe media mirror User manual

ezdupe
ezdupe NVMe CyCLONE Pro User manual

ezdupe
ezdupe Mini USB Pro User manual

ezdupe
ezdupe NV-05M User manual

ezdupe
ezdupe Classic NVMe CyCLONE User manual

ezdupe
ezdupe Flex PRO SD User manual

ezdupe
ezdupe PRO Series User manual

ezdupe
ezdupe HD Pal Series User manual

ezdupe
ezdupe Gold Premier User manual