FACTO FT40-8HC User manual

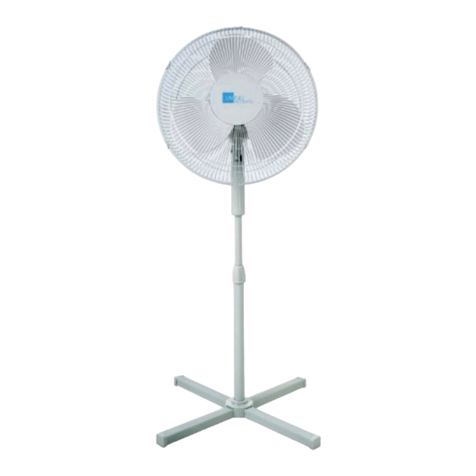
16" Table Fan
Ventilateur de table de 16 po
70395010
FT40-8HC
1
4

1
CAUTION
WARNING
RULES FOR SAFE OPERATION
PARTS LIST
BASE ASSEMBLY
ASSEMBLY OF BLADE AND GRILLES
OPERATING INSTRUCTIONS
CLEANING
WARRANTY
.....................................................................................2
....................................................................................2
..............................................2
..................................................................................2
.......................................................................2
.................................3
..................................................3
...................................................................................3
.................................................................................3
SUMMARY

9
1234
56
7
10
8
12
11
WARNING
1. To reduce the risk of fire or electric shock, do not use this fan with any solid-state speed
control device.
2. If the supply cord is damaged, it must be replaced by the manufacturer, or its service agent
or a similarly qualified person in order to prevent a safety hazard.
3. This appliance has a polarized plug (one blade is wider than the other). To reduce the risk
of electric shock, this plug is intended to fit in a polarized outlet only one way. If the plug
does not fit all the way into the outlet, reverse the plug. If it still does not fit, contact a
qualified electrician. Do not attempt to bypass this safety feature.
4. Do not leave the fan running unattended.
5. Do not run the cord under carpeting. Do not cover the cord with throw rugs, runners, or
similar coverings. Keep the cord away from traffic areas, where it will not be tripped over.
RULES FOR SAFE OPERATION
1. Fan should be used according to the rated voltage.
2. Connect power after the fan is fully assembled.
3. Never insert fingers, pencils, or any other objects through the grille when the fan is
running.
4. Unplug the fan before cleaning or moving.
5. Unplug the fan when removing grilles for cleaning.
6. Be sure the fan is on a stable suface when operating to prevent it from tipping over.
7. DO NOT use the fan in a window.Rain may create an electrical hazard.
PARTS LIST
1. Front grille
2. Blade
3. Plastic nut
4. Rear grille
5. Motor shaft
6. Oscillation knob
7. Fan body
8. Spinner
9. Base
10. Speed control buttons
11. Tighten
12. Loosen
CAUTION
For safe operation, read these rules and instructions carefully.
1. Detach the screw from the base of the fan.
2. Match the locking tab to the base and click into position.
3. Tighten the screw in the base to secure the fan to the base.
BASE ASSEMBLY
2

ASSEMBLY OF BLADE AND GRILLES
1. Remove the plastic nut by turning it counterclockwise.
2. Set the rear grille in the proper position with the handle at the top.
3. Screw on the plastic nut tightly to attach the grille.
4. Discard the plastic sleeve on the shaft.
5. Install the blade onto the shaft until the retaining pin fits into the notch on the blade.
6. Screw the spinner onto the motor shaft counterclockwise.
7. Mount the front grille and join both grilles together using the clips.
OPERATING INSTRUCTIONS
Speed control
Buttons are used to control the speed: 0 (Stop), 1 (Low), 2 (Medium), 3 (High).
Oscillation control
To make the fan oscillate, push down the oscillation knob located on top of the motor
housing. To stop the fan from oscillating and to lock it in the position desired, pull the
oscillation knob up.
Tilt control
The airflow can be adjusted upward or downward by tilting the fan head to a vertical angle
as desired.
CLEANING
1. Unplug the fan from the electrical supply before cleaning.
2. Plastic parts should be cleaned with mild soap and a damp cloth or sponge.
Thoroughly remove soap film with clean water.
3. Be sure not to get water or other liquid into the motor.
4. Thoroughly dry all parts before reassembling and reconnecting the fan.
WARRANTY
3
PRINTED IN CHINA
Thank you for purchasing this FACTO product. These products have been made to quality
standards and are guaranteed for domestic use against manufacturing faults for a period of
12 months from the date of purchase.
This warranty does not affect your statutory rights. In case of any malfunction of your
FACTO product (failure, missing part, etc.), please contact one of our service technicians
at our toll free service line at 1-866-206-0888 from 8 AM to 6 PM, Monday to Friday,
Eastern Standard time. RONA reserves the right to repair or replace the defective product,
at its discretion.
The product is guaranteed for 12 months if used for normal trade purposes. Any warranty
is invalid if the product has been overloaded or subject to neglect, improper use or an
attempted repair other than by an authorized agent. Heavy-duty or daily professional/
commercial usage are not guaranteed. Due to continuous product improvement, we reserve
the right to change the product specifications without prior notice.

ATTENTION
MISE EN GARDE
RÈGLES D'UTILISATION SÉCURITAIRE
LISTE DES PIÈCES
ASSEMBLAGE DE LA BASE
ASSEMBLAGE DE L’HÉLICE ET DES GRILLES
INSTRUCTIONS D’UTILISATION
NETTOYAGE
GARANTIE
.....................................................................................5
.............................................................................5
....................................5
.........................................................................5
..........................................................6
........................6
................................................6
...................................................................................6
........................................................................................7
SOMMAIRE
4

9
1234
56
7
10
8
12
11
1. Grille avant
2. Hélice
3. Écrou de plastique
4. Grille arrière
5. Arbre du moteur
6. Bouton d'oscillation
7. Corps du ventilateur
8. Tourniquet
9. Base
10. Bouton de commande de vitesses
11. Serrer
12. Desserrer
MISES EN GARDE
1. Afin de réduire les risques d'incendie et de choc électrique, n’utilisez pas ce ventilateur
avec un régulateur de vitesse à semi-conducteurs.
2. Un cordon d'alimentation endommagé doit être remplacé par le fabricant, un intermédiaire
de service ou une autre personne qualifiée afin de prévenir les risques.
3. Cet appareil est doté d’une fiche polarisée (une lame est plus large que l’autre). Pour
réduire le risque de choc électrique, cette fiche est conçue pour ne s’insérer que d’une
seule façon dans une prise polarisée. S’il est impossible de l’insérer à fond, inversez-la.
Si cela ne fonctionne toujours pas, communiquez avec un électricien qualifié. Ne tentez
pas de contourner cette caractéristique de sécurité en modifiant la fiche.
4. Ne laissez pas fonctionner l'appareil sans surveillance.
5. Évitez de passer le cordon d’alimentation sous une moquette. Ne le recouvrez pas d’un
tapis, d’une carpette ou tout autre revêtement similaire. Éloignez le cordon des endroits
passants afin d’éviter qu’il ne fasse trébucher quelqu’un.
RÈGLES D'UTILISATION SÉCURITAIRE
1. Le ventilateur doit être utilisé sur un circuit de la tension électrique recommandée.
2. Branchez l'appareil une fois qu'il est entièrement assemblé.
3. N’insérez rien (doigts, crayons ou autres objets) à travers les grilles de protection pendant
que l'appareil est en marche.
4. Débranchez l'appareil dans les situations suivantes : lorsqu'il n'est pas utilisé, pour le
déplacer, avant d'en retirer des pièces ou d'y en ajouter et avant de le nettoyer.
5. Débranchez l’appareil avant de retirer les grilles pour procéder au nettoyage.
6. Assurez-vous que le ventilateur se trouve sur une surface stable pour éviter
qu’il ne bascule.
7. N’utilisez PAS le ventilateur dans une
fenêtre. La pluie risquerait de causer
un choc électrique.
LISTE DES PIÈCES
ATTENTION
Pour une utilisation sécuritaire, lisez attentivement les présentes règles et instructions.
5

1. Retirez la vis de la base du ventilateur.
2. Alignez la languette de blocage sur la base et enfoncez-la jusqu’à ce que vous
entendiez un déclic.
3. Serrez la vis dans la base pour bien fixer le ventilateur.
ASSEMBLAGE DE LA BASE
ASSEMBLAGE DE L’HÉLICE ET DES GRILLES
1. Retirez l'écrou en plastique en le tournant dans le sens anti-horaire.
2. Placez la grille arrière sur la tête du ventilateur, la poignée vers le haut.
3. Vissez l'écrou de plastique à fond afin de fixer la grille sur la tête du ventilateur.
4. Jetez le petit manchon de plastique qui se trouve sur l'arbre du moteur.
5. Glissez l'hélice du ventilateur sur l'arbre moteur jusqu’à ce que la tige de retenue
s’insère dans l’encoche de l’hélice.
6. Vissez le cône dans le sens anti-horaire sur l'arbre du moteur.
7. Installez la grille avant et joignez les deux grilles à l'aide de pinces.
INSTRUCTIONS D’UTILISATION
Réglage de la vitesse
Un bouton de commande permet de régler la vitesse du ventilateur :
Arrêt (0)- Basse (1)- Moyenne (2)- Élevée (3).
Réglage de l'oscillation
Pour faire osciller le ventilateur, appuyez sur le bouton d'oscillation situé sur le logement du
moteur. Pour arrêter l'oscillation à la position voulue, appuyez à nouveau sur le bouton.
Réglage de l'inclinaison
Pour ajuster le débit d'air vers le haut ou vers le bas, inclinez la tête du ventilateur selon
l'angle vertical désiré.
NETTOYAGE
1. Assurez-vous de débrancher l'appareil avant le nettoyage.
2. Nettoyez les pièces de plastique à l’aide d’une éponge ou d’un linge humide et d’un
savon doux. Rincez à fond.
3. Assurez-vous qu'aucun liquide ne s'infiltre à l'intérieur du moteur.
4. Séchez complètement toutes les pièces avant de les réassembler et de rebrancher
l'appareil.
6

GARANTIE
Merci d’avoir acheté ce produit FACTO. Ces produits ont été conçus pour répondre à
des normes de qualité et sont garantis pour usage domestique contre tout défaut de
fabrication pour 12 mois suivant la date d’achat. Cette garantie n’a aucune incidence
sur vos droits légaux.
En cas de mauvais fonctionnement de votre produit FACTO (bris, pièces manquantes,
etc.), veuillez appeler notre ligne de service pour parler à un technicien au 1-866-206-
0888, du lundi au vendredi de 8 h à 18 h, heure normale de l’Est. RONA se réserve le
droit de réparer ou remplacer le produit défectueux à sa discrétion.
Ce produit est garanti durant 12 mois si utilisé de façon normale. Toute garantie est
invalide si le produit a été utilisé en surcharge ou de façon non recommandée, ou s'il a
fait l’objet de négligence ou de réparations non effectuées par un agent autorisé.
L’usage professionnel/commercial au quotidien et l’usage intensif ne sont pas garantis.
Dû à l’amélioration continue de nos produits, nous nous réservons le droit de modifier
les caractéristiques de ce produit sans avertissement.
7
IMPRIMÉ EN CHINE
This manual suits for next models
1
Table of contents
Languages:
Other FACTO Fan manuals
Popular Fan manuals by other brands

Designers Fountain
Designers Fountain 52SR3L5-DW owner's manual

Breeze
Breeze KBB Series user manual

Flex-a-Lite
Flex-a-Lite Black Magic 150 Mounting instructions

Minka Group
Minka Group Aire Roto F524 Instruction manual warranty certificate

Hunter
Hunter Hardwick 50593 installation manual

Vents
Vents D Series user manual