1716
Camera.
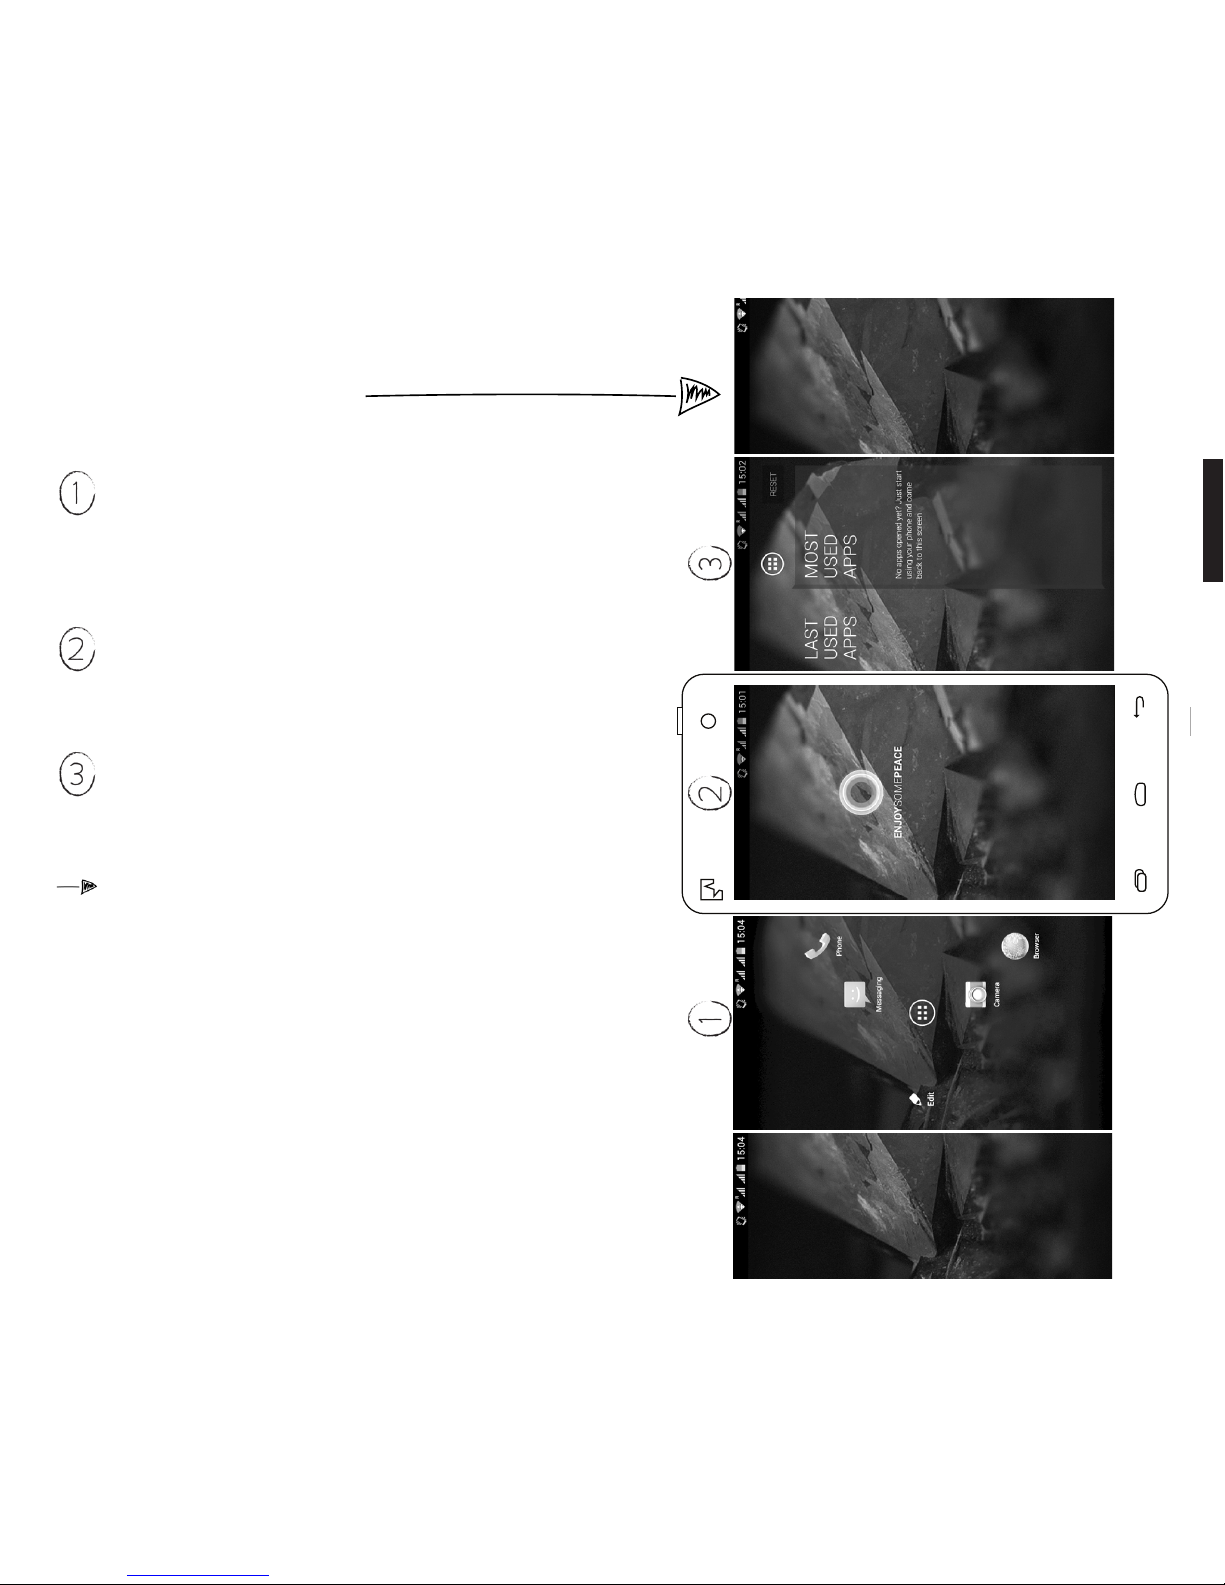
Open your Quick Access menu and slide your
nger to the camera icon.
Take a picture or make a video. Point your phone at
whatever you’d like to capture and press the Photo icon
or the Video icon . You can switch between the
front and rear camera by pressing the icon at the
bottom right of your screen.
View your pictures. View all your photos and videos
by pressing the image box at the bottom right. At the
upper left corner of the screen, you can switch between
Filmstrip view (one by one) or Grid view (complete
collection).
Additional options. The Camera app offers many other
options and fun ways to edit your images. Start exploring!
Web browser.
This is the basic browser for accessing the web.
You can, of course, download another browser if you prefer.
Connect to Wi-Fi. This is what you normally use to access
the internet at home, work or from a cafe. Go to System
Settings (p 23) > Wi-Fi and slide the lever to On. If there
are a variety of connections available, tap the Wi-Fi
icon and choose a connection name from the list. If it’s
security enabled, it will prompt you for the password. If
you don’t know it, ask the system administrator or the
nearest waiter. Some connections might have additional
security settings that you can access under Show
Advanced Options.
Mobile data connection. This data connection is provided
by your operator and can be accessed anywhere you have
signal coverage. To activate your data connection, go to
the pull-down menu and press the Data Connection icon
to turn it on or off. Your connection speed will
depend on your provider and your physical location. The
following icons show you how fast your connection is.