Fakir MINSO User manual

Meat grinder
MINSO
Kıyma Makinesi
Instruction Manual
Kullan›m K›lavuzu

2
Girifl:
Uzun y›llar sorunsuz çal›flmas› için
tasarlanan ve üretilen Fakir Minso k›yma
makinesini sat›n alm›fl oldu¤unuz için
teflekkür ederiz.
Benzer ürünleri kullanmaya al›fl›k
olabilirsiniz, ancak kullanma k›lavuzunu
okumak için lütfen zaman ay›r›n›z. Bu k›lavuz
sat›n alm›fl oldu¤unuz üründen en iyi
performans› alman›z için haz›rlanm›flt›r.
Güvenlik Önemlidir
Kendi güvenli¤iniz ve di¤erlerinin güvenli¤i
için ürünü çal›flt›rmadan önce kullanma
k›lavuzunu okuyunuz. Bu k›lavuzu ilerideki
kullan›mlar için güvenli bir yerde saklay›n›z.
E¤er cihaz›n›z› birisine veriyorsan›z,
kullanma k›lavuzunu da veriniz. Bütün
paketleri sökünüz, fakat cihaz›n›z›n
çal›flt›¤›ndan emin olana kadar da paketleri
saklay›n›z.
Güvenlik uyar›lar›:
Bir elektrikli cihaz kullan›rken afla¤›daki basit
güvenlik önlemleri her zaman al›nmal›d›r:
• Cihaz›n›z› dikkatli bir flekilde kullanmak için
kullan›m k›lavuzunu mutlaka okuyunuz ve
cihaz›n›z› kullanmadan önce montaj k›sm›n›
okuyunuz.
• Bu kullanma k›lavuzunu ilerideki kullan›mlar
için saklay›n›z.
• Cihaz› çal›flt›rmadan önce flebeke voltaj›n›n
cihaz›n›z›n tip etiketinde gösterilenle ayn›
oldu¤unu kontrol ediniz.
• Fakir taraf›ndan önerilmeyen herhangi bir
cihaz aksesuar› ya da parças›n› kesinlikle
kullanmay›n›z. Üreticiniz taraf›ndan
önerilmeyen farkl› aksesuarlar›n veya
parçalar›n kullan›lmas› durumunda
garantiniz geçersiz hale gelecektir.
• Cihaz›n›z› e¤er kablosu, fifli veya herhangi
bir parças› ar›zal› ise kesinlikle
kullanmay›n›z.
• Cihaz›n›z›n kablosu, fifli veya parçalar›
hasarl› ise, herhangi bir zarar›n önlenmesi
için yetkili bir Fakir servisi taraf›ndan yerine
yenisi ile de¤ifltirilmelidir.
• Cihaz›n›z› ilk kez kullanmadan önce,
yiyecekle temasa geçecek olan parçalar›
lütfen y›kay›n›z.
• Cihaz›n›z› kulland›ktan sonra fiflini prizden
çekiniz.
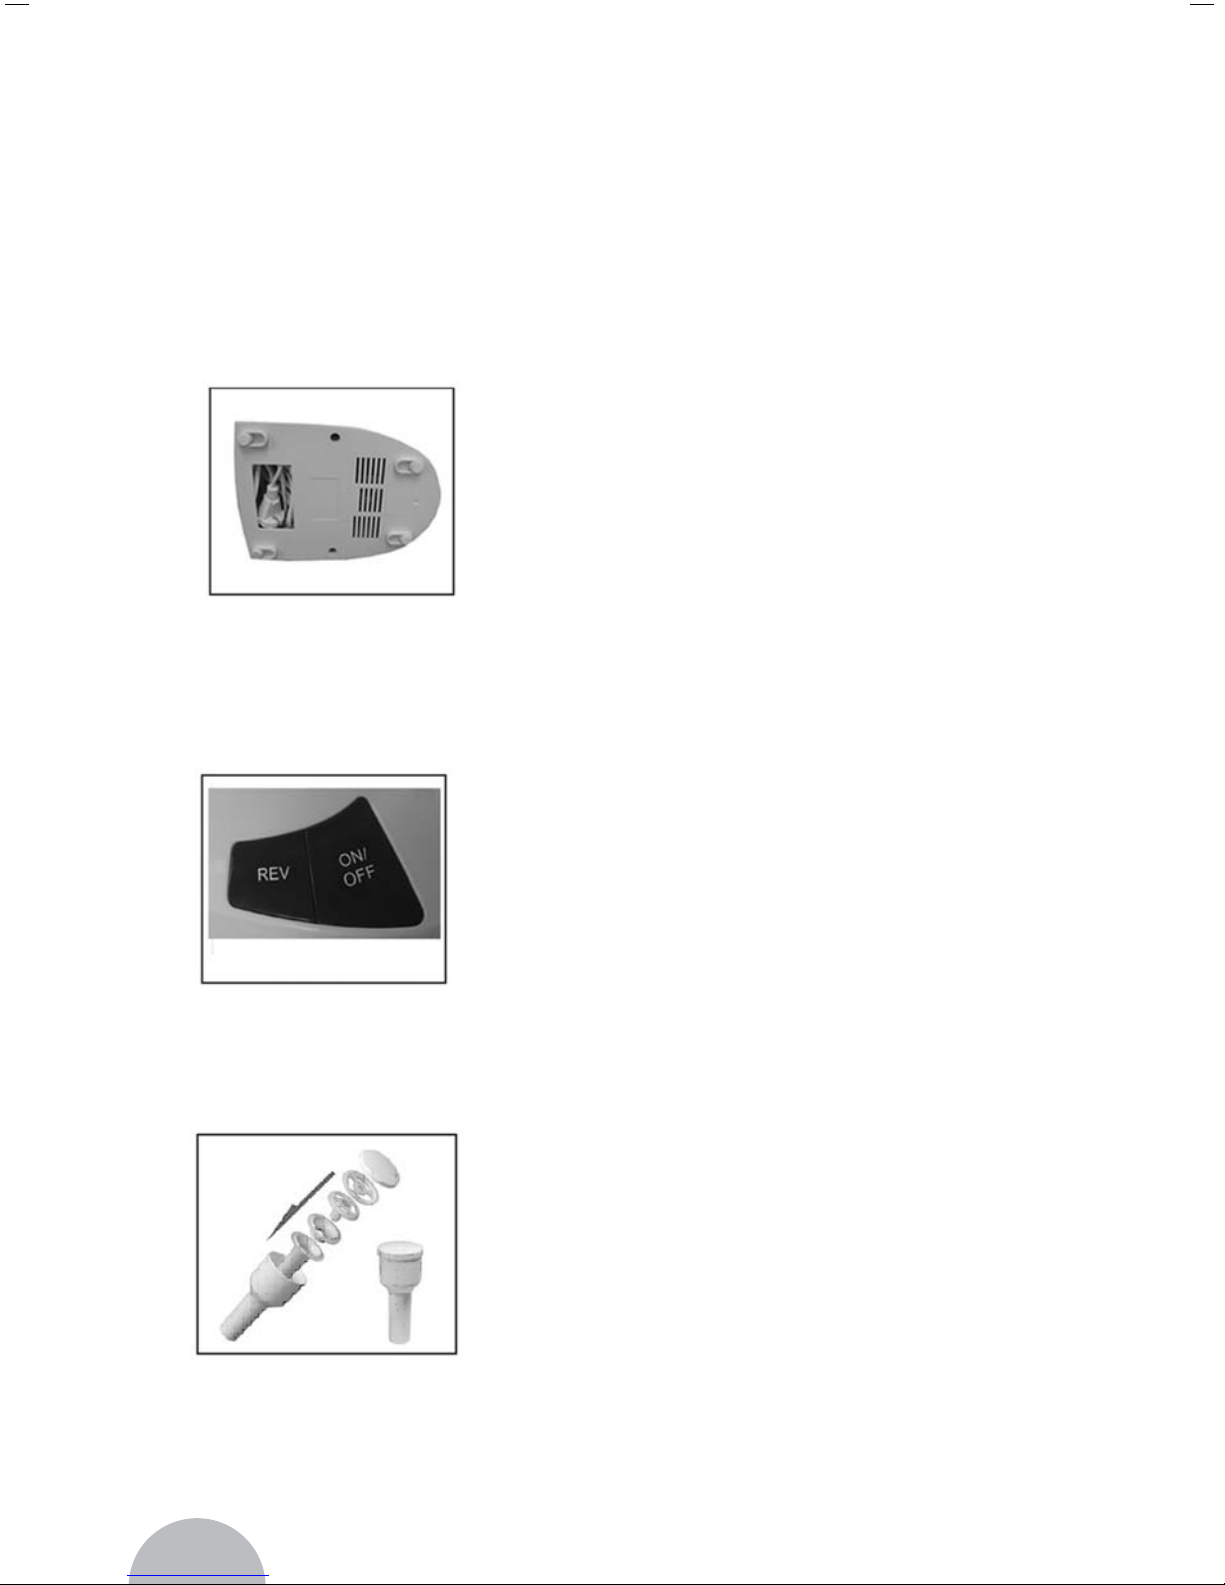
• Cihaz›n›z çal›fl›r durumdayken,
yiyeceklerinizi cihaz›n tüp k›sm›ndan
geçirmek için asla parmaklar›n›z› ve ya
herhangi bir nesneyi kullanmay›n›z.
Yiyeceklerinizi tüpten geçirmek için yaln›zca
itme sap›n› kullan›n›z.
• Çocuklar›n veya engelli kiflilerin cihaza
ulaflmalar›na engel olunuz. Gözetiminiz
olmadan cihaz› kullanmalar›na izin
vermeyiniz.
• Cihaz›n›z›n gözetiminiz olmadan kendi
bafl›na çal›flmas›na müsaade etmeyiniz.
• Cihaz›n›za aksesuarlar› tak›p sökmeden
veya cihaz›n›z› temizlemeden önce, mutlaka
cihaz›n›z› kapal› konuma getiriniz.
• Cihaz›n›z›n parçalar›n› sökmeden önce
hareket eden parçalar durana kadar
bekleyiniz.
• Cihaz›n›z› kesinlikle suya veya herhangi bir
s›v›ya dald›rmay›n›z ya da suyun alt›nda
cihaz›n›z› çalkalamay›n›z. Cihaz›n›z›
temizlemek için yaln›zca nemli bir bez
kullan›n›z.
• Cihaz›n›zla asla kemik, kuruyemifl veya
benzeri sert cisimleri k›ymaya çal›flmay›n›z.
• Cihaz›n›z›n kesici k›sm›na asla ellerinizle
dokunmaya çal›flmay›n›z. Yiyecekleri k›ymak
için her zaman itme sap›n› kullan›n›z.
• Cihaz›n›z›n kullan›m› bittikten sonra derhal
fiflini prizden çekiniz.
• Cihaz›n›z› asla devaml› olarak 3 dakikadan
fazla çal›flt›rmay›n›z.
• Cihaz yaln›zca yemek haz›rlama amaçl›
olup, gözetim alt›nda tutulmal›d›r. Yaln›zca
ev içi kullan›m için tasarlanm›flt›r.
• Cihaz›n›z› düz, temiz ve kuru bir yüzey
üzerinde kullan›n›z.
• Cihaz çal›fl›rken üzerine saç, eflarp, kravat
v.b. sarkmamas›na özen gösteriniz.
• Müflteri taraf›ndan yap›lan ola¤an temizlik
ve bak›m d›fl›ndaki her türlü müdahale,
yetkili bir Fakir servisi taraf›ndan yap›lmal›d›r.
• Cihaz›n›z›n fifli veya kablosunu su veya
herhangi bir s›v›ya sokmay›n›z.
• Elektrik kablosunun çocuklar›n eriflebilece¤i
yerlerden sarkmas›na izin vermeyiniz.
• Elektrik kablosu hiçbir zaman cihaz›n›z›n
s›cak k›s›mlar›n›n, bir ›s› kayna¤›n›n
yak›n›nda veya onlarla temasta olmamal›
ve keskin kenarlardan uzak tutulmal›d›r.

3
D‹KKAT: Kullanma k›lavuzunuzda yaz›l›
olan güvenlik kurallar›n› ve kullanma
talimatlar›n› dikkatlice okuyunuz.
Bu kullanma k›lavuzunu ilerideki kullan›mlar
için saklay›n›z.
Ürün Bilgileri:
Güç: max. 1000 Watt
Voltaj:220-240V-50Hz
Koruma S›n›f›: II
Kullanım Ömrü:7 yıl
Ürün Parçalar›n›n Tan›t›m›:
A. ‹tme sap›
B. Yiyecek koyma tepsisi
C. Kesici k›s›m
D. Açma /Kapama (On/Off) dü¤mesi
E. Geri alma dü¤mesi
F. Kilit dü¤mesi
G. Motor gövdesi
J. Orta ayar k›yma diski
K. Vida
L. Kesici bݍak
M. Kal›n ayar k›yma diski
N. Somun
O. Ay›r›c›
P. Sosis yapma aparat›
Q. ‹çli köfte yapma aparat›
R. Halka
Kullan›m:
Etin k›y›lmas›:
1. Viday› plastik bölümü kesici k›sma gelecek
flekilde kesici k›sma yerlefltiriniz. Kesici
b›ça¤› vidan›n üstüne yerlefltiriniz.( Kesici
b›çaklar ön k›sma yerlefltirilmelidir). Kendi
tercihinize göre seçmifl oldu¤unuz k›yma
disklerinden birini yerlefltiriniz. (K›yma
diskinin ortas›ndaki deli¤in vida ç›k›nt›s›na
oturmufl oldu¤undan emin olunuz). Somunu
kesici k›sma yerine tam olarak yerleflinceye
kadar çevirerek oturtunuz.
2. Kesici k›sm› flekilde gösterildi¤i gibi cihaza
yerlefltiriniz.
3. Yiyecek koyma tepsisini kesici k›sm›n üst
sa¤ k›sm›na yerlefltiriniz.
4. Cihaz›n›z art›k k›yma ifllemi için haz›r
konumdad›r.

Etten kemik, k›k›rdak ve piflmesi veya
yenmesi kolay olmayan k›s›mlar› ay›klay›n›z.
( Çi¤ biftek için, eti orta boy k›yma diski ile
2 kez k›y›n›z ve kesinlikle donuk et k›ymaya
çal›flmay›n›z.) Eti 10 cm uzunlu¤unda, 2 cm
kal›nl›¤›nda fleritler halinde kesiniz ve
yiyecek koyma tepsisine yerlefltiriniz. Açma
kapama dü¤mesine bas›n›z. ‹tme sap›
yard›m›yla eti kesici ünitenin içine sokunuz.
Hiçbir zaman parmaklar›n›zla veya baflka
bir gereçle itmeyiniz.
Cihaz›n›z›n t›kanmas› durumunda cihaz›
durdurup, yiyecekleri d›flar› atmak için birkaç
saniye geri alma dü¤mesine bas›n›z. Geri
kumandas›n› harekete geçirmeden önce
cihaz›n tamamen durmas›n› bekleyiniz.
K›yma ifllemine devam etmek için açma
kapama tufluna tekrar bas›n›z.
Sosis yap›lmas›:
1. Viday› plastik bölümü kesici k›sma gelecek
flekilde kesici k›sma yerlefltiriniz. Ay›r›c›y›
kesici k›sma yerlefltiriniz. Sosis yapma
aparat›n› ve somunu kesici k›sma
yerlefltiriniz. . (Ay›r›c› aparat›n ortas›ndaki
deli¤in vida ç›k›nt›s›na oturmufl oldu¤undan
emin olunuz). Somunu kesici k›sma yerine
tam olarak yerleflinceye kadar çevirerek
oturtunuz.
2. Kesici k›sm› flekilde gösterildi¤i gibi cihaza
yerlefltiriniz.
3. Yiyecek koyma tepsisini kesici k›sm›n üst
sa¤ k›sm›na yerlefltiriniz.
4. Cihaz›n›z art›k sosis yapmak için haz›r
konumdad›r.
Ba¤›rsa¤› esnekleflmesi için ›l›k suda
bekletin, daha sonra yaklafl›k 5 cm taflacak
flekilde sosis yapma aparat›n›n üzerine
geçiriniz.
Kesici ünitenin içini daha önceden haz›rlam›fl
oldu¤unuz k›yma ile doldurun, çal›flt›r›n ve
k›ymay› tam sosis aparat›n›n ucuna kadar
getirecek flekilde bast›rma çubu¤u ile
4

5
bast›r›n›z. Cihaz› durdurunuz. Taflan 5 cm
ba¤›rsak ile bir dü¤üm yap›n›z. Ba¤›rsak
içinde hava kalmas›na engel olmak için,
dü¤ümü sosis aparat›n›n ucu üzerine itiniz.
Tekrar çal›flt›r›n›z ve k›yma koymaya devam
ediniz. Ba¤›rsak dolar. Ba¤›rsa¤›n afl›r›
gerilmesinden kaç›nmak için çok büyük
sosisler yapmay›n›z. Bütün k›yma geçti¤inde
cihaz› durdurunuz, sosis aparat› üzerinde
kalan ba¤›rsa¤› ç›kar›n ve dü¤üm yap›n›z.
‹çli köfte yap›lmas›:
1. Viday› plastik bölümü kesici k›sma gelecek
flekilde kesici k›sma yerlefltiriniz. ‹çli köfte
yapma aparat›n› ve halkay› kesici k›sma
yerlefltiriniz. (Ay›r›c› içli köfte aparat›n›n
ortas›ndaki deli¤in vida ç›k›nt›s›na oturmufl
oldu¤undan emin olunuz). Somunu kesici
k›sma yerine tam olarak yerleflinceye kadar
çevirerek oturtunuz.
2. Kesici k›sm› flekilde gösterildi¤i gibi cihaza
yerlefltiriniz.
3. Yiyecek koyma tepsisini kesici k›sm›n üst
sa¤ k›sm›na yerlefltiriniz.
4. Cihaz›n›z art›k içli köfte yapmak için haz›r
konumdad›r.
‹çli Köfte Tarifi:
D›fl›n›n kaplanmas›:
• 500gram kuzu eti, fleritler halinde kesilecek.
• 500gram y›kanm›fl ve ay›klanm›fl bulgur
• 1 küçük so¤an
Kuzu eti ve bulguru orta k›yma diski ile
k›y›n›z, k›yma ifllemi bitmeden önce so¤an›
ekleyiniz, k›yma ifllemine kuzu eti ve bulgurla
devam ediniz. K›y›lm›fl eti, bulguru, so¤an›
beraber kar›flt›r›p ard›ndan tekrar et k›yma
makinesinde k›y›n›z. E¤er fazladan
malzemelerinizi k›ymak isterseniz, orta
k›yma diski ile üçüncü kez malzemelerinizi
k›yabilirsiniz. Kar›fl›m›n›z içli köfte
aparat›ndan çekilmesi için haz›r konumdad›r.
Doldurulmas›:
• 400 gram kuzu eti, fleritler halinde kesilecek,
• 15ml/ 1 çorba kafl›¤› ya¤,
• 2 adet orta boy do¤ranm›fl so¤an,
• 5–10 ml /1-2 çay kafl›¤› yenibahar,
• 15ml/ 1 çorba kafl›¤› un
• Tuz ve karabiber
‹çli köftenin doldurulmas› için; ilk olarak kuzu
etini ince k›yma diski ile k›y›n›z, do¤ranm›fl
so¤an› karar›ncaya kadar ya¤da k›zart›n›z,
k›y›lm›fl olan kuzu etini k›zart›lm›fl olan
so¤ana ekleyip, kahverengi bir renk al›ncaya
kadar k›zart›n›z. Geri kalan malzemeleri
ekleyip, 1–2 dakika daha pifliriniz.
‹çli köfte yapma aparat›n› cihaza tak›n›z.
D›fl malzemeyi kesici ünitenin içine koyunuz.
Ç›kan malzemeyi yaklafl›k 7–7,5 cm
uzunlu¤unda kesiniz, sonra dikkatlice daha
önceden haz›rlam›fl oldu¤unuz iç malzemeyi

d›fl malzeme yüzeyinde küçük bir boflluk
b›rakarak doldurunuz. ‹çini doldurmufl
oldu¤unuz dıfl malzemenin her iki ucunuda
kapatınız. Bu ifllemden sonra 190°C de
k›zartm›fl oldu¤unuz ya¤›n içinde
karar›ncaya kadar k›zart›n›z.
Saklama:
• Cihaz›n›z›n kablosunu afla¤›ya do¤ru
dolay›n›z ve flekilde belirtilen yere
yerlefltiriniz.
• Cihaz›n›z t›kan›r ise, lütfen geri alma tufluna
(REV) bas›n›z. Etin kesici k›s›m içinde
s›k›flmas› ve kesici bölümü t›kamas›
normaldir, cihaz al›fl›lm›fl durumuna tekrar
geri dönecektir.
• Ay›r›c›, sosis yapma aparat›, içli köfte yapma
aparat›, külah itme sap› içinde flekilde
gösterildi¤i gibi itme sap›n›n içinde
saklanabilmektedir.
Temizleme:
Kesici k›sm›n içinde kalan eti, bir dilim
ekmekle temizleyebilirsiniz.
• Cihaz›n›z› temizlemeden önce, cihaz›n›z›
kapal› konuma getirip, fiflini prizden çekiniz.
• Kilit tufluna bas›n›z ve bütün kesici k›sm›
döndürünüz. ‹tme sap› ve yiyecek koyma
tepsisini ç›kart›n›z.
• Vida halkas›n› çevirerek aç›n›z ve kesici
k›s›mdaki bütün k›s›mlar› sökünüz. Aparatlar›
kesinlikle bulafl›k makinesinde y›kamay›n›z.
• Cihaz›n etle temas eden bütün aparatlar›n›
s›cak köpüklü suda y›kay›n›z. Aparatlar›
kulland›ktan sonra derhal temizleyiniz.
• Aparatlar› temiz s›cak suda bekletip,
ard›ndan durulayabilirsiniz.
• Kesici k›sm› ve k›yma disklerini ayçiçe¤i
veya m›s›r özü ya¤› ile ya¤laman›z tavsiye
dilmektedir.
• B›çaklar çok keskin oldu¤u için lütfen cihaz›
kullan›rken dikkatli olunuz.
SEVK
Cihaz›n, orijinal ambalaj›nda veya zarar
görmesini önlemek için, iyi ve yumuflak
pakette tafl›nmas› gerekmektedir.
CE UYGUNLUK DEKLERASYONU
Bu cihaz Avrupa Birli¤inin 2004/108/EC
Elektromanyetik Uyumluluk ve 2006/95/EC
Gerilim Direktifleri’ne tamamen uygundur.
Bu ürün cihaz tip etiketinde CE iflaretine
sahiptir.
6

7
Introduction
Thank you for purchasing Fakir Minso Meat
Grinder which has been designed and
manufactured to give you many years of
trouble-free service.
You may already be familiar with using a
similar product, but do please take time to
read these instructions - they have been
written to ensure you get the very best from
your purchase.
Safety is important
For yours and others safety please read the
instructions before using the appliance.
Please keep this instruction in a safe place
for the further use. If you pass the appliance
on, pass on the instructions too. Remove
all packaging, but keep it until you are
satisfied that the appliance is working.
Important Safeguards
When use electrical appliances, basic safety
precautions should always be followed,
including the following
• Read these instructions for use carefully
and look at the illustrations before using the
appliance.
• Keep these instructions for use for future
reference.
• Check if the voltage indicated on the
appliance corresponds to the local mains
voltage before you connect the appliance.
• Never use any accessories of parts that are
not suggested by Fakir. Your guarantee will
become invalid if different accessories or
parts have been used.
• Do not use the appliance if the mains cord,
the plug or other parts are damaged.
• If the mains cord, plug or part of this
appliance is damaged, it must always be
replaced by an authorized Fakir service, in
order to avoid hazardous situations
• Thoroughly clean the parts that will come
into contact with food before you use the
appliance for the first time.
• Unplug the appliance immediately after use.
• Never use you finger or an object to push
ingredients down the feed tube while the
appliance is running. Only the pusher is to
be used for this purpose.
• Keep the appliance out of the reach of
children or inform people. Do not let them
use the appliances without supervision.
• Never let the appliance run unattended.
• Switch the appliance off before detaching
and install any accessory or cleaning the
appliance.
• Wait until moving parts have stopped running
before you remove the parts of the
appliance.
• Never immerse the motor unit in water or
any other liquid, nor rinse it under the tap.
Use only a moist cloth to clean the motor
unit.
• Do not attempt to grind bones, nuts or other
hard items.
• Never reach into the cutter housing. Always
use the pusher.
• Unplug the appliance immediately after use.
• Never operation the appliance continuously
for more than 3 minutes.
• Your appliance is intended only for indoor,
domestic use, for culinary purposes. Do not
leave it running unsupervised.
• Use your appliance on a level, clean and
dry surface.
• Do not allow long hair, scarves, ties, etc. to
dangle over accessories during operation.
• Any work on the appliance other than normal
care and cleaning by the customer must be
carried out by an authorized Fakir Service.
• Do not place the appliance, the supply cable
or plug in water or in any other liquid.
• Do not allow the supply cable to hang down
within reach of children.
• The supply cable must never be close to or
in contact with the hot parts of your appliance
or any other source of heat and should be
kept away from sharp edges.
NOTE: Please read all instructions and
safety guards carefully.
Please keep this instruction manual for
further usage.

8
Specifications:
Power consumption: max.1000 Watt
Voltage: 220-240V- 50Hz
Protection class: II
Usage life:7 years
Parts of description:
A. Pusher
B. Tray
C. Cutter housing
D. Switch button
E. Reversal button
F. Release button
G. Motor unit
J. Medium grinding disc
K. Worm shaft
L. Cutter blade
M. Coarse grinding disc
N. Screw ring
O. Separator
P. Sausage horn
Q. Former
R. Cone
Usage:
Mincing the meat:
1. Insert the worm shaft into the cutter housing,
the plastic end first. Place the cutter unit
onto the worm shaft. (The cutting edges
should be at the front)
Place the medium grinding disc or coarse
grinding disc (depending on the consistency
you prefer) onto the worm shaft. (Make sure
the notch of the grinding disc fit onto the
projections of the mincer head.) Turn the
screw ring in the direction of the arrow on
the cutter housing until it is properly fastened.
2. Attach the cutter housing to the motor unit.
3. Place the tray on the upright part of the
cutter housing.

9
4. Now the appliance is ready for mincing.
Remove bones, pieces of gristle and sinews
as much as possible. (Never use frozen
meat, for steak tartare, mince the meat with
the medium grinding disc twice.). Cut the
meat into 10cm-long, 2cm-thick strips. Press
switch on button. Push the meat, piece by
piece, down the cutter housing, using
pusher. Never push with the fingers or any
other implement.
If your appliance is stucked, stop the mincer
by pressing the switch button off position,
then press the reverse button for a few
seconds to release the jam. Wait until the
appliance has stopped completely before
pressing “On” or “reverse” button. Press the
switch button on to continue mincing.
Making sausages:
1. Insert the worm shaft into the cutter housing,
the plastic end first. Place the separator in
the cutter housing. Place the sausage horn
on the cutter housing and screw the ring on
the cutter housing. (Make sure the notches
of the separator fit onto the projections of
the mincer head.). Turn the screw ring in
the direction of the arrow on the cutter
housing until it is properly fastened.
2. Attach the cutter housing to the motor unit.
3. Place the tray on the upright part of the
cutter housing.
4. Now the appliance is ready for making
sausages.
After soaking the sausage skin in tepid water
to make it supple, thread it onto the sausage
horn leaving about 5 cm hanging over the
end.
Fill the cutter housing with your prepared
sausage meat; start the appliance and press
down with the pusher until the meat shows

10
at the end of the sausage horn. Stop the
appliance. Make a knot in the overhanging
end of the sausage skin. Push the knot up
against the end of the sausage horn to avoid
any air being trapped in the sausage skin.
Start the appliance again and keep up the
supply of sausage meat. The sausage skin
will fit with meat. To avoid overstretching
the sausage skin, do not make your
sausages too fat. When all the sausage
meat has been used, stop the appliance,
pull the remaining sausage skin off the
sausage horn and tie a knot.
Making Kebbe:
1. Insert the worm shaft into the cutter housing,
the plastic end first.
Place the cone in the cutter housing. Place
the former on the cutter housing and screw
the ring on the cutter housing. (Make sure
the notches of the separator fit onto the
projections of the mincer head.). Turn the
screw ring in the direction of the arrow on
the cutter housing until it is properly fastened.
2. Attach the cutter housing to the motor unit.
3. Place the tray on the upright part of the
cutter housing.
4. Now the appliance is ready for making
kebbe.
Guide of Stuffed Kebbe:
Outer Casing:
500g lamb, cut into strips
500g washed and drained bulgur wheat
1 small onion
Pass alternate batches of lamb and bulgur
wheat through the mincer fitted with the fine
screen, adding the onion before all the lamb
and wheat are minced. Mix the minced lamb,
onion and wheat together then pass back
through the mincer a second time. If an
extra fine screen and mince the mixture for
a third time, alternatively continue mincing
using the fine screen. The mixture is now
ready to extrude through the kebbe maker
attachment.
Filling:
400 g lamb, cut into strips
15 ml/1 tbsp oil

11
2 medium onions, finely chopped
5-10 ml/ 1-2 tsp allspice
15 ml/1 tbsp plain flour
Salt and pepper
To make the filling, mince the lamb using
the fine screen, fry the onion in the oil until
golden brown, add the lamb and allow to
brown and cook through. Add the remaining
ingredients and cook for 1-2 minutes.
Extrude the casing mixture through the
kebbe maker and cut into approximately 7-
7, 5 cm lengths. Pinch one end of the tube
together, end which can be pinched together,
and then carefully fill with the stuffing mixture
leaving a small gap at the open end which
can be pinched together to seal. Deep fry
the kebbe in batches in hot oil 190°C for
approximately 6 minutes of until golden
brown and the filling piping hot.
Storage:
• Lash down the power cord, and then foist
it into the place with arrow diagramming.
• If the appliance is locked, please press
Reversal button (REV). The meat locked in
cutter housing is untrodden, so the appliance
can renew its usual condition.
• The parts of separator, sausage horn,
former, and cone can be stowed in the
pusher.
Cleaning:
Meat left behind in the cutter housing may
be removed from the inside of the appliance
by passing a slice of bread through the
cutter housing.
1. Before you clean the appliance, switch the
appliance off and remove the plug from the
socket.
2. Press the release button and turn the whole
cutter housing in the direction of the arrow.
Remove the pusher and the tray.
3. Unscrew the screw ring and remove all parts
of the cutter housing. Do not clean the parts
in the dishwasher!
4. Wash all parts that have come into contact
with meat in hot soapy water. CLEAN THEM
IMMEDIATELY AFTER USE.
5. Rinse them with clear hot water and dry
them IMMEDIATELY.
6. We advise you to lubricate the cutter unit
and the grinding discs with some vegetable
oil.
7. The blades are very sharp, please attention.
DISPATCH
Carry the appliance in the original package
or a similar, well-padded package to prevent
damage to the appliance.
CE DECLARATION OF CONFORMITY
This appliance fulfills the requirements of
the Appliance and Product Safety Law
(GPSG) and the EU Directives. The
appliance bears the CE mark on the rating
plate.

‹malatç› / ‹thalatç› Firma: Fakir Elektrikli Ev Aletleri D›fl Tic. A.fi.
Meflrutiyet Cad. No:43 Tepebafl›-‹stanbul TÜRK‹YE
Tel:(212) 249 70 69 (pbx) Fax:(212) 251 51 42
Table of contents
Languages:
Other Fakir Meat Grinder manuals