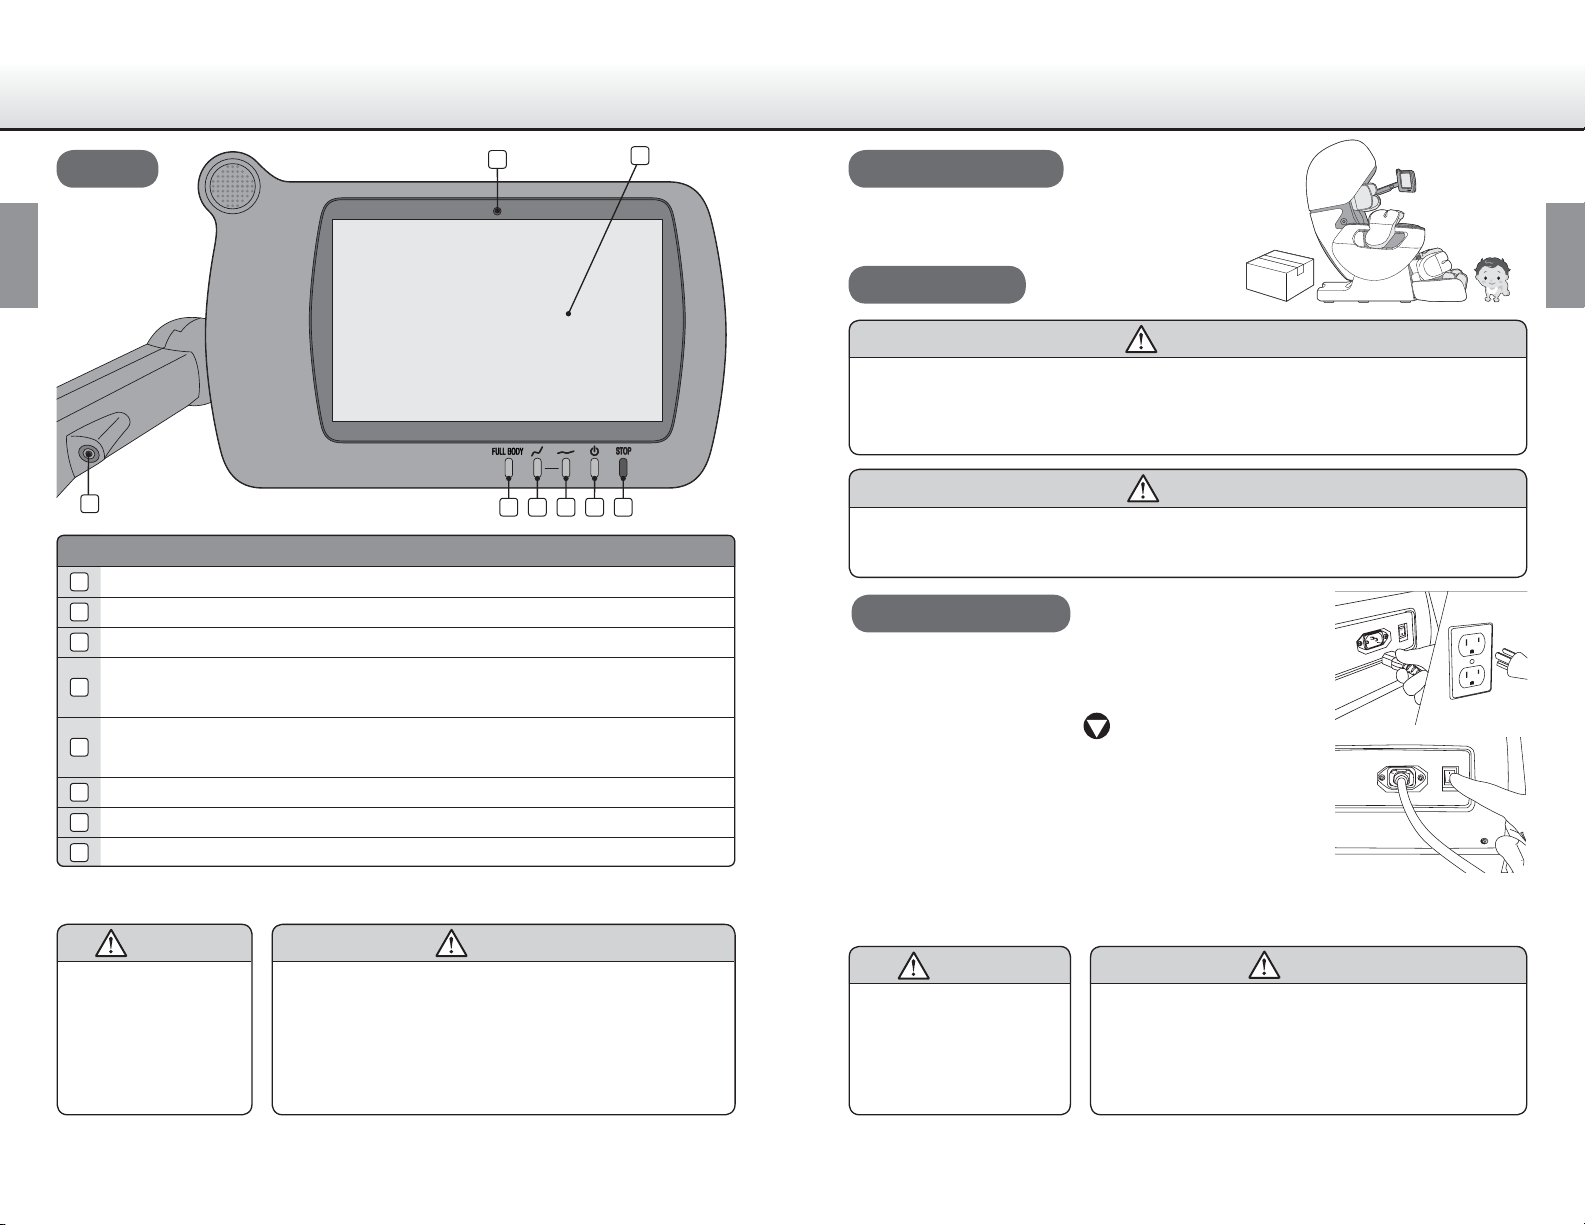
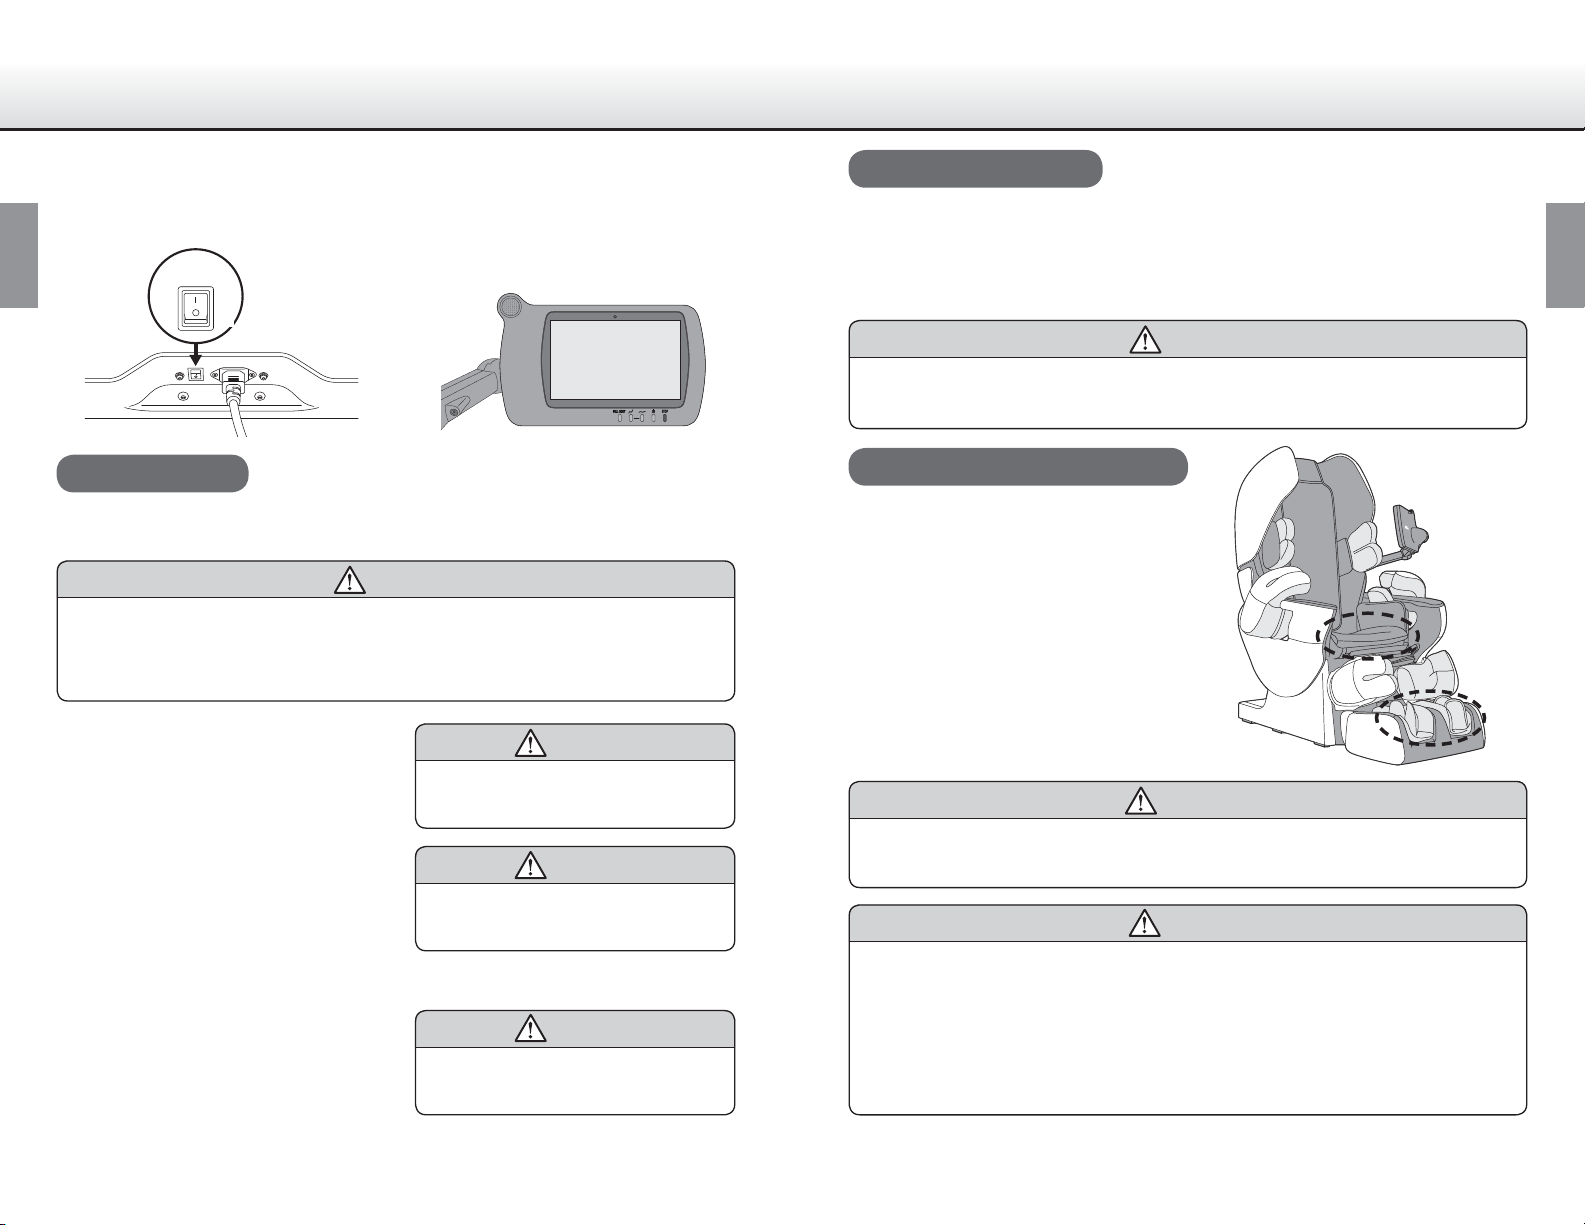
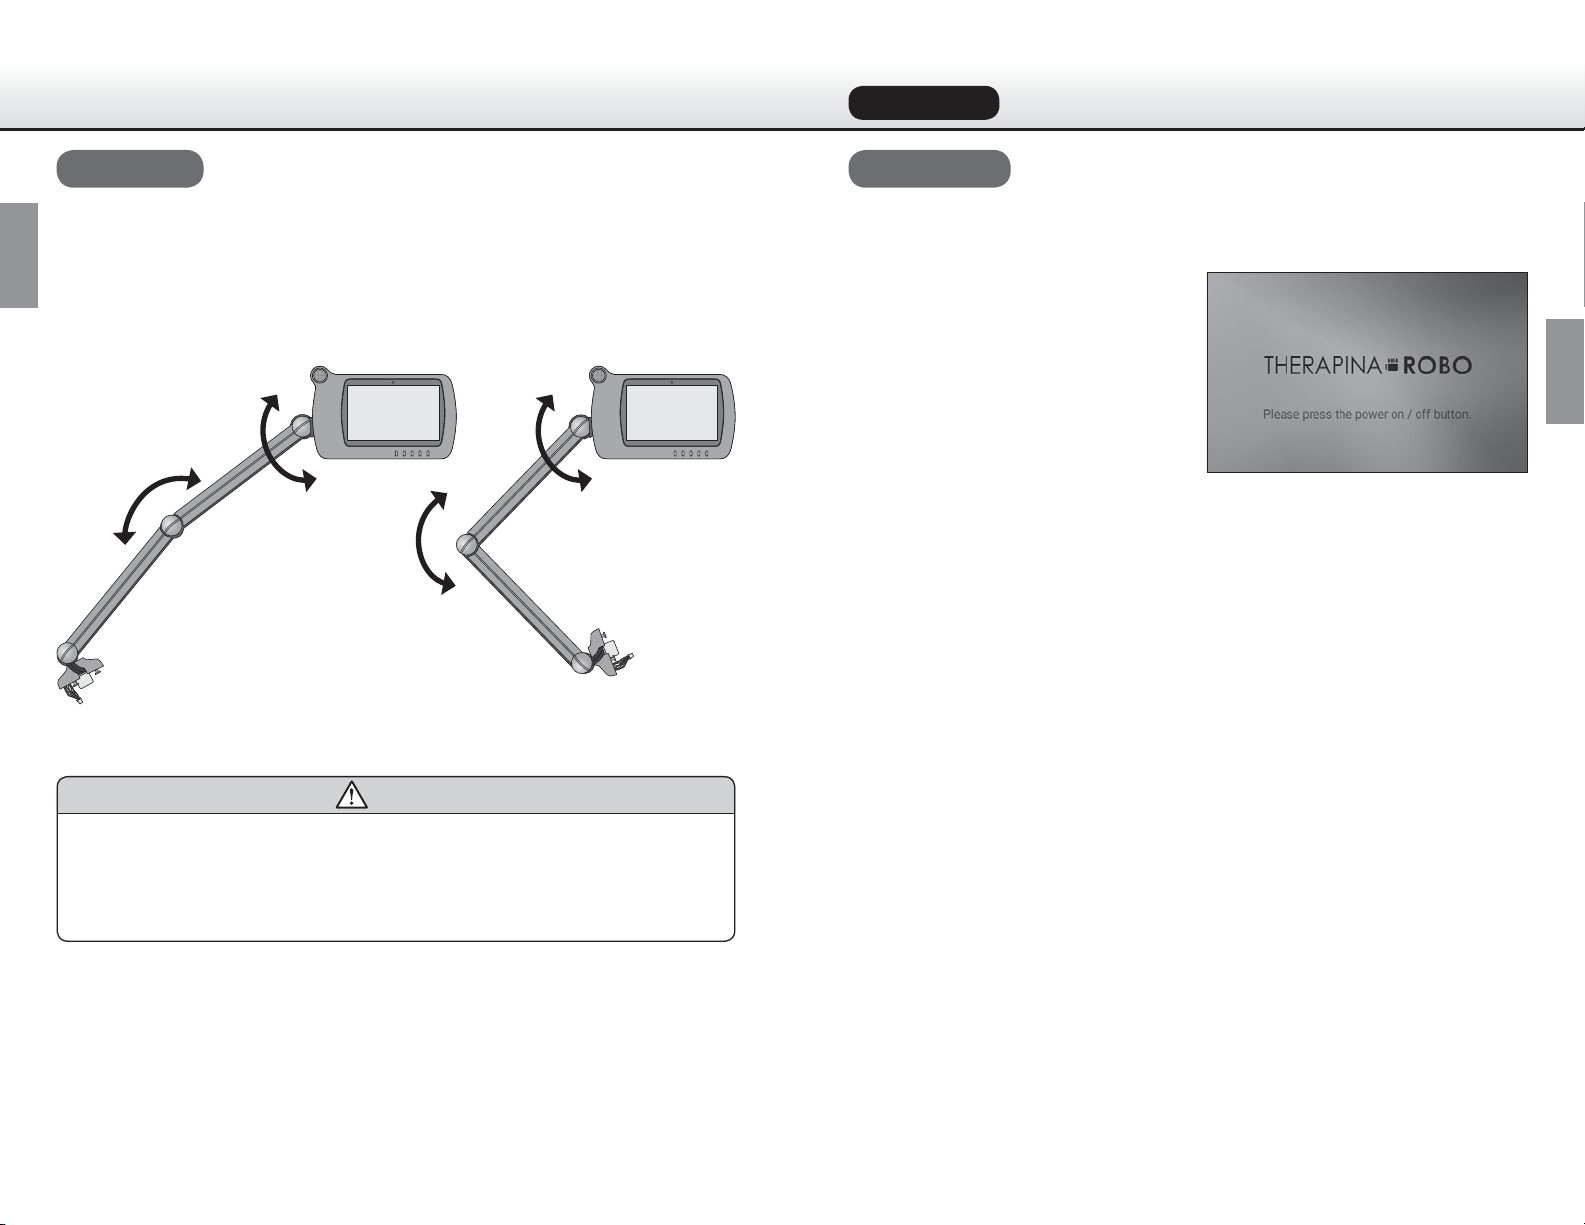
Turn “ON” the main power switch on
the main unit.
"
;OLTHPUWV^LYZ^P[JOPZSVJH[LKVU[OL
IHJRZPKLVM[OLTHPU\UP[
The tablet screen is displayed.
#
(M[LY [OL LSHWZL VM H JLY[HPU WLYPVK VM
[PTL^P[OUVVWLYH[PVUILPUNWLYMVYTLK
[OLZJYLLU[\YUZISHJR 7YLZZ[OL¸65
6--¹I\[[VUVY[V\JO[OLZJYLLU[VYL-
[\YU[VHIYPNO[Z[H[L
Check the main unit
Make sure to check that the fabric of the main unit is not torn.
!
•Before use, make sure to check that the fabric of the main unit is not torn. Also, make sure to check that the
fabric of other parts is not torn.
•However small a break, immediately stop using the product, disconnect the power plug, and contact your local
distributor.
5L]LYYLTV]L[OLMHIYPJVM[OLTHPU\UP[VY\ZLP[PUH[VYUZ[H[LHZP[PZ]LY`KHUNLYV\Z
Make sure that no foreign objects are
caught in the main unit.
"
•Make sure to check that no foreign objects are
caught in the main unit before use.
4H`JH\ZLHUHJJPKLU[VYPUQ\Y`
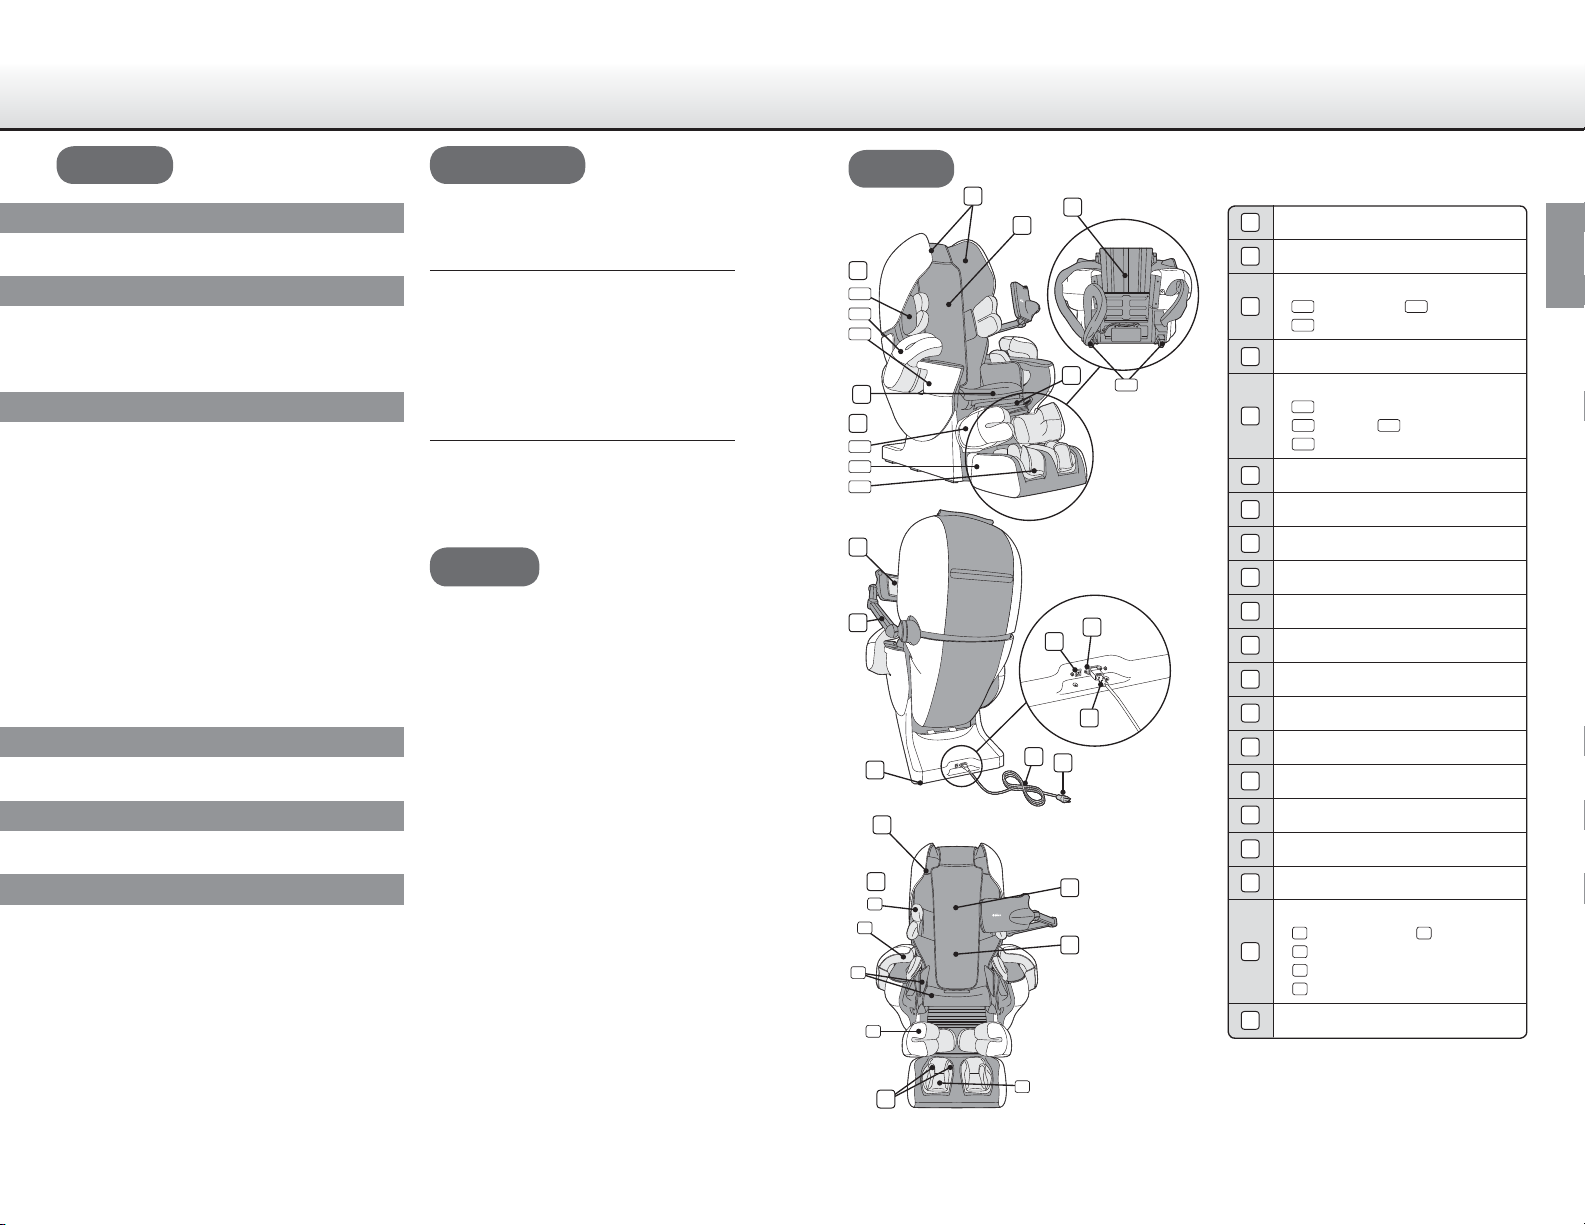
4LJOHUPZTZ[V^LKWVZP[PVUZ
)HJRTLJOHUPZT¯;VWVM[OLIHJRYLZ[
(YTTLJOHUPZT¯6WLUZ[H[LPUMYVU[VM
[OLHYTYLZ[Z
*HSMTLJOHUPZT¯6WLUZ[H[L
:VSLTLJOHUPZT¯6WLUZ[H[L
Make sure to check that each mecha-
nism is in its stowed position.
#
•Make sure that each mechanism is in the stowed
position before sitting down.
4H`JH\ZLHUHJJPKLU[VYPUQ\Y`
•When the footrest is not fully lowered, do not sit
down, stand, or place an object on the footrest.
4H`JH\ZLHUHJJPKLU[VYPUQ\Y`
Make sure to check that the backrest
is fully raised and the footrest is fully
lowered.
$
•Do not sit in the chair while the footrest is raised.
(UPTWHJ[TH`ILHWWSPLK[V[OLMVV[YLZ[JH\ZPUNHTHSM\UJ[PVU(SZVHUHJJPKLU[VYPUQ\Y`TH`YLZ\S[PU[OLJHZLVM[OLTHPU\UP[V]LY[\YUPUN
•Before use, fully raise the backrest.
Precautions for getting in/out of the chair
•Do not subject the tablet stand or armrests to strong impacts or lean against it.
6]LY[\YUPUNTH`JH\ZLHUHJJPKLU[PUQ\Y`VYHTHSM\UJ[PVU
•
If the arm mechanism and/or footrest is in operation, wait for the operation to stop, and then get in/out of the chair.
•Do not sit down on the footrest while it is raised.
•Never get in/out while each mechanism is moving
because it is very dangerous.
4H`YLZ\S[PUPUQ\Y`VYHTHSM\UJ[PVU
•We recommend use of this product for persons
weighing 100kg (220 lbs.) or less.
>OLUHWLYZVU^LPNOPUNRNSIZZP[ZPU[OL
JOHPYHSVHKVMHWWYV_PTH[LS` RNSIZPZHW-
WSPLK[V[OLMSVVYWLYJT2PU2
•Before use, make sure to check that the fabric is not
torn.
•The withstand load of the armrests is approximately
30kg (66 lbs.).
•The tensile load of the armrests is approximately
30kg (66 lbs.).
•The withstand load of the footrest is approximately
30kg (66 lbs.).
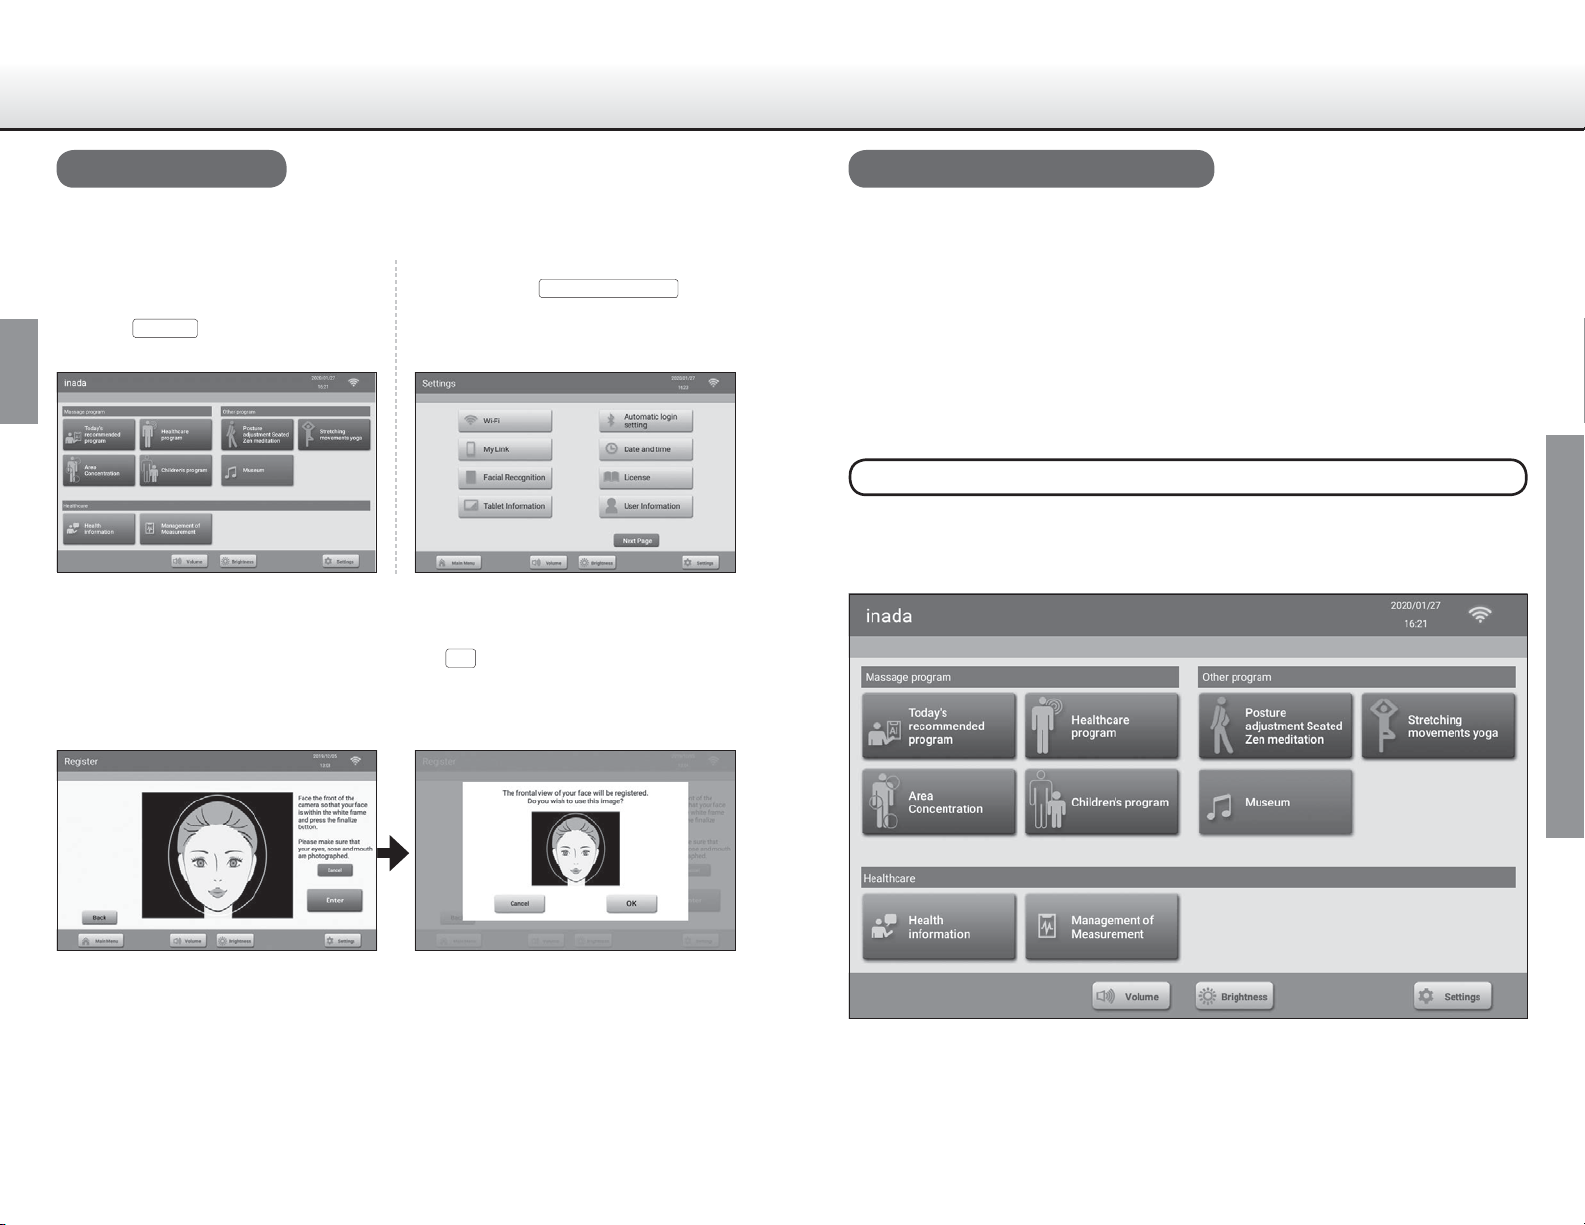
How to sit down on the chair
5VYTHSS`LHJOTLJOHUPZTPZPUHZ[V^LKZ[H[L
)HJRTLJOHUPZT¯;VWVM[OLIHJRYLZ["(YTTLJOHUPZT¯6WLUZ[H[LPUMYVU[VM[OLHYTYLZ[Z"*HSM
TLJOHUPZT¯6WLUZ[H[L":VSLTLJOHUPZT¯6WLUZ[H[L
-VYZHML[`JOLJRLHJOTLJOHUPZTWVZP[PVUILMVYLZP[[PUNKV^UHUKPMP[PZUV[PUHZ[V^LKZ[H[LKVUV[
ZP[KV^UPTTLKPH[LS`I\[[\YUVU[OLTHPUWV^LYZ^P[JO[VYL[\YULHJOTLJOHUPZT[V[OLZ[V^LKZ[H[L
HUK[OLUZSV^S`ZP[KV^UPU[OLJLU[LYVM[OLJOHPY
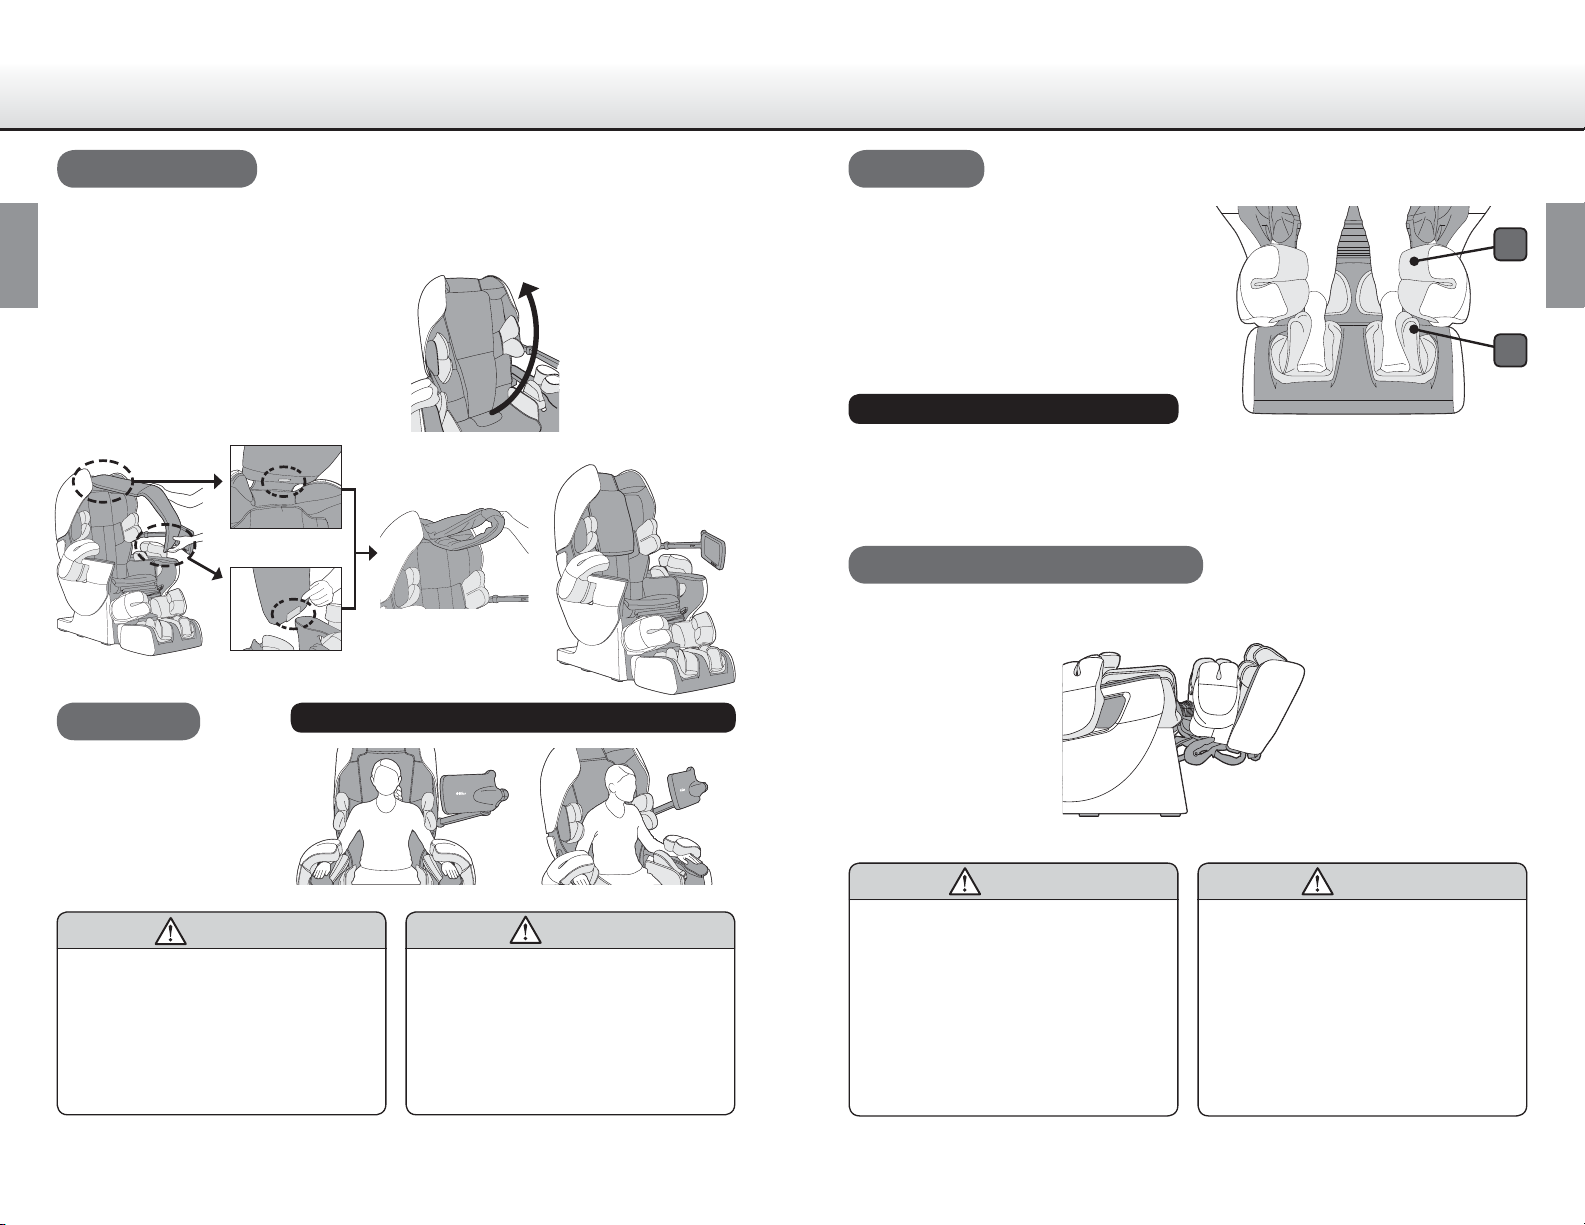
Make sure to check that the footrest
is fully lowered, and then put your feet
into the sole unit.
Sit down in the center of the seat and
sit back slowly.
Get in/out of the chair by placing your
hands on the seat.
!
"
#
Main power switch
ON
OFF
>HYUPUN
>HYUPUN
*H\[PVU
*H\[PVU
*H\[PVU
*H\[PVU
*H\[PVU
Before Use
Before Use
*VU[PU\LK)LMVYL:[HY[PUN4HZZHNL
6 7