Nasal cannula
Auto-fill chamber
2.1 Buttons
Please refer to Section 3, “Using myAirvo 2”, of your myAirvo 2 User Manual for information on how to
operate your myAirvo 2.
Please refer to Section 3, “Using myAirvo 2”, and Section 4, “Cleaning and maintenance”, of your
myAirvo 2 User Manual for information on how to clean myAirvo 2.
On/O button
The On/O button turns
myAirvo 2 on when held for
5 seconds. After use, press
for 3 seconds to begin Drying
Mode. Your device will turn
o automatically after 99
minutes.
Audio Pause button
The Audio Pause button allows
you to temporarily silence audio
alarms.
Mode button
The Mode button allows you
to cycle between modes:
• Temperature
• Flow Rate
• Day/Night
• Compliance
Up and Down buttons
The Up and Down buttons allow
you to change settings within
the following modes:
• Temperature
• Flow Rate
• Day/Night
After use, remove your interface. To begin the 99-minute
Drying Mode, press and hold the On/O button for 3
seconds. To avoid burns, do not wear the interface during
Drying Mode and do not remove the water chamber until
Drying Mode is complete.
Remove water chamber. Carefully put the MR290
chamber aside.
Switch o the unit and unplug from
the mains/utility power socket.
Remove the breathing tube and drain
any excess condensate.
Remove the interface from the
breathing tube, wash it in warm
water with mild dishwashing
detergent added, rinse it in drinking-
quality water, then reconnect it to the
breathing tube.
Rinse the interface in drinking-quality water then
reconnect to the breathing tube whilst still in Drying Mode
to dry the interface.
Thoroughly wipe the inside of the breathing tube
connection port with a clean, low-lint cloth dipped in
warm water with mild dishwashing detergent added. Wipe
the exterior of the unit with a clean damp (not wet) cloth
dipped in warm water with mild dishwashing detergent
added.
3.1 Daily cleaning
3.2 Weekly cleaning
1
4
1
2
5
2 3
Audio Pause button
2.3 Alarms
Please refer to Section 3, “Using myAirvo 2”, of your myAirvo 2 User Manual for information on alarms. Your
myAirvo 2 has alarms to warn you about interruptions to your treatment. You can use the Audio Pause
button to silence the alarm for 115 seconds.
2.2 Modes and settings in default mode
Please refer to Section 3, “Using myAirvo 2”, of your myAirvo 2 User Manual for information on how to
operate your myAirvo 2. Your myAirvo 2 will remember your settings when switched o.
Temperature Mode
Use the Up and Down
buttons to cycle
between temperatures of
31 °C, 34 °C and 37 °C.
Flow Rate Mode
Use the Up and Down buttons
to select your flow rate from
10-60 L/min. Please see your
myAirvo 2 User Manual for
information about flow ranges
for your interface.
Day/Night Mode
Use the Up and Down buttons
to cycle between Day Mode
and Night Mode. In Night
Mode some audio signals
will become quieter and your
display screen will dim.
Compliance Mode
Compliance Mode automatically
cycles between device usage
statistics:
• Total hours used
• Hours per day
• Checksum (for your clinician)
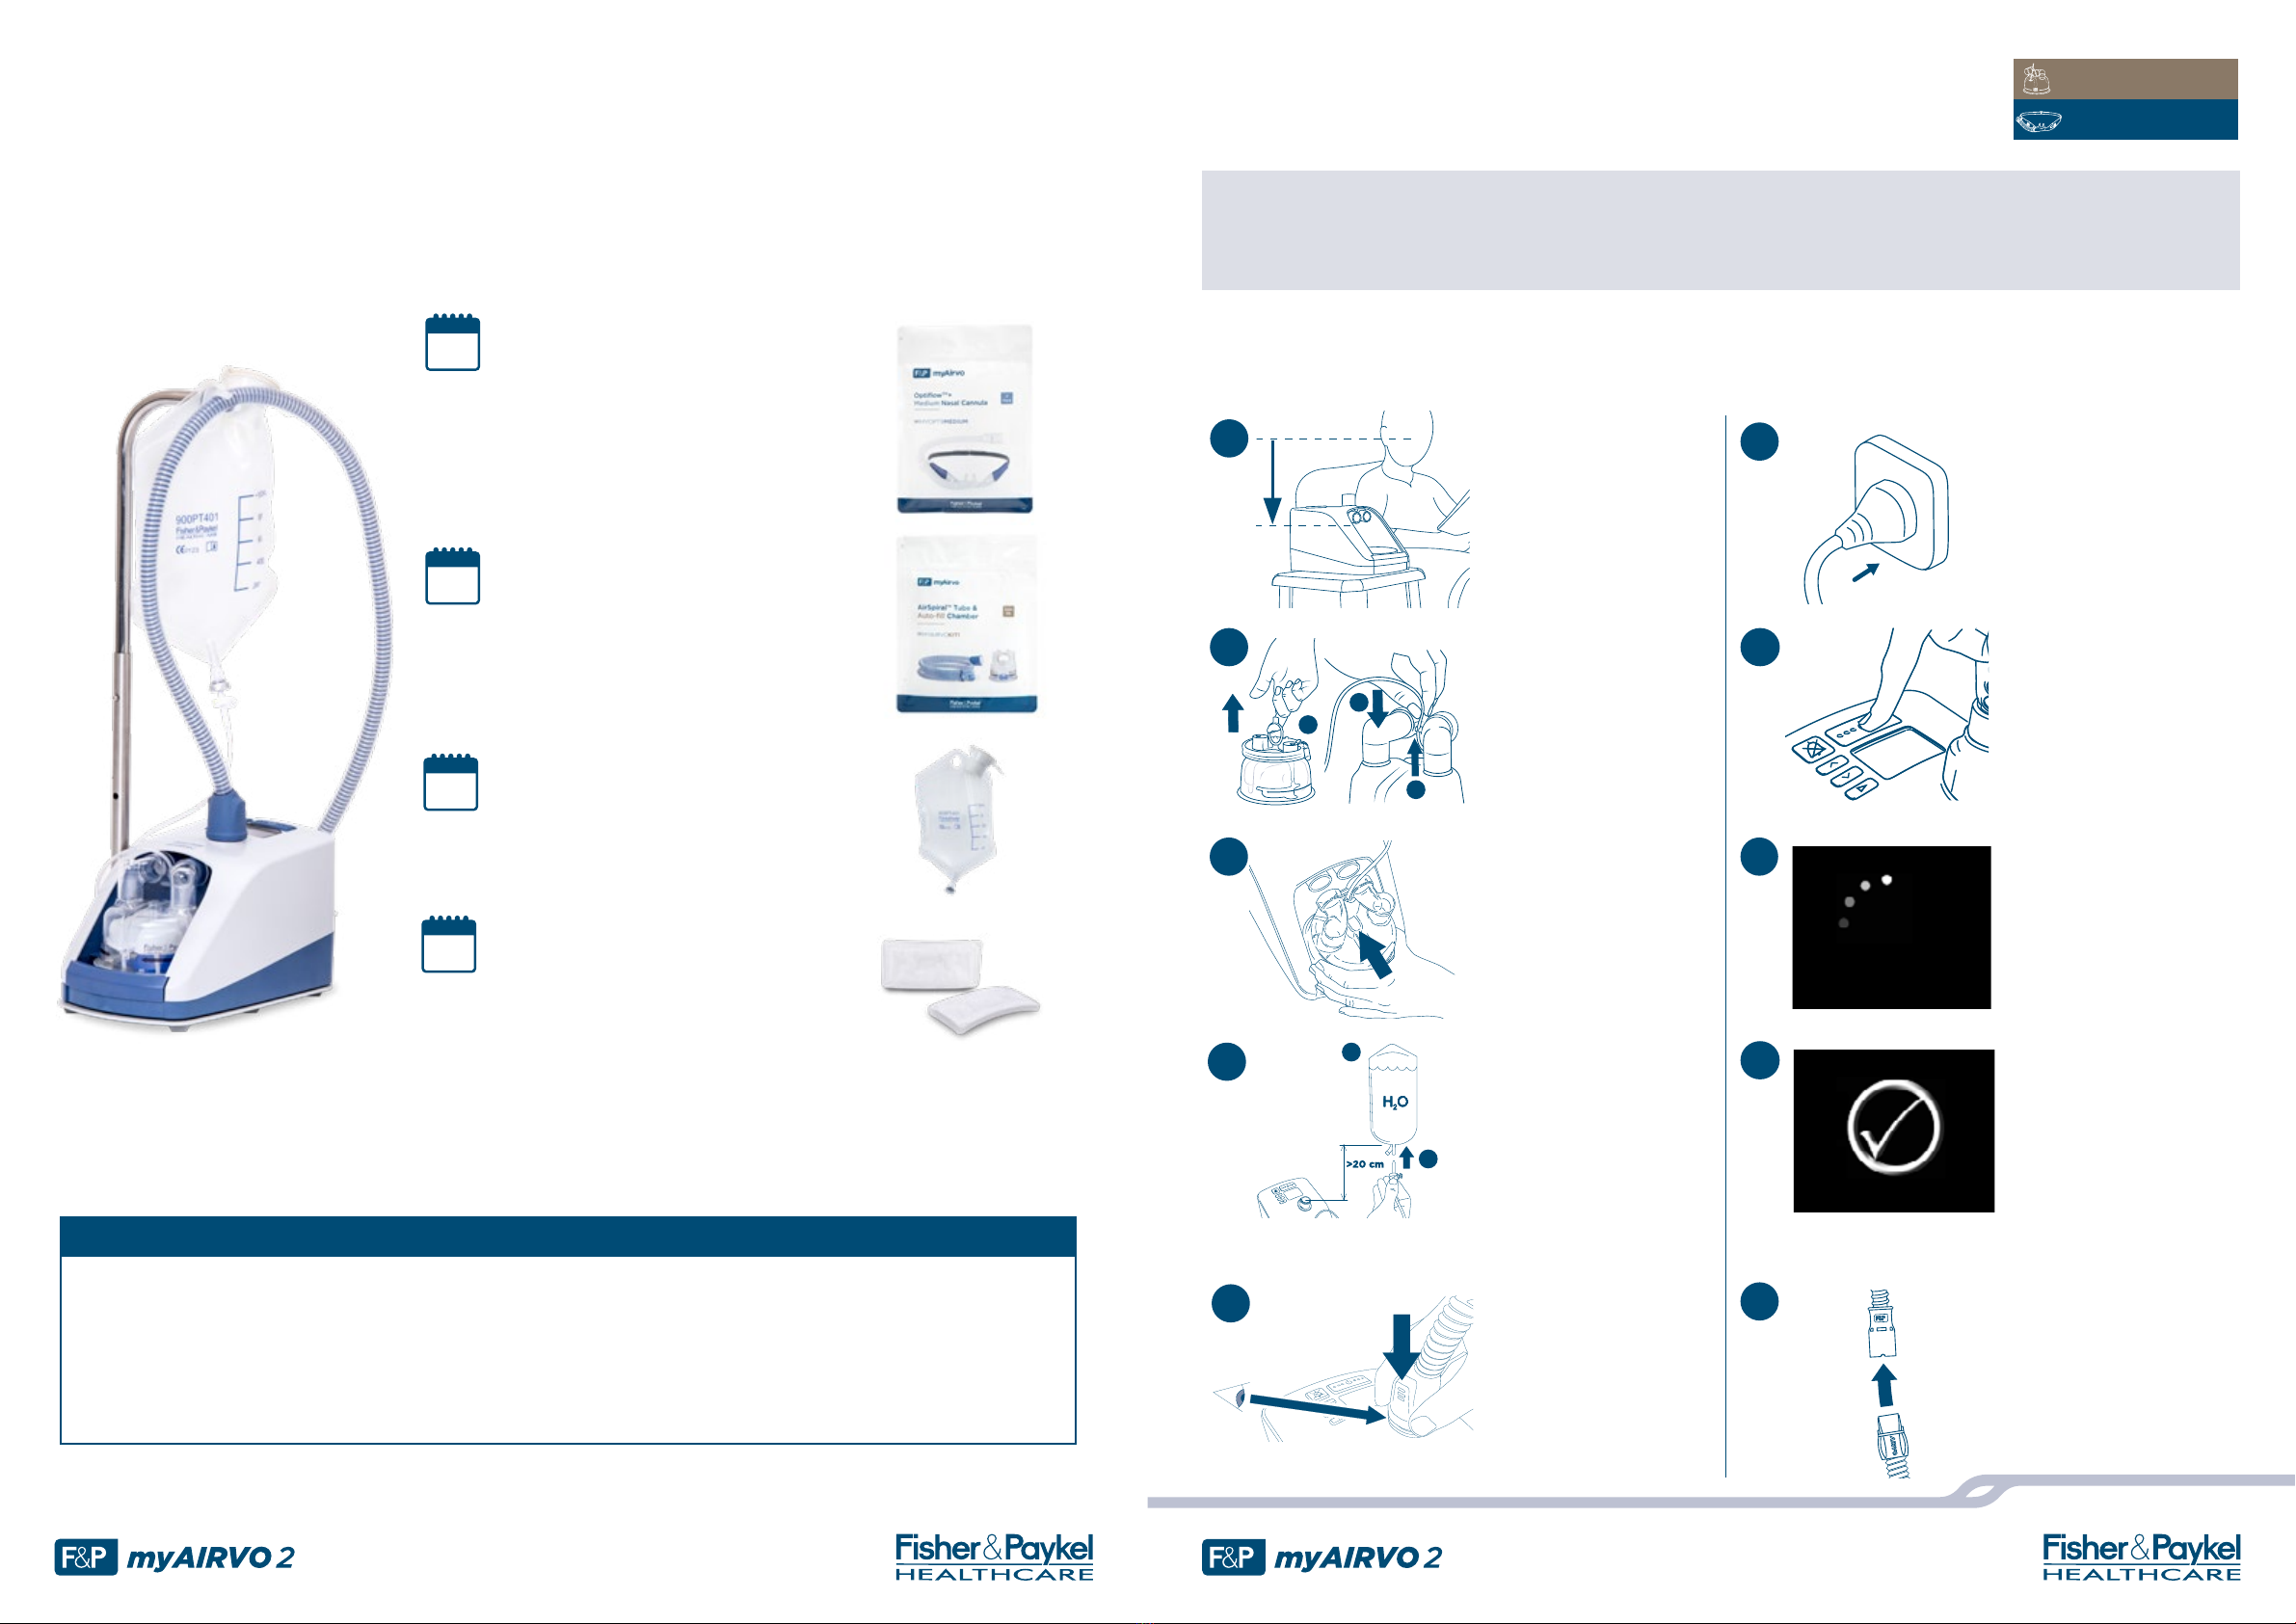
When cleaning is complete, set up your myAirvo 2 using the setup steps previously described.
2. How to use your device 3. How to clean your device