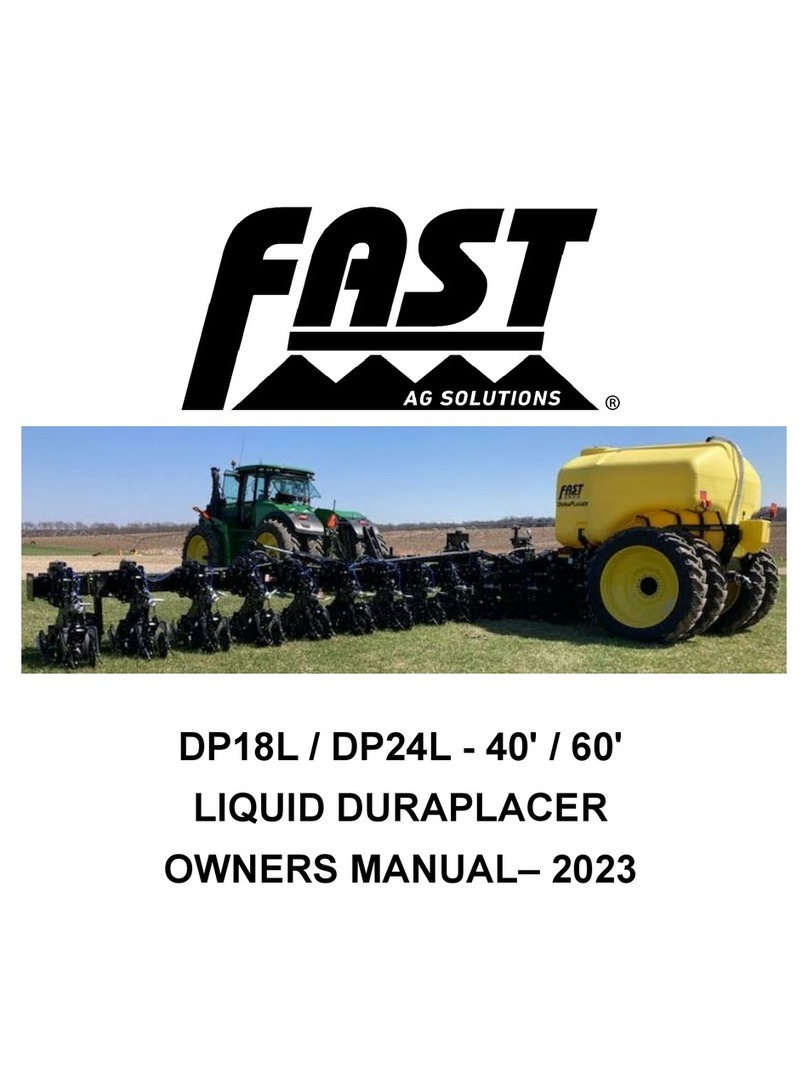
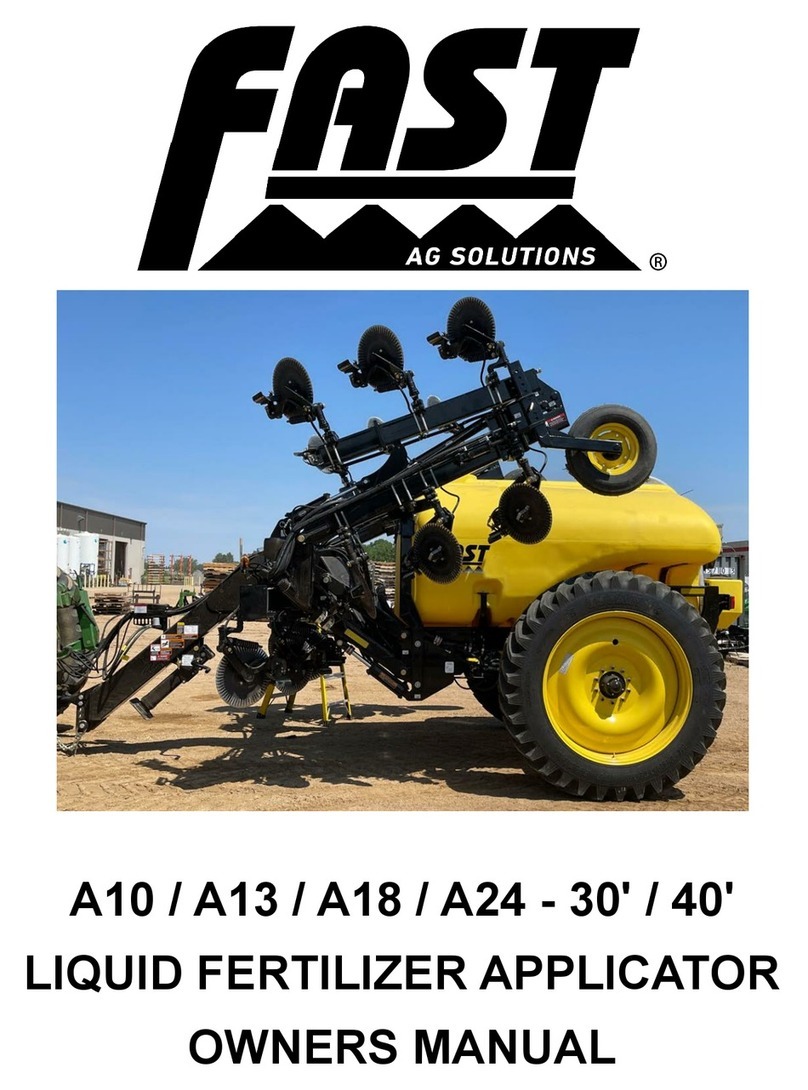
Fast 8200 User manual

8200 Liquid Fertilizer Applicator
OPERATION MANUAL
FAST GLOBAL SOLUTIONS
4130 Commerce Boulevard
Windom, MN 56101

2
General Information
All rights, especially copying and distribution rights are reserved. No part of this publication may be reproduced in
any form or by any means, electronic or mechanical, including photocopying, without express written permission from
FAST Ag Solutions.
Parts information in this manual represents components installed when product was manufactured based upon the best
available information. Modications made subsequent to initial delivery are not included. Always verify the parts and color
required with FAST Ag Solutions at 1-800-772-9279.
If you have any questions, please contact your dealer or our Parts and Service Department.

3
Limited Warranty
FAST Ag Solutions warrants to the buyer that the new machinery is free from defects in material and workmanship.
This warranty is only effective as to any new machinery which has not been altered, changed, repaired or treated since its
delivery to the buyer, other than by FAST Ag Solutions or its authorized dealers or employees, and does not apply to
accessories, attachments, tools or parts, sold or operated with the new machinery, if they have not been manufactured by
Fast Ag Solutions.
FAST Ag Solutions shall only be liable for defects in the materials or workmanship attributable to faulty material or bad
workmanship that can be proved by the buyer, and specically excludes liability for repairs arising as a result of normal
wear and tear of the new machinery or in any other manner whatsoever, and without limiting the generality of the
foregoing, excludes application or installation of parts not completed in accordance with FAST Ag Solutions operator’s
manual, specications, or printed instructions.
Written notice shall be given by registered mail, to FAST Ag Solutions within seven (7) days after the defect shall have
become apparent or the repairs shall have become necessary, addressed as follows:
FAST GLOBAL SOLUTIONS
4130 Commerce Boulevard
Windom, MN 56101
This warranty shall expire one (1) year after the date of delivery of the new machinery.
If these conditions are fullled, FAST shall at its own cost and at its own option either repair or replace any defective parts
provided that the buyer shall be responsible for all expenses incurred as a result of repairs, labor, parts, transportation or
any other work, unless FAST has authorized such expenses in advance.
The warranty shall not extend to any repairs, changes, alterations, or replacements made to the new equipment other than
by FAST or its authorized dealers or employees.
This warranty extends only to the original owner of the new equipment.
Rubber parts (including tires, hoses, grommets) are not warranted.
This warranty is limited to the terms stated herein and is in lieu of any other warranties whether express or implied, and
without limiting the generality of the foregoing, excluded all warranties, express or implied or conditions whether statutory
or otherwise as to quality and tness for any purpose of the new equipment. FAST disclaims all liability for incidental or
consequential damages.
This Applicator is subject to design changes and Fast Ag Solutions shall not be required to retrot or exchange items on
previously sold units except at its own option.
FAST Ag Solutions
Warranty void if not registered.

4
FAST Ag Solutions
LIQUID FERTILIZER APPLICATOR
Warranty Registration Form & Inspection Report
Warranty Registration
This form must be lled out by the dealer and signed by both the dealer and the customer at the time of delivery.
Customer’s Name ________________________________________________________________________________
Address ________________________________________________________________________________________
City, State, Code _________________________________________________________________________________
Phone Number __________________________________________________________________________________
Dealer Name ____________________________________________________________________________________
Address ________________________________________________________________________________________
City, State, Code _________________________________________________________________________________
Applicator Model _________________________________________________________________________________
Serial Number ___________________________________________________________________________________
Delivery Date ____________________________________________________________________________________
DEALER INSPECTION REPORT SAFETY
____All Fasteners Tight ____ Safety Chain Installed
____Wheel Bolts Torqued ____ All Guards Installed
____Hydraulic Hoses and Fittings Free and Tight ____ All Safety Signs Installed
____Fertilizer Hoses and Fittings Free and Tight ____ Reectors, SMV and Lights Clean
____Wheel Drive Turns Freely ____ Review Operating and
____Lubricate Machine Safety Instructions
____Check Tire Pressure
____Frame and Wings Level
____Monitors and Controllers Function
____Wiring Harness Connected
I have thoroughly instructed the buyer on the above described equipment which review included the Operator’s Manual
content, equipment care, adjustments, safe operation and applicable warranty policy.
Date_____________________ Dealer’s Rep. Signature___________________________________________________
The above equipment and Operator’s Manual have been received by me and I have been thoroughly instructed as to care,
adjustments, safe operation and applicable warranty policy.
Date_____________________ Owner’s Signature________________________________________________________
White - FAST Ag Solutions
Yellow - Dealer
Pink - Customer

5
Contents
General Information ...................................................................................................................... 2
FAST Ag Solutions Warranty Policy ............................................................................................... 4
Liquid Fertilizer Applicator Registration..................................................................................... 4
Serial Number Location................................................................................................................ 7
1 Introduction..................................................................................................................................... 7
2 Safety ............................................................................................................................................. 8
2.1 Safety Alert Symbol And Signal Words ............................................................................... 8
2.2 General Safety ........................................................................................................................ 9
2.3 Operating Safety .................................................................................................................. 10
2.4 Maintenance Safety.............................................................................................................. 10
2.5 Hydraulic Safety ................................................................................................................... 11
2.6 Transport Safety................................................................................................................... 11
2.7 Storage Safety ...................................................................................................................... 12
2.8 Tire Safety............................................................................................................................. 12
2.9 Safety Signs.......................................................................................................................... 12
2.10 Sign-Off Form ..................................................................................................................... 13
2.11 Safety Sign Locations........................................................................................................ 14
3 Operation....................................................................................................................................... 17
3.1 New Operator Or Owner ...................................................................................................... 17
3.2 Machine Components.......................................................................................................... 17
3.3 Break-In................................................................................................................................. 19
3.4 Pre-Operation Checklist ...................................................................................................... 19
3.5 Equipment Matching............................................................................................................ 20
3.6 Controls ................................................................................................................................ 20
3.7 Attaching/Unhooking Tractor.............................................................................................. 21
3.8 Machine Setting.................................................................................................................... 22
3.9 Field Operation..................................................................................................................... 23
3.10 Transport............................................................................................................................. 28
3.11 Storage................................................................................................................................ 29
3.11.1 Placing In Storage...................................................................................................... 29
3.11.2 Removing From Storage ........................................................................................... 30
4 Service And Maintenance ............................................................................................................ 31
4.1 Service .................................................................................................................................. 31
4.1.1 Fluids And Lubricants................................................................................................. 31
4.1.2 Greasing ....................................................................................................................... 31
4.1.3 Servicing Intervals....................................................................................................... 31
4.1.4 Service Record............................................................................................................. 33
4.2 Maintenance ......................................................................................................................... 33
4.2.1 Adjust Gauge Wheel Height........................................................................................ 33
4.2.2 Nozzles ......................................................................................................................... 33
4.2.3 Filter.............................................................................................................................. 34

6
5 Troubleshooting ........................................................................................................................... 35
6 Specications .............................................................................................................................. 36
6.1 Mechanical............................................................................................................................ 36
6.2 Hydraulic Fitting Torque...................................................................................................... 36

7
Serial Number Location
Always give your dealer the serial number of your
FAST Ag Solutions Liquid Fertilizer Applicator when
ordering parts or requesting service or other information.
The serial number is stamped into the frame where indicated.
Please write number in space provided for easy reference.
Model Number__________________________________
Applicator Serial Number__________________________
1. Introduction
Congratulations on your choice of a FAST Ag
Solutions Liquid Fertilizer Applicator to complement your
operation. This equipment has been designed and
manufactured to meet the needs of a discriminating
buyer for the efcient application of liquid fertilizer.
Safe, efcient and trouble free operation of your
FAST Ag Solutions Liquid Fertilizer Applicator requires
that you and anyone else who will be operating or
maintaining the applicator, read and understand the
Safety, Operation, Maintenance and Trouble Shooting
information contained in the Operator’s Manual.
This manual covers the 8200 Series Liquid Fertilizer
Applicators built by FAST Ag Solutions. Use the
Table of Contents as a guide when searching for
specic information.
Keep this manual handy for frequent reference and to pass
on to new operators or owners. Call your FAST Ag
Solutions dealer or distributor if you need assistance or
information.
OPERATOR ORIENTATION - The directions left, right,
front and rear, as mentioned throughout this manual, are
as seen from the tractor driver’s seat and facing in the
direction of travel.
If you have any questions not answered in this manual or
require additional copies or the manual is damaged,
please contact your dealer or
FAST GLOBAL SOLUTIONS
4130 Commerce Boulevard
Windom, MN 56101
(Telephone) 507-427-3861
(FAX) 507-427-3030
www.fastsprayers.com

8
2. Safety ^
YOU are responsible for the SAFE operation and
maintenance of your FAST Ag Solutions Liquid
Fertilizer Applicator. YOU must ensure that you and
anyone else who is going to operate, maintain or work
around the Liquid Fertilizer Applicator be familiar with
the operating and maintenance procedures and related
SAFETY information contained in this manual. This
manual will take you step-by-step through your working
day and alerts you to good safety practices that should
be adhered to while operating the applicator.
Remember, YOU are the key to safety. Good safety practices
not only protect you but also the people around you. Make
these practices a working part of your safety program.
Be certain that EVERYONE operating this equipment is
familiar with the recommended operating and maintenance
procedures and follows all the safety precautions. Most
accidents can be prevented. Do not risk injury or death by
ignoring good safety practices.
Applicator owners must give operating instructions•
to operators or employees before allowing them to
operate the unit, and at least annually thereafter per
OSHA regulation 1928.57.
The most important safety device on this equipment is a•
SAFE operator. It is the operator’s responsibility to read
and understand ALL Safety and Operating instructions
in the manual and to follow these. All accidents can be
avoided.
A person who has not read and understood all operating•
and safety instructions is not qualied to operate the
machine. An untrained operator exposes himself and
bystanders to possible serious injury or death.
Do not modify the equipment in any way. Unauthorized•
modication may impair the function and/or safety and
could affect the life of the equipment.
Think SAFETY! Work SAFELY!•
2.1 Safety Alert Symbol And Signal
Words
This symbol means ATTENTION! BECOME ALERT! YOUR
SAFETY IS INVOLVED!
^
The level of risk is indicated by the following signal words:
^DANGER
DANGER - Indicates a hazardous situation,
which, if not avoided, WILL result in death or
serious injury.
^WARNING
WARNING - Indicates a hazardous situation,
which, if not avoided, could result in death or
serious injury.
^CAUTION
CAUTION - Indicates a hazardous situation,
which, if not avoided, could result in minor or
moderate injury.
NOTICE
NOTICE - Indicates a situation that could
result in damage to the equipment or other
property.

9
2.2 General Safety
Read and understand Operator’s Manual1.
and all safety signs before operating,
maintaining or adjusting applicator.
Only trained competent persons shall operate2.
applicator. An untrained operator is not qualied to
operate machine.
Have a rst-aid kit available for use should the need3.
arise and know how to use it.
Have a re extinguisher available for use should the4.
need arise and know how to use it.
Do not allow riders.5.
Wear appropriate protective devices as instructed on6.
the chemical or fertilizer MSDS.
Lower machine to ground, place all controls in neutral,7.
stop engine, set park brake, remove ignition key,
and wait for all moving parts to stop before servicing,
adjusting, repairing or unplugging.
Read chemical manufacturers warnings, instructions8.
and procedures before starting and follow them
exactly.
Post Poison Control Emergency telephone number9.
for your area on applicator before using Agricultural
chemicals.
Washington: (202) 962-4525
Ottawa: (613) 992-5606
Have container label handy when seeking medical
attention.
Review safety related items with all personnel10.
annually.

10
2.3 Operating Safety ^
Read and understand Operator’s Manual and all safety1.
signs before using.
Lower machine to ground, place all controls in neutral,2.
stop engine, set park brake, remove ignition key,
and wait for all moving parts to stop before servicing,
adjusting, repairing or unplugging.
Install and secure all guards and shields before starting3.
or operating.
Keep hands, feet, hair and clothing away from all moving4.
and/or rotating parts.
Do not allow riders on applicator or tractor during5.
operation or transporting.
Clear area of all bystanders, especially children, before6.
starting or lling with chemical or fertilizer.
Read chemical or fertilizer manufacturers warnings,7.
instructions and procedures before starting and follow
them exactly.
Do not breathe, touch or ingest chemicals or fertilizer.8.
Always wear protective clothing and follow safe handling
procedures.
Stay away from wings when folding or extending wings.9.
Keep others away.
Clean reectors, SMV and lights before transporting.10.
Attach securely to towing unit using a hardened pin with11.
a retainer and a safety chain.
Do not exceed a safe travel speed.12.
Use hazard asher on tractor and applicator when13.
transporting.
Stay away from overhead power lines when folding or14.
extending wings and during transport.
Before applying pressure to hydraulic system, make15.
sure all components are tight, hoses and couplings are
in good condition.
Review safety instructions annually.16.
2.4 Maintenance Safety ^
Review Operator’s Manual and all safety items before1.
working with, maintaining or operating applicator.
Lower machine to ground, place all controls in neutral,2.
stop engine, set park brake, remove ignition key,
and wait for all moving parts to stop before servicing,
adjusting, repairing or unplugging.
Follow good shop practices:3.
Keep service area clean and•
dry.
Be sure electrical outlets and•
tools are properly grounded.
Use adequate light for job at•
hand.
Before applying pressure to a hydraulic system, make4.
sure all components are tight, hoses and couplings are
in good condition.
Relieve pressure from hydraulic circuit before servicing5.
or disconnecting from tractor.
Keep hands, feet, clothing and hair away from all moving6.
and/or rotating parts.
Clear area of bystanders, especially children, when7.
carrying out any maintenance and repairs or making
any adjustments or lling.
Place stands or blocks under frame before working8.
beneath machine or when changing tires.
Be sure all guards are in place and secured when9.
maintenance work is completed.
Use only tools, jacks and hoists of sufcient capacity10.
for the job.

11
2.5 Hydraulic Safety ^
Always place all tractor hydraulic controls in neutral1.
before dismounting.
Make sure that all components in hydraulic system are2.
kept in good condition and are clean.
Replace any worn, cut, abraded, attened or crimped3.
hoses.
Do not attempt any makeshift repairs to hydraulic lines,4.
ttings or hoses by using tape, clamps or cements.
The hydraulic system operates under extremely high-5.
pressure. Such repairs will fail suddenly and create a
hazardous and unsafe condition.
P6. ressurized uids can penetrate the
skin. Hydraulic hoses can fail from
age, damage and exposure. Do not
search for hydraulic leaks without
body and face protection. A tiny,
almost invisible leak can penetrate
the skin, thereby requiring
immediate medical attention.
Use wood or cardboard to
detect hydraulic leaks, never
use your hands.
If injured by a concentrated high-pressure stream of7.
hydraulic uid, seek medical attention immediately.
Serious infection or toxic reaction can develop from
hydraulic uid piercing skin surface.
Before applying pressure to system, verify all8.
components are tight, hoses and couplings are in good
condition.
2.6 Transport Safety ^
Read and understand ALL information in Operator’s1.
Manual regarding procedures and SAFETY when
operating applicator in eld and/or on road.
Check with local authorities regarding applicator2.
transport on public roads. Obey all applicable laws and
regulations.
NOTICE
Prevent equipment damage.
Verify main tank is empty before
transporting on road.
Always travel at a safe speed. Use caution when making3.
corners or meeting trafc.
Make sure the SMV (Slow Moving Vehicle) emblem and4.
all lights and reectors that are required by the local
highway and transport authorities are in place, are clean
and can be seen clearly by all overtaking and oncoming
trafc.
Daybreak and dusk are particularly dangerous and pilot5.
vehicles are recommended.
Be sure applicator is properly connected to towing6.
vehicle and a retainer is used through drawbar pin.
Always attach a safety chain between frame and towing
vehicle.
Keep right and yield right-of-way to allow faster trafc to7.
pass. Drive on road shoulder, if permitted by law.
Do not exceed 20 mph (32 km/h). Reduce speed on8.
rough roads and surfaces.
Always use hazard warning ashers on tractor when9.
transporting unless prohibited by law.
Stay away from overhead power lines during transport.10.
Electrocution can occur without direct contact.

12
2.7 Storage Safety ^
Store unit in an area away from human activity.1.
Do not permit children to play on or around the stored2.
applicator.
2.8 Tire Safety ^
Failure to follow proper procedures when mounting a1.
tire on a wheel or rim can produce an explosion which
may result in serious injury or death.
Do not attempt to mount a tire unless you have the2.
proper equipment and experience to do the job.
Have a qualied tire dealer or repair service perform3.
required tire maintenance.
2.9 Safety Signs ^
Keep safety signs clean and legible at all times.1.
Replace safety signs that are missing or have become2.
illegible.
Replaced parts that displayed a safety sign should also3.
display the current sign.
Safety signs are available from your Distributor or the4.
factory.
How to Install Safety Signs:
Be sure that the installation area is clean and dry.•
Be sure temperature is above 50°F (10°C).•
Decide on exact position before you remove backing•
paper.
Remove the smallest portion of the split backing paper.•
Align the sign over the specied area and carefully•
press the small portion with the exposed sticky backing
in place.
Slowly peel back the remaining paper and carefully•
smooth the remaining portion of the sign in place.
Small air pockets can be pierced with a pin and smoothed•
out using the piece of sign backing paper.

13
2.10 Sign-Off Form
FAST Ag Solutions follows the general Safety Standards specied by the American Society of Agricultural Engineers
(ASAE) and the Occupational Safety and Health Administration (OSHA). Anyone who will be operating and/or maintaining the
FAST Ag Solutions Liquid Fertilizer Applicator must read and clearly understand ALL Safety, Operating and Maintenance
information presented in this manual.
Do not operate or allow anyone else to operate this equipment until such information has been reviewed. Annually review
this information before season start-up.
A sign-off sheet is provided for your record keeping to show that all personnel who will be working with the
equipment have read and understand the information in the Operators Manual and have been instructed in the
operation of the equipment.
Sign-Off Form
DATE EMPLOYEES SIGNATURE EMPLOYERS SIGNATURE

14
2.11 Safety Sign Locations
Safety signs and locations on machine are shown in the
following illustrations. Familiarize yourself with safety signs,
type of warning and area, or particular function related to
that area, that requires your SAFETY AWARENESS.

15
Decal A
Decal B
Decal C
Stay away from machine when
extending or folding wings.
Keep others away.
Move wings only from tractor seat.
OVERHEAD HAZARD
KEEP AWAY
To prevent serious injury or
death from overhead hazard:
WARNING
800009
WARNING
PINCH POINT HAZARD
KEEP AWAY
To prevent serlous injury or death from pinching:
Stay away from wings when folding or
extending.
Keep others away.
800011
DANGER
CRUSHING HAZARD
To prevent serious personal injury or death:
•Read and understand the owners
manual before using machine.
•Keep hands and body out of hitch
area when attaching towing vehicle.
•Always use the safety chains provided.
•Do not tow over 25 MPH, slower on
uneven ground. Allow no riders. 800013
Decal D
Decal E
Decal F
DANGER
ELECTROCUTION HAZARD
KEEP AWAY FROM POWER LINES
To prevent serious injury or death from electrocution:
1. Stay well away from power lines when folding
or extending wings. Electrocution can occur
without direct contact.
2. Lower wings completely before moving
or transporting.
800006
800008

16
Decal G
Decal H
Decal I
WARNING
HIGH PRESSURE FLUID HAZARD
To prevent serious injury or death
from high pressure fluid:
Relieve pressure on systembefore
repairing,adjusting or disconnecting.
Keepall components in good repair.
Wearproperhand and eye protection
when searching for leaks. Use wood
or cardboard instead of hands.
800004
ATTENTION:PLEASE CHECK
LUG NUT TORQUE AT 5, 10, AND
50 HOURS OFOPERATION, AND
REGULARLY THEREAFTER.
TORQUE SHOULD BE 265 FT/LBS.

17
3. Operation
Read and understand Operator’s Manual and all safety
signs before using.
^Lower machine to the ground, place all controls in
neutral, stop engine, set park brake, remove ignition key,
and wait for all moving parts to stop before servicing,
adjusting, repairing or unplugging.
^ Install and secure all guards and shields before starting
or operating.
^ Keep hands, feet, hair and clothing away from all
moving and/or rotating parts.
^ Do not allow riders on the applicator or tractor during
operation or transporting.
^ Clear area of all bystanders, especially children, before
starting or lling with chemical or fertilizer.
^ Read chemical or fertilizer manufacturers warnings,
instructions and procedures before starting and follow them
exactly.
^ Do not breathe, touch or ingest chemicals or fertilizer.
Always wear protective clothing and follow safe handling
procedures.
^ Stay away from wings when folding or extending
wings. Keep others away.
^ Clean reectors, SMV and lights before transporting.
^ Attach securely to towing unit using a hardened pin
with a retainer and a safety chain.
^ Do not exceed a safe travel speed.
^ Use hazard asher on tractor when transporting.
^ Stay away from overhead power lines when folding or
extending the wings and during transport.
^ Before applying pressure to the hydraulic system,
make sure all components are tight, hoses and couplings
are in good condition.
^ Review safety instructions before operating machine.
3.1 New Operator Or Owner
The FAST Ag Solutions Liquid Fertilizer Applicator is
designed to meter out and distribute liquid chemical or
fertilizer and place it where required.
It is the responsibility of the owner or operator to read this
manual and to train all other operators before they start
working with the machine. Follow all safety instructions
exactly. Safety is everyone’s business. By following
recommended procedures, a safe working environment is
provided for the operator, bystanders and the area around
the work site. Untrained operators are not qualied to
operate the machine.
Many features incorporated into this machine are the
result of suggestions made by customers like you. Read
this manual carefully to learn how to operate the machine
safely and how to set it to provide maximum eld efciency.
By following the operating instructions in conjunction with
a good maintenance program, your applicator will provide
many years of trouble-free service.
3.2 Machine Components
The FAST Ag Solutions Liquid Fertilizer Applicator has
a hydraulic powered metering pump to send liquid
chemicals or fertilizer to the distribution lines on the tool
bar. Coulters open the soil to receive the liquid. Nozzles
mounted to the tool bar spray the fluid into the soil.

18
A - Outer Wing
B - Flow Control
C - Tank
D - Hitch
E - Center Frame
F - Nozzle
G - Liquid Line
H - Inner Wing
I - Coulter
J - Gauge Wheel
K - Rinse Tank
L - Pump

19
3.3 Break-In
Perform the following steps on a new applicator:
A. After 1 hour of operation:
Tighten all wheel lugs to 265 lb/ft of torque.1.
Tighten all other fasteners and hardware to required2.
torque.
Check that no chemical or hydraulic lines are being3.
pinched or crimped. Re-route as required.
Check that all coulters, nozzles and placement4.
components are clean and working properly. Clean
as required.
Check that metering pump is functioning properly.5.
Adjust as required.
Lubricate all grease ttings.6.
B. After 5 hours of operation:
Tighten all wheel lugs to 265 lb/ft of torque.1.
C. After 10 hours of operation:
Tighten all fasteners and hardware to required1.
torque.
Check chemical and hydraulic line routing.2.
Check that all placement components are clean3.
and working properly.
D. After 50 hours of operation:
Tighten all wheel lugs to 265 lb/ft of torque.1.
Then follow normal servicing and maintenance2.
schedule as dened in Maintenance Section.
3.4 Pre-Operation Checklist
Efcient and safe operation of the FAST Ag Solutions
Liquid Fertilizer Applicator requires that each operator
reads and understands operating procedures and all
related safety precautions outlined in this section. A
pre-operational checklist is provided for the operator. It
is important for both personal safety and maintaining the
good mechanical condition of the applicator that this
checklist be followed.
Before operating applicator, check the following items:
Lubricatemachineper scheduleoutlinedin“Maintenance1.
Section”.
Use only a tractor of adequate power and weight2.
to operate applicator. See Section 3.5.1 for
recommendations.
Be sure that machine is properly attached to tractor.3.
Be sure that a mechanical retainer is installed through
drawbar pin and safety chain is installed.
Inspect all hydraulic lines, hoses, ttings and couplers4.
for tightness.
Check tires and verify they are inated to specied5.
pressure.
Calibrate applicator if at start of season or a new6.
applicator rate is being used.
Check condition and routing of all uid hoses and lines.7.
Be sure that all lines are routed in large arcs. Replace
any that are damaged. Re-route those that are rubbing,
pinched or crimped.
Check placement components. Remove and replace8.
any that are worn.
Remove all entangled material.9.
Raise tool bar and turn metering pump slightly. Check10.
that there is liquid coming out of each nozzle. Unplug
or connect lines as required. Replace any nozzles that
are plugged.

20
3.5 Equipment Matching
To insure the safe and reliable operation of the applicator, it
is necessary to use a tractor with appropriate specications.
As a guideline, insure that these requirements are met:
Tractor Horsepower:1.
Refer to table below minimum recommended
horsepower for your machine. Although recommended
tractor horsepower is not required to pull machine, it
does provide required strength in drawbar as hitch is
very heavy. This will also insure that the unit has the
required stability and control in hilly terrain and during
transport.
Model Width Horsepower
8200 40 130
44 150
60 150
66 170
Front End Weights:
2.
By following recommendations for tractor power, tractor
will have sufcient weight to provide stability during eld
operation or when transporting. It is also recommended
that each tractor be equipped with a full compliment of
suitcase weights on front of tractor. This will provide the
required weight on front for turning and extra traction if
equipped with front wheel assist.
Hydraulic System:3.
Tractor hydraulic system must be capable of 8 gpm (24
lpm) at 2000 psi (13,800 kPa) to operate lift cylinders
and drive motor. Either closed center or open-centered
systems can be used. However an open centered
hydraulic system is limited to 8 gpm maximum.
Note: Contact factory for an optional ow control for use
with high ow open center system.
Three remote outlets are required to operate the
applicator.
Tool bar lift cylinders and wing kick.
1.
Inner wing extend/fold cylinders and outer wing extend/2.
fold cylinders
Chemical / fertilizer pump drive motor.3.
Note: Always place hydraulic control lever in detent to
provide a constant ow of oil to pump drive motor.
3.6 Controls
It is recommended that all operators review this section of
manual and metering pump manual to familiarize themselves
with location and function of all machine controls and
settings before starting.
Metering Pump:1.
An Operator’s Manual is supplied with machine. Review
manual carefully to determine required hydraulic setting
on pump for your application.
Liquid System Pressure Gauge:2.
This gauge monitors pressure in liquid circuit providing
ow to injector orices. It is normally used to determine
pressure in chemical/fertilizer circuit when setting
system for a specic application rate. Monitor gauge
during operation. Stop and check system if pressure
changes suddenly.
Table of contents
Other Fast Farm Equipment manuals
Popular Farm Equipment manuals by other brands

Schaffert
Schaffert Rebounder Mounting instructions

Stocks AG
Stocks AG Fan Jet Pro Plus 65 Original Operating Manual and parts list

Cumberland
Cumberland Integra Feed-Link Installation and operation manual

BROWN
BROWN BDHP-1250 Owner's/operator's manual

Molon
Molon BCS operating instructions

Vaderstad
Vaderstad Rapid Series instructions
