Hanauer Landstr. 7A · 63791 Karlstein/Germany · www.fehling-instruments.de
+49 (0) 61 88 –95 74.40 · +49 (0) 61 88 –95 74.45 · info@fehling-instruments.de
2 Assembly
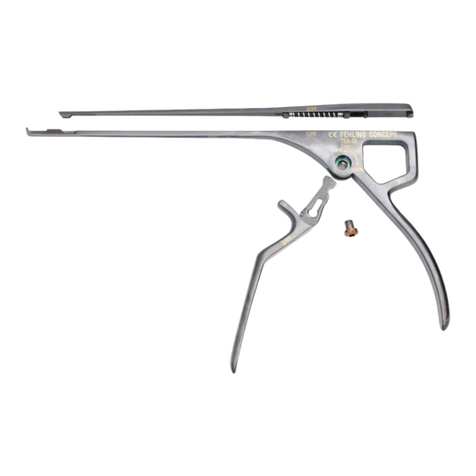
Each APART punch consists of two component parts:
punch body and slider. Only component parts belonging
to the same unit may be assembled. This can be verified
by means of the identification number (no. 5) that is
marked on both component parts.
a) Place the slider with the spring (no. 6) on the milled groove (no. 7) in the punch body
and at the same time place the front guide of the slider (no. 8) on the guide rail (no. 9)
of the punch body.
b) Hold the punch components in both hands, and with your right thumb slowly push the
slider to the front until the rear end of the slider guide (no. 10) is no longer visible (no.
11).
c) Hold the slider in that position and slowly slide the handle (no. 2) upward with the left
hand until it locks in place with a click sound. The handle is properly locked only if the
golden button sticks completely out of the marked side of the punch. If the position of
the button looks "WRONG" as in the figure, the assembly has to be restarted as de-
scribed in steps 2 a) - c). The punch may be used only if the handle is properly
locked!
d) The punch can be used again after a functional test.
