manuals.online logo
Brands
  1. Home
  2. •
  3. Brands
  4. •
  5. Festool
  6. •
  7. Power Tools
  8. •
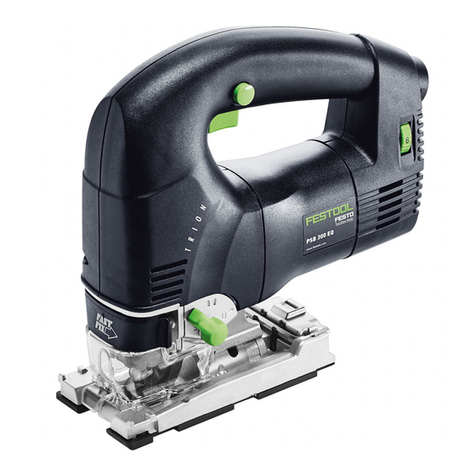
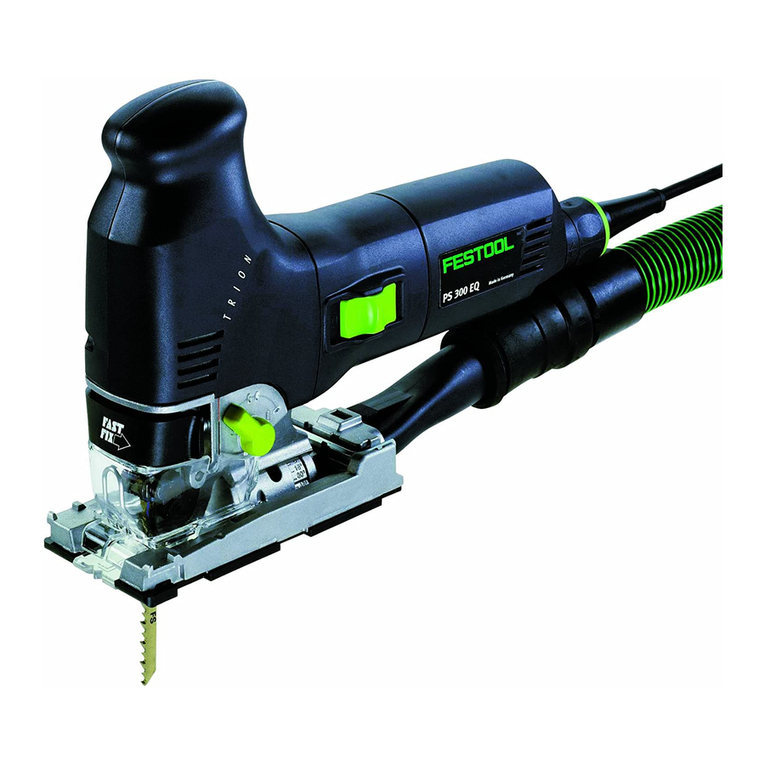
  9. Festool Trion PS-300Q User manual

Festool Trion PS-300Q User manual

PS 300 Q TRION
PS 300 EQ TRION
PSB 300 Q TRION
PSB 300 EQ TRION
Bedienungsanleitung Pendelstichsäge 4 - 6
Operating Instructions Pendulum jigsaw 7 - 9
Mode demploi Scie sauteuse oscillante 10 - 12
Instrucciones de servicio Sierra caladora pendular 13 - 16
Istruzioni duso Seghetto alternativo 17 - 19
Gebruiksaanwijzing Pendeldecoupeerzaag 20 - 22
Bruksanvisning Pendelsticksåg 23 - 25
Käyttöohje Pendel-Pistosaha 26 - 28
Driftsvejledning Pendulstiksav 29 - 31
Bruksanvisning Pendelstikksag 32 - 34
Instruções de uso Serra vertical pendular 35 - 37
Ðóêîâîäñòâî ïî ýêñïëóàòàöèè Ìàÿòíèêîâàÿ íîæîâî÷íàÿ ïèëà 38 - 41
Návod k obsluze Pøímoèará pila s kyvným zdvihem 42 - 44
Instrukcja obs³ugi Tarczáwka wahadi³owa 45 - 47
Kezelési utasítás Ingalykfûrész 48 - 50
Ïäçãßá ëåéôïõñãßáò Åíáëëáêáêôéêï ðñéüíé 51 - 54
Festool GmbH Wertstr. 20 D-73240 Wendlingen (07024/804-0
463 158_001
Seen at Ideal Tools.
7
2Correct use
The pendulum jigsaws have been designed to saw
wood and wood-like materials.
Plastics, steels, aluminium, non-ferrous metals and
ceramic tiles can also be processed using special
saw blades as recommended in the Festool sales
documents for the individual materials.
The user shall be liable for damages and accidents
due to incorrect use.
Please read before starting work
-Please read the safety instructions on the enclosed
leaflet before starting work.
-Check the tight fit of the saw blade before starting
work for the first time.
-Replace blunt or deformed saw blades by new
ones.
-If the tool is used predominantly to saw metals
the inside of the drive may become very dirty. In
such cases we recommend fitting a fault current
breaker, the use of a powerful dust extractor and
a shortening of the cleaning cycles.
-Do not drill the motor housing since this could
damage the protective insulation.
-When sawing metals and mineral building materials
always wear safety goggles.
-Always place the pendulum jigsaw on the
workpiece with the saw blade running.
-Repairs may only be carried out by qualified
experts.
-Warning: Use only original spare parts and
accessories from Festool! This guarantees a safe
and perfect function of our pendulum jigsaw.
Noise and vibration information
Typical values measured according to EN 50144
for the devices are:
Sound level
PS 300 Q, PSB 300 Q: 86 dB(A)
PS 300 EQ, PSB 300 EQ: 83 dB(A)
Rated acceleration
PS 300 Q, PS 300 EQ: 6 m/s2
PSB 300 Q, PSB 300 EQ: <2,5 m/s2
When working with pendulum jigsaws the sound
level at the place of work may exceed 85 dB(A), in
which case sound protection measures (ear
protection) are needed for the operators.
3Electrical connections and starting
The mains voltage must be identical to that specified
on the ratings plate.
The PS 300 Q and PS 300 EQ have a slide switch
(1.1) to switch the tool on and off (I = ON, 0 = OFF).
The PSB 300 Q and PSB 300 EQ have a push
button switch (2.2) to switch the tool on and off.
This can be locked with the stop button (2.1) for
continuous operation. Press the push button switch
again to release the lock.
See Fig. 2a for connection and disconnection of the
power cable.
4Changing saw blades
Warning: Always unplug from the mains when
working on the jigsaw!
-Open chuck lever (3.4) up to the stop.
-Remove fitted saw blade.
-Insert new saw blade up to the stop in the saw
blade holder (3.1).
-Close chuck lever.
The specified illustrations can be found at the beginning of the operating instructions.
Seen at Ideal Tools.
8
5Adjusting three saw blade guide
The pendulum jigsaws have an additional hard metal
guide (3.2) immediately above the workpiece for a
better guidance of the saw blade (3.2).
-Tighten the screw (3.3) with the Allen key (1.3)
until the jaws almost rest against the saw blade.
Warning: The saw blade should still be able to be
moved easily!
6Fitting the splinterguard
The splinterguard allows cuts with splinter-free
edges, even on the exit side of the saw blade.
-With the tool switched off, fit the splinterguard (4.3)
on the guide (4.2) up to the saw blade.
-Switch the jigsaw on and with the tool running,
push the splinterguard in and cut on a level surface
until the splinterguard is flush with the front edge
of the base runner.
Note: The splinterguard must lie close to the saw
blade on both sides to ensure its reliable operation.
Thus, a new splinterguard should be fitted every
time the saw blade is changed to ensure splinter-
free cuts.
7Fitting the chip guard
The chip guard prevents chips from flying off and
improves the efficiency of the chip extractor.
-Insert the chip guard (2.8) between the base runner
and chuck lever and push back with a slight
pressure until it catches in place.
8The chip extractor
Jigsaws can be connected to a dust extractor (hose
diameter 27 mm) using the extractor adapter (2.4).
When working with suction units, always use a
splinterguard in order to prevent the suction
channels becoming blocked.
-Insert the extractor adapter into the rear hole of
the base runner in so that the hook (2.6) catches
in the notch (2.7).
-Press the lever (2.5) to remove the extractor
adapter.
The integrated blow-off system comes into effect if
working with an extractor. A directed jet of air ensues
that chips do not obscure the scribe mark.
Warning: The electric tool must be connected to a
suitable dust extractor during longer periods of work
with wood or materials which produce!
9Adjusting the base runner
The base runner can be swivelled to both sides by
up to 45° for bevel cuts:
-Remove chip guard and splinterguard.
-Release locking screw (4.1) with Allen key (1.3).
-Push base runner approx. 5 mm forwards.
-Set desired inclination according to the scale (5.2).
-Tighten locking screw (4.1).
The base runner can be moved back for sawing
close to edges.
-Remove chip guard and splinterguard.
-Release locking screw (4.1) with Allen key (1.3).
-Push base runner to rear position so that the
centring pin (5.1 ) fits in the opening (5.3).
-Tighten locking screw (4.1).
10 Adjusting the pendulum stroke
In order to process different materials with an
optimum feed movement the pendulum jigsaws have
an adjustable pendulum stroke. Select the desired
setting with the pendulum stroke switch (1.4):
setting 0 = pendulum stroke off,
setting 3 = maximum pendulum stroke.
Recommended settings of the pendulum stroke
Hard and soft wood 1-3
Wood core plywood, plywood 1-2
Chip board, wood fibre board 1-3
Plastics 1-2
Ceramic 0
Aluminium, NF metals 0-2
Steel 0-1
11 Adjusting the cutting speed / number of
strokes
The PS 300 EQ and PSB 300 EQ have control
electronics which enable an infinite adjustment of
the number of strokes between 1000 and 2900
strokes per minute. The desired number of strokes
is set with the adjusting wheel (1.2, 2.3):
setting 1 = 1000 strokes per minute,
setting 6 = 2900 strokes per minute.
Recommended number of strokes (adjusting
wheel setting)
Hard and soft wood, wood core plywood 6
plywood, chip board 6
Wood fibre boards 4-6
Plastics 3-6
Ceramic 3-5
NF metals 3-5
Steel 2-4
12 Working with the jigsaws
12.1 Free hand according to the scribe mark
The triangular shape of the splinterguard (4.3) shows
the cutting line of the saw blade and thus facilitates
cutting to a scribe mark.
Seen at Ideal Tools.
9
12.2 Plunge cutting without pilot drilling
The base runner must be in the front position for
plunge cuts in timber materials (basic setting, see
Figure 1).
Place saw on the front edge of the runner. Set saw
to maximum no. of strokes and pendulum stroke
setting 3 and start the plunge cut into the workpiece
(Figure 6).
13 Accessories
13.1 Festool guide system FS
The use of the Festool guide system FS (Figure 7)
facilitates the production of straight and precise cuts,
particularly with material thicknesses up to 20 mm.
The jigsaw is hereby placed in a guide stop (7.1,
order no. 490 031) and guided along the guide rail
in this.
The guide stop has two adjustable limit stops (7.2)
for a setting free from play.
Use only crossed saw-blades when utilising the guide
stop. We recommend Festool saw blade - S 75/4
FSG.
13.2 Parallel guide
Use the parallel guide (order no. 486 719) to guide
the jigsaw parallel to the workpiece edge.
The parallel guide can be fitted on both sides of the
base runner:
-Slide clamping clip (8.1) onto the base runner
from the front,
-insert parallel guide (8.2) through the clamping
clip from the side to the desired position.
-Tighten rotary knob (8.3).
13.3 Circle cutter
The circle cutter (order no. 490 032) can be used
to produce circular cuts with a diameter between
120 and 720 mm.
The circle cutter can be fitted on both sides of the
base runner:
-Slide clamping clip (8.1) onto the base runner
from the front,
-insert circle cutter (8.4) through the clamping clip
from the side to the desired position.
-Tighten rotary knob (8.3).
-Insert circle tip (8.5) in the rear bore hole of the
circle cutter.
13.4 Festool Basis Plus
By fitting the jigsaws in the Festool Systems Basis
Plus you end up with a semi-stationary bench-
mounted saw for profile cuts.
Further information can be found in the Basis Plus
brochure.
13.5 Other accessories, saw blades
Festool can offer saw blades which are ideally
matched to your Festool jigsaw and every application
to ensure quick and clean cuts in a variety of
materials.
The order numbers for these saw blades as well as
for all other accessories can be found in the Festool
catalogue or on the Internet under
www.festool.com.
14 Maintenance and care
Warning: Always unplug the tool from the mains
before carrying out any maintenance work!
The cooling vents in the motor housing must be
kept clear and clean to ensure a good circulation of
air.
Any maintenance or repair work which entails an
opening of the motor housing may only be carried
out by authorised service workshops.
15 Warranty
Our equipment is under warranty for at least 12
months with regard to material or production faults
in accordance with national legislation. In the EU
countries, the warranty period is 24 months (an
invoice or delivery note is required as proof of
purchase).
Damage resulting from, in particular, normal wear
and tear, overloading, improper handling, or caused
by the user or other damage caused by not following
the operating instructions, or any fault acknowledged
at the time of purchase, is not covered by the
warranty.
Complaints will only be acknowledged if the
equipment has not been dismantled before being
sent back to the suppliers or to an authorised Festool
customer support workshop.
Store the operating instructions, safety notes, spare
parts list and proof of purchase in a safe place. In
addition, the manufacturers current warranty
conditions apply.
Note
We reserve the right to make changes to the technical
data contained in this information as a result of
ongoing research and development work.
Seen at Ideal Tools.
CE-Konformitetserklæring. Vi erklærer på eget
ansvar at dette produktet er i overensstemmelse med
følgende normer eller normative dokumenter: EN 50 144,
EN 55 014, EN 61 000 i henhold til bestemmelsene i direktivene
73/23/EØF, 98/37/EF, 89/336/EØF.
EG-Konformitätserklärung. Wir erklären in alleiniger
Verantwortung, dass dieses Produkt mit den
folgenden Normen oder normativen Dokumenten
übereinstimmt:
EN 50 144, EN 55 014, EN 61 000 gemäß den Bestimmungen
der Richtlinien 73/23/EWG, 98/37/EG, 89/336/EWG.
455 789/05.02
EY-standardinmukaisuusvakuutus. Vakuutamme
yksinvastuullisina, että tuote on seuraavien
standardien ja normatiivisten ohjeiden mukainen: EN 50 144,
EN 55 014, EN 61 000 direktiivien 73/23/EY, 98/37/EY,
89/336/EY määräysten mukaan.
EG-konformitetsförklaring. Vi förklarar i eget ansvar,
att denna produkt stämmer överens med följande
normer och normativa dokument: EN 50 144, EN 55 014,
EN 61 000 enligt bestämmelserna i direktiven 73/23/EEG,
98/37/EG, 89/336/EEG.
EG-conformiteitsverklaring. Wij verklaren op eigen
verantwoordelijkheid dat dit produkt voldoet aan de
volgende normen of normatieve documenten. EN 50 144,
EN 55 014, EN 61 000 conform de richtlijnen 73/23/EEG, 98/
37/EG, 89/336/EEG.
CE-Dichiarazione di conformità. Dichiariamo sotto
la nostra esclusiva responsabilità che il presente
prodotto è conforme alle norme e ai documenti normativi
seguenti: EN 50 144, EN 55 014, EN 61 000 conformemente
alle normative delle direttive 73/23/CEE, 98/37/CE,
89/336/CEE.
Owiadczenie o zgodnoci CE. Niniejszym
owiadczamy z ca³¹ odpowiedzialnoci¹, ¿e wyrób
ten odpowiada nastêpuj¹cym normom wzglêdnie dokumentom
normatywnym: EN 50 144, EN 55 014, EN 61 000 zgodnie z
postanowieniami wytycznych 73/23/EWG, 98/37/EG,
89/336/EWG.
Äçëùóç óõììüñöùóçò ÅÊ. Ìå áíÜëçøç ôçò
óõíïëéêÞò åõèýíçò äçëþíïõìå, üôé ôï ðáñüí ðñïéüí
óõìöùíåß ìå ôá ðáñáêÜôù ðñüôõðá êáé ìå ôá
ðñüôõðá ðïõ áíáöÝñïíôáé óôá ó÷åôéêÜ Ýããñáöá ÅÍ 50 144,
ÅÍ 55 014, EN 61 000 óýìöùíá ìå ôïõò êáíïíéóìïýò
73/23 ÅÏÊ, 98/37ÅÊ, 89/336/ÅÏÊ
CE-konformitás-nyilatkozat.Kizárólagos
felelõsségvállalás mellett ezennel tanúsítjuk, hogy
a jelen termék megfelel az alábbi szabványoknak ill.
szabványdokumentációnak: EN 50 144, EN 55 014,
EN 61 000 a 73/23/EWG, 98/37EG, 89/336/EWG irányvonalak
rendelkezései szerint.
Leitung Forschung und Entwicklung
Management Research and Development
Direction de recherce et développement
Festool GmbH
Wertstr. 20
D-73240 Wendlingen
Dr. Johannes Steimel
EC-Declaration of Conformity: We declare at our sole
responsibility that this product is in conformity with
the following standards or standardised documents:
EN 50 144, EN 55 014, EN 61 000 in accordance with the
regulations 73/23/EEC, 98/37/EC, 89/336/EEC.
CE-Declaração de conformidade: Declaramos, sob
a nossa exclusiva responsabilidade, que este
produto corresponde às normas ou aos documentos
normativos citados a seguir:
EN 50 144, EN 55 014, EN 61 000 segundo as disposições
das directivas 73/23/CEE, 98/37/CE, 89/336/CEE.
CE-Déclaration de conformité communautaire. Nous
déclarons sous notre propre responsabilité que ce
produit est conforme aux normes ou documents de
normalisation suivants: EN 50 144, EN 55 014, EN 61 000
conformément aux prescriptions des directives 73/23/CEE,
98/37/CE, 89/336/CEE.
Çàÿâëåíèå î êîíôîðìíîñòè ÑÅ. Ìû çàÿâëÿåì â
åäèíîëè÷íîé îòâåòñòâåííîñòè, ÷òî äàííîå èçäåëèå
ñîîòâåòñòâóåò òðåáîâàíèÿì ñëåäóþùèõ ñòàíäàðòîâ èëè
íîðìàòèâîâ: EN 50 144, EN 55 014, EN 61 000 â ñîîòâåòñòâèè
ñ ïîñòàíîâëåíèÿìè äèðåêòèâ ÅÝÑ 73/23, ÅÑ 98/37,
ÅÝÑ 89/336.
CE-Declaración de conformidad. Declaramos bajo
nuestra exclusiva responsabilidad que este
producto corresponde a las siguientes normas o documentos
normalizados: EN 50 144, EN 55 014, EN 61 000 conforme a
las prescripciones estipuladas en las directrices
73/23/CEE, 98/37/CE, 89/336/CEE.
Prohláení o souladu s normami CE. Prohlaujeme
na vlastní zodpovìdnost, e tento výrobek odpovídá
následujícím normám nebo normativním dokumentùm:
EN 50 144, EN 55 014, EN 61 000 v souladu s ustanoveními
smìrnic 73/23/EHS, 98/37/EHS, 89/336/EHS.
EF-konformitetserklæring: Vi erklærer at have alene
ansvaret for, at dette produkt er i overensstemmelse
med de følgende normer eller normative dokumenter:
EN 50 144, EN 55 014, EN 61 000 i henhold til bestemmelserne
af direktiverne 73/23/EØF, 98/37/EF, 89/336/EØF.
Seen at Ideal Tools.
Festool GmbH
Postfach 1163
D- 73236 Wendlingen
Wertstr. 20
D- 73240 Wendlingen
)(07024) 804-0
Fax (07024) 804-608
http://www.festool.com
Seen at Ideal Tools.

Other manuals for Trion PS-300Q

6

Other Festool Power Tools manuals

Festool Domino DF 500 Q User manual

Festool

Festool Domino DF 500 Q User manual

Festool OF 1400 EQ User manual

Festool

Festool OF 1400 EQ User manual

Festool OSC 18 User manual

Festool

Festool OSC 18 User manual

Festool PSC 420 EB Installation instructions

Festool

Festool PSC 420 EB Installation instructions

Festool ETS EC 125/3 EQ User manual

Festool

Festool ETS EC 125/3 EQ User manual

Festool Domino XL DF 700 EQ User manual

Festool

Festool Domino XL DF 700 EQ User manual

Festool PF 1200 E Alucobond Installation instructions

Festool

Festool PF 1200 E Alucobond Installation instructions

Festool Trion PS-300Q User manual

Festool

Festool Trion PS-300Q User manual

Festool PS 2 E User manual

Festool

Festool PS 2 E User manual

Festool OFK 700 EQ User manual

Festool

Festool OFK 700 EQ User manual

Festool Trion PS 300 EQ User manual

Festool

Festool Trion PS 300 EQ User manual

Festool Carvex PSC 400 EB Installation instructions

Festool

Festool Carvex PSC 400 EB Installation instructions

Festool Domino XL DF 700 EQ User manual

Festool

Festool Domino XL DF 700 EQ User manual

Festool OFK 500 Q User manual

Festool

Festool OFK 500 Q User manual

Festool Domino DF 500 Q Installation instructions

Festool

Festool Domino DF 500 Q Installation instructions

Festool TPE-RS 100 Q Installation instructions

Festool

Festool TPE-RS 100 Q Installation instructions

Festool OF 2200 EB-F User manual

Festool

Festool OF 2200 EB-F User manual

Festool LRS 400 User manual

Festool

Festool LRS 400 User manual

Festool PF 1200 E Installation instructions

Festool

Festool PF 1200 E Installation instructions

Festool Trion PS 300 EQ User manual

Festool

Festool Trion PS 300 EQ User manual

Festool OF 2200 EB User manual

Festool

Festool OF 2200 EB User manual

Festool VS-600 Manual

Festool

Festool VS-600 Manual

Festool MFK 700 EQ User manual

Festool

Festool MFK 700 EQ User manual

Festool VS-600 User manual

Festool

Festool VS-600 User manual

Popular Power Tools manuals by other brands

Dynapac DRP25D Operating	 instruction

Dynapac

Dynapac DRP25D Operating instruction

Proxxon FF 500 manual

Proxxon

Proxxon FF 500 manual

Valfor Tools Router Bit Vise owner's manual

Valfor Tools

Valfor Tools Router Bit Vise owner's manual

Retsch RS200 operating instructions

Retsch

Retsch RS200 operating instructions

Makita HG5030 instruction manual

Makita

Makita HG5030 instruction manual

Matco Tools MT2260 manual

Matco Tools

Matco Tools MT2260 manual

Hakko Electronics 474 instruction manual

Hakko Electronics

Hakko Electronics 474 instruction manual

Argo 2S Operation manual

Argo

Argo 2S Operation manual

MASTERPAC PCR6040 Series Operation manual

MASTERPAC

MASTERPAC PCR6040 Series Operation manual

Kyocera TJEP ST-15 manual

Kyocera

Kyocera TJEP ST-15 manual

Chicago Electric 69582 owner's manual

Chicago Electric

Chicago Electric 69582 owner's manual

Makita VR001C instruction manual

Makita

Makita VR001C instruction manual

Sharp VH25 Operator's manual

Sharp

Sharp VH25 Operator's manual

Sealey AK303.V2 instructions

Sealey

Sealey AK303.V2 instructions

Bosch GOF 2000 CE Professional Original instructions

Bosch

Bosch GOF 2000 CE Professional Original instructions

Arbortech POWER CHISEL Owner's instruction manual

Arbortech

Arbortech POWER CHISEL Owner's instruction manual

Parkside PMFW 310 C2 manual

Parkside

Parkside PMFW 310 C2 manual

RED ROOSTER RRI-130T manual

RED ROOSTER

RED ROOSTER RRI-130T manual

manuals.online logo
manuals.online logoBrands
  • About & Mission
  • Contact us
  • Privacy Policy
  • Terms and Conditions

Copyright 2025 Manuals.Online. All Rights Reserved.