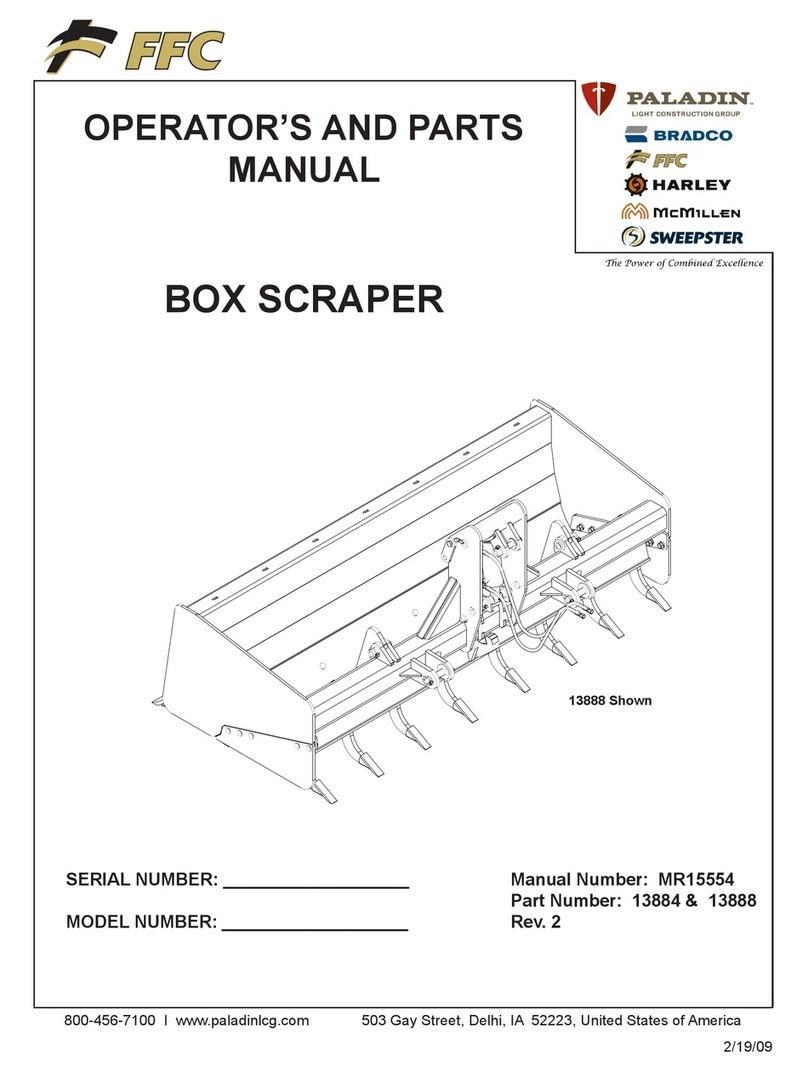
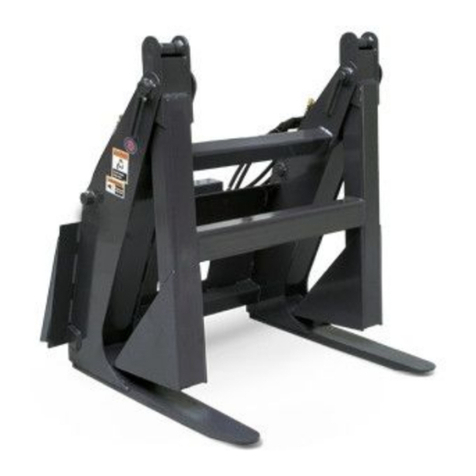
FFC AUTORAKE LAF6866 Owner's manual

Farmers’ Factory Company
AUTORAKE ®
OWNER'S & OPERATOR'S MANUAL
Models covered:
LAF6866,
LAF6876
OWNER'S & OPERATOR'S MANUAL
FFC PART # MR15595
FARMERS’ FACTORY COMPANY
100 EAST LEE ROAD
LEE, IL 60530
1-800-747-2132
06-23-00

TABLE OF CONTENTS
Introduction, General Information, Serial Number…………………………………………….1
Owner and Operator Safety Information..............................…..................................….2-5
Definitions of Safety Terms and Symbols, Accident Prevention....………..………2
Safety Instructions..................……....................................................................3-4
Safety Signs...............................……...….............................................................5
Power Unit Specifications, Mounting, Hydraulic
Connection………………..…....................6 Operation
............................................................……......................................................7-8
Maintenance ......................……...........................................................…………….............8
Service
..….........................................………...........…...…..............................................…9 Parts
Illustration.................................……..................................................……................10
Parts List..................................................……..............................................................11-
12 Specifications
.................……..........…..............................................................................13 Warranty
...........................................…..........…….....................................….............….....i
INTRODUCTION
Congratulations on your purchase of a new Farmers’ Factory Company AutoRake®. This product has been
designed and built to remove small rocks (less than 6” maximum dimension) and debris from loose soil and the sifting of
the surface layer of that soil. You or any other person who will be assembling, operating, maintaining, or working with this
product are required to read and completely understand the information and instructions contained in this manual. If
anyone does not fully understand every part of this manual, please obtain further assistance by contacting the dealer from
which this product was purchased or by contacting FFC at the telephone number or address listed on the cover of this
manual. Keep this manual available for reference whenever this product is being handled or used. Provide this manual
to any new owners and/or operators.
This manual covers model(s) LAF6866 and LAF6876. The difference between the models is the width of the
product, details of which are covered on the parts list and specifications page(s).
GENERAL INFORMATION
The purpose of this manual is to assist in assembling, mounting, operating, and maintaining your AutoRake®.
Read this manual carefully to obtain valuable information and instructions that will help you achieve years of safe and
dependable service.
The illustrations and data used in this manual were current at the time of printing, but due to possible engineering
and/or production changes, this product may vary slightly in detail. FFC reserves the right to redesign and/or change
components as may be necessary without notification to anyone.
Throughout this manual, references may be made to:
Power Unit The engine-driven machine to which this product must be attached.
Right, Left, Front, Rear Directions that are determined in relation to the operator of the equipment when
seated in the normal operating position.
IMPORTANT Precautions that must be followed to prevent damage to equipment.
NOTICE Precautions that must be followed to prevent substandard performance.
SERIAL NUMBER LOCATION
Always refer to the model and serial number when ordering parts or requesting information from your dealer. The
serial number plate for this product is located on the top left side of the bucket portion of your AutoRake®.
Reference Information
Model Number _______________________ Loader Make ____________________________
Serial Number _______________________ Loader Model ____________________________
Date Purchased _______________________ Loader Serial # ____________________________
1

DEFINITION OF SAFETY TERMS AND SYMBOLS
Throughout this manual, the terms DANGER, WARNING, and CAUTION are used to indicate the degree of
hazard to personnel if proper safety procedures are not followed. These words will be used in conjunction with the Safety
Alert Symbol: a dark triangle containing a white exclamation mark.
The Safety Alert Symbol means:
ATTENTION! BECOME ALERT! YOUR SAFETY IS INVOLVED!
DANGER Indicates an imminently hazardous situation which, if not avoided,
WILL result in death or serious injury.
WARNING Indicates a potentially hazardous situation which, if not avoided,
could result in death or serious injury.
CAUTION Indicates a potentially hazardous situation which, if not avoided,
may result in minor or moderate injury;
OR
mayalso be used to alert against unsafe practices that may result in personal injury.
ACCIDENTS CAN BE PREVENTED WITH
YOUR HELP !
No accident prevention program can be successful
without the wholehearted cooperation of the person who
is directly responsible for the operation of the equipment.
To read equipment accident reports from all over the
country is to be convinced that a large number of
accidents can be prevented only by operators who
consistently anticipate the results of their actions and
thus prevent accidents from ever occurring. No power-
driven equipment, whether it is on the highway, in a farm
field, or in an industrial plant, can be any safer than is
allowed by the person who is at the controls.
If accidents are to be prevented (and accidents can be
prevented), that prevention will come from equipment
operators who accept their complete responsibility.
The designer, the manufacturer, and the safety engineer
all help create a safe product, but the operator of that
product can wipe out their combined efforts with a single
careless act.
The best safety device is a careful operator. FFC and
your dealer ask that YOU be that careful, responsible
equipment operator.
YOU ARE THE KEY TO SAFETY BECAUSE:
YOU are responsible for the SAFE operation and
maintenance of YOUR AutoRake®.
YOU are responsible to familiarize yourself, and anyone
else who will assemble, operate, maintain, or work
around this product, with the SAFETY information
contained in this manual.
YOU are responsible to read ALL information contained
in this manual to any operators or maintenance person-
nel who are not fully able to read the written English
language. Whether YOU read the manual as written or
translate it into another language, YOU must make cer-
tain that all operators and maintenance personnel have
a complete understanding of the full and exact contents
of this manual. Translations of this manual into other
languages are available by submitting an order to FFC.
YOU can reduce the risk of injury or death by following
all safety precautions and by using good safety
practices.
2

SAFETY INSTRUCTIONS
WORK SAFELY - A CAREFUL OPERATOR IS THE BEST INSURANCE AGAINST ACCIDENTS !!
SECTION 1
WARNING
Obey all the safety instructions listed in
this section and throughout this manual.
Failure to obey instructions in this
section could result in death or serious
injury.
BEFORE ATTEMPTING ANY TYPE OF ASSEMBLY,
OPERATION, MAINTENANCE, OR OTHER WORK ON
OR NEAR THIS PRODUCT:
•READ AND COMPLETELY UNDERSTAND THIS
MANUAL.
•READ AND COMPLETELY UNDERSTAND THE
MANUALS PROVIDED WITH YOUR power unit,
loader, and quick-attach.
•Read and understand all safety signs on this product
and on your power unit, loader, and quick-attach.
•Know all your controls and know how to quickly stop
all power unit movement, the AutoRake®movement,
and the engine in case of an emergency.
•Know and obey all applicable government rules,
O.S.H.A. regulations, local laws and other
professional guidelines for your operation.
•Make sure that anyone who will be assembling,
mounting, maintaining, repairing, removing, and/or
storing this product:
•has been instructed in the safe operation of this
product and of the power unit, loader, and quick-
attach to which this product is attached.
•is physically and mentally capable of the safe
operation of this type of equipment.
•is not under the influence of drugs or alcohol.
•is carefully supervised from a safe distance,
especially if such person is inexperienced.
•wears appropriate protective equipment (i.e.
hardhat, safety glasses, work gloves, protective
shoes, respirator, ear protection, etc.).
•does not wear loose fitting clothing, loose or
uncovered hair, or any accessories (jewelry,
necktie, scarf, wrist watch, etc.) that can catch in
moving parts.
•has annually reviewed all safety instructions.
•Know and follow good work practices when
assembling, mounting, maintaining, repairing,
removing, and storing this product:
•Work on a level surface in a well-lit area.
•Keep the area clean and dry.
•Use properly grounded electrical outlets & tools.
•Use the right tool for the job at hand.
•Make sure that your tools are in good condition
for performing the desired function.
•When using tools, wear the protective
equipment specified by the tool manufacturer.
(i.e. hardhat, safety glasses, work gloves,
protective shoes, etc.)
WHEN YOUR POWER UNIT IS USED DURING ANY
TYPE OF ASSEMBLY, OPERATION, MAINTENANCE,
OR OTHER WORK ON OR NEAR THIS PRODUCT:
•Before leaving the operator’s station or before
beginning any type of work on this product, lower
this product to the ground, apply your power unit’s
parking brake, stop the engine, remove the starter
key, wait for all moving parts to stop, and then
relieve all pressure in the hydraulic lines. Refer to
your power unit’s operator’s manual for instructions
on how to relieve hydraulic pressure in lines.
•Know your loader’s safe lifting and operating
capacity and the weight of this product. See the
specifications in this manual for the weight of this
product and refer to your power unit’s and your
loader’s operator’s manuals for safe operating limits.
Lift capacity may be reduced if using a quick-attach.
•Never allow anyone, except the operator, to be
around the power unit or this product when either is
in motion. Do not startup unless others are clear of
the work area.
•Do not allow riders on this product or the power unit.
•Do not stand or climb on this product when raised.
•Never lift the lowest portion of the attachment plate
higher than 5’-0” above the ground.
•Do not place any part of your body under any part of
this product unless this product is securely resting
on adequate blocking or on the ground.
•Do not use blocking made of concrete blocks, logs,
buckets, barrels or any other material that could
suddenly collapse or shift positions. Do not use
wood or steel blocking that shows any signs of
material decay. Do not use blocking that is warped,
twisted, or tapered.
•Never operate controls from the ground. Operate
the controls only from the operator’s station.
•Never leave equipment unattended with the engine
running or with this product raised on the loader.
•Be aware of the added weight and width of this
product. Reduce travel speeds accordingly,
especially when traveling over rough ground.
•Keep this product close to the ground and under
control when transporting.
3

SAFETY INSTRUCTIONS
WORK SAFELY - A CAREFUL OPERATOR IS THE BEST INSURANCE AGAINST ACCIDENTS !!
SECTION 1 (CONTINUED)
WARNING
Obey all the safety instructions listed in
this section and throughout this manual.
Failure to obey instructions in this
section could result in death or serious
injury.
WHEN DEALING WITH HYDRAULICS DURING ANY
TYPE OF ASSEMBLY, OPERATION, MAINTENANCE,
OR OTHER WORK ON OR NEAR THIS PRODUCT:
•Hydraulic fluid under pressure can penetrate the
skin and cause serious injury or death. Hydraulic
leaks under pressure may not be visible!
•If any fluid penetrates the skin, GET IMMEDIATE
MEDICAL ATTENTION!!
•Wear safety glasses, protective clothing, and use a
sound piece of cardboard or wood when searching
for hydraulic leaks. DO NOT USE YOUR HANDS!
•Before connecting or disconnecting hydraulic hoses,
read your power unit’s operator’s manual for detailed
instructions on connecting and disconnecting
hydraulic attachments.
•Make certain that all parts meet the specifications for
this product when installing or replacing hydraulic
hoses or fittings.
•After connecting hydraulic lines:
•Slowly and carefully raise the loader and cycle
the rollback / dump cylinders to check hose
clearances and to check for any interference.
•Operate the hydraulics on this product to check
hose clearances and to check for any
interference.
•Make certain that the hoses cannot interfere
with or actuate the quick-attach mechanism.
•Make certain that hoses will not be pinched, or
get tangled, in any equipment.
•Do not lock the auxiliary hydraulics of your power
unit in the “ON” position.
•Refer to your power unit’s operator’s manual and
this manual for procedures and intervals, then
inspect and maintain the entire hydraulic system to
insure that the fluid remains clean, that all devices
function properly, and that there are no fluid leaks.
WHEN MOUNTING THIS PRODUCT TO YOUR
POWER UNIT:
•Refer to the operator’s manuals of your power unit,
your loader, and your quick-attach for special or
detailed mounting instructions.
•This product should fit onto the quick-attach or
loader arms of your power unit the same as the
original products that were designed by your loader /
quick-attach manufacturer.
•If this product does not fit properly, contact FFC
before operating.
•Never place your finger into the mounting plate or
loader holes. A slight movement of the power unit or
this product could cause serious injury.
BEFORE EACH USE, THOROUGHLY INSPECT THIS
PRODUCT AND:
•Make certain that all safety signs are in place and
legible. Refer to the safety sign page in this manual
for the placement of safety signs for this product.
•Replace all damaged or excessively worn parts and
hardware only with genuine FFC parts or with
properly rated fasteners, hydraulic hoses, or fittings.
•Make certain that all locking pins, latches, and
connection devices are properly installed and
secured.
•Make certain that all protective guards, canopies,
doors, etc. are in place and secure.
WHEN OPERATING THIS PRODUCT IN
ACCORDANCE WITH DESIGN INTENTIONS:
•Keep everyone at least nine feet away from the unit
when operating.
WHEN ADJUSTING, SERVICING OR REPAIRING
THIS PRODUCT:
•Make no modifications to your AutoRake®.
•When making repairs, use only genuine FFC parts
or, for fasteners, hydraulic hoses, or hydraulic
fittings, use only properly rated parts.
•Replacement parts, for parts with safety signs
attached, must also have safety signs attached.
SECTION 2
CAUTION
Obey all the safety instructions listed in
this section and throughout this manual.
Failure to obey instructions in this
section may result in personal injury.
•Do not use the top of this product as a step. Under
certain conditions, this area can be slippery.
4

SAFETY SIGN LOCATIONS
ITEM QTY. PART # - DESCRIPTION
1 1 RDL3141-Read Manual
2 1 RDL3129-Hydraulics
3 2 RDL3100-Stand Clear
4 1 RDL3101-Roll Over Hazard
5 1 RDL3102-Shields
6 2 RDL3178-No Step
INSTRUCTIONS
•Keep all safety signs clean and legible.
•Replace all missing, illegible, or damaged
safety signs.
•Replacement parts for parts with safety
signs attached must also have safety
signs attached.
•Safety signs are available, free of charge,
from your dealer or from FFC.
PLACEMENT OR REPLACEMENT OF SAFETY SIGNS
1. Clean the area of application with non-flammable
solvent, and then wash the same area with soap
and water.
2. Allow the surface to fully dry.
3. Remove the backing from the safety sign, exposing
the adhesive surface.
4. Apply the safety sign to the position shown in the
diagram above and smooth out any bubbles.
ITEM 1
ITEM 2 ITEM 3 ITEM 4
ITEM 5 ITEM6
5

POWER UNIT SPECIFICATIONS
IMPORTANT Exceeding any of the maximum recommended power unit specifications
CAN result in damage to this product and
WILL
void all FFC warranties.
DESCRIPTION SPECIFICATIONS
Rated net Engine Horsepower of Power Unit 110 maximum
Weight of Power Unit without Autorake 10,000 lbs. maximum
Hydraulic Pressure Output 4,000 psi. maximum
Rear Ballast As required to maintain full power unit stability.
(Note the Shipping Weight on page 13, then see the operator’s
manual(s) for your power unit, loader, and quick-attach for
ballasting needs.)
AUTORAKE®MOUNTING
SAFETY FIRST!! READ AND UNDERSTAND THE SAFETY
INSTRUCTIONS (pages 2-5 of this manual) BEFORE BEGINNING ANY
AUTORAKE®MOUNTING
1. Place this product on a firm, level surface that is large enough to safely accommodate this product, your power unit
and all workers involved in the mounting process.
2. Refer to the operator’s manual(s) for your power unit, loader, and quick-attach and follow the mounting instructions
contained therein.
3. Carefully raise the loader and cycle the rollback/dump cylinders to check clearances and to verify that all mounting
procedures have been successfully completed.
4. IMPORTANTLubricate all grease fittings before connecting this product to your power unit’s hydraulic
system. Refer to AUTORAKE®MAINTENANCE on page 8 and follow the instructions.
AUTORAKE®HYDRAULIC CONNECTION
SAFETY FIRST!! READ AND UNDERSTAND THE SAFETY
INSTRUCTIONS (pages 2-5 of this manual) BEFORE BEGINNING ANY
AUTORAKE®HYDRAULIC CONNECTION
1. Disconnect the hydraulic hose quick couplers from one another and attach the quick couplers to your power unit as
per the instructions in your power unit’s operator’s manual.
2. Carefully raise the loader and cycle the rollback/dump cylinders to check hose clearances and to check for any
interference. Operate the hydraulic cylinder(s) on this product to make the same checks.
3. Cycle the hydraulic cylinder(s) on this product several times from fully retracted to fully extended until all air has been
completely removed from the cylinder(s).
NOTICE: When shipped, the hydraulic cylinder(s) on this product contained air or an air-fluid mixture. Also,
there are orifices beneath the port(s) in the hydraulic cylinder barrel(s) that will restrict the exit of that air. Failure
to remove all the air from the hydraulic cylinder(s) can cause uneven, jerky cylinder movement when the
hydraulic controls are being operated and unwanted cylinder movement when those controls are not being
operated.
WARNING
Do not lock the auxiliary hydraulics of your power unit in the “ON” position.
Failure to obey this warning could result in death or serious injury.
6

AUTORAKE®OPERATION
SAFETY FIRST!! READ AND UNDERSTAND THE SAFETY
INSTRUCTIONS (pages 2-5 of this manual) BEFORE BEGINNING ANY
AUTORAKE®OPERATION
WARNING
Failure to obey the following procedures could result in death or serious injury.
•Never lift this product above (a.) the operator’s eye level or (b.) to a height where visibility is
obstructed, whichever is lower.
•Do not roll back this product so far that the load falls off toward or on the operator.
•Do not lock the auxiliary hydraulics of your power unit in the “ON” position.
•Keep everyone at least nine feet away from the unit when operating.
CAUTION
Failure to obey the following procedures may result in personal injury.
•Do not use the top of this product as a step. Under certain conditions, this area can be slippery.
IMPORTANT Attempting to pick up large rocks, large tree branches, etc.
CAN result in damage to this product and
WILL
void all FFC warranties.
IMPORTANT Using this product to till compacted soil
CAN result in damage to this product and
WILL
void all FFC warranties.
Before using this product on an area, make sure that:
•the area is free of all boulders larger than 6” in diameter, all logs and large tree branches, all wire, all lumber, and any
other item that is too large for the bucket or could get wrapped around the rake chain, and
•the soil is relatively loose and any compacted areas have been tilled with another piece of equipment to a depth of 2”
or deeper.
RAKING
Keeping in mind that all raking must be done while moving backward, position your power unit and this product on the
area to be raked. To begin raking:
1. activate the auxiliary hydraulics for operating the rake chain,
(If the rake chain does not move but the hydraulic cylinder begins to retract, then activate the auxiliary hydraulics
in the opposite direction to get the rake chain to operate.)
2. lower the loader arms completely and set the loader arm control in the float position,
3. tilt this product forward until the weight of the rake portion is resting on the depth adjustment plates, and
4. move your power unit slowly backward.
To achieve the best possible results, please keep in mind that:
•If the rake is throwing too much soil into the bucket, then the depth adjustment plates should be placed in a lower hole
on the main housing.
•If the rake is slipping over items that should be collected, then the depth adjustment plates should be placed in a
higher hole on the main housing.
•Multiple passes may be needed to achieve the desired results depending on what those results are and what the
initial conditions are.
•The wide variety of soil types, moisture conditions, compaction levels, foliage densities, and rock and debris
quantities that can be encountered mean that the operator may need to make adjustments based upon the operator’s
experience.
IMPORTANT Opening the main housing and using the bucket for standard bucket operations
CAN result in damage to this product and
WILL
void all FFC warranties.
7

AUTORAKE®OPERATION (Continued)
SAFETY FIRST!! READ AND UNDERSTAND THE SAFETY
INSTRUCTIONS (pages 2-5 of this manual) BEFORE BEGINNING ANY
AUTORAKE®OPERATION
DUMPING
1. Shut off the auxiliary hydraulics.
2. Move to the dump site and park on firm, level ground.
3. Activate the auxiliary hydraulics in the direction opposite of what was used to operate the rake chain. This will retract
the hydraulic cylinder and open the main housing.
4. Raise this product about four feet above the ground.
5. Dump the bucket and reverse the process so that you are ready to resume raking.
AUTORAKE®MAINTENANCE
SAFETY FIRST!! READ AND UNDERSTAND THE SAFETY
INSTRUCTIONS (pages 2-5 of this manual) BEFORE BEGINNING ANY
AUTORAKE®MAINTENANCE
BEFORE EACH USE
•Make sure that all nuts and bolts are in place and properly tightened.
•Make sure that all other fasteners are in place and are performing their specified function.
•Make sure that all hydraulic fittings are tightened and that there are no leaks in any fittings or hoses.
•Make sure that all safety signs are in place, are clean, and are legible.
(SEE THE SAFETY SIGN SECTION ON PAGE 5.)
•Replace any damaged parts and excessively worn parts. Replace the rake chain when the raking action has been
reduced to an inefficient level.
AFTER EVERY 10 HOURS OF USE
•Grease 11 fittings: one on each of the six bearings (one on each end of the two idler shafts and one on each end of
thedriveshaft),
two on each of the two swing arms where the main housing pivots on the bucket, and
one on the barrel end of the hydraulic cylinder.
AFTER EVERY 30 HOURS OF USE
•Check the drive chain and the rake chain tension and adjust if necessary. (See AUTO-RAKE SERVICE on page 9)
•The proper tension on the drive chain results in the longest run of chain having a 3/8” to 1/2” midpoint deflection.
•The proper tension on the rake chain results in the top run of chain (i.e. from the front idler shaft to the drive shaft)
having a 3/4” to 1” midpoint deflection. (Note: For this chain, the combined up and down midpoint deflection of 1-
1/2” to 2” may be easier to measure.)
•Check the rake chain travel to make sure that the chain is centered on the idlers. Adjust the front idler if centering is
necessary.
AFTER EVERY 250 HOURS OF USE
•Check the drive chain, the drive and driven sprockets, the drive shaft, and the idler shafts for excessive wear and
replace if necessary.
IMPORTANT Using heat to straighten bent rake chain teeth
CAN result in damage to this product and
WILL
void all FFC warranties.
•Check for bent rake chain teeth and cold straighten those teeth.
BEFORE EXTENDED STORAGE (More than 2 month)
•Oil the drive chain and all 3 rake chains.
8

AUTORAKE®SERVICE
SAFETY FIRST!! READ AND UNDERSTAND THE SAFETY
INSTRUCTIONS (pages 2-5 of this manual) BEFORE BEGINNING ANY
AUTORAKE®SERVICE
1. Park your power unit on a level surface with this product properly attached.
2. Place your power unit’s transmission in “Park” and engage the parking brake.
3. Lower this product onto a level surface.
4. Shut off your power unit’s engine, remove the starter key, wait for all moving parts to come to a stop, and relieve all
pressure in the hydraulic lines.
DRIVE CHAIN ADJUSTMENT
5. Remove four bolts from the drive chain shield. (Two from the top-front face and two from the bottom-rear face.)
6. Remove the shield by pulling straight out to the left.
7. Loosen the nut on the idler sprocket and push the sprocket toward the chain until the opposite chain run (i.e. the
longest) has a midpoint defection of 3/8” to 1/2”.
8. Retighten the idler sprocket nut to 304 ft. lbs., + or - 22 ft. lbs.
9. Recheck the chain deflection and repeat steps 7 and 8 if the deflection is not within the above specified range.
10. Replace the drive chain shield and bolts. Tighten the bolts to 20 ft. lbs., + or - 2.0 ft. lbs.
RAKE CHAIN ADJUSTMENT
5. Loosen the four nuts that secure the bearing on one end of the front idler shaft. Repeat this process for the other end
of the front idler shaft.
6. For each of the two front idler shaft bearings, loosen the jam nut on the 5/8” dia. x 6” long tightener bolt.
7. Tighten the tightener bolts until a midpoint deflection of 3/4” to 1” between the idler shaft and the drive shaft has been
achieved for each of the roller chain portions of the rake chain. (By utilizing a tape measure and a long, slender hook
device, the combined up and down midpoint deflection of 1-1/2” to 2” may be easier to measure.)
8. Retighten the four nuts on each of the two bearings to 84 ft. lbs., + or - 6.0 ft. lbs. and retighten the jam nut on the two
tightener bolts to 169 ft. lbs., + or - 12 ft. lbs.
9. Recheck the chain deflection for compliance with the above specifications and check the chain travel to make sure
that the chain is centered on the idlers. Repeat steps 5 to 8 until both the specified deflection and desired line of
travel has been attained.
9

PARTS ILLUSTRATION
10

AUTORAKE®PARTS LIST
LAF6866 LAF6876
ITEM QTY. 66” 76” DESCRIPTION
1 1 LAF4216 Hydraulic Cylinder: 2” Dia. Piston x 8-1/2” Stroke x 1” Dia. Rod
With(2)#6MaleO-RingPorts
2 1 LAF4243 Hydraulic Hose Protector: 1-7/8” Dia. x 7’-9” Long
3 1 LAF4245 Hydraulic Hose Protector: 1-7/8” Dia. x 2-10” Long
4 1 LAF4082 Hydraulic Hose Protector: 1-7/8” Dia. x 2-2” Long
5 1 LAF4533 Hydraulic Control Block
6 2 LAF4252 Hydraulic Plug: Socket Head, Male #6 O-Ring Boss
7 1 LAF4528 Hydraulic Check Valve Cartridge: Male #10 O-Ring Boss
8 1 LAF4528 Hydraulic Relief Valve: Male #10 O-Ring Boss
9 1 LAF4278 Hydraulic Elbow: 90 Degree, Male #10 O-Ring Boss To Male #10 JIC
10 1 Contact FFC To Obtain The Correct Hydraulic Hose Quick Coupler: #10 Female O-Ring Boss,
Couplers (And Possibly Adapters). With Male Connection
11 1 Contact FFC To Obtain The Correct Hydraulic Hose Quick Coupler: #10 Female O-Ring Boss
Couplers (And Possibly Adapters). With Female Connection
12 2 LAF4360 Hydraulic Hose: 1/2” I.D. x 2’-6” Long W/ (1) #10 Female JIC & (1) #10
MaleO-RingBossFittings
13 1 LAF4307 Hydraulic Hose: 3/8” I.D. x 3’-8” Long W/ (2) #6 Female JIC Fittings
14 1 LAF4311 Hydraulic Hose: 3/8” I.D. x 2’-10” Long W/ (2) #6 Female JIC Fittings
15 2 LAF4514 Hydraulic Hose: 1/2” I.D. x 7’-9” Long W/ (1) #10 Female JIC & (1) #10
MaleO-RingBossFittings
16 2 LAF4406 Hydraulic Adapter: Male #6 O-Ring Boss To Male #6 JIC
17 3 LAF4414 Hydraulic Adapter: Male #10 O-Ring Boss To Male #10 JIC
18 1 LAF4417 Hydraulic Elbow: 90 Degree, Female #10 JIC To Male #10 JIC
20 1 LAF4584 Hydraulic Motor: 2 Bolt Flange With 1-1/4” Dia. Keyed Shaft
And 7/8” Dia. x 14 TPI Female O-Ring Boss Ports
21 2 LAF6801 Swing Arm
22 4 LAF6802 Swing Arm Pivot Bushing
23 4 LAF6803 Depth Adjustment Plate
24 1 LAF6804 Connecting Link: #80 Single Pitch
25 7 LAF6805 Washer: 13/32” I.D. x 1-27/32” O.D. x 1/4” Thick (Shaft End)
26 5 LAF6806 Shaft End Shield
27 1 LAF6807 Drive Chain Shield
28 2 LAF6808 Flange Mount Bearing: 1-7/16” I.D., 4 Bolt
29 4 LAF6809 Flange Mount Bearing: 1-7/16” I.D., 2 Bolt
30 2 LAF6810 Bearing Backplate
31 1 LAF6811 Drive Sprocket: 13 Tooth #80 With 1-1/4” Keyed Bore
32 1 LAF6812 Driven Sprocket: 13 Tooth #80 With 1-7/16” Keyed Bore
33 1 LAF6813 Idler Sprocket: 12 Tooth #80 With 3/4” I.D. Bearing
34 1 LAF6814 Roller Chain: #80 x 37 Links
35 1 LAF6815 Offset Connecting Link: #80
36 1 LAF9965 Washer: 41/64” I.D. x 2” O.D. x 5/16” Thick (Spring Retainer)
37 1 LAF6817 Spring: 1-3/4”O.D. x 4” Long, Coil Compression
38 2 LAF6818 Cylinder Rod Support Block Pivot Bushing
39 1 LAF6819 Cylinder Rod Support Block
40 1 LAF6820 Cylinder Rod Guide Tube
41 2 LAF6821 Cylinder Rod Wiper: 1” I.D.
42 2 LAF6822 Washer: 17/32” I.D. x 2-1/4” O.D. x 1/4” Thick (Guide Tube Retainer)
43 1 LAF6823 Cylinder Cross Tube Sleeve
NOTE: All parts are the same as the LAF6876 except for those parts numbered under the other models.
11

AUTORAKE®PARTS LIST (Continued)
LAF6866 LAF6876
ITEM QTY. 66” 76” DESCRIPTION
44 3 LAF6824 Connecting Link: #80 Double Pitch
45 1 LAF6867 LAF6877 Bucket Weldment
46 1 LAF6868 LAF6878 Main Housing
47 2 LAF6869 LAF6879 Rake Chain Shaft: Idler
48 1 LAF6870 LAF6880 Rake Chain Shaft: Drive
49 1 LAF6871 LAF6881 Rake Chain Weldment
50 4 RHW1203 Hex Head Cap Screw: 3/8” Dia. x 3/4” Long, Grade 5
51 7 RHW1205 Hex Head Cap Screw: 3/8” Dia. x 1” Long, Grade 5
52 2 RHW1218 Hex Head Cap Screw: 3/8” Dia. x 3-3/4” Long, Grade 5
53 2 RHW1403 Hex Head Cap Screw: 1/2” Dia. x 1” Long, Grade 5
54 2 RHW1406 Hex Head Cap Screw: 1/2” Dia. x 1-3/4” Long, Grade 5
55 2 RHW1666 Hex Head Cap Screw: 5/8” Dia. x 6” Long, Grade 5, Full Threads
56 4 RHW1707 Hex Head Cap Screw: 3/4” Dia. x 2-1/2” Long, Grade 5
57 1 RHW1715 Hex Head Cap Screw: 3/4” Dia. x 5” Long, Grade 5
58 8 RHW2406 Carriage Bolt: 1/2” Dia. x 1-3/4” Long, Grade 5
59 1 RHW2709 Carriage Bolt: 3/4” Dia. x 3” Long, Grade 5
60 4 RHW5262 Washer: 3/8” Dia. USS
61 2 RHW5462 Washer: 1/2” Dia. USS
62 16 RHW5732 Washer: 3/4” Dia. SAE
63 1 RHW5932 Washer: 1” Dia. SAE
64 6 RHW6202 Lock Washer: 3/8” Dia. Medium Split
65 18 RHW6402 Lock Washer: 1/2” Dia. Medium Split
66 2 RHW7201 Hex Nut: 3/8” Dia. With 16 Threads Per Inch
67 16 RHW7401 Hex Nut: 1/2” Dia. With 13 Threads Per Inch
68 8 RHW7403 Locknut: 1/2” Dia. Center Dent
69 2 RHW7601 Hex Nut: 5/8” Dia. With 11 Threads Per Inch
70 11 RHW8090 Grease Zerk: 1/4” Dia. With 28 TPI, Self-Tapping
71 1 RHW8115 Square Key: 5/16” x 5/16” x 1-1/4” Long (Drive)
72 1 RHW8116 Square Key: 3/8” x 3/8” x 2” Long (Driven)
73 12 RHW8226 Set Screw: 5/16” Dia. x 24 TPI x 1/4” Long, Socket Head
74 2 RHW8236 Socket Head Cap Screw: 1/2” Dia. x 1-1/2” Long, Grade 5
75 6 RHW8604 Locknut: 3/4” Dia. Flanged
76 1 RHW8605 Locknut: 5/8” Dia. With 18 Threads Per Inch, Top Lock
77 12 RHW2405 Carriage Bolt: 1/2” Dia. x 1-1/2” Long, Grade 5
78 2 LAF4298 Hydraulic Elbow: 90 Degree, Male #6 O-Ring to Male #6 JIC
79 2 RHW5970 Machinery Bushing – 2.25 OD. X 1.50 ID X 10 GA.
80 4 LAF9526 Spacer – 1.88 OD. X 0.25 Wall X 0.50
81 1 LAF4524 Hydraulic Orifice: 0.078 ID
82 1 LAF4527 Hydraulic Orifice: 0.142 ID
12

NUMBERS FROM HYDRAULIC CYLINDER ILLUSTRATION
1 1 LAF4105 Barrel: 2” I.D. x 8-1/2” Stroke With Internal Cross Tube End
2 1 LAF4106 Shaft: 1” Dia. With Turned Down 5/8-18 Threaded End
3 1 LAF4107 Head: 1” I.D., Nominal
4 1 LAF4108 Piston: 2” O.D. x 5/8” I.D., Nominal
5 1 RHW8605 Nut: 5/8” Dia., 18 TPI, Top Lock
6 1 LAF4109 Seal Kit (Includes All Seals, O-Rings, Etc.)
7 1 RHW8090 Grease Zerk: 1/4” Dia. With 28 TPI, Self-Tapping
NOTE: All parts are the same as the LAF6876 except for those parts numbered under the other models.
HYDRAULIC CYLINDER
ILLUSTRATION
AUTORAKE®SPECIFICATIONS
Model Overall Overall Overall Working No. of Bucket Shipping
Number Width Height Depth Width Teeth Capacity* Weight
LAF6866 74” 40” 64” 63.5” 432 13 cu. ft. 1,092 lbs.
LAF6876 84” 40” 64” 73.5” 504 15 cu. ft. 1,200 lbs.
All replacement hydraulic hoses and fittings must have a minimum rated working pressure of 4,000 psi.
TORQUE SPECIFICATION FOR STANDARD MACHINE HARDWARE
Bolt SAE Grade Torque Bolt SAE Grade Torque
Size Bolt Ft./Lbs Size Bolt Ft./Lbs
0.31-24 5 19 0.63-11 5 150
0.38-16 5 30 0.63-18 5 180
0.50-13 5 75 0.75-10 5 260
13
This manual suits for next models
1
Table of contents
Other FFC Farm Equipment manuals
Popular Farm Equipment manuals by other brands

Krone
Krone EasyCut 2801 CV operating instructions
AGI
AGI A114 Assembly and operators manual
Checchi & Magli
Checchi & Magli UNITRIUM Use and maintenance manual
RUGGED RANCH
RUGGED RANCH Nesting Box Assembling instructions

Cima
Cima S520 Instructions for use and maintenance
AGI
AGI Westeel EasyFlow2 100 Series Assembly & installation manual
