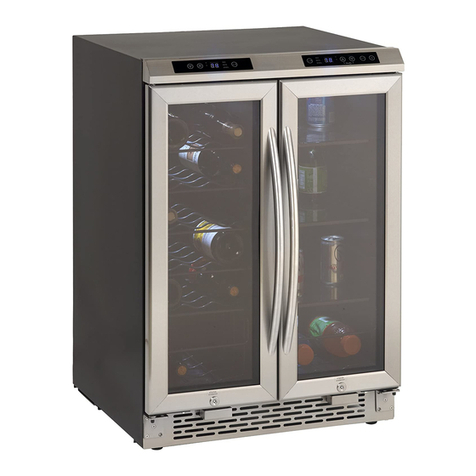
Fhiaba StandPlus Series User manual

Wines cellars
User manual
Cave à Vins
Mode d’emploi
Enfriador de botellas de vino
Manual de usuario

www.fhiaba.com · www.thevettagroup.com · Info Line 1-855-4-FHIABA (1-855-434-4222) www.fhiaba.com · www.thevettagroup.com · Info Line 1-855-4-FHIABA (1-855-434-4222) 3
www.fhiaba.com · www.thevettagroup.com · Info Line 1-855-4-FHIABA (1-855-434-4222)
2
EN
1
1.1
1.2
1.3
IMPORTANT INSTRUCTIONS FOR SAFETY AND THE ENVIRONMENT
For your safety..................................................................................................................................................
Important information when using the appliance......................................................................................
Respect for the environment..........................................................................................................................
4
4
4
5
2
2.1
2.2
INSTALLATION
Installation..........................................................................................................................................................
Connection to the electrical mains...............................................................................................................
5
5
5
3
3.1
3.2
3.3
3.4
3.5
3.6
BEFORE STARTING
Getting to know the appliance.......................................................................................................................
Main components..............................................................................................................................................
Electronic Control.............................................................................................................................................
Main control panel (1T and 0H models).......................................................................................................
Electronic Control.............................................................................................................................................
Main control panel Main control panel (0F models).................................................................................
6
6
7
9
9
10
10
4
4.1
4.2
4.3
TURNING THE APPLIANCE ON AND OFF
Turning on and off............................................................................................................................................
How to adjust the temperature to suit various needs..............................................................................
Information and malfunction signals on the display................................................................................
11
11
11
12
5
5.1
5.2
5.3
SETTINGS AND SPECIAL FUNCTIONS
Customization and Language Settings.........................................................................................................
Special functions activated through the Menu..........................................................................................
Basic settings of the Menu.............................................................................................................................
12
12
13
14
6
6.1
INTERNAL LAYOUT
Internal Layout (positioning, adjustment, removal)...................................................................................
16
16
7
7.1
LIGHTING
Lighting...............................................................................................................................................................
16
16
8
8.1
USE OF THE TRIMODE COMPARTMENT
Use of the TriMode compartment..................................................................................................................
16
16
9
9.1
9.2
9.3
9.4
9.5
CONSERVATION OF WINES
General directions............................................................................................................................................
Conservation temperature..............................................................................................................................
Time of conservation.......................................................................................................................................
Consumption temperature.............................................................................................................................
Position of bottles.............................................................................................................................................
17
17
17
18
19
19
10
10.1
CONSERVATION OF FOOD
Recommended times for food conservation...............................................................................................
20
20
11
11.1
11.2
11.3
CARE AND CLEANING
Care and Cleaning.............................................................................................................................................
Condenser cleaning..........................................................................................................................................
Internal cleaning...............................................................................................................................................
21
21
21
22
12
12.1
12.2
TROUBLESHOOTING GUIDE
Troubleshootingguide......................................................................................................................................
Malfunction indications appearing on the display.....................................................................................
22
22
24
13
13.1
13.2
FHIABA ACCESS MENU MAP
Functions............................................................................................................................................................
Settings...............................................................................................................................................................
25
25
26
INDEX

www.fhiaba.com · www.thevettagroup.com · Info Line 1-855-4-FHIABA (1-855-434-4222) www.fhiaba.com · www.thevettagroup.com · Info Line 1-855-4-FHIABA (1-855-434-4222)
4 5
EN
1.1 For your safety
> If this appliance is replacing an existing appliance
which must be removed or disposed of, make sure
that it does not become a dangerous trap for children
by cutting its power supply cable and rendering it im-
possible to close the door. Use the same caution at
the end of the lifespan of the new appliance.
> This appliance is designed to refrigerate beverages
and foods and is destined for domestic use.
> The appliance must be installed by following the
instructions in the Installation Guide, particular care
should be taken not to obstruct the vent openings of
the appliance and of the built-in units.
> The appliance features a concentrated lighting sys-
tem with LED lamps. Do not stare into these lamps
when they are on to avoid possible eyesight damage.
This warning is also contained on the label attached
to the inside of the refrigerator door.
> When the freezer is functioning do not touch the
inner surfaces in stainless steel with wet or damp
hands, since skin may stick to the very cold surfaces.
> Do not use any type of electrical equipment inside
of the food conservation compartments.
> When positioning the shelves, do not place fingers
in the shelf slide guides.
> Do not position containers of flammable liquids
near the appliance.
> Completely switch o the appliance and unplug the
power supply cable during cleaning operations. If the
plug is not easily reached, it is a good idea to discon-
nect the omnipolar switch that controls the socket
that the appliance is connected to.
> The packaging parts can be dangerous for chil-
dren: do not allow children to play with the plastic
bags, plastic film or Styrofoam.
> Any repairs must be performed by a qualified Fh-
iaba Service technician.
> This appliance is not intended for use by persons
(including children) with reduced physical, sensory
or lack of experience and knowledge unless they
have been given supervision or instruction concern-
ing use of the appliance by a person responsible for
their safety. Children should be supervised to ensure
that they do not play with the appliance.
> Do not damage the appliance refrigerant circuit
pipes.
> Do not store explosive substances such as aerosol
cans with a flammable propellant in this appliance.
> If the power cord of this appliance is damaged, it
must be replaced by the manufacturer, customer
service or a similarly qualified person. Improper in-
stallations and repairs may put the user at consider-
able risk.
> Repairs may be performed by the manufacturer,
customer service or a similarly qualified person only.
Symbols used in the Guide:
Notes
Suggestions for proper use
of the appliance
Important
Instruction to prevent damage
to the appliance
Warning
Instructions for preventing personal injury
1.2 Important information when using
the appliance
> Never use electrical appliances inside the appli-
ance (e.g. heater, electric ice maker, etc.). Explosion
hazard!
> Never defrost or clean the appliance with a steam
cleaner! The steam may penetrate electrical parts
and cause a short-circuit. Risk of electric shock!
> Do not use pointed and sharp-edged implements
to remove frost or layers of ice. You could dam-
age the refrigerant tubes. Leaking refrigerant may
cause eye injuries or ignite.
> Do not store products which contain flammable
propellants (e.g. spray cans) or explosive substanc-
es in the appliance.
Explosion hazard!
> Do not stand on or lean heavily against base of
appliance, drawers or doors, etc.
> Before cleaning the appliance, pull out the power
cord plug or switch o the fuse. Do not pull out the
power cord plug by tugging on the power cord.
> Store high-percentage alcohol tightly closed and
standing up.
> Keep plastic parts and the door seal free of oil and
grease. Otherwise, parts and door seal will become
porous.
> Never cover or block the ventilation openings for
the appliance.
2.1 Installation
Make sure that installation is performed correct-
ly, adhering to all of the instructions in the specif-
ic installation guide provided with the appliance.
2.2 Connection to the electrical mains
The appliance operates at 115 V AC, 60 Hz and is
equipped with a power supply cord with a 3-prong
grounded plug, which must be connected to a cor-
responding 3-prong (15 Amp) grounding-type wall
receptacle.
Important
Do not use extension cords and/or
multiple adapters for connection.
1.3 Respect for the environment
> Make sure you dispose properly of all packing
materials.
> The appliance must not be disposed of with ur-
ban waste.
Contact local waste disposal authorities for infor-
mation on the disposal of recyclable waste.
> For disposal, cut the power supply cord and
make it impossible to close the door.
> During disposal, avoid damage to the refrigera-
tion circuit.
> Neither the refrigeration circuit nor the insula-
tion contain substances that are hazardous to the
ozone layer
1. IMPORTANT INSTRUCTIONS FOR SAFETY AND THE ENVIRONMENT 2. INSTALLATION

www.fhiaba.com · www.thevettagroup.com · Info Line 1-855-4-FHIABA (1-855-434-4222) www.fhiaba.com · www.thevettagroup.com · Info Line 1-855-4-FHIABA (1-855-434-4222)
6 7
1
7
2
3
4
5
6
1
5
3
2
4
EN
3.1 Getting to know the appliance
Congratulations for having purchased your new Fh-
iaba: from now on you can use our innovative con-
servation system, which will allow you to keep all of
your food in the best way possible.
This manual will answer most of your questions
about the product’s features. Should you require
further information, please
> call us: 1-855-4-FHIABA (1-855-434-4222)
> write us an e-mail at fhiaba@adcoservice.com
>our website www.fhiaba.com
Important
Before calling, write down the model
type and serial number which are avail-
able on the warranty certificate and on
the rating plate located on the bottom
left-hand corner of the appliance, behind
the bottom drawer.
1T Models
0F Models
3.2 Main components
1Structure in stainless
steel with aluminium
trim
2Wine Cellar and TriMode
control panels
3Sliding bottle shelfs,
mounted on wheels
for easy extraction
4 Cantina area
control panel
5 Wine Cellar
6Frezer compartment
that can be transformed
into a refrigerator
or Crisper-Fresco
compartment
(TriMode function)
7Led lighting
3. BEFORE STARTING
Cantina
TriMode Wine Cellar
Cantina
Wine Cellar

www.fhiaba.com · www.thevettagroup.com · Info Line 1-855-4-FHIABA (1-855-434-4222) www.fhiaba.com · www.thevettagroup.com · Info Line 1-855-4-FHIABA (1-855-434-4222)
8 9
12 34 5 67 98
ALARM
ENTER
WINE CELLAR
UNIT LIGHT
1
7
2
3
6
EN
0H Models
1Structure in stainless
steel with aluminium
trim
2Wine Cellar and TriMode
control panels
3Sliding bottle shelfs,
mounted on wheels
for easy extraction
5Wine Cellar
6Frezer compartment
that can be transformed
into a refrigerator
or Crisper-Fresco
compartment
(TriMode function)
7Innovative lighting
Wine CellarTriMode
FridgeTriMode
3.3 Electronic Control
The innovative electronic control system designed by Fhiaba maintains constant temperature on the
three compartments and visualizes it on the control panel display. It also allows user interaction making
it possible to personalize settings of the various functions and to receive sound and/or visual messages
should any malfunction occur in the appliance.
3.4 Main control panel (1T and 0H models)
1Unit Allows complete shutdown and start-up of the appliance
(press for three seconds).
2Wine cellar Allows switching on and o only the Wine Cellar compartment (press for three seconds).
3Menu Allows access to the appliance functions menu.
4Up/down Wine
Cellar
Using the Up and Down buttons, it is possible to change the set temperature of the refrigerator
and scroll through the interactive menu.
5Display Displays the temperature of the Wine Cellar and TriMode compartments, the date and time,
Menu functions and visual messages.
6Up/Down
(TriMode)
By selecting Up/Down the preset temperature can be changed according to the selected function
mode (freezer, refrigerator, Crisper-Fresco) and scroll through the interactive menu.
7Enter Confirms activation or deactivation of the selections made in the Menu.
8Alarm Blinks to signal user alerts such as door left open, also in combination with a sound signal which
can be deactivated by pressing the button.
9Light Allows illumination of the Wine Cellar and Cantina compartments also when the door is closed.
Once activated, the light of the top compartment will automatically shut o after 6 hours.
3. BEFORE STARTING

www.fhiaba.com · www.thevettagroup.com · Info Line 1-855-4-FHIABA (1-855-434-4222) www.fhiaba.com · www.thevettagroup.com · Info Line 1-855-4-FHIABA (1-855-434-4222)
10 11
12 34 5 67 98
ENTER
UNIT HUMIDITY ALARM
LIGHT
10 11 12 13
CANTINA HUMIDITY
EN
10 Display Shows the temperature of the Cantina compartment.
11 Up/Down
Cantina
Using the Up and Down keys, it is possible to change the set temperature for the Cantina
compartment.
12 Cantina Allows switching on and off only the Cantina compartment on or off
(press for three seconds).
13 Humidity Allows adjustment of humidity in the Wine Cellar and Cantina compartments to three levels:
High, Medium, and Low.
3.6 Main control panel (0F models)
1Unit Allows complete shutdown and start-up of the appliance
(press for three seconds).
2Humidity Allows adjustment of humidity in the Wine Cellar and Cantina compartments to three levels:
High, Medium and Low.
3Menu Allows access to the appliance functions menu.
4Up/down
Cantina
Using the Up and Down buttons, it is possible to change the set temperature of the refrigerator
and scroll through the interactive menu.
5Display Displays the temperature of the Wine Cellar and TriMode compartments, the date and time, Menu
functions and visual messages.
6Up/Down
Wine Cella
Using the Up and Down keys, it is possible to change the set temperature for the Cantina com-
partment and scroll through the interactive menu.
7Enter Confirms activation or deactivation of the selections made in the Menu.
8Light Allows illumination of the Wine Cellar and Cantina compartments also when the door is closed.
Once activated, the light of the top compartment will automatically shut off after 6 hours.
9Alarm Blinks to signal user alerts such as door left open, also in combination with a sound signal which can
be deactivated by pressing the button.
3.5 Secondary control panel (1T models) 4.1 Turning on and o
First start-up
When the appliance is connected to the electrical
power supply but has not yet been turned on, the
display shows the message
This is a safety message to warn that power is
supplied to the appliance, while all of the keys on
the panel are off.
To switch on all the appliance compartments,
press the Unit button for three seconds.
Turning off the Wine Cellar compartment
Once you have turned on all of the compartments
of the appliance, you can turn off only the wine
cellar compartment by pressing the relevant key
for three seconds.
The TriMode compartment is always on and can-
not be turned off except by completely turning off
the appliance.
Turning the Wine Cellar compartment on again
Press again for three seconds the relevant key.
Complete shutdown
To shut down the unit completely for cleaning or
maintenance, press the Unit key for three sec-
onds.
Also take the plug out of the socket and turn off
the omnipolar switch that powers it.
Lengthy shutdown periods
After you have completely shut down the appli-
ance and unplugged it, empty it of all its contents,
clean it and dry it. Leave the doors and the draw-
ers ajar to prevent the formation of unpleasant
odours.
Note
To prevent accidental modification of set-
tings, the keypad locks automatically after a
certain period of time and the display shows
the message “keypad locked”. To re-activate
it, simultaneously press the keys Menu and
Up/Down (Down) for three seconds or Menu.
At the first start-up, if the message Standby
does not appear, it means that the appliance
has already started the cooling process. If this
is the case, deactivate any possible acoustic
signals by pressing the Alarm key , close
the door and wait until the set temperature is
reached.
During the first start-up, you will not be able
to use the Menu to modify factory settings un-
til the default temperature has been reached.
It is however possible to set the time and date
immediately; these parameters are required
to activate some of the special functions.
If only the Cantina or Wine Cellar compart-
ment is turned o, the corresponding fan will
continue to run independently to prevent the
formation of unpleasant odours and mould.
4.2 How to adjust the temperature
for suit various needs
To adjust the temperature in the various com-
partments, use the up/down key for that com-
partment (see chapter 3.5).
If the “keypad locked” message appear, simul-
taneously press the keys Menu and Up/Down
(Down) for 3 seconds or Menu .
Wines compartment
Each model has been carefully tested before
leaving the factory and is adjusted so as to en-
sure high performance and low consumption.
The ideal temperature for wine conservation does
however depend on the types of wine you want to
conserve, the method of conservation (Wine Cel-
lar for conservation and consumption, or Cantina
for the conservation and aging of prized bottles).
It also varies according to personal taste.
Please refer to the guide on wine conservation
included further ahead in this manual.
As needed, you can reset the temperatures as
follows:
> Cantina Compartment:
from +4° C to +18° C (from 39° F to 64° F).
The default temperature is +12° C (53° F).
> Wine Cellar compartment:
from +4° C to +18° C (from 39° F to 64° F).
The default temperature is +10° C (50° F).
TriMode compartment (1T/0T/0H models)
The TriMode compartment is default set to freez-
er mode but it can also be set to run as a refrig-
erator or cooler compartment.
Instructions for conversion are provided in the
paragraph on special functions and settings.
As needed, you can reset the temperatures as
follows:
3. BEFORE STARTING 4. TURNING THE APPLIANCE ON AND OFF

www.fhiaba.com · www.thevettagroup.com · Info Line 1-855-4-FHIABA (1-855-434-4222) www.fhiaba.com · www.thevettagroup.com · Info Line 1-855-4-FHIABA (1-855-434-4222)
12 13
EN
> Freezer compartment: from -13° C to -23° C
(from 9° F to -11° F), the default temperature,
which is recommended, is -18° (0° F)
> Refrigerator compartment: from +1° C to +7°
C (from 34° F to 46° F), the default temperature,
which is recommended, is +5° C (41° F).
> Cooler compartment: from -2° C to +2° C (from
28° F to 36° F), the default temperature, which is
recommended, is 0° C (32° F).
Warning
If the “keypad locked” message appear, si-
multaneously press the keys Menu and
Up/Down (Down) for 3 seconds.
Note
The displayed temperature may vary
slightly with respect to the set tempera-
ture if the doors are continuously opened
or insertion of room temperature food or
large quantities of food.
It takes 6 to 12 hours to reach the select-
ed temperature.
4.3 Information and malfunction
signals on the display
An integrated control system provides informa-
tion through luminous signals or text messages
shown on the display.
The information signal is always displayed with a
fixed text message, while a malfunction signal is
shown with blinking text.
The acoustic signal that accompanies some mal-
function signals can be deactivated by pressing
the Alarm key on the main control panel.
The list of malfunction signals is located in the
back of this manual.
5.1 Customization and Language
Settings
Note
To prevent an inadvertent change to the
settings the keypad is automatically
locked after a certain period of time.
To re-activate the Menu function, press si-
multaneously the Menu button and the
Down button for at least three seconds
or just press the Menu button again for
3 seconds.
The key lock can be disabled through the
specific function in the Settings menu.
It is possible to customized the functions of your
Fhiaba to adapt it to diverse usage needs, reset-
ting the main parameters (Settings) or activating
special functions (Functions).
Functions are visualized on the main display by
pressing the Menu button .
The Up/Down buttons permit scrolling the avail-
able functions, which can be selected by press-
ing the Enter button . The display visualizes the
current functioning status.
Using the Up/Down buttons , it is also possible
to scroll through the selected function, activating
or deactivating by pressing the Enter button .
Once the function is confirmed, the display will
automatically visualize the main menu to select
other functions.
At any time it is possible to return to the previous
selection through
the Menu button .
The language of the messages appearing on the
display can be changed by operating as follows:
Enter the Menu by pressing the Menu button
select Settings via the Up/Down buttons and
confirm via Enter .
Then select the Language function and the de-
sired language.
5.2 Special functions activated through
the Menu
To use special functions, select the Menu key and
use the Up/Down key to access the menu, con-
firming the selection
.
Dual Zone (0T, 0H models)
This function can be activated only on models fea-
turing a wine cellar without internal separator. It
allows to dierentiate the temperature in the up-
per part of the cellar (warmer and therefore better
suited to keep red wines) from the temperature in
the lower part (colder and therefore better suited to
keep white wines).
Shopping TriMode
This function must be activated at least 24 hours
before inserting room temperature items into the
freezer, or several hours before placing into the
freezer previously frozen items which have been
subject to a slight temperature rise. This func-
tion is automatically deactivated when the pro-
grammed time period expires.
It is possible o program timed activation of the
function.
After a prolonged interruption of the electrical
power, it is necessary to reactivate the function.
How to activate:
How to deactivate:
Vacation TriMode
This function (recommended in case of prolonged
absences since it allows considerable energy sav-
ings) brings the Tri-Mode compartment tempera-
ture to - 18°C (46.4°F).
It is possible to program the duration, or it can be
manually deactivated upon re-entry after a period
of absence.
This function remains active even if during the pe-
riod of absence there is a prolonged interruption of
electrical power.
It is possible to program a period from 1 to 90 days.
Bottle Cooler
This function can be activated when it is necessary
to cool o beverages quickly, by placing them inside
the freezer compartment.
It is possible to select a duration of 1 to 45 minutes.
A sound signal will indicated when the optimal tem-
perature has been reached.
After removing the beverages, deactivate the sound
signal by pressing the Alarm button .
How to activate:
How to deactivate:
How to program timed activation:
How to activate:
How to deactivate:
How to program the duration:
How to activate:
How to deactivate:
How to program the duration:
5. SETTINGS AND SPECIAL FUNCTIONS
FRIDGE
UNIT

www.fhiaba.com · www.thevettagroup.com · Info Line 1-855-4-FHIABA (1-855-434-4222) www.fhiaba.com · www.thevettagroup.com · Info Line 1-855-4-FHIABA (1-855-434-4222)
14 15
EN
DATE
Set date
The display will visualize the date in the format
dd:mm:yy (day:month:year), the day will blink. Use
the Up/Down buttons to modify the setting, con-
firm with Enter to go on to the next setting; once
the year is confirmed the date will be set.
Show Date
Using this function it is possible to deactivate/acti-
vate the date visualization on the display.
Sabbath Mode (Optional)
The function makes it possible to comply to certain
religious observances requiring that the operation
of the appliance is not aected by the opening or
closing of the doors (the thermostatic control, the
inner lighting and the ice maker are deactivated).
How to activate:
How to deactivate:
Attention
If the default settings are restored, it is nec-
essary to reactivate the choice of operation
of the TriMode compartment in case it was
previously set as Fridge or Fresco.
5.3 Basic settings of the Menu
Select the Menu button and used the Up/Down
button to select .
TriMode Options
The freezer compartment can, if required, be con-
verted to the refrigeration o Crisper-Fresco operat-
ing mode.
How to set the Fridge function:
How to set the Crisper-Fresco function:
How to revert to the Freezer function:
How to reset default settings:
How to set the date:
How to activate the date:
How to deactivate the date:
Default Setting
This oers the possibility to reset default factory
settings and cancels any previous changes.
Keypad lock
Through this function it is possible to activate/de-
activate the keypad lock.
TIME
Set time
The display visualizes the hours and minutes in the
format hh:mm and with hh: blinking. Use the Up/
Down buttons to modify the setting and then con-
firm by pressing Enter to go on to the next setting.
Once the minutes are confirmed, the time will be
set.
How to set the time:
Set 12/24
This function selects the display at 12 or 24 h.
How to set the display to 12 h:
How to set the display to 24 h:
Show Time
Through this function it is possible to activate/de-
activate the constant visualization of the time.
How to activate the permanent time:
How to deactivate:
LANGUAGE
The function allows selection of the language for
the display messages.
Set °C/°F
This function permits visualizing the temperature
in Centigrade or Fahrenheit degrees. Normally, the
appliance is set for visualization in centigrade de-
grees.
How to set the temperature in Centigrade:
How to set the temperature in Fahrenheit:
How to activate:
keypad lock
How to deactivate:
keypad lock
Italian
English
French
German
Spanish
5. SETTINGS AND SPECIAL FUNCTIONS

www.fhiaba.com · www.thevettagroup.com · Info Line 1-855-4-FHIABA (1-855-434-4222) www.fhiaba.com · www.thevettagroup.com · Info Line 1-855-4-FHIABA (1-855-434-4222)
16 17
ICEMAKER
ENTER
FRIDGE
UNITICEMAKER
ENTER
FRIDGE
UNIT
ICEMAKER
ENTER
FRIDGE
UNIT
CRISPER
1T 0H 0F
EN
6.1 Internal Layout
(positioning, adjustment, removal)
Wine shelf
The shelves can be easily removed for cleaning.
Remove the bottles, completely extract the shelf,
tilt it upward until the wheels are free of their
seat and extract it.
TriMode drawer (1T, 0T, 0H)
Fixed to the slide guides with two locking nuts
> to remove the drawer, unscrew the locking nuts
and remove the drawer.
> to remove the inner TriMode drawer unscrew
the locking nuts.
7.1 Lighting
To provide optimum interior lighting, LED strips
illuminate the refrigerator compartment from
the top and sets of LED lights directly illuminate
different areas of the refrigerator compartment,
of the Crisper-Fresco drawers and the freezer
drawer.
In case of malfunction and/or failure of the light-
ing system, you should contact an authorized Fh-
iaba Service Agent.
Note
Once activated, the light of the top com-
partment will automatically shut off after
6 hours.
8.1 Use of the TriMode compartment
The TriMode compartment, used in conjunction
with the Wine Cellar and Cantina compartment,
allows great flexibility in the use of the appliance.
Some possible uses:
Freezer mode
> Liquors, such as vodka, gin, tequila, schnapps,
limoncello and the glasses to serve them
> Rapid cooling of beverages, by activating the
bottle cooler function
> Storage of large amounts of ice.
Refrigerator mode
> As expansion of the Wine Cellar or of the Can-
tina
> For refrigeration of beer and soft drinks
> For storage of cold dishes and snacks.
Cooler mode
> For conservation of ham, salmon
> gourmet preparations.
It comes without saying that, the compartment can
be used in a traditional manner. Suggestions and
instructions are provided to oer you best conser-
vation of your food over time in complete safety.
9.1 General directions
As is known, wine can be stored for long periods
of time if this is done under the following condi-
tions:
> Suitable temperature without appreciable vari-
ations over time
> Controlled level of humidity
> Protection from light
> Absence of noise and vibrations
> Absence of odours
> Bottle kept horizontal.
All of these conditions are fully met in the Fhiaba
Wine Cellar.
9.2 Conservation temperature
The space offered by the Wine Cellar and Cantina
compartments, which can be expanded as neces-
sary by using the TriMode compartment as a wine
cellar, allows conservation of your best wines at
three different temperatures.
The three compartments are initially set to the
following temperatures:
> Cantina compartment
+12° C (53 ° F) - adjustable from +4° C to +18° C
(from 39° F to 64° F)
> Wine Cellar compartment
+10° C (50° F) - adjustable from +4° C to +18° C
(from 39° F to 64° F)
> TriMode drawer
-18° (0° F) - adjustable from -13° C to -23° C
(from 9° F to -11° F)
(freezer mode)
To transform the TriMode compartment into a
wine cellar space, you must access the Menu, set
it as a refrigerator compartment, and adjust it to
a temperature between +4° C and +8° C (from
39.2° F to 46.4° F).
All the temperatures can be modified accord-
ing to the characteristics of the wines and per-
sonal preferences. However, you should attempt
to keep the temperature as constant as possible
over time.
Rapid and large-scale temperature variations
can in fact cause dilation of the liquid and early
aging of the wine.
You should also avoid very low temperatures (be-
low 1° C - 34° F ) which may lead to the formation
of deposits and damage the aesthetic qualities of
the wine.
All the compartments offer optimal conditions
and take into account all these needs. It should
however be noted that the Cantina compartment,
in particular, is thermostatically controlled in a
very precise manner and ensures the utmost
care and attention over time of your most prized
bottles. When the Cantina compartment is set be-
low +10° C (50° F) the Wine Cellar must not be
set beyond +12° C (53° F).
Models with Cantina and Wine Cellar (1T)
Cantina
Wine Cellar
TriMode
> Cantina compartment
+12° C (53.6° F)
- adjustable from +4° C to +18° C (from
39° F to 64° F)
> Wine Cellar compartment
+10° C (50° F)
- adjustable from +4° C to +18° C (from
39° F to 64° F)
> TriMode drawer
-18° (0° F)
- adjustable from -13° C to -23° C (from
9° F to -11° F)(freezer mode)
Models with Wine Cellar (0H)
Wine Cellar
TriMode
> Wine Cellar compartment
+10° C (50° F)
- adjustable from +4° C to +18° C (from
39° F to 64° F)
> TriMode drawer
-18° (0° F)
- adjustable from -13° C to -23° C (from
9° F to -11° F)(freezer mode)
6. INTERNAL LAYOUT 7-8. LIGHTING 9. CONSERVATION OF WINES

www.fhiaba.com · www.thevettagroup.com · Info Line 1-855-4-FHIABA (1-855-434-4222) www.fhiaba.com · www.thevettagroup.com · Info Line 1-855-4-FHIABA (1-855-434-4222)
18 19
EN
Models with Cantina and Wine Cellar (0F)
Cantina
Wine Cellar
> Cantina compartment
+12° C (53.6° F)
- adjustable from +4° C to +18° C (from
39° F to 64° F)
> Wine Cellar compartment
+10° C (50° F)
- adjustable from +4° C to +18° C (from
39° F to 64° F)
9.3 Time of conservation
Improvement of wine over time and its duration usually depends on the character of the variety and its
type. The following chart shows the best period of conservation and aging for various types in ideal con-
servation conditions offered by your appliance.
However, you should always follow the instructions of the winemaker, especially for fine wines.
TYPE OF WINE CONSERVATION TEMPERATURE TIME OF CONSERVATION
New wines (Vin Nouveau) from 12° to 14° C 6 months
Sweet sparkling wines from 8° to 10° C 1 year
Rosé from 10° to 14° C 1 year
Semi-sparkling wines from 10° to 12° C 1 - 2 years
Normal white wines from 10° to 14° C 1 - 2 years
Light red wines from 12° to 14° C 2 years
Dry sparkling wines from 8° to 10° C 2 years
Classic sparkling wines from 8° to 10° C 3 - 4 years
Barrique and Vigorous white wines from 8° to 12° C 3 - 5 years
Normal red wines from 14° to 16° C 3 - 5 years
Barrique and Vigorous red wines from 14° to 18° C 7 - 10 years
Straw wines or Liquorous wines from 16° to 18° C 10 - 15 years
9.4 Consumption temperature
As a general rule, white wines should be served
at a temperature between 10 and 12° C (50 and
53,6°F) and red wines between 12 and 14° C (53,6
and 57,2°F).
Some wines may however be best enjoyed at
higher or lower temperatures.
You should also keep in mind that, during the
summer, wine is generally enjoyed at lower tem-
peratures than during the winter.
You should also consider the following:
White wines
White wines are normally not served at high tem-
peratures, since they are generally more acidic
that red wines and not very tannic. Therefore they
are more enjoyable at low temperatures.
It is preferable to serve these wines between
10° C and 14° C (50°F and 57,2°F). Young, fresh
and aromatic wines can also be served at 10° C
(50°F), while less aromatic ones are served at
12° C (53,6°F).
Temperatures between 12° C and 14° C (53,6°F
and 57,2°F) are for soft, mature white wines that
have been aged for some years in the bottle.
Higher temperatures would favour the exaltation
of the sweet character of the wine, at the expense
of the acidity and flavour, which are considered
pleasant and desirable characteristics of this
type of wine.
Rosé
Rosé wine is served at the same temperature as
white wines. It should be noted that these wines
may include a certain amount of tannin and may
therefore be preferable at higher temperatures.
Therefore, they are served between 10° C and
12° C (50°F and 53,6°F), if young and fresh, and
between 12° C and 14° C (53,6°F and 57,2°F) if
robust and mature.
New wines (Vin Nouveau)
Due to the special processing they undergo, new
vintage wines contain a low tannin content and
are therefore more enjoyable if served between
12° C and 14° C (53,6 and 57,2°F).
Red wines
Since they contain more tannin and are less acid-
ic, red wines are normally served at higher tem-
peratures.
Younger wines with less tannin are normally
served between 14° C and 16° C (57,2 and 60,8°F),
while more full-bodied ones that are more tan-
nic may be served at up to 18° C (64,4°F). Some
wines that have aged for years in the bottle, still
full-bodies and tannic, may be served at 18°C
(64,4°F) or even 20° C (68°F).
Young red wines with little tannin and slightly
structured may be enjoyable at lower tempera-
tures, between 12° C and 14° C (53,6 and 57,2°F).
Sparkling wines
It is difficult to provide instructions to cover the
wide variety of sparkling wines in available.
As a general rule, sweeter and more aromatic
sparkling wines should be served at lower tem-
peratures, down to 8° C (46,4°F), whereas more
tannic sparkling wines may be served at higher
temperatures, up to 14° C (57,2°F).
Dry sparkling wines are usually served between
8° C and 10° C (46,4 and 50°F).
“Classic” sparkling wines are normally served
at these temperatures, which may be as high as
12° C (53,6°F) for sparkling wines that have been
aged for some time.
It is however advisable, especially for finer wines,
to follow the suggestions and recommendations
of the winemaker on the bottle.
Liqueur and straw wines
These types of wines can be served at tempera-
tures between 16° C and 18° C (60,8 and 64,4°F),
depending on personal tastes, to attenuate the
sweet taste of straw wines, it can also be served
at 10° C (50°F).
9.5 Position of bottles
The sliding shelves are made of fine wood and
contoured so as to hold bottles of the most clas-
sical traditional shape or of the most modern
design.
Whether your collection holds fine bouteilles or
petit bouteilles, they will be right at home in the
Fhiaba Wine Cellar. A special accessory, avail-
able on request, will let you place them in an
inclined position, in order to display the labels
of your most prized items.
Also Magnum bouteilles can be stored, provided
9. CONSERVATION OF WINES

www.fhiaba.com · www.thevettagroup.com · Info Line 1-855-4-FHIABA (1-855-434-4222) www.fhiaba.com · www.thevettagroup.com · Info Line 1-855-4-FHIABA (1-855-434-4222)
20 21
EN
you remove the shelf just above the one that will
hold them.
Warning
After a prolonged interruption of electri-
cal power, once the electrical power is re-
activated, an audible signal will indicate if
the temperature has raised above normal
levels. In addition to this the display will
show for one minute the highest temper-
10.1 Recommended times for food conservation
ature detected inside the compartments,
to allow the user to decide how to better
use the food items.
After one minute the display will resume
normal operation, while the Alarm button
will continue to blink.
Press the Alarm button to display the
highest recorded temperatures.
FRESH FOODS CONSERVATION AREA TIME
Raw meats
Large cuts Cooler Compartment 4 days
Steaks, poultry and wild game Cooler Compartment 3 days
Ground meat Cooler Compartment 1-2 days
Carpaccio Cooler Compartment Immediately
Cooked meat
Boiled meat and roasted meat Refrigerator Compartment 2 days
Meat sauce Refrigerator Compartment 6 days
Raw and cooked fish Cooler Compartment 2 days
Soups and broths Refrigerator Compartment 2 days
Pasta Refrigerator Compartment 2 days
Opened cold cuts Refrigerator Compartment 3 days
Fresh cheeses Refrigerator Compartment 2-3 days
Well protected aged cheeses Refrigerator Compartment Several months
Eggs (fresh and unwashed) Refrigerator Compartment 15 days
Opened containers Refrigerator Compartment 2-3 days
Raw vegetables (in perforated bags) Refrigerator Compartment 3-6 days
11.1 Care and Cleaning
To clean the parts made of steel use a microfib-
er cloth and the sponge provided in the kit with
the appliance. Always use the cloth and sponge
in the direction of the steel’s satin finish.
Every now and then, to polish the steel, wipe
with a slightly damp microfiber cloth.
Do not use the sponge on aluminium parts, such
as the handles and the profiles of the glass
shelves.
You should use special care to keep the ventila-
tion openings in the appliance or in the cabinet
that houses it free of obstructions.
Scrupulously follow the detailed direc-
tions that can be found in the provided kit
and never use abrasive or metallic prod-
ucts which could scratch and damage the
11.2 Condenser cleaning
A ventilation grille is located either at the top of
the appliance or at the bottom according to the
model type.
To clean it use a vacuum cleaner with a soft
brush attachment at maximum power, sweep-
ing it along the vent slits. In case of a significant
satin finishing on the appliance perma-
nently.
Before performing any sort of cleaning,
disconnect the appliance from the electri-
cal power supply.
Make sure you do not damage the refrig-
erant circuit in any way.
Warning
The use of chlorine-based detergents or
similar that contains it should be avoided
(bleach, hypochlorite, etc).
FROZEN FOODS CONSERVATION AREA TIME
Beef, veal, lamb and goat Freezer Compartment (steaks) 6-12 months
Beef, veal, lamb and goat Freezer Compartment (Meat with bone) 4-6 months
Ground beef Freezer Compartment 1-2 months
Pork Freezer Compartment (Without bone) 4-6 months
Pork Freezer Compartment (With bone) 2-3 months
Ground pork Freezer Compartment 1-2 months
Meat leftovers Freezer Compartment 2-3 months
Whole chicken and turkey Freezer Compartment 8-12 months
Goose, duck and pheasant Freezer Compartment 4-8 months
Fish Freezer Compartment 1-2 months
Crustaceans Freezer Compartment 2-3 months
Cooked foods Freezer Compartment 1-2 months
Vegetables Freezer Compartment 8-12 months
Fruit Freezer Compartment 6-12 months
Desserts and cakes Freezer Compartment 2-3 months
10. CONSERVATION OF FOOD 11. CARE AND CLEANING

www.fhiaba.com · www.thevettagroup.com · Info Line 1-855-4-FHIABA (1-855-434-4222) www.fhiaba.com · www.thevettagroup.com · Info Line 1-855-4-FHIABA (1-855-434-4222)
22 23
EN
dust build up, the ventilation grille can be re-
moved to allow a more accurate cleaning of the
filter.
Every 6 months the display shows the message
“Check Cond”, clean the condenser and press for
5 seconds the Enter button to reset.
Operate as follows:
> Switch off the appliance by pressing the Unit
button on the main control panel for approx 3
seconds.
> Wait approx 30 minutes, until the finned con-
denser cools down to room temperature.
> On models with ventilation at the base remove
the grille at the bottom (magnetically attached)
and take it off. On models with ventilation lift the
grille as shown in the picture.
> Thoroughly clean the grille and the foam fil-
ter, by means of a vacuum cleaner and the soft
brush attachment.
> Clean it thoroughly from any dust build up as
shown in the picture, taking care not to damage
it.
> Start up the appliance again, by pressing the
Unit button on the main
Warning
The edges of the condenser are sharp,
therefore use adequate protection for the
hands and arms when cleaning the con-
denser.
11.3 Internal cleaning
Clean the internal and removable parts by wash-
ing them with a solution of lukewarm water, a
small amount of dishwashing detergent.
Rinse and dry right away.
Do not use mechanical devices or other methods
to speed up defrosting.
Warning
Do not use water on the electrical parts,
lights and control panel.
Warning
The use of chlorine-based detergents or
similar that contains it should be avoided
(bleach, hypochlorite, etc).
Note
Do not bring cold glass parts into contact
with boiling water.
Do not wash any parts of the refrigerator
in a dishwashing machine since this could
damage or irreparably deform the parts.
12.1 Troubleshooting guide
If you notice malfunctions in your appliance, use
this guide before calling Service. This guide may
help you resolve the problem yourself or could
provide important information to ensure rapid
and effective service.
Malfunction message
A malfunction is usually indicated on the display.
Problems that cannot be resolved by the user are
signalled through a malfunction code.
The appliance does not work
Is the appliance connected to the electrical pow-
er supply?
Does electrical power arrive at the electrical
socket?
Is the Unit key activated?
Is the condenser clean?
The internal temperatures are
higher than normal
Does the display show a malfunction code?
Is the temperature adjusted correctly?
Is the condenser clean?
Were the doors or drawers open for a long period
of time?
Were large quantities of food recently inserted?
The appliance remains in function for a long
time period
Bear in mind that during a very hot weather and
with very high temperatures in the room it is nor-
mal that the compressor remains in operation for
prolonged periods of time.
Were the doors or drawers open for a long period
of time?
Were large quantities of food recently inserted?
Is the condenser clean?
Check that the doors are closed and that the food
or containers do not obstruct the perfect closure
of the door.
If you hear strange noises
It is normal to hear noise from the fans or com-
pressors during the defrost phase.
Noise could be louder depending on the position
of the appliance and the surrounding environ-
ment.
Condensation forms both inside and out
If the climate is very humid, the formation of con-
densation is normal. Opening the door or draw-
ers for prolonged periods of time can contribute
to the formation of condensation.
In any case, make sure that the doors are always
perfectly closed.
The Refrigerator or Freezer has frost or ice
Did you leave the doors open for a long period of
time?
Do the doors close perfectly?
If the doors do not close perfectly, contact your
installer.
Unpleasant odours inside the refrigerator
Clean the appliance completely as indicated in
this manual.
Hermetically cover all the food. Do not conserve
food for prolonged periods of time.
The doors are difficult to open
The appliance was designed to permit hermetic
closure.
When the door is closed, a vacuum situation can
occur: in this case it is necessary to wait a few
seconds until the pressure balances before open-
ing the door.
12. TROUBLESHOOTING GUIDE

www.fhiaba.com · www.thevettagroup.com · Info Line 1-855-4-FHIABA (1-855-434-4222) www.fhiaba.com · www.thevettagroup.com · Info Line 1-855-4-FHIABA (1-855-434-4222)
24 25
EN
12.2 Malfunction indications appearing on the display
Display message Malfunction description
Power Failure Prolonged interruption of electrical power
The appliance starts up again automatically and indicates
the highest recorded temperatures
Door open Door open
this message appears few minutes from the door opening
Drawer open Drawer open
this message appears few minutes from the drawer opening
Cellar too warm Cellar (Wine Cellar) compartment too warm
See the troubleshooting guide
Cellar too cold Cellar (Wine Cellar) compartment too cold
Wait 12 hours. If the problem persists, contact Customer Care
Cantina too warm Cantina compartment too warm
See the troubleshooting guide
Cantina too cold Cantina compartment too warm
Wait 12 hours. If the problem persists, contact Customer Care
Fridge too warm TriMode compartment (refrigerator mode) too warm
See the troubleshooting guide
Fridge too cold TriMode compartment (refrigerator mode) too cold
Wait 12 hours. If the problem persists, contact Customer Care
Cooler too warm TriMode compartment (cooler mode) too warm
See the troubleshooting guide
Cooler too cold TriMode compartment (cooler mode) too cold
Wait 12 hours. If the problem persists, contact Customer Care
Freezer too warm TriMode compartment (freezer mode) too warm
See the troubleshooting guide
Freezer too cold TriMode compartment (freezer mode) too cold
Wait 12 hours. If the problem persists, contact Customer Care
Error Code... Functional problems
call Customer Care who may help you to salve the problem or put you in contact
with the nearest Service Agent
Check condenser Check Condenser
Every 6 months the display shows the message “Check Cond”, clean the conden-
ser and press for 5 seconds the Enter button to reset.
FUNCTIONS
Shopping TriMode
Vacation TriMode
Bottle Cooler
Set Sabbath Mode
Dual Zone
13.1 Functions
Shopping ON/OFF
Vacation ON/OFF
Shopping TriMode O
Vacation TriMode O
Bottle Cooler O
Bottle Cooler On
Set Cooling Time
Sabbath Mode O
Shopping TriMode On
Vacation TriMode On
Shopping Time
Vacation Time
Cooler ON/OFF
Sabbath Mode On
Set Hours: 1
Set Days: 1
Set Time: 20 min
Dual Zone O
Dual Zone On
12. TROUBLESHOOTING GUIDE 13. FHIABA ACCESS MENU MAP

www.fhiaba.com · www.thevettagroup.com · Info Line 1-855-4-FHIABA (1-855-434-4222) www.fhiaba.com · www.thevettagroup.com · Info Line 1-855-4-FHIABA (1-855-434-4222)
26 27
FR
SETTINGS
13.2 Settings
TriMode Options
Default Setting
Freezer
Fresco
Enter to Confirm
DATE: 01-01-2009 On
TIME: 01:01 On
Set: 24
Set Date
On
Set Time
italiano
français
english
Set °C
DATE: 01-01-2009 O
TIME: 01:01 O
Set: 12
Fridge
Show Date
O
Set View
Show Time
deutsch
español
Set °F
DATE: 01-01-2009
TIME: 01:01
Date
Keypad lock
Time
Language
Set °C/°F
13. MEN
Ù
MAP
1
1.1
1.2
1.3
INDICATIONS IMPORTANTES CONCERNANT LA SÉCURITÉ
Consignes de sécurité et risque potentiel................................................................................................................
Dans l’utilisation quotidienne......................................................................................................................................
Respect de l’environnement......................................................................................................................................
28
28
28
29
2
2.1
2.2
INSTALLATION
Installation........................................................................................................................................................................
Branchement au réseau électrique........................................................................................................................
27
29
29
3
3.1
3.2
3.3
3.4
3.5
3.6
AVANT DE COMMENCER
Pour bien connaître l’appareil.................................................................................................................................
Composants principaux...............................................................................................................................................
Contrôle électronique...................................................................................................................................................
Panneau de commande principal (1T et 0H).................................................................................................
Contrôle électronique...................................................................................................................................................
Panneau de commande principal (0F)..................................................................................................................
30
30
31
33
33
34
34
4
4.1
4.2
4.3
MISE EN MARCHE ET ARRÊT DE L’APPAREIL
Mise en marche et arrêt..............................................................................................................................................
Comment régler la température en fonction des différentes exigences..............................................
Signaux d’information et d’anomalie sur l’écran.......................................................................................
35
35
35
36
5
5.1
5.2
5.3
CONFIGURATIONS ET FONCTIONS SPÉCIALES
Personnalisation et seléction de la langue..................................................................................................
Fonctions spéciales pouvant être activées moyennant le Menu............................................................
Configurations de base du Menu…………………………………………………………………………………………………….......
36
36
37
38
6
6.1
ÉQUIPEMENT INTERNE
Équipement interne (positionnement, réglage, retrait)………………............................................................
40
40
7
7.1
ÉCLAIRAGE
Éclairage...........................................................................................................................................................................
40
40
8
8.1
UTILISATION DU COMPARTIMENT TRIMODE
Utilisation du compartiment TriMode.....................................................................................................................
40
40
9
9.1
9.2
9.3
9.4
9.5
CONSERVATION DES VINS
Indications générales...................................................................................................................................................
Température de conservation..................................................................................................................................
Temps de conservation.............................................................................................................................................
Température de dégustation......................................................................................................................................
Positionnement des bouteilles..................................................................................................................................
41
41
41
42
43
43
10
10.1
CONSERVATION DES ALIMENTS
Temps recommandés pour la conservation des Aliments.............................................................................
44
44
11
11.1
11.2
11.3
ENTRETIEN ET NETTOYAGE
Entretien et Nettoyage.................................................................................................................................................
Nettoyage du condenseur...........................................................................................................................................
Nettoyage interne..........................................................................................................................................................
45
45
46
46
12
12.1
12.2
GUIDE DES SOLUTIONS AUX PROBLÈMES
Guide des solutions aux problèmes........................................................................................................................
Indications d’anomalie pouvant apparaître sur l’écran............................................................................
46
46
48
13
13.1
13.2
PLAN DU MENU
Functions...........................................................................................................................................................................
Settings..............................................................................................................................................................................
49
49
50
SOMMAIRE

www.fhiaba.com · www.thevettagroup.com · Info Line 1-855-4-FHIABA (1-855-434-4222) www.fhiaba.com · www.thevettagroup.com · Info Line 1-855-4-FHIABA (1-855-434-4222)
28 29
1. INDICATIONS IMPORTANTES CONCERNANT LA SÉCURITÉ 2. INSTALLATION
> Conserver l’alcool de haute graduation dans un
conteneur hermétiquement fermé et placé en posi-
tion verticale.
> Éviter que des huiles ou des graisses puissent
souiller des éléments plastiques ou les joints des
portes. Les graisses attaquent la matière plastique
et les joints des portes deviennent fragiles et po-
reux.
> Ne pas obstruer les passages de l’air de ventila-
tion de l’appareil.
> Il est recommandé d’autoriser l’utilisation de l’ap-
pareil uniquement à des enfants d’au moins 8ans.
Surveiller les enfants pendant le nettoyage et l’en-
tretien.
Symboles utilisées dans le manuel:
Note
Conseils pour une correcte
utilisation de l’appareil
Important
Indications afin d’éviter tout
endommagement de l’appareil
Attention
Indications afin d’éviter toute lésion aux
personnes
1.3 Respect de l’environnement
> Faire très attention aux correctes modalités d’éli-
mination de tous les composants de l’emballage.
> L’appareil ne doit pas être éliminé avec les déchets
urbains. S’informer auprès des centres de collecte
pour l’élimination des matériaux recyclables.
> En cas d’élimination, couper le câble d’alimenta-
tion et rendre impossible la fermeture de la porte.
> Durant l’élimination, éviter d’endommager le cir-
cuit réfrigérant.
> L’appareil ne contient pas, dans le circuit réfri-
gérant et dans l’isolation, de substances nocives
pour la couche d’ozone atmosphérique.
1.1 Consignes de sécurité et
risque potentiel
> Si cet appareil remplace un autre appareil déjà
existant qui doit être mis de côté ou éliminé, veiller à
ce que celui-ci ne devienne pas un dangereux piège
pour les enfants, en coupant le câble d’alimentation
et en rendant impossible la fermeture de la porte.
Prêter la même attention à la fin du cycle de vie du
nouvel appareil.
> Cet appareil est conçu pour refroidir les boissons
et les aliments et est destiné à un usage domesti-
que.
> L’appareil doit être installé en suivant les instruc-
tions reportées dans la Notice d’installation. Les
ouvertures prévues pour la ventilation de l’appareil
ou dans la structure à encastrement doivent rester
libres.
> L’appareil est doté d’un système d’éclairage à lu-
mière concentrée moyennant des lampes à Led.
Ne pas regarder à l’intérieur des lampes lorsque
celles-ci sont allumées afin d’éviter tout dommage
à la vue.
Cette recommandation est également reportée sur
l’étiquette collée à l’intérieur de la porte du réfri-
gérateur.
> Lorsque le réfrigérateur fonctionne, ne pas tou-
cher les surfaces internes en acier avec les mains
humides ou mouillées, la peau pourrait rester atta-
chée aux surfaces particulièrement froides.
> N’utiliser aucun appareil électrique à l’intérieur
des compartiments prévu pour la conservation des
aliments.
> Lors du repositionnement des clayettes ne pas
approcher les doigts des coulisses de la clayette.
> Ne pas positionner de récipients contenant des
liquides inflammables près de l’appareil.
> Durant les opérations d’entretien, arrêter com-
plètement l’appareil en le débranchant de la pri-
se de courant. Si la fiche est dicile à atteindre,
débrancher l’interrupteur omnipolaire correspon-
dant à la prise à laquelle l’appareil est branché.
> Les composants de l’emballage peuvent être
dangereux pour les enfants; ne pas les laisser
jouer avec les sachets, les films plastiques et le
polystyrène.
> Toute réparation doit être eectuée par un tech-
nicien qualifié.
> Cet appareil ne doit pas être utilisé par des per-
sonnes (enfants compris) présentant des capacités
physiques, sensorielles ou mentales réduites, ou
sans expérience ni connaissance, sauf ci celles-
ci sont contrôlées ou si elles ont été auparavant
formées pour utiliser l’appareil par une personne
responsable de leur sécurité. Les enfants devraient
être contrôlé afin d’éviter qu’ils ne jouent avec l’ap-
pareil.
> N’endommagez pas les tubes du circuit réfri-
gérant du réfrigérateur.
> Ne pas placer de vaporisateurs ou de récipients
contenant des agents propulseurs ou des substan-
ces inflammables dans l’appareil.
> La quantité de gaz réfrigérant contenue dans vo-
tre appareil est indiquée sur la plaque d’identifica-
tion placée à l’intérieur de l’appareil. Au cas où le
câble de branchement électrique devait subir des
dommages, il est nécessaire de le remplacer, con-
tacter le SAV agréé ou un électricien qualifié pour
eectuer cette opération.
> Toute installation ou réparation eectuée par un
personnel non autorisé, peut potentiellement créer
un danger pour l’utilisateur et endommager l’appa-
reil. Les réparations doivent être eectuées par le
SAV agréé.
> Il est autorisé d’utiliser uniquement des pièces
détachées d’origine du constructeur. Ce n’est qu’en
cas d’utilisation de ces composants que le con-
structeur garantit que les conditions requises de
sécurité du produit sont respectées.”
1.2 Dans l’utilisation quotidienne
> Ne jamais utiliser un nettoyeur vapeur pour dégi-
vrer ou nettoyer votre appareil. La vapeur pourrait
atteindre des composants électriques et provoquer
un court-circuit. Danger de décharge électrique!
> Ne pas utiliser d’objets pointus ou tranchants
pour éliminer les couches de givre ou de glace. Il
est possible d’endommager les raccords du circu-
it réfrigérant, ce qui rend l’appareil inutilisable. La
sortie du gaz, par eet de la pression, peut causer
des irritations aux yeux.
> Ne pas utiliser de manière inappropriée le socle,
les tiroirs extractibles, les portes etc. en tant que
point d’appui ou comme support.
> Pour le nettoyage retirer la fiche d’alimentation ou
bien déconnecter l’interrupteur de sécurité. Éviter
de tirer sur le câble électrique, mais saisir correcte-
ment la fiche électrique.
2.1 Installation
Veiller à ce que l’installation soit correctement eec-
tuée, en respectant toutes les indications reportées
dans la notice d’installation fournie avec l’appareil.
2.2 Branchement au réseau électrique
L’appareil fonctionne à 115 V AC, 60 Hz, et est équipé
d’un cable d’alimentation 15 Amp avec une fiche à 3
broches mise à la terre,
qui doit être branché au réseau électrique moyen-
nant une prise correspondante
Important
N’utiliser ni rallonges ni adaptateurs
multiples pour le branchement.
FR

www.fhiaba.com · www.thevettagroup.com · Info Line 1-855-4-FHIABA (1-855-434-4222) www.fhiaba.com · www.thevettagroup.com · Info Line 1-855-4-FHIABA (1-855-434-4222)
30 31
1
7
2
3
4
5
6
1
5
3
2
4
3. AVANT DE COMMENCER
3.1 Pour bien connaître l’appareil
Congratulations pour avoir acheté votre nouveau
Fhiaba: vous pourrez maintenant utiliser notre in-
novant système de conservation, qui vous permet-
tra de préserver au mieux tous les aliments que
vous souhaitez.
Ce manuel d’utilisation répondra à la plupart de vos
questions pour ce qui concerne les caractéristiques
du produit. Pour toute autre information, n’hésitez
pas à nous contacter:
> ou par: 1-855-4-FHIABA (1-855-434-4222)
> ou par e-mail à [email protected]
> visitez notre site www.fhiaba.com
Important
Avant d’appeler prenez note du numéro
de série de l’appareil, reporté sur le cer-
tificat de garantie et sur la plaque si-
gnalétique qui se trouve dans le compar-
timent Réfrigérateur.
Cantina
TriMode Wine Cellar
Cantina
Wine Cellar
Modèle 1T
Modèle 0F
3.2 Composants principaux
1Structure en acier inox
avec finitions en alumi-
nium
2Panneau de commandes
de la Wine Cellar et du
TriMode
3Étagères porte bouteilles
coulissantes sur roulet
tes et facilement amovi
bles
4Panneau de commandes
Cantina
5Compartiment Wine
Cellar
6Grand bac TriMode, peut
être utilisé comme bac
Congélateur, Réfrigéra
teur ou Crisper-Fresco
7Éclairage led
FR

www.fhiaba.com · www.thevettagroup.com · Info Line 1-855-4-FHIABA (1-855-434-4222) www.fhiaba.com · www.thevettagroup.com · Info Line 1-855-4-FHIABA (1-855-434-4222)
32 33
12 34 5 67 98
ALARM
ENTER
WINE CELLAR
UNIT LIGHT
1
7
2
3
6
3. AVANT DE COMMENCER
1Unit Permet l’arrêt complet et la mise en marche de l’appareil
(appuyer sur celui-ci pendant 3 secondes).
2Wine cellar Permet l’arrêt et la mise en marche du compartiment Wine Cellar seulement
(appuyer sur celui-ci pendant 3 secondes).
3Menu Permet l’accès au menu des fonctions de l’appareil.
4Up/down Wine
Cellar
En eeurant les touches Up (haut) et Down (bas), il est possible de modifier la température déjà
configurée pour le compartiment Wine Cellar et de se déplacer à l’intérieur du menu interactif.
5Display Ache les températures des compartiments Wine Cellar et TriMode, la date et l’heure, les fon-
ctions Menu et les messages visuels.
6Up/Down
(TriMode)
En eeurant les touches Up/Down, il est possible de modifier la température pré-configurée
selon les choix d’utilisation du compartiment TriMode (congélateur, réfrigérateur ou Crisper-
Fresco) et de se déplacer à l’intérieur du menu interactif.
7Enter Permet de confirmer les choix opérés moyennant Menu.
8Alarm Clignote pour signaler les éventuelles anomalies de fonctionnement, également mises en évi-
dence par un signal sonore. Désactivable moyennant l’eeurage de la touche.
9Light
Permet d’illuminer les compartiments Wine Cellar et Cantina même lorsque la porte est fermée.
Une fois activé, la lumière du compartiment supérieur s’éteindra automatiquement au bout de 6
heures.
Modèle 0H
Wine CellarTriMode
1Structure en acier inox
avec finitions en alumi-
nium
2Panneau de commandes
de la Wine Cellar et du
TriMode
3Étagères porte bouteilles
coulissantes sur roulet
tes et facilement amovi
bles
5Compartiment Wine
Cellar
6Grand bac TriMode, peut
être utilisé comme bac
Congélateur, Réfrigéra
teur ou Crisper-Fresco
7Éclairage innovant
3.3 Contrôle électronique
L’innovant système de contrôle électronique mis au point par Fhiaba maintient constante la température
des trois compartiments et l’affiche sur l’écran du panneau de commande. Il permet par ailleurs l’inte-
raction de l’usager avec le système de contrôle, moyennant la configuration personnalisée des différen-
tes fonctions et l’envoi de messages sonores et/ou visuels, au cas où se vérifieraient des anomalies de
fonctionnement de l’appareil.
3.4 Panneau de commande principal (1T et 0H)
FR

www.fhiaba.com · www.thevettagroup.com · Info Line 1-855-4-FHIABA (1-855-434-4222) www.fhiaba.com · www.thevettagroup.com · Info Line 1-855-4-FHIABA (1-855-434-4222)
34 35
12 34 5 67 98
ENTER
UNIT HUMIDITY ALARM
LIGHT
10 11 12 13
CANTINA HUMIDITY
4. MISE EN MARCHE ET ARRÊT DE L’APPAREIL3. AVANT DE COMMENCER
1Unit Permet l’arrêt complet et la mise en marche de l’appareil
(appuyer sur celui-ci pendant 3 secondes).
2Humidity Permet le réglage de l’humidité à l’intérieur des compartiments Wine Cellar et Cantina sur trois
niveaux: Haute, Moyenne, Basse.
.3 Menu Permet l’accès au menu des fonctions de l’appareil.
4Up/down
Cantina
En eeurant les touches Up (haut) et Down (bas), il est possible de modifier la température déjà
configurée pour le compartiment Wine Cellar et de se déplacer à l’intérieur du menu interactif.
5Display Ache les températures des compartiments Wine Cellar et TriMode, la date et l’heure, les fonctions
Menu et les messages visuels.
6Up/Down
Wine Cella
En eeurant les touches Up/Down, il est possible de modifier la température reconfigurée pour le
compartiment Cantina et de se déplacer à l’intérieur du menu interactif.
7Enter Permet de confirmer les choix opérés moyennant Menu.
8Light Permet d’illuminer les compartiments Wine Cellar et Cantina même lorsque la porte est fermée. Une
fois activé, la lumière du compartiment supérieur s’éteindra automatiquement au bout de 6 heures.
9Alarm Clignote pour signaler les éventuelles anomalies de fonctionnement, également mises en évidence
par un signal sonore. Désactivable moyennant l’eeurage de la touche.
10 Display Ache la température du compartiment Cantina.
11 Up/Down
Cantina
En eeurant les touches Up/Down, il est possible de modifier la température reconfigurée pour le
compartiment Cantina.
12 Cantina Permet l’arrêt et la mise en marche du compartiment Wine Cellar seulement (appuyer sur celui-ci
pendant 3 secondes).
13 Humidity Permet le réglage de l’humidité à l’intérieur des compartiments Wine Cellar et Cantina sur trois
niveaux: Haute, Moyenne, Basse.
3.6 Panneau de commande principal (0F)
4.1 Mise en marche et arrêt
Première mise en marche
Lorsque l’appareil est branché au réseau électri-
que mais n’a pas encore été mis en marche, sur
l’écran s’affiche le message
(message de sécurité pour avertir que l’appareil est
sous tension), tandis que toutes les touches du pan-
neau sont éteintes.
Pour mettre en marche tous les compartiments de
l’appareil, appuyer pendant 3 secondes sur la tou-
che Unit .
Lors de chaque allumage, l’appareil eectue une
procédure d’auto-diagnostic de la durée de 3 minu-
tes avant de se mettre en marche complètement.
Arrêt du compartiment Vins
Une fois mis on marche tous les compatiments de
l’appareil, il est possible d’arreter le compartiment
vins seulement en appuyant por 3 secondes sur la
touche relative.
Le compartiment TriMode reste allumé et ne peut
être éteint qu’en arrêtant complètement l’appareil.
Remise en marche du compartiment et Wine Cellar
Appuyer de nouveau pendant 3 secondes sur la
touche relative.
Arrêt complet
Pour arrêter complètement l’appareil durant les
opérations de nettoyage ou d’entretien, appuyer
pendant 3 secondes sur la touche Unit .
Débrancher également la fiche de la prise d’ali-
mentation et appuyer sur l’interrupteur omnipo-
laire qui l’alimente.
Arrêt pendant de longues périodes
Après avoir complètement arrêté l’appareil et
après l’avoir débranché de la prise d’alimenta-
tion, le vider de tout son contenu, le nettoyer et
l’essuyer et laisser les portes et les bacs partiel-
lement ouverts afin d’éviter que ne se forment de
mauvaises odeurs.
Afin d’éviter la modification accidentelle des
configurations, le clavier se bloque auto-
matiquement après un certain temps et sur
l’écran apparaît le message “keypad locked”.
Pour le réactiver, appuyer en même temps
sur les touches Menu et Up/Down (Down)
pendant 3 secondes.
Si lors de la première mise en marche, n’ap-
paraît pas le message Stand-by, cela signifie
que l’appareil a déjà commencé la procédure
de refroidissement. Dans ce cas désactiver
les éventuels messages sonores en eeu-
rant la touche Alarm , refermer la porte et
attendre que les températures programmées
soient atteintes.
Lors de la première mise en marche, il ne
sera pas possible d’utiliser le Menu pour une
éventuelle modification des pré-configura-
tions faites en usine tant que ne sera pas at-
teinte la température pré-configurée. Il est to-
utefois possible de régler tout de suite l’heure
et la date, des paramètres nécessaires pour
activer certaines fonctions spéciales.
Si n’est arrêté que le compartiment Cantina
ou le compartiment Wine Cellar, le ventilateur
correspondant continue à fonctionner de ma-
nière autonome afin de prévenir la possible
formation d’odeurs et de moisi.
4.2 Comment régler la température en
fonction des diérentes exigences
Pour régler la température dans les différents
compartiments, appuyer sur la touche Up/Down
correspondant au compartiment (voir chapitre
3.5). Si le clavier est bloqué (message “keypad lo-
cked”), appuyer en même temps sur les touches
Menu et Up/Down (Down) pendant 3 secon-
des.
Compartiment à Vins
Chaque modèle est attentivement testé avant
de quitter l’usine et réglé de manière à garantir
de hautes performances et des consommations
contenues. La température idéale pour la conser-
vation des vins, toutefois, dépend des variétés de
vins que l’on veut conserver, de la modalité de
conservation (Wine Cellar pour la conservation
et dégustation ou Cantina pour la conservation et
le vieillissement de bouteilles de haute qualité),
mais aussi des goûts personnels.
Nous vous invitons dans tous les cas à consulter
le guide concernant la conservation des vins re-
porté ci-après dans ce manuel.
Selon les nécessités, il est possible de reconfigu-
rer les températures comme suit:
> Compartiment Cantina:
de +4° C à +18° C (de 39° F à 64° F),
3.5 Panneau de commande (1T)
FR

www.fhiaba.com · www.thevettagroup.com · Info Line 1-855-4-FHIABA (1-855-434-4222) www.fhiaba.com · www.thevettagroup.com · Info Line 1-855-4-FHIABA (1-855-434-4222)
36 37
5. CONFIGURATIONS ET FONCTIONS SPÉCIALES
FRIDGE
UNIT
la température pré-configurée est de +12° C (53°
F).
> Compartiment Wine Cellar:
de +4° C à +18° C (de 39 ° F à 64° F),
la température pré-configurée est de +10° C (50° F).
Compartiment TriMode (modelles1T/0T/0H)
Le compartiment TriMode sort de l’usine confi-
guré comme Congélateur mais peut également
fonctionner comme compartiment Réfrigérateur
ou Crisper-Fresco.
Les instructions pour la conservation sont
fournies au paragraphe “Configurations et fon-
ctions spéciales”.
Selon les nécessités, il est possible de reconfigu-
rer les températures comme suit:
> Compartiment Congélateur: de -13° C à -23° C
(de 9° F à -11° F),
la température conseillée et pré-configurée est
de -18° (0° F)
> Compartiment Réfrigérateur: de +1° C à +7° C
(de 34° F à 46° F),
la température conseillée et pré-configurée est
de +5° C (41° F)
> Compartiment Crisper-Fresco: de -2° C à +2° C
(de 28° F à 36° F),
la température conseillée et pré-configurée est
de 0° C (32° F).
Attention
Si le clavier est bloqué (message “keypad
locked”), appuyer en même temps sur les
touches Menu et Up/Down (Down) pen-
dant 3 secondes.
Note
La température affichée peut légèrement
varier par rapport à celle configurée sui-
te à une ouverture continue des portes ou
à l’introduction d’aliments à température
ambiante ou en grandes quantités.
6 à 12 heures peuvent être nécessaires
pour atteindre la température sélec-
tionnée.
4.3 Signaux d’information et d’anoma-
lie sur l’écran
Un système de contrôle intégré fournit des infor-
mations moyennant des signaux lumineux ou des
messages textuels visualisés sur l’écran.
Le signal d’information s’affiche avec un texte
fixe tandis que le signal d’anomalie s’affiche avec
un texte clignotant.
Le signal sonore qui accompagne certains si-
gnaux d’anomalie peut être désactivé en effleu-
rant la touche Alarm sur le panneau de com-
mande principal. La liste des signaux d’anomalie
est reportée à la fin de ce manuel.
5.1 Personnalisation et seléction de la
langue
Om ongewenste wijziging van de instellin-
gen te voorkomen, blokkeert het toetsen-
bord automatisch na het verstrijken van
een bepaalde periode en verschijnt op het
display de melding “keypad locked”.
Druk, om het toetsenbord weer te active-
ren, gelijktijdig op de toetsen Menu en
Up/Down gedurende minstens 3 secon-
den of gewoon nogmaals op de toetsen
Menu 3 seconden ingedrukt.
De sleutel slot kan worden uitgeschakeld
door de specifieke functie in het menu
“Settings”.
Il est possible de personnaliser le fonctionnement
de votre Fhiaba afin de l’adapter aux différentes
exigences d’utilisation, en reconfigurant les pa-
ramètres principaux (Setting) ou en activant les
fonctions spéciales (Functions).
Les fonctions apparaissent sur l’écran principal
en effleurant la touche Menu .
Les touches Up/Down permettent le défilement
des fonctions disponibles, sélectionnées en ef-
fleurant la touche Enter et sur l’écran apparaît
l’état actuel de la fonction.
Toujours moyennant les touches Up/Down , il
est possible de se déplacer à l’intérieur de la fon-
ction sélectionnée, en l’activant ou en la désacti-
vant en effleurant la touche Enter .
Une fois confirmée la fonction, sur l’écran appa-
raîtra automatiquement le menu principal pour
choisir d’autres fonctions.
Il est à tout moment possible de retourner au
choix précédent moyennant la touche Menu .
La langue des messages qui apparaissent sur
l’écran peut être changée comme suit:
Entrer dans le menu en appuyant au même tem-
ps sur les touches Menu et Enter , au moyen
des touches Up/Down choisir Settings (Réglages)
et après confirmer avec la touche Enter .
Ensuite choisir la fonction Language (Langue) et
la langue souhaitée.
5.2 Fonctions spéciales pouvant être
activées moyennant le Menu
Pour utiliser les fonctions spéciales, sélection-
ner la touche Menu yennant la touche Up/
Down accéder au menu en confirmant le choix
.
Dual-Zone (modelles 0T et 0H)
Cette fonction peut être activée sur des modèles
avec cave a vin sans separateur et permet de
diérencier la température dans la partie supérieu-
re du compartiment (plus chaude, donc plus conve-
nable aux vins rouges) de la température dans la
partie inférieure (plus froide, donc plus convenable
aux vins blancs).
Shopping TriMode
La fonction doit être activée au moins 24 heures
avant l’introduction dans le TriMode d’aliments à
température ambiante ou quelques heures avant
l’introduction d’aliments déjà congelés qui ont
subi une augmentation modérée de la tempéra-
ture. La fonction se désactive automatiquement
à la fin de la période de fonctionnement pro-
grammée. Il est possible de programmer par
avance l’activation de la fonction. Après une in-
terruption prolongée de courant, il est nécessaire
de réactiver la fonction.
Il est possible de programmer avec une avance
allant de 1 à 12 heures.
Comment activer:
Pour désactiver:
Comment activer:
Pour désactiver:
Pour programmer par avance l’activation:
Vacation TriMode
La fonction (recommandée en cas d’absences pro-
longées car elle permet une importante économie
d’énergie) amène la température du compartiment
TriMode à - 18°C (46.4°F) si le compartiment est
configuré comme Congélateur et à +14°C (57.2°F)
si le compartiment est configuré comme Réfrigéra-
teur. La fonction ne peut pas être activée si le com-
partiment est configuré comme Crisper-Fresco. La
fonction reste active même si se vérifie une longue
interruption du courant. Il est possible de program-
mer une période de 1 à 90jours.
Comment activer:
Pour désactiver au retour des vacances:
Pour programmer la durée:
Refr. Bouteilles
La fonction peut être activée pour refroidir rapide-
ment des boissons, en les mettant à l’intérieur du
compartiment Congélateur.
Il est possible de sélectionner une durée du tem-
ps de refroidissement allant de 1 à 45 minutes. Un
signal sonore avertira que la température optima-
le a été atteinte. Après avoir prélevé les boissons,
désactiver le signal sonore en eeurant la touche
Alarm .
FR

www.fhiaba.com · www.thevettagroup.com · Info Line 1-855-4-FHIABA (1-855-434-4222) www.fhiaba.com · www.thevettagroup.com · Info Line 1-855-4-FHIABA (1-855-434-4222)
38 39
5. CONFIGURATIONS ET FONCTIONS SPÉCIALES
DATE
Régler la date
L’écran achera la date comme dd:mm:yy
(jour:mois:année), le jour clignotera. Avec les tou-
ches Up/Down modifier la configuration, confir-
mer avec Enter pour passer à la configuration
suivante; une fois confirmée l’année, la date sera
configurée.
Montrer la date
Avec cette fonction il est possible de désactiver/ac-
tiver l’achage de la date sur l’écran.
Mode Sabbath (Optional)
Cette fonction permet de respecter l’observance
de certaines règles religieuses qui demandent que
l’appareil ne soit pas aecté par l’ouverture des
portes (le fonctionnement thermostatique, l’éclai-
rage intérieur et la fabrication des glaçons ne sont
pas opérationnels dans ce mode).
Comment activer:
Pour désactiver:
Pour programmer la durée:
Comment activer:
Pour désactiver:
Réglages de base
Cette fonction ore la possibilité de rétablir les
réglages de base configurées en usine en annulant
toute modification eectuée par la suite.
Attention:
Si les paramètres de base sont restaures
il faut réactiver le choix de fonctionnement
du compartiment Trimode au cas où il étét
précédemment défini comme Frigo ou Fre-
sco.
5.3 Configurations de base du Menu
Sélectionner la touche Menu et moyennant la
touche Up/Down choisir .
Options TriMode
Le compartiment Congélateur peut au cas où fon-
ctionner comme compartiment Réfrigérateur ou
comme compartiment Crisper-Fresco et peut donc
opérer avec les températures les plus adéquates
pour ces compartiments.
Comment choisir la fonction Réfrigérateur:
Comment choisir la fonction Crisper-Fresco:
Pour rétablir les réglages de base:
Comme rétablir la fonction Congélateur:
Comment configurer la date:
Comment activer la date:
Comment désactiver la date:
Blocage clavier
Avec cette fonction il est possible d’activer/désacti-
ver le blocage de le clavier.
HEURE
Régler l’heure
L’écran ache l’heure et les minutes comme
hh:mm et avec hh: clignotant. Avec les touches Up/
Down peut être modifiée la configuration qui doit
être confirmée moyennant la touche Enter pour
passer à la configuration suivante ; lors de la con-
firmation des mm: l’heure sera configurée. Cette
fonction permet de choisir l’achage à 12 ou 24
heures.
Comment configurer l’heure:
Choisir 12/24
Cette fonction permet de choisir l’achage à 12 ou
24 heures.
Comment configurer l’achage à 12 h:
Comment configurer l’achage à 24 h:
Montrer le temps
Avec cette fonction il est possible d’activer/désacti-
ver l’achage permanent de l’heure.
Comment activer l’heure permanente:
Comment désactiver l’heure permanente:
LANGUE
La fonction permet de choisir la langue dans la-
quelle sont visualisés les messages à l’écran.
italiano
english
français
deutsch
español
Choisir °C/°F
Cette fonction permet l’achage de la température
en degrés Centigrades ou en degrés Fahrenheit. En
général, l’appareil est configurée pour un achage
en degrés centigrades.
Comment configurer en degrés Centigrades:
Comment configurer en degrés Fahrenheit:
Comment activer:
blocage clavier
Pour désactiver:
blocage clavier
FR
This manual suits for next models
5
Table of contents
Languages:
Other Fhiaba Wine Cooler manuals
Fhiaba
Fhiaba XS8991TWT6 User manual
Fhiaba
Fhiaba Integrated Series User manual

Fhiaba
Fhiaba Integrated Series User manual
Fhiaba
Fhiaba 1T User manual
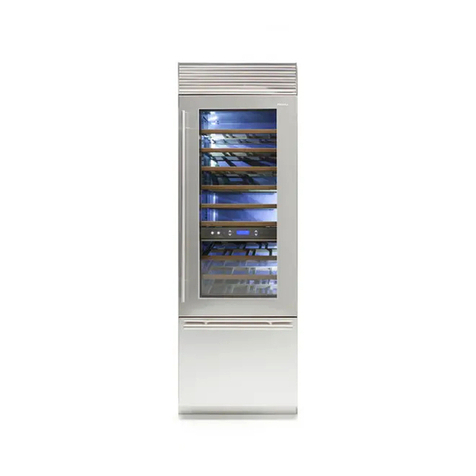
Fhiaba
Fhiaba XS5991TWT6U User manual

Fhiaba
Fhiaba 1T User manual
Fhiaba
Fhiaba Wine Cellars User manual
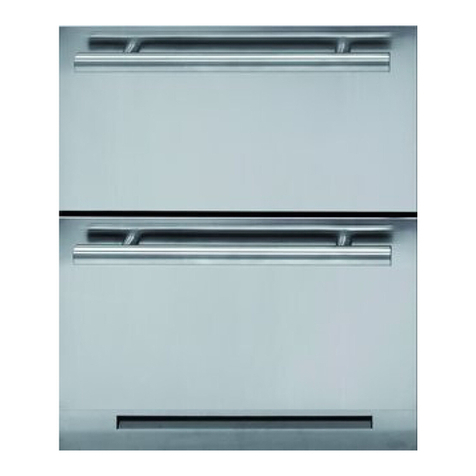
Fhiaba
Fhiaba Premium Series Assembly instructions
Fhiaba
Fhiaba FP24BWRLGS User manual
Fhiaba
Fhiaba TriMode User manual
