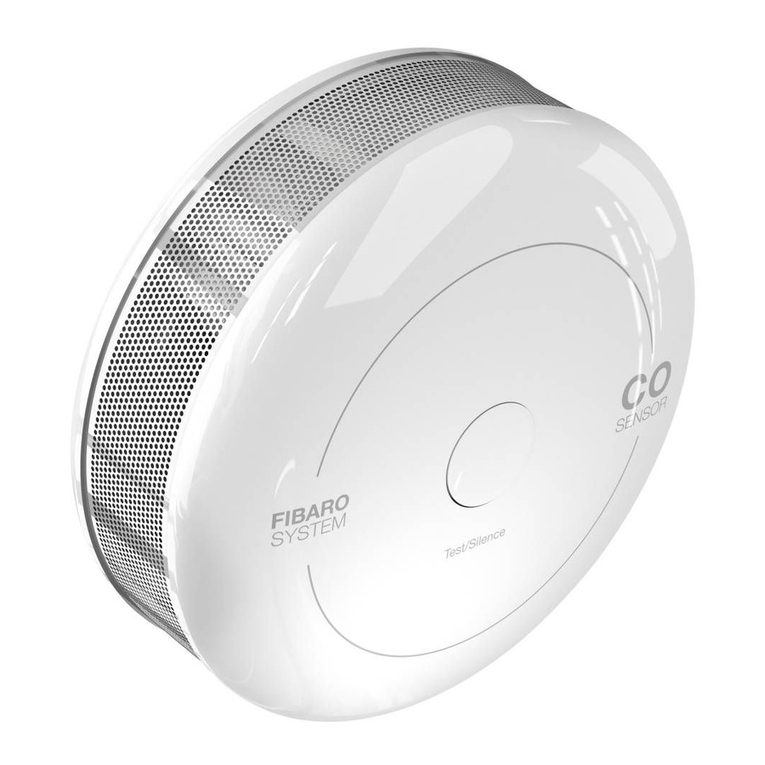
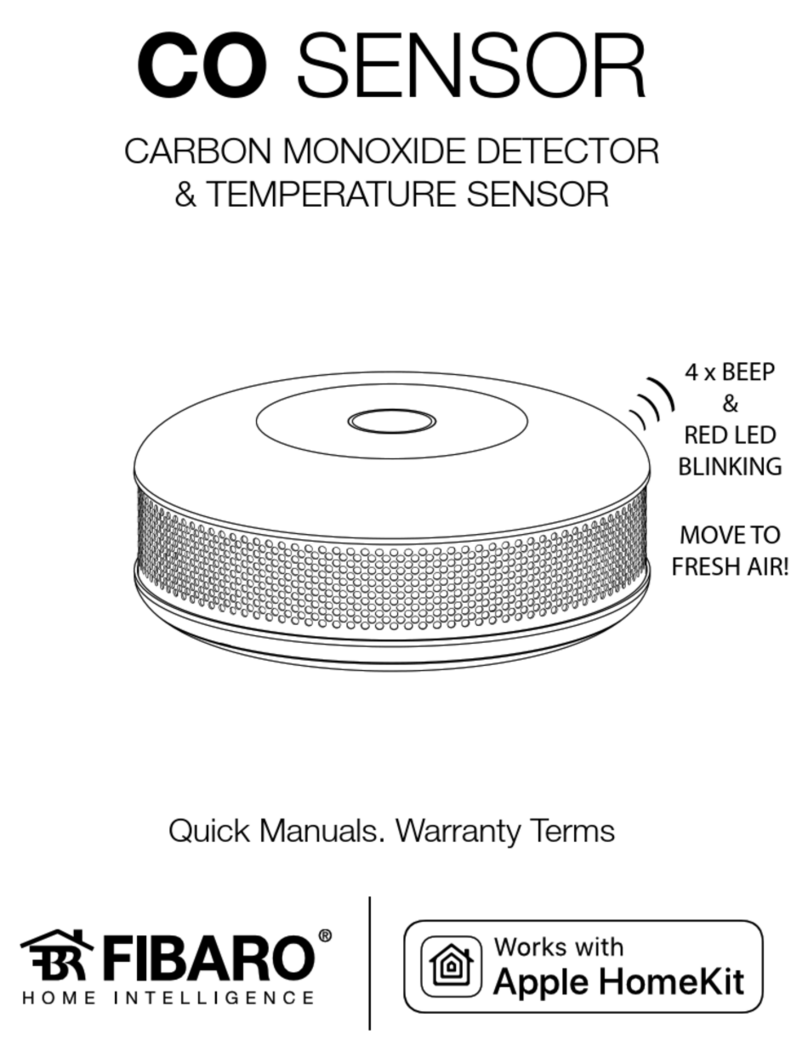
FIBARO CO Sensor FGCD-001 User manual

CO Sensor
FGCD-001
) ))
4 x BEEP
&
RED LED
BLINKING
MOVE TO
FRESH AIR!

For more information about FIBARO CO Sensor, like video guides,
parameters, technical manuals, and declarations visit our website:
manuals.baro.com/co-sensor
The manufacturer, Fibar Group S.A. will not be held responsible for any
loss or damage resulting from not following instructions of the manuals.

ENGLISH 9
POLSKI 16
DEUTSCH 23
FRANÇAIS 30
ESPAÑOL 37
PORTUGUÊS 44
ITALIANO 51
NEDERLANDS 58
SVENSKA 65
NORSK 72
ČESKY 79
SLOVENSKÝ 86
MAGYAR 93
ROMÂNĂ 100
107
EESTI 114
LIETUVIŲ 121
LATVIEŠU 128

4
CEILING
FLOOR
NOT HERE
HERE
30cm/1ft
1.5m/5ft
WALL
Place of installation

5
B
e
e
p
!
PULL
1xCR123A(3V)
PULL
1xCR123A(3V)
PULL
1xCR123A(3V)
Battery replacement
Fig. 1 Fig. 2
Fig. 3 Fig. 4

6
PULL
1xCR123A(3V)
Fig. 1 Fig. 2
Fig. 3 Fig. 4
Installation
1/2
PULL
1xCR123A(3V)
To be installed only by a qualied specialist!
B
e
e
p
!
PULL
1xCR123A(3V)

7
Fig. 5
Fig. 6.
Fig. 7
Installation
2/2


9
Description
FIBARO CO Sensor is an ultra-light, compact, battery-powered carbon monoxide
detector, designed to be placed on a wall. Its high sensitivity allows to detect the
presence of the carbon monoxide (CO) gas at the early stage in order to prevent
carbon monoxide poisoning. Alarm is signalled with a built-in siren, blinking LED
indicator and by sending commands to Z-Wave network devices. Additionally,
the device is equipped with a temperature sensor.
General carbon monoxide information
Carbon monoxide (CO) is a colourless, odourless, and tasteless poison gas that
can be fatal when inhaled. It is produced when liquid, solid, or gas fuel is burned.
Symptoms of carbon monoxide poisoning
The early symptoms of carbon monoxide poisoning can be confused with
u-like symptoms: headache, dizziness and nausea. Breathing carbon monox-
ide causes these symptoms even in healthy people. It can also cause sleepiness,
vision problems (including blurred vision), ringing in the ears, aching arms and
legs, irregular breathing, fatigue and confusion. At very high levels, it causes loss
of consciousness and death.
Some external factors, eg. exposure to high concentration of basic (non-acidic)
gases, silicone vapors, hydrogen sulde or sulfuric acid gas, organic vapors, con-
tact with water, dust and oil mist, or dew condensation may aect the reliability
of the device operation.
This device may not protect from long-term exposure to low levels of carbon
monoxide which can also lead to neurological symptoms.
ENGLISH

10
Warnings
This product is not a toy. Keep away from children and animals!
Failure to observe recommendations included in this manual may cause risk to
life and health or result in malfunction of the device.
The manufacturer, Fibar Group S.A. will not be held responsible for any loss or
damage resulting from not following instructions of the manuals.
Risk of malfunction as a result of tampering with the device.
The device should be installed below the ceiling level.
The device should not be installed: in a bathroom, next to heat sources, within
range of kids, obstructed from possible carbon monoxide sources, in direct sunlight.
The device is not a substitute for appropriate ventilation and exhaust systems.
Do not paint the device.
The device should be cleaned with a slightly damp cloth or moistened tissue.
Replace the device before date on the front or if sensor error is detected.
CAUTION: Risk of Explosion if Battery is replaced by an Incorrect Type. Dispose of
Used Batteries According to the Instructions.
Place of installation (page 4)
Install the device on the wall, at least 30 cm (1 ft) away from the corner.
Recommended height of installation is dependant on the purpose of the room
and height at which head typically is.
Installation (page 6/7)
1. Turn the cover counter clockwise (Fig. 1).
2. Take o the cover (Fig. 2).
3. Remove the paper strip protecting the battery (Fig. 3).
4. Proper powering up will be conrmed with a short beep (Fig. 4).
5. Mount the cover on a wall (Fig. 5).
6. Attach the device to its cover (Fig. 6).
7. Turn the device clockwise to close it (Fig. 7).
ENGLISH

11
WHAT YOU HEAR
WHAT YOU SEE WHAT IT MEANS WHAT TO DO
4 x BEEP
every 5s
4 x RED BLINK
every 5s
DETECTED
PRESENCE OF
CARBON
MONOXIDE WHICH
CAN KILL YOU!
1. Open windows
2. MOVE TO
FRESH AIR!
3. Contact emer-
gency services
1 x BEEP
1 x YELLOW BLINK
every 30s
Low battery level Replace battery
1 x BEEP
every 30s
—
Sensor error,
DOES NOT DETECT
CARBON MONOXIDE
Reset device,
replace if no eect
2 x BEEP 2 x CYAN BLINK
every 30s
End of lifespan Reset device,
replace if no eect
3 x BEEP
every 30s
1 x BLUE BLINK
every 30s
Heat alarm Be cautious of re
1 x BEEP 1 x WHITE BLINK Tamper alarm Check housing
— 1 x GREEN BLINK
after button press
Device powered —
1 x BEEP 1 x GREEN BLINK
after powering
Added to Z-Wave —
1 x BEEP 1 x RED BLINK
after powering
Not added
to Z-Wave
—
1 x BEEP 1 x MAGENTA BLINK Out of range Check Z-Wave
—CYAN BLINKING Firmware update Wait for completion
ENGLISH

12
Testing
Caution! The alarm is very loud! Only the rst alarm sequence is quieter.
1. Press and hold the button.
2. The LED indicator will glow white and you will hear a short beep - keep holding.
3. Release the button when you hear the rst alarm sequence.
4. Move away from the device to protect your hearing.
Battery replacement (page 5)
1. Remove the device from the cover by turning it counter-clockwise.
2. Pull the paper strip to take out the battery.
3. Press and hold the button for at least one second.
4. Insert a new CR123A battery observing the polarities shown inside.
5. Attach the device to its cover by turning it clockwise and perform the test.
Use only type of battery specied in this manual and keep proper polarity!
Z-Wave procedures
Adding to the network
1. Place the device within direct range of the Z-Wave controller.
2. Set the main Z-Wave controller into adding mode.
3. Quickly, triple click the button located on the casing.
4. Wait for the device to be added into the system.
5. Install the device in desired location.
Reset
1. Press and hold the button.
2. Release the button when LED indicator glows white.
3. Click the button when LED indicator glows yellow.
4. After few seconds the device will be reset (conrmed by red LED indicator).
ENGLISH

13
Technical data
Battery type: 3V, CR123A (included)
Battery life: 3 years on default
settings (tested with
Panasonic Industrial
Lithium)
Lifespan
under typical
conditions:
8 years
Operating
temperature:
0-50°C (32-122°F)
Operating
humidity:
10-95%RH without
condensation
Measuring
accuracy:
±10ppm / ±5%
Alarm response
times on default
settings:
50ppm 60-90min
100ppm 10-40min
300ppm <1.5min
Radio protocol: Z-Wave
Radio frequen-
cy:
868.4, 868.42 or
869.8 MHz EU;
869.0 or 869.02
MHz RU;
Max. transmit
power:
0 dBm
Dimensions
(d x h):
65 x 28 mm
Conformity with: EN 50291-1:2010
Declaration of Conformity
Hereby, Fibar Group S.A. declares that the device is in compliance with Directive
2014/53/EU and 2011/65/EU. The full text of the EU declaration of conformity is
available at the following internet address: www.manuals.baro.com
WEEE Directive Compliance
Device labelled with this symbol should not be disposed with other household
wastes. It shall be handed over to the applicable collection point for the recycling
of waste electrical and electronic equipment.
ENGLISH

14
Guarantee terms and conditions
1. FIBAR GROUP S.A. with its registered oce in Poznan, ul. Lotnicza 1, 60-421 Poznań, entered
into the Register of Entrepreneurs of the National Court Register maintained by the District Court
for Poznań-Nowe Miasto and Wilda in Poznań, VIII Commercial Division of the National Court
Register (KRS) under number: 553265, NIP 7811858097, REGON: 301595664, share capital PLN
1,182,100 paid in full, other contact information is available at: www.baro.com (hereinafter“the
Manufacturer”) guarantees that the device sold (hereinafter: “the Device” is free from material
and manufacturing defects.
2. The Manufacturer shall be responsible for malfunctioning of the Device resulting from physical
defects inherent in the Device that cause its operation to be incompatible with the specications
within the period of:
- 24 months from the date of purchase by the consumer,
- 12 months from the date of purchase by a business customer (the consumer and business cus-
tomer are further collectively referred to as“Customer”).
3. The Manufacturer shall remove any defects revealed during the guarantee period, free of
charge, by repairing or replacing (at the sole discretion of the Manufacturer) the defective com-
ponents of the Device with new or regenerated components. The manufacturer reserves the right
to replace the entire Device with a new or regenerated device. The Manufacturer shall not refund
money paid for the device.
4. Under special circumstances, the Manufacturer may replace the Device with a dierent device
most similar in technical characteristics.
5. Only the holder of a valid guaranty document shall be entitled to make claims under guarantee.
6. Before making a complaint, the Manufacturer recommends using the telephone or online sup-
port available at https://www.baro.com/support/.
7. In order to make a complaint, the Customer should contact the Manufacturer via the email
address given at https://www.baro.com/support/.
8. After the complaint has been properly led, the Customer will receive contact details for the
Authorized Guarantee Service (“AGS”). The customer should contact and deliver the Device to
AGS. Upon receipt of the Device, the manufacturer shall inform the Customer of the return mer-
chandise authorization number (RMA).
9. Defects shall be removed within 30 days from the date of delivering the Device to AGS. The
guarantee period shall be extended by the time in which the Device was kept by AGS.
10. The faulty device shall be provided by the Customer with complete standard equipment and
documents proving its purchase.
11. The cost of transporting the Device in the territory of the Republic of Poland shall be covered
by the Manufacturer. The costs of the Device transport from other countries shall be covered
by the Customer. For unjustied complaints, AGS may charge the Customer with costs related
to the case.
ENGLISH

15
ENGLISH
12. AGS shall not accept a complaint claim when:
- the Device was misused or the manual was not observed,
- the Device was provided by the Customer incomplete, without accessories or nameplate,
- it was determined that the fault was caused by other reasons than a material or manufacturing
defect of the Device
- the guarantee document is not valid or there is no proof of purchase,
13. The guarantee shall not cover:
- mechanical damages (cracks, fractures, cuts, abrasions, physical deformations caused by im-
pact, falling or dropping the device or other object, improper use or not observing the operating
manual);
- damages resulting from external causes, e.g.: ood, storm, re, lightning, natural disasters, earth-
quakes, war, civil disturbance, force majeure, unforeseen accidents, theft, water damage, liquid
leakage, battery spill, weather conditions, sunlight, sand, moisture, high or low temperature, air
pollution;
- damages caused by malfunctioning software, attack of a computer virus, or by failure to update
the software as recommended by the Manufacturer;
- damages resulting from: surges in the power and/or telecommunication network, improper
connection to the grid in a manner inconsistent with the operating manual, or from connecting
other devices not recommended by the Manufacturer.
- damages caused by operating or storing the device in extremely adverse conditions, i.e. high hu-
midity, dust, too low (freezing) or too high ambient temperature. Detailed permissible conditions
for operating the Device are dened in the operating manual;
- damages caused by using accessories not recommended by the Manufacturer
- damages caused by faulty electrical installation of the Customer, including the use of incorrect
fuses;
- damages caused by Customer’s failure to provide maintenance and servicing activities dened
in the operating manual;
- damages resulting from the use of spurious spare parts or accessories improper for given model,
repairing and introducing alterations by unauthorized persons;
- defects caused by operating faulty Device or accessories.
14. The guarantee shall not cover natural wear and tear of the Device and its components list-
ed in the operating manual and in technical documentation as such elements have a dened
operational life.
15. The Device Guarantee shall not exclude, limit or suspend the Customer’s warranty rights.
16. The Manufacturer shall not be liable for damages to property caused by defective device. The
Guarantor shall not be liable for indirect, incidental, special, consequential or punitive damages,
or for any damages, including, inter alia, loss of prots, savings, data, loss of benets, claims by
third parties and any other damages arising from or related to the use of the Device.

16
Opis
FIBARO CO Sensor to kompaktowy, zasilany bateryjnie detektor tlenku węgla,
przeznaczony do montażu na ścianie. Jego wysoka czułość umożliwia wykrycie
obecności tlenku węgla (CO) na wczesnym etapie w celu zapobiegnięcia jego
zatruciem. Alarm jest sygnalizowany za pomocą wbudowanej syreny, migającej
diody LED oraz przez wysłanie komend do urządzeń sieci Z-Wave. Ponadto
urządzenie posiada wbudowany czujnik temperatury.
Podstawowe informacje dotyczące tlenku węgla
Tlenek węgla (CO), zwany także czadem, to bezbarwny i bezwonny gaz, którego
wdychanie może spowodować śmierć. Powstaje podczas procesu niepełnego
spalania.
Objawy zatrucia tlenkiem węgla
Pierwsze objawy zatrucia czadem mogą być mylone z objawami grypy. Należą do
nich ból i zawroty głowy oraz nudności. Wdychanie tlenku węgla może powodo-
wać takie konsekwencje nawet u osób zdrowych. Wystąpić mogą również sen-
ność, problemy ze wzrokiem (niewyraźne widzenie), dzwonienie w uszach, bóle
kończyn, przyspieszenie tętna i oddechu, osłabienie oraz uczucie oszołomienia.
Wysokie stężenie czadu może skutkować utratą przytomności oraz śmiercią.
Niektóre czynniki zewnętrzne, np. narażenie na wysokie stężenie gazów pod-
stawowych, oparów silikonowych, siarkowodoru lub kwasu siarkowego, oparów
organicznych, kontakt z wodą, pyłem, mgłą olejową, lub kondensacja rosy, mogą
wpływać na niezawodność działania urządzenia.
Urządzenie może nie chronić przed długotrwałą ekspozycją na niskie stężenie
tlenku czadu, która również może być szkodliwa dla organizmu i prowadzić do
wystąpienia objawów neurologicznych.
POLSKI

17
Ostrzeżenia
Nieprzestrzeganie zaleceń zawartych w instrukcji może okazać się niebezpieczne
dla życia i zdrowia lub spowodować nieprawidłowe działanie urządzenia.
Producent urządzenia, Fibar Group S.A. nie ponosi odpowiedzialności za szkody
powstałe w wyniku użytkowania niezgodnego z niniejszą instrukcją.
Ryzyko nieprawidłowego działania urządzenia w wyniku ingerencji.
Urządzenie nie powinno być montowane w łazience, w pobliżu źródeł ciepła,
w zasięgu dzieci, odcięte od potencjalnych źródeł tlenku węgla lub w miejscu
bezpośredniego działania światła słonecznego.
Urządzenie nie jest zamiennikiem odpowiedniego systemu wentylacyjnego.
Nie malować urządzenia.
Urządzenie powinno być czyszczone wilgotną szmatką lub chusteczką.
Wymień urządzenie na nowe przed upływem daty znajdującej się na obudowie
lub jeżeli wykryty został błąd czujnika.
Ten produkt nie jest zabawką. Trzymać poza zasięgiem dzieci i zwierząt!
UWAGA:W przypadku korzystania z nieprawidłowego typu baterii istnieje ryzyko
pożaru lub wybuchu. Zużyte baterie należy utylizować zgodnie z obowiązujący-
mi przepisami ochrony środowiska.
Miejsce instalacji (strona 4)
Zainstaluj urządzenie na ścianie, w odległości co najmniej 30 cm od narożnika.
Rekomendowana wysokość montażu zależy od rodzaju pomieszczenia oraz wy-
sokości, na której najczęściej znajduje się głowa.
Instalacja (strona 6/7)
1. Obróć pokrywę w kierunku przeciwnym do ruchu wskazówek zegara (Fig. 1).
2. Zdejmij pokrywę obudowy (Fig. 2).
3. Usuń zabezpieczenie baterii (Fig. 3).
4. Poprawne zasilenie zostanie potwierdzone krótkim sygnałem dźwiękowym (Fig. 4).
5. Zainstaluj pokrywę obudowy na ścianie (Fig. 5).
6. Przyłóż urządzenie do zainstalowanej na ścianie pokrywy (Fig. 6).
7. Przekręć urządzenie zgodnie z ruchem wskazówek zegara, aby je zamocować (Fig. 7).
POLSKI

18
CO SŁYSZYSZ
CO WIDZISZ CO TO ZNACZY CO ROBIĆ
4 x SYGNAŁ
co 5s
4 x CZERWONY
BŁYSK co 5s
WYKRYTO POZIOM
TLENKU WĘGLA,
KTÓRY MOŻE BYĆ
ŚMIERTELNY!
1. Otwórz okna
2. WYJDŹ NA
ZEWNĄTRZ!
3. Powiadom
służby ratunkowe
1 x SYGNAŁ
1 x ŻÓŁTY BŁYSK co 30s
Niski poziom baterii Wymień baterię
1 x SYGNAŁ
co 30s
—
Błąd czujnika,
TLENEK WĘGLA NIE
JEST WYKRYWANY
Zresetuj lub wy-
mień urządzenie
2 x SYGNAŁ 2 xTURKUSOWY
BŁYSK
co 30s
Koniec okresu
eksploatacji sensora
Zresetuj lub wy-
mień urządzenie
3 x SYGNAŁ
co 30s
1 x NIEBIESKI
BŁYSK
co 30s
Alarm wysokiej
temperatury
Ryzyko wystąpienia
pożaru
1 x SYGNAŁ 1 x BIAŁY
BŁYSK
Alarm naruszenia Sprawdź obudowę
— 1 x ZIELONY
BŁYSK
po
naciśnięciu przycisku
Akcesorium jest
zasilane
—
1 x SYGNAŁ 1 x ZIELONY
BŁYSK
po zasileniu
Dodany do sieci
Z-Wave
—
1 x SYGNAŁ 1 x CZERWONY
BŁYSK
po zasileniu
Niedodany do sieci
Z-Wave
—
1 x SYGNAŁ 1 x RÓŻOWY
BŁYSK
Brak zasięgu Z-Wave Sprawdź Z-Wave
—MIGANIE NA
TURKUSOWO
Aktualizacja
oprogramowania
Zaczekaj na
ukończenie
POLSKI

19
Testowanie
Uwaga! Alarm jest bardzo głośny! Tylko pierwsza sekwencja jest cichsza.
1. Wciśnij i przytrzymaj przycisk.
2. Wskaźnik LED zaświeci na biało i usłyszysz krótki sygnał dźwiękowy - trzymaj
przycisk wciśnięty.
3. Zwolnij przycisk po usłyszeniu pierwszej sekwencji alarmowej.
4. Oddal się od urządzenia, aby zapobiec uszkodzeniu słuchu.
Wymiana baterii (strona 5)
1. Zdejmij urządzenie ze ściany obracając je w kierunku przeciwnym do ruchu
wskazówek zegara.
2. Pociągnij za pasek papieru, aby wyjąć zużytą baterię.
3. Wciśnij i przytrzymaj przycisk przez co najmniej sekundę.
4. Włóż nową baterię CR123A zwracając uwagę na poprawną polaryzację.
5. Zamocuj urządzenie na ścianie poprzez przyłożenie i obrócenie w kierunku
zgodnym z ruchem wskazówek zegara i wykonaj test działania.
Używaj tylko typu baterii podanego w instrukcji pilnując poprawnej polaryzacji!
Dodawanie do sieci Z-Wave
1. Umieść urządzenie w pobliżu kontrolera Z-Wave.
2. Uruchom tryb dodawania w kontrolerze Z-Wave.
3. Trzykrotnie, szybko wciśnij przycisk znajdujący się na obudowie.
4. Poczekaj aż urządzenie zostanie dodane do systemu.
5. Zainstaluj urządzenie w miejscu docelowym.
Reset
1. Wciśnij i przytrzymaj przycisk.
2. Gdy wskaźnik LED zaświeci na biało, zwolnij przycisk.
3. Naciśnij przycisk ponownie, gdy wskaźnik LED zaświeci na żółto.
4. Po kilku sekundach urządzenie zostanie zresetowane, co potwierdzi czerwony
kolor wskaźnika LED.
POLSKI

20
Dane techniczne
Typ baterii: 3V, CR123A (w zestawie)
Żywotność
baterii:
3 lata przy ustaw. do-
myślnych (testowane
z Panasonic Industrial
Lithium)
Okres
eksploatacji
w typowych
warunkach:
8 lat
Temperatura
pracy:
0-50°C (32-122°F)
Dopuszczalna
wilgotność:
10-95% RH bez
kondensacji
Dokładność
pomiaru:
±10ppm / ±5%
Czas reakcji alar-
mu przy ustaw.
domyślnych:
50ppm 60-90min
100ppm 10-40min
300ppm <1,5min
Częstotliwość
radiowa:
868.4, 868.42 or
869.8 MHz EU;
869.0 or 869.02
MHz RU;
Protokół
radiowy:
Z-Wave+
Moc nadawania: 0 dBm
Wymiary
(śred. x wys.):
65 x 28 mm
Zgodność
z wymogami UE:
RED 2014/53/EU
RoHS 2011/65/EU
EN 50291-1:2010
Deklaracja zgodności
Fibar Group S.A. niniejszym oświadcza, że urządzenie jest zgodne z dyrektywą
2014/53/EU. Pełny tekst deklaracji zgodności UE jest dostępny pod następującym
adresem internetowym: www.manuals.baro.com
Zgodność z dyrektywą WEEE
Urządzenia oznaczonego tym symbolem nie należy utylizować lub wyrzucać
wraz z odpadami komunalnymi. Obowiązkiem użytkownika jest dostarczenie
zużytego urządzenia do wyznaczonego punktu recyklingu.
POLSKI
Other manuals for CO Sensor FGCD-001
2
This manual suits for next models
1
Table of contents
Languages:
Other FIBARO Gas Detector manuals