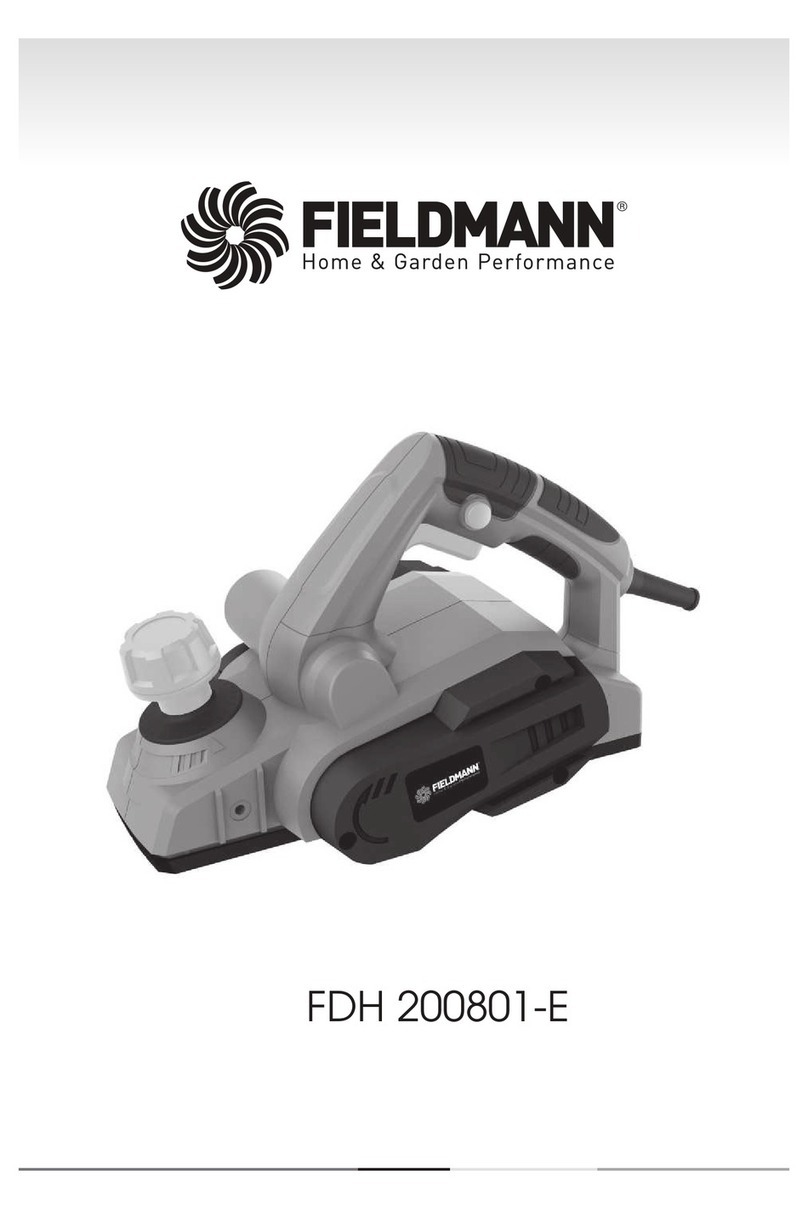
Fieldmann FDH 200801-E User manual

'%)&

)'+(


)'+(


EN
ELECTRIC HANDHELD PLANER OPERATING INSTRUCTIONS
7
Electric Hand-held Planer
INSTRUCTION MANUAL
Thank you for your purchase of the electric hand-held planer. For your personal safety,
read and understand the Instruction Manual before using. Keep the Instruction Manual in
a safe place for future reference.
CONTENTS
1. GENERAL SAFETY INSTRUCTIONS ................................................................................................................ 8
2. SYMBOLS ..............................................................................................................................................................
3. %&4$3*15*0/ ...............................................................................................................................................................
4. PROPER USE ........................................................................................................................................................
5 BEFORE STARTING THE EQUIPMENT ..........................................................................................................
6. OPERATION .........................................................................................................................................................
.CLEANING, MAINTENANCE AND ORDERING OF SPARE PARTS .....................................................
. TECHNICAL SPECIFICATIONS .......................................................................................................................
. DISPOSAL .............................................................................................................................................................. 20
Contents

EN 8
FDH 2001-E
General safety instructions
1. GENERAL SAFETY INSTRUCTIONS
WARNING! Carefully read the instruction manual before use.
Important safety warnings
Unpack the product carefully and be sure not to throw away any part of the package before having found all
components of the product.
Keep the product in a dry place out of reach of children.
Read all cautions and instructions. The failure to adhere to warning cautions and instructions may result in
an accident, fire and/or a serious injury.
Packaging
The product is placed in a package preventing damage during transport. This package is a raw material
therefore it can be handed-over for recycling.
Instructions for use
Before beginning to work with the machine, read the following safety rules and instructions for use. Familiarize
with operating elements and the proper use of the device. Keep the manual in a safe place for future reference.
We recommend keeping the original package including the inner packaging materials, cash voucher and
guarantee card for a period of warranty at minimum. For a case of transportation, pack the machine into the
original box from the manufacturer, thus ensuring a maximum protection of the product during a possible
transport (e.g. moving or sending into a service station)..
Note: If you hand the machine over to next persons, hand it over together with the manual. Adherence to
the attached instructions for use is a precondition for the proper use of the machine. The operation manual
includes also instructions for operation, maintenance andrepairs.
The manufacturer does not take any responsibility for accidents or damages resulting
from the failure to adhere to this manual.

EN
ELECTRIC HANDHELD PLANER OPERATING INSTRUCTIONS
9
General safety instructions
Carefully read, remember and keep these safety instructions
WARNING! In the use of electric machines and power tools, it is necessary to respect
and follow the following safety instructions for the reasons of protection against electric
shock, personal injury and danger of fire. The term “power tool” in the instructions below
refers both to mains-operated (corded) power tool or battery-operated (cordless) power tool.
Save all warnings and instructions for future reference.
Workplace
Keep the work area clean and well lit. Cluttered or dark areas in the workplace invite
accidents. Store power tools that you don’t currently use.
Do not operate power tools in environments with danger of occurrence of a fire or explosion,
such as in the presence of flammable liquids, gases, or dust. Power tools create sparks
which may ignite the dust or fumes.
Keep unauthorised persons, especially children, away from the work area while operating
a power tool! Distractions can cause you to lose control over the performed activity. In no
event leave your power tool unattended. Keep the equipment away from animals.
Electrical Safety
Power tool plugs must match the mains socket outlet. Never modify the plug in any way.
Do not use any adapter plugs with earthed (grounded) power tools. Undamaged plugs and
matching outlets will reduce risk of electric shock. Damaged or fouled supply cables increase
the risk of electric shock. If the power cord is damaged, it must be replaced by a new power
cord which is available at the authorised service centre or the importer.
Avoid body contact with earthed or grounded surfaces such as pipes, radiators, cooking
ranges and refrigerators. There is an increased risk of electric shock if your body is earthed or
grounded.
Do not expose power tools to rain or wet conditions. Never touch the power tool with wet
hands. Never wash the power tool under running water or immerse it in water.
Never use the supply cable for other than intended purposes. Never use the cord for carrying
or pulling the power tool. Never unplug the plug from the outlet by pulling the cable. Keep
electric cables away from sharp or hot objects to prevent mechanical damage.
The power tool was designed to be powered solely by alternating electric current. Always
check if the electric voltage matches the information specified in the type label of the power
tool.
Never use power tool with damaged electric cable or plug or which has been dropped or is in
any way damaged.

EN 10
FDH 2001-E
General safety instructions
If an extension cord is used, always check whether its technical parameters match the
information specified in the type label of the power tool. When operating a power tool
outdoors, use an extension cord suitable for outdoor use. If extension drums are used, these
must be rolled out to prevent overheating of the cord.
If a power tool is operated in a damp location or outdoors, its operation is only permitted if
connected to an electric circuit protected by a residual current device <30 mA. Use of residual
current device (RCD) reduces the risk of electric shock.
Hold the power tool by insulated gripping surfaces only as the cutting or drilling tool may
contact hidden wiring or its own power cord during operation.
Personal Safety
Be careful, stay alert and watch what you are doing when operating a power tool.
Concentrate on your work. Do not use a power tool while you are tired or under the influence
of drugs, alcohol or medication. A moment of inattention while operating power tools may
result in serious personal injury. Do not eat, drink and smoke while operating a power tool.
Use personal protective equipment. Always wear eye protection. Use protective equipment
corresponding to the type of work you are doing. Protective equipment such as dust mask,
non-skid safety shoes, hard hat, or hearing protection used in accordance with the working
conditions will reduce the risk of personal injury.
Prevent unintentional starting. Do not carry the power tool while it is energised or with
your finger on the switch or trigger. Ensure the switch or trigger is in the “off” position before
connecting to power source. Carrying power tools with your finger on the switch or energising
power tools that have the switch on may result in serious injuries.
Remove any adjusting key or wrench before turning the power tool on. An adjusting wrench or
a key left attached to a rotating part of the power tool may result in personal injury.
Keep proper footing and balance at all times. Do not overreach. Never overestimate your own
capabilities. Never use power tools while you are tired.
Dress properly. Wear work clothes. Do not wear loose clothing or jewellery. Keep your hair,
clothing, gloves and other part of your body away from moving or hot parts of the power tool.
Connect the equipment to dust exhaustion. If the tools are provided for the connection of dust
collection or exhaustion devices, ensure these are properly connected and used. Use of such
devices can reduce dust-related hazards.
Fix the work-piece tightly. Use a cabinet clamp or a cramp to fix the work-piece you are about
to machine.
Never use power tools if you are under the influence of alcohol, drugs, medication or other
narcotic or addictive substances.
This equipment is not intended for use by persons (including children) with limited physical,
sensual or mental capacities or lack of experience or knowledge unless they are supervised
or instructed about the use of the equipment by a person responsible for their safety. Children
must be supervised to make sure they are not playing with the equipment.

EN
ELECTRIC HANDHELD PLANER OPERATING INSTRUCTIONS
11
General safety instructions
Power Tool Use and Maintenance
Always disconnect the power tool from the mains in case of any problem during the work,
before cleaning the power tool or its maintenance, during each transportation and after the
completion of the work! Never operate a power tool if it is damaged in any way.
Immediately stop working if the power tool generates abnormal noise or smell.
Do not overload the power tool. The power tool will operate better and safer if it is used at the
rate for which it was designed. Use correct power tool which is intended for the given activity.
The correct power tool will do the job it was designed for better and safer.
Do not use the power tool if it cannot be safely turned on and off using the control switch.
Use of such power tool is dangerous. Defective switches must be repaired by a certified
service provider.
Disconnect the tool from the power source before making any adjustments, changing
accessories or maintenance. Such preventive safety measure prevents the risk of starting the
power tool accidentally.
Store idle power tools out of the reach of children and unauthorised persons. Power tools can
be dangerous in the hands of untrained users. Store the power tools in a dry and safe place.
Keep the power tool in good condition. Check the adjustment of moving parts and their
mobility. Check for any damage to the protective guards or other parts which could affect
safe operation of the power tool. If damaged, have the power tool properly repaired before
further use. Many accidents are caused by poorly maintained power tools.
Keep cutting tools sharp and clean. Properly maintained cutting tools with sharp cutting
edges facilitate work, reduce the risk of injury and are easier to control. Use of accessories
other than those specified in the instructions for use could result in damage to the power tool
and cause injuries.
Use the power tool, accessories and tool bits etc. in accordance with these instructions and
in the manner intended for the particular type of power tool taking into account the working
conditions and the work to be performed. Use of the power tool for purposes other than those
the power tool was intended for could result in hazardous situations.
Service
Do not replace parts of the power tool, do not make any repairs or interfere in any way with
the construction of the power tool. Have your power tool repaired by qualified repair persons.
Any repair or modification of the product without our company’s authorisation is
impermissible (it could cause injury or damage to the user).
Always have your power tool repaired in a certified service centre. Use only original or
recommended replacement parts. This will ensure that your safety and the safety of your
power tool is maintained.

EN 12
FDH 2001-E
2.SYMBOLS
Double-insulated.
Read the Instruction Manual
attentively prior to use.
The product complies with the applicable
standards and regulations.
Use eyes protective equipment
Use ears protectiove equipment
Subjected to recycling
Wear a breathing mask.
Symbols

EN
ELECTRIC HANDHELD PLANER OPERATING INSTRUCTIONS
13
3.%&4$3*15*0/ (Figs. 1/2/3)
1. Setting knob for the chip depth
2. Dust bag
3. Safety lock-off
4. ON/OFF switch
5. Rear base plate
6. Belt cover
7. Chip ejector
8. Front base plate
10. Power cable
11. Thumb screw for step depth scale
12. Step depth scale
13. Parallel stop
4.PROPER USE
The hand-held electric planer is designed for planing, rabating and chamfering pieces of wood.
The machine is to be used only for its prescribedpurpose. Any other use is deemed to be a case of misuse.
The user / operator and not the manufacturer will be liable for any damage or injuries of any kind caused as a
result of this.
Please note that our equipment has not been designed for use in commercial, trade or industrial applications.
Our warranty will be voided if the machine is used in commercial, trade or industrialbusinesses or for equivalent
purposes.
5.BEFORE STARTING THE EQUIPMENT
Before you connect the equipment to the mains supply make sure that the data on the rating plateare identical
to the mains data.
Always pull the power plug before making adjustments to the equipment.
5.1 Adjusting the chip depth (Fig. 4/Item 1)
You can adjust the chip depth in steps of 0.1 mm from 0 to 2 mm by turning the setting knob for the chip depth (1).
Turn the setting knob for the chip depth (1) in a clockwise direction to set a greater chip depth:
Greater chip depth
Layout | Propeer Use | Before starting the equipment

EN 14
FDH 2001-E
Turn the setting knob for the chip depth (1) in a counter-clockwise direction to set a lower chip depth:
Lower chip depth
After finishing work, set the chip depth so that the knives are lowered and thus protected from damage. Turn the
setting knob for the chip depth to position “0” for this purpose.
5.2 Sawdust extraction (Fig. 5-6)
For an optimal sawdust extraction you can connect the supplied dust bag (2) to the hand-held electric planer.
To do so, slide the dust bag (2) into the the chip ejector (7) of the hand-held electric plane.
5.3 Parallel stop (Fig. 7/Item 13)
Use the parallel stop (13) when you want to planer parallel to the edge of the workpiece.
Fitting the parallel stop (Fig. 7)
Fasten the mount (d) of the parallel stop to the left side of the tool using the supplied thumb screw (a).
Now connect the mount (d) to the slide of the parallel stop (13).
The guide rail must always be aligned in downward direction.
Fix the distance required between the parallel stop and the edge of the workpiece.
Fasten the parts with the carriage bolt (b) and the wing nut (c).
6.OPERATION
6.1 ON/OFF switch (Fig. 8)
The hand-held electric planer comes with a safety switch which is designed to prevent accidents.
To switch on the tool press the side safety lockoff (3) and press the button switch.
Release the button switch (4) to switch off the electric plane. The button switch (4) jumps back into its
starting position.
6.2 Practical tips
Important: Only ever bring the hand-held electric planer towards the workpiece while switched on.
6.2.1 Planing surfaces
Now adjust the desired chip depth. Equip the front base plate and place the hand-held electric planer onto the
piece of wood you whish to plane. Then switch on the plane. Push to electric planer over the surface with both
hands and make sure that the both the front and the rear base plate lie flat on the workpiece.
Used a low chip depth for finishing surfaces and complete several passes over the surface.
Before starting the equipmen | Operation

EN
ELECTRIC HANDHELD PLANER OPERATING INSTRUCTIONS
15
6.2.2 Chamfering edges (Fig. 9-10)
There is a V-shaped groove (a) in the front base plate that enables you to planer edges at an angle of 45° for
a smooth finish.
Switch on the tool and wait until it reaches full speed. Place the V-shaped groove (a) on the edge of the
workpiece at an angle of 45°.
Now move the electric planer along the edge of the workpiece.
To achieve a good quality result you should keep the feed speed and angle constant.
6.2.3 Planing steps (Fig. 7/11)
The planing of steps is possible with the help of the parallel stop (13).
Mount the parallel stop (13) on the left side of the tool (see section 5.3).
To mount the depth stop fasten the step depth scale (12) to the front right side of the planer housing with the
locking screw (11) (see Fig. 11).
Release the locking screw (11) and position the step depth scale (12) so that the required step depth is dis-
played. Tighten the locking screw (11) again.
Width of step:
You can set the width of the step with the parallel stop (13).
Depth of step:
We recommend you to set a cutting depth of 2 mm and to keep planing the workpiece until the required depth
of step is reached.
3&1-"$*/(5)&108&3$"#-&
If the power cable for this equipment is damaged, it must be replaced by the manufacturer or its aftersales
service or similarly trained personnel to avoid danger.
Operation

EN 16
FDH 2001-E
.CLEANING, MAINTENANCE AND ORDERING
OF SPARE PARTS
Always pull out the mains power plug before starting any cleaning work.
Cleaning
Keep all safety devices, air vents and the motor housing free of dirt and dust as far as possible. Wipe the
equipent with a clean cloth or blow it with compressed air at low pressure.
We recommend that you clean the device immediately each time you have finished using it.
Clean the equipment regularly with a moist cloth and some soft soap. Do not use cleaning agents or solvents;
these could attack the plastic parts of the equipment. Ensure that no water can seep into the device.
Carbon brushes
In case of excessive sparking, have the carbon brushes checked only by a qualified electrician.
Important! The carbon brushes should not be replaced by anyone but a qualified electrician.
Changing the planing knives (Fig. 12-13)
Important : Always pull the plug out of the power socket before doing any work on the equipment.
To change the planing knives, use the supplied wrench (a).
The hand-held electric planer comes with two carbide metal reversible knives. Reversible knives have two
cutting edges and can be reversed. The guide slot on the reversible knives ensures the same height setting after
a change. Replace a worn, blunt or damaged knife.
Carbide metal reversible knives cannot be resharpened.
Undo the three hexagonal screws (c) using the wrench (a) supplied and push the carbide metal reversible knife
out of the planing shaft using a piece of wood. (see Fig. 12).
Clean the knife seat before fitting. Install the knives in reverse order. Check that the planing knife conforms with
both ends of the planing shaft. Always replace both knives to ensure a uniform chip depth.
Important : Before using the hand-held electric planer make sure the knives are installed securely and in
the right place.
Check the correct setting (Fig. 13)
(8) Front base plate (moving planer shoe)
(5) Rear base plate (fixed planer shoe)
Cleaning, maintanance and ordering of spare parts

EN
ELECTRIC HANDHELD PLANER OPERATING INSTRUCTIONS
17
Cleaning, maintanance and ordering of spare parts
1. Correct adjustment
Result: Smooth planed surfaces
2. Notches in the surface
Problem: The cutting edge on the planing knife (or both planing knives) is not parallel to the height ofthe rear
base plate.
3. Furrows at the start of the planed surface
Problem: The cutting edge on the planing knife (or both planing knives) is below the height of the rear base plate.
4. Furrows at the end of the planed surface
Problem: The cutting edge on the planing knife (or both planing knives) is above the height of the rear base plate
.
.
Replacing the drive belt
The belt should be replaced by a trained expert.
The drive belt (b) must be replaced if it is worn.
Undo the screws (a) and remove belt cover at the sides (6).
Remove the worn belt drive (b) and clean the two belt pulleys (c/d).
Place the new drive belt on the small belt pulley (c) and pull the belt onto the large belt pulley (d) whilst turning
the planing shaft.
Ensure that the longitudinal grooves on the drive belt are in the guide grooves on the drive wheels.
Fit the belt cover (6) and secure it with the screws (a).
.
.
Maintenance
There are no parts inside the equipment which require additional maintenance..
Ordering replacement parts
Please quote the following data when ordering replacement parts:
Type of machine
Article number of the machine
Identification number of the machine
Replacement part number of the part required
For our latest prices and information please go to www.isc-gmbh.info

EN 18
FDH 2001-E
.TECHNICAL SPECIFICATIONS
Electric hand-held planer:
Mains voltage: 230V/50Hz
Power input: W
Idling speed: rpm
Chip depth: 0-2mm
Rebate depth: 0-6mm
Planer width: 82mm
Protection class: II
Weight: kg
LpA sound pressure level dB(A)
LWA sound power level dB(A)
Vibration emission value ah = . m/s2
Important !
The vibration value changes according to the area of application of the electric tool and may exceed the speci
ied value in exceptional circumstances.
Technical specifications

EN
ELECTRIC HANDHELD PLANER OPERATING INSTRUCTIONS
19
Technical specifications
7URXEOHVKRRWLQJ
6XVSHFWHGPDOIXQFWLRQVDUHRIWHQGXHWRFDXVHVWKHXVHUFDQÀ[WKHPVHOYHV7KHUHIRUHFKHFNWKHSURGXFWXVLQJWKLVVHFWLRQ,QPRVW
ĐDVHVWKHSUREOHPFDQEHVROYHGTXLFNO\
2QO\SHUIRUPWKHVWHSVGHVFULEHGZLWKLQWKHVHLQVWUXFWLRQV$OOIXUWKHULQVSHFWLRQŵDLQWHQDQFHDQGUHSDLUZRUNŵXVWEHSHUIRUPHGE\DQ
DXWKRUL]HGVHUYLFHFHQWUHRUDVLPLODUO\TXDOLÀHGVSHFLDOLVWLI\RXFDQQRWVROYHWKHSUREOHP\RXUVHOI
:$51,1*
3UREOHP 3RVVLEOH&DXVH 6ROXWLRQ
3URGXFWGRHVQRWVWDUW 1RWĐŽQQHFWHGWRSRZHUVXSSO\
3RZHUFRUGŽƌƉůXJLVĚĞIHFWLYH
2WKHUHOHFWULFDOGHIHFWWRWKHSURGXFW
&RQQ
HFWWRSRZHUƐXSSO\
&KHFNE\DƐSHFLDOLVWHOHFWULFLDQ
3URGXFW GRHVQRWUHDFKIXOO
SRZHU
([WHQVLRQ FRUG LVQRWVXLWDEOH
IRURSHUD WLRQZLWKWKLVƉURGXFW
3RZHUVRXUFH HJ
JHQHUDWRU
KDVƚRRORZYROWDJH
$LUYHQWVDUHEORFNHG
8
VHDSURSHUH[WHQVLRQFRUG
&R
QQHFWƚRDQRWKHUSRZHUƐŽXUFH
&OHDQWKHĂŝƌYHQWV
8QVDWLVIDFW
RU\UHVXOW 'LVNELWŝƐĚƵůůĚĂPDJHG
'LVN ELWLVQRWVXLWDEOHIRUZRUN
SLHFHPDWHULDO
5HSODFHZLWKQHZRQH
8VHSURSHUGULOOELW
([FHVVLYH YLEUDWLRQ RUQRLVH 'LVNELWŝƐĚƵůůĚĂPDJHG
%ROWVŶƵƚVDUHORRVH
5HSODFHZLWKDQHZRQH
7LJKWHQEROWVŶƵƚV

EN 20
FDH 2001-E
.%JTQPTBM
INSTRUCTIONS AND INFORMATION ON DISPOSAL OF USED PACKAGING
Put any used package material to the place determined by the municipality for waste disposal.
DISPOSAL OF USED ELECTRIC AND ELECTRONIC EQUIPMEN
This symbol on products or accompanying documents means that used electric or
electronic products must not be put to ordinary municipal waste. Hand over such products
to determined collection points for proper disposal, restoration and recycling. Alternatively,
in some countries of the European Union or other European countries you can return your
products to your local dealer when you buy an equivalent new product. By dutiful disposal of
this product you can preserve precious natural resources and you help prevent any potential
adverse effects on the environment and human health which could be the results of wrong
waste disposal. Ask your local authority or the nearest collection point for additional details.
In case of improper disposal of this waste kind penalties can be imposed in accordance
with national regulations.
For companies in the European Union countries
Should you want to dispose of electric and electronic devices, ask your dealer or vendor
for necessary information.
Disposal in other countries outside the European Union
Should you want to dispose of this product, ask your local authorities or your dealer
for necessary information about disposal method
This product fulfils all basic requirements of the EU directives that apply to it.
Text, design and technical specifications can change without prior notice and we reserve the right for
their change.
Disposal
Other manuals for FDH 200801-E
1
Table of contents
Other Fieldmann Planer manuals
Popular Planer manuals by other brands

Mac allister
Mac allister MPTP1500B MAC Original instructions

Delta
Delta 22-560 instruction manual

DeWalt
DeWalt DW 50 Operation, adjustments, maintenance, spare parts

Makita
Makita 2012NB instruction manual

Bosch
Bosch PHO 30-80 operating instructions

Scheppach
Scheppach 4902205901 Translation from the original instruction manual