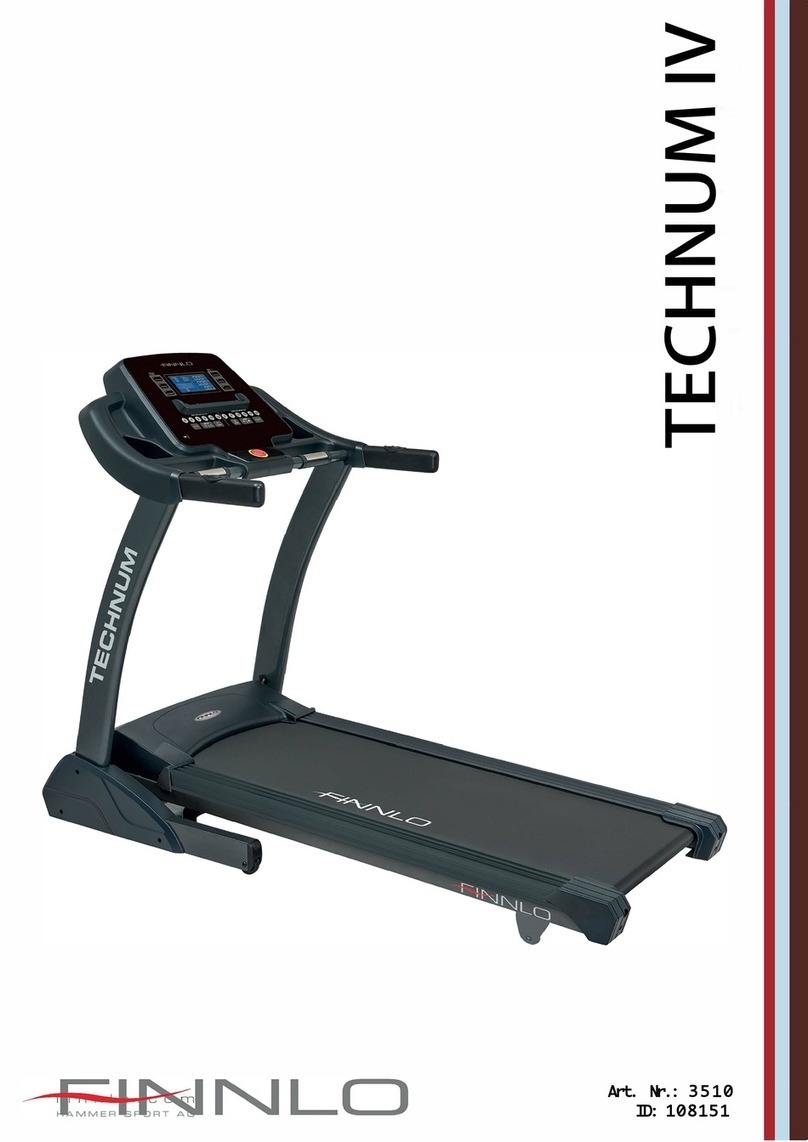
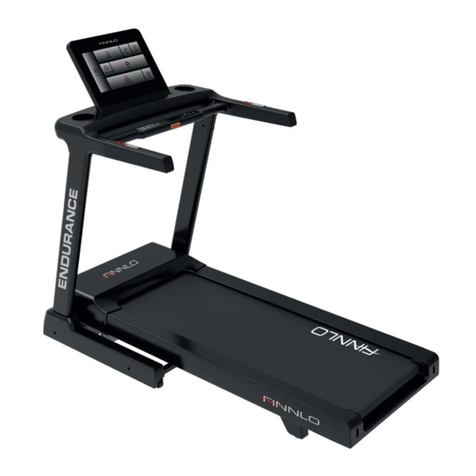
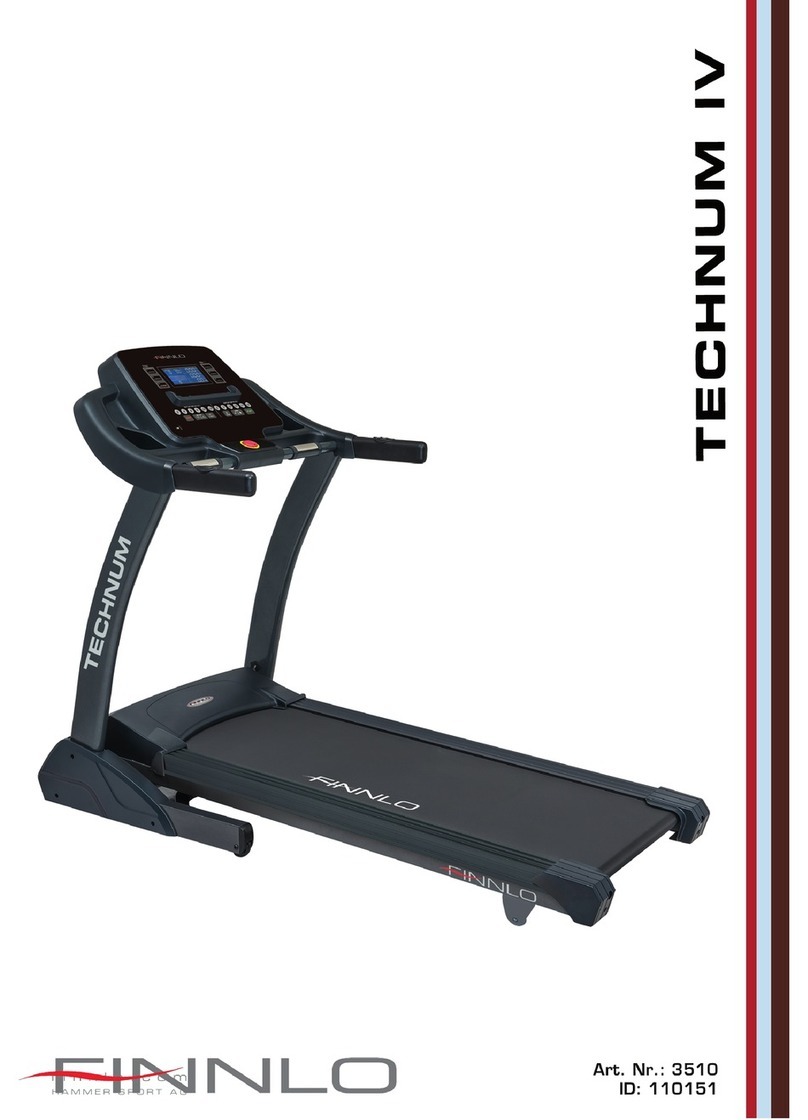
Finnlo ENDURANCE IV User manual

>
-
w
u
z
Œ
C
z
w

1. Istruzioni di sicurezza
2. Generale
2.1 Confezione
2.2 Smaltimento
3. Montaggio
3.1 Lista di controllo
3.2 Fasi di montaggio
3.3 Impostazioni
3.3.1 Configurazione in dettaglio
3.3.2 Alimentazione
3.3.3 Richiudere il tapis roulant
3.3.4 Riaprire il tappeto
3.3.5 Spostare il tapis roulant
3.3.6 Riporre il tapis roulant
4. Procedura di avvio
4.1
4.2
4.3
4.4
Alimentazione
Chiave di sicurezza
Come salire/scendere dal tapis roulant
Absteigen im Notfall
5. Computer
5.1 Pulsanti Computer
5.2 Display
5.2.1
5.3
Spiegazione dei simboli
Funzionamento del computer
5.3.1 Avvio
5.3.2 Quick Start
5.3.3
5.4
Modalità di programmazione
Impostazioni dati KG/LBS
6. Cura e manutenzione
6.1
6.2
6.3
6.4
Cura
Centrare il nastro da corsa
Tendere il nastro da corsa
Lubrificare il nastro da corsa
7. Manuale dell'allenamento
7.1
7.2
7.3
7.4
7.5
Frequenza dell'allenamento
Intensità dell'allenamento
Allenamento guidato dalle pulsazioni
Controllo dell'allenamento
Durata dell'allenamento
8. Esploso Grafico
9. Lista parti di ricambio
10. Garanzia
11. Servizio-Assistenza-e-ricambi
1. Safety instructions 2
2. General 3
Packaging 32.1
2.2
Disposal 3
3. Assembly 4
4
5
3.1
3.2
3.3
Check list
Assembly steps
Setting up the item 7
3.3.1 Setting up in detail 7
3.3.2 Power supply 7
3.3.3 Folding up 7
3.3.4 Unfolding of the treadmill 7
3.3.5 Moving of the treadmill 8
3.3.6 Storing 8
4. Starting procedure 8
8
9
8
4.1
4.2
4.3
4.4
Power supply
Safety-key
Step on and off
Tread off in emergency case 8
95. Computer
5.1 Computer keys 9
5.2 Display 11
5.2.1 11
5.3
Explanation of the symbols
Computer operation 11
5.3.1 Start/ready status 11
5.3.2 Quick Start 11
5.3.3 11
5.4
Program Mode
KGS/ LBS switching
mode
14
6. Care and Maintenance 15
15
15
16
6.1
6.2
6.3
6.4
Care
Centering the running belt
Tighten the belt
Lubricate the running belt 16
7. Training manual 17
17
17
17
18
7.1
7.2
7.3
7.4
7.5
Training frequency
Training intensity
Heartrate orientated training
Training control
Training duration 19
21
22
24
8. Explosion drawing
9. Parts list
10. Warranty
11. -25
Indice Index Pagina/Page
01

IMPORTANT!
•The treadmill is produced according to DIN EN 957-1/6 classHB.
•Max. user weight is 130 kg.
•The treadmill should be used only for its intended
purpose.
•Any other use of the item is prohibited and maybe dangerous. The
importer cannot be held liable for damage or injury caused by
improper use of the equipment.
•The treadmill has been produced according to
the latest safety standards.
To prevent injury and / or accident, please read and fol-low these
simple rules:
1. Do not allow children to play on or near the equipment.
2. Regularly check that all screws, nuts, and
handles are tightly secured.
3. Promptly replace all defective parts and do not use the
equipment until it is repaired. Watch for any material fatigue.
4. Avoid high temperatures, moisture and splashing water.
5. Carefully read through the operating instructions before
starting the equipment.
6. The equipment requires sufficient free space in all
directions, at the rear side, min. 2x1m!
7. Set up the equipment on a solid and flat
surface.
8. Do not exercise immediately before or after meals.
9. Before starting any fitness training, let yourself
examined by a physician.
10.The safety level of the machine can be ensured only if you
regularly inspect parts subject to wear. These are
indicated by an * in the parts list. Levers and other
adjusting mechanisms of the equipment must not obstruct
the range of movement during training.
11.Training equipment must never be used as toys.
12.Do not step on the housing but only on the
steps provided for this purpose.
13.Do not wear loose clothing; wear suitable training
gear such as a training suit, for example.
14.Wear shoes and never exercise barefoot.
15.Make certain that other persons are not in the area of the
treadmill, because other persons may be injured by
the moving parts.
16.It is not allowed to place the item in rooms with high humidity
(bathroom) or on the balcony.
17.Please check that the item is grounded during exercise. If the
ground is not perfect, a mailfunction of the computer can cause
an electrical shock!
18.Repairs are only allowed to be done by an electrician.
19.Pay attention to enough distance between the power cable and
the treadmill to hot sources.
20.Set up the treadmill in such a way, that you are able to see
other persons, who are appraoching.
1. Istruzioni di sicurezz 1. Safety instructions
02
IMPORTANTE!
•Questa attrezzatura è prodotta secondo la norma DIN EN957-1/10.
•Peso Massimo utente è di 150 kg.
•La speed bike deve essere utilizzata solo per lo scopo previsto.
•Ogni altro uso dell'apparecciatura è vietato e puo' essere
pericoloso. L'importatore non può essere ritenuto responsabile per
danni o lesioni causati da un uso improprio dell'attrezzatura.
•Questa sppedbike è stata realizzata secondo gli ultimi standard di
sicurezza.
Per evitare lesioni e / o incidenti, si prega di leggere e seguire
queste semplici regole:
1. Non lasciare giocare i bambini sopra o vicino l'apparacchiatura.
2. Controllare regolarmente che tutte le viti, dadi, maniglie e pedali
siano saldamente fissati.
3. Sostituire prontamente tutte le parti difettose e non utilizzare l'
attrezzatura finché non viene riparata. Controllare qualsiasi usura
del materiale.
4. Evitare le alte temperature, l'umidità e gli spruzzi d'acqua.
5. Leggere attentamente le istruzioni prima di avviare
l'apparacchiatura.
6. L' apparacchiatura richiede spazio libero sufficiente in tutte le
direzioni (di almeno 1,5 m).
7. Disporre l' apparacchiatura su una superficie solida e piatta.
8. Non iniziare l'allenamento immediatamente prima o dopo i pasti.
9. Prima di iniziare qualsiasi allenamento fitness, é necessario fare una
visita medica.
10.Il livello di sicurezza della macchina può essere garantito solo se si
controllano regolarmente le parti soggette ad usura. Queste sono
indicacated da un * asterisco nell'elenco dei pezzi di ricambio.
Leve e altri meccanismi di regolazione dell'apparecchiatura non
devono ostacolare i movimenti durante l'allenamento.
11.La presente é un'apparacchiatura per fitness e non deve mai essere
usata come giocattolo.
12.Non salire su altre parti della struttura, ma solo sulle pedane previste
a tale scopo.
13.Non indossare abiti larghi; indossare indumenti adeguati all'
esercizio sportivo, quali una tuta da ginnastica, per esempio.
14.Indossare scarpe da ginnastica e mai allenarsi a piedi nudi.
15.Assicurarsi che altre persone non siano a prossimità durante
l'allenamento, poiché potrebbero essere ferite dalle parti in
movimento della macchina.
16.Non è consentito inserire l'apparecchiatura in ambienti ad alta
umidità (bagno) o sul balcone.
17.Controllare che l'apparecchiatura sia collegata con la messa a terra
durante il funzionamento. Se la messa a terra non è funzionante/
presente, un mal funzionamento del computer può causare scosse
elettriche!
18.Le riparazioni sono consentite solo da elettricisti qualificati.
19.Prestare attenzione a garantire una distanza sufficiente tra il cavo di
alimentazione, il tapis roulant e eventuali fonti di calore.
20.Sistemare il tapis roulant in modo da poter vedere le persone
quando si avvicinano all'apparecchiatura.

2.2 Smaltimento
Si prega di conservare l'imballaggio nel caso di richiesta di riparazione /
garanzia. L'apparecchiatura non deve essere smaltita tra i rifiuti
domestici!
This training equipment is for use at home. The equipment
complies with the requirements of DIN EN 957-1/6 Class HB. The
CE marking refers to the EU Directive 2004/108/EEC; 98/37/EEC,
2006/42/EEC and die 2006/95/EEC. Damage to health cannot be
ruled out if this equipment is not used as intended (for example,
excessive training, incorrect settings, etc.).
Before starting your training, you should have a complete physical
examination by your physician, in order to rule out any existing health
risks.
2.1 Packaging
Environmentally compatible and recycable materials:
•External packaging made of cardboard
•Molded parts made of foam CFS-free polystyrol (PS)
•Sheeting and bags made of polyethylene (PE)
•Wrapping straps made of polypropylene (PP)
2.2 Disposal
Please be sure to keep the packing for the event of repairs / warranty
matters. The equipment should not be disposed of in the household
rubbish!
2. Generale 2. General
03
Questa apparecchiatura per allenamento fisico è da utilizzare in casa.
L'apparecchiatura è conforme ai requisiti della norma DIN EN 957-1/6
Class HB. Il marchio CE si riferisce alla direttiva 2004/108/EEC;
98/37/EEC, 2006/42/EEC e 2006/95/EEC. Non possono essere
esclusi eventuali danni alla salute qualora l'uso dell'apparecchiatura
non rispetti l'uso previsto per la quale é stata conepita. (Per esempio:
allenamento eccessivo, impostazioni errate, ecc.).
Pima di iniziare l'allenamento, é consigliabile fare una visita medica
completa al fine di escludere eventuali rischi per la salute.
2.1 Confezione
Materiali ecocompatibili e riciclabili:
•Confezione esterna in cartone
•Parti stampate in polistirolo (PS) senza CFC
•Pellicole e sacchetti in polietilene (PE)
•Cinghie di fissaggio in polipropilene (PP)

Al fine di rendere il montaggio il più semplice possibile, abbiamo
preassemblato parti più importanti. Prima di montare l'attrezzatura, si
prega di leggere attentamente le istruzioni e poi proseguire fase dopo
fase, come descritto.
Contenuto della confezione
•Disimballare tutte le singole parti e metterli a vicenda sul pavimento.
•Le parti metalliche possono danneggiare e/o graffiare il pavimento,
quindi si prega di utilizzare un pad. Il tampone deve essere piatta e non
troppo spesso, quindi la palestra ha un supporto stabile.
•Assicurarsi di avere spazio sufficiente per il movimento (almeno 1,5 m)
su tutti i lati in fase di montaggio.
Per un montaggio in sicurezza, il tapis roulantl deve essere montato da
due persone. Non mettere mai le dita tra il telaio principale e il
coperchio del motore!
3.1 Elenco di controllo
In order to make assembly of the treadmill as easy as possi-
ble for you, we have pre assembled the most important parts.
Before you assemble the equipment, please read these instruc-
tions carefully and then continue step by step as described.
Contents of packaging
•Unpack all individual parts and place them on the floor.
•Make certain that you have adequate room for movement (at least 1.5
m) on all sides during assembly.
•Before assembling, please make sure, that the treadmill is having room
temperature.
To have a secure assembly, the treadmill has to be assembled by two
persons. Put your fingers never between the mainframe and the motor
cover!
3.1 Check list
3. Assemblaggio 3. Assembly
04

05
Fase/ Step 2
3.2 Fasi di montaggio / Assembly steps
Fase / Step 1
Montare il computer sui montanti verticali utilizzando le viti (a).
Warning:
Don’t untie the loincloth until assembly is finished. If untie the
loincloth first, it may cause danger. The assembly need to be done
by two persons!
Attenzione:
Rimuovere la cinghia di sicurezza solo dopo la fine
dell'assemblaggio, per evvitare eventuali rischi!
L'assemblaggio deve essere fatto da due persone!
Assemble the computer on the upright poles by using the screws (a).

06
Fase/ Step 3
Sollevare i montanti verticali sinistro e destro come mostrato nel disegno
sopra e serrare con la vite esagonale (a), quindi è possibile sganciare il
gancio di sicurezza.
Lift the left and right upright poles as shown in the right drawing and
tighten with hex screw(a), then you can untie the loincloth.
Montare le coperture (C, D) con tre viti a croce (f)Assemble the covers (C, D) with three crosshead screws (f)
Fase / Step 4

07
3.3 Impostazioni
•Non usare all'aperto.
•Non installare l'elemento vicino all'acqua o in una stanza con umidità
elevata.
•Assicurarsi che il cavo di alimentazione non intralci il passaggio.
•Se il tapis roulant è posto su un tappeto, controllare che vi sia spazio
sufficiente tra il tappeto e il tapis roulant. In caso contrario, utilizzare
un tappetino di protezione.
•Assicurarsi di lasciare un'area di sicurezza sul lato posteriore del
tapis roulant di alment 2x1m.
•È possibile trovare residui di abrasioni di gomma dopo un esercizio
prolungato. E' normale e non si tratta di un difetto dell'attrezzatura.
Per evitare qualsiasi impurità, è possibile inserire una protezione
sotto la zona di corsa.
3.3.1 Configurazione in dettaglio
Il pavimento deve essere perfettamente in piano.
3.3.2 Alimentazione
Prestare attenzione che il tapis roulant non sia collegato a una presa
multipla, se ci sono già TV e altri elettrodomestici collegati.
3.3.3 Richiudere il tapis roulant
La chiusura del tapis toulant é facile, grazie a un sistema di compressione
molla. Assicurarsi che la superficie del tapis roulant sia orizzontale
(inclinazione 0%) prima di piegare l'elemento. Spostare il blocco di corsa
verso l'alto, tenendo il telaio sul retro, finché non si sente "Clack" quindi la
posizione dell'area di corsa è assicurata.
3.3.4 Riaprire il tappeto
Per riaprire il tapis roulant, premere la leva di sblocco con il piede e
accompagnare lentamente l'area di corsa verso il basso. Prestate bene
attenzione che il sistema di compressione a molla accompagni il
movimento, ma non lasciare la presa dal tapis roulant finche non
raggiunge il pavimento!
3.3 Setting up the item
•Don't use it outside.
•Don't set up the item very close to water sources or in a room with
high humidity.
•Make sure, that the power cord doesn't lay, where you are walking
•If the treadmill is placed on a carpet, please check, that there is
enough space between the carpet and the running belt. If not,
please use a protection mat.
•Pay attention to the safety area at the rear side of the treadmill of
2x1m.
•You can find rubber abrasion during longer exercise. It is not a
defect, it is a normal scoring. To avoid any impurity, you can put a
protection mat under the running area.
3.3.1 Setting up in detail
The ground has to be even in the area, where you will set up the item.
3.3.2 Power supply
Pay attention, that the treadmill will not be plugged in a multi
socket, if there are already TV and other entertainment items
plugged in.
3.3.3 Folding up
The folding up goes easily, because of the assistance of the
compression spring system. Make sure, that the running surface is
flat (incline 0%) before you fold up the item. Move the running area
up, by holding the frame at the rear side, till you can hear a „Clack“
and the position of the running area is secured.
3.3.4 Unfolding of the treadmill
To unfold the treadmill, press the unlock system with your
foot and guide the running area downwards. Pay attention,
that the compression spring system will support you, but
please don´t unhand the running deck!

08
3.3.5 Spostare il tapis roulant
Per spostare il tapis roulant in un altro luogo, seguire le
istruzioni seguenti:
- L'inclinazione deve essere 0%.
-Spegnere il tapis roulant.
- Scollegare il cavo di alimentazione della presa.
-Ripiegare l'area di corsa.
-Inclinanare delicatamente il tapis roulant e usando i rulli di
trasporto spingerlo fino alla posizione desiderata.
3.3.6 Riporre il tapis roulant
Prestare attenzione ai suegenti punti:
4.1 Alimentazione
Accendere l'interruttore di alimentazione.
4.2 Chiave di sicurezza
Controllare che la chiave di sicurezza sia inserita. Se la chiave di
sicurezza non è posizionato correttamente, il tapis roulant non si
avvia. Non é possibile iniziare l'allenamento se non si é inserita la
chiave di sicurezza perché in caso di caduta il tapis roulant non si
bloccherebbe. Per fermare in modo sicuro il tapis roulant,
utilizzare il tasto STOP.
Se si tira la chiave di sicurezza e l'inclinazione del tapis roulant non è
0% È necessario reimpostare l'inclinazionea su zero, dopo aver
agganciato la chiave di sicurezza, premendo INCLINE. Se non si
impsta l'inclinazione su 0%, il tapis roulant non parte.
4.3 Passare e spegnere il tapis roulant
Si prega di utilizzare i corrimano per salire e scendere dal tapis
roulant. Durante l'allenamento, tenere lo sguardo in direzione del
computer. Se si desidera interrompere l'esercizio, premere il
pulsante STOP e attendere finché il tapis roulant non si fermi
completamente.
4.4 Bloccare in caso di emergenza
In caso di emergenza, seguire la seguente procedura:
- Estrarre la chiave di sicurezza
- Afferrare entrambe le maniglie
- Saltate sulle guide laterali e aspettate fino a che il nastro scorevole
sia completamente fermo.
- Premere il pulsante STOP.
3.3.5 Moving of the treadmill
To move the treadmill to another place, follow up the following
instruction, please:
-Incline angle has to be 0%.
-Switch off the item.
-Unplug the power cord of the socket.
-Fold up the item.
-Cant the treadmill to your side, till your can roll it easily on the
integrated rollers to the new place.
3.3.6 Storing
Pay attention for storing.
-Switch off the item.
-Unplug the main cord.
-Remove the emergency key and put it at an unapproachable
location for kids.
4.1 Power supply
Switch on the power switch.
4.2 Safety-key
Check if the safety-key is placed. If the safety-key is not
placed correctly, the treadmill cannot be started. An exercise
without fixing the cord is not allowed, because the treadmill will not
stop, if you fall down. To stop the treadmill safely, use the STOP-
button, please.
If you pull the safety key and the incline of the treadmill is not 0%,
you have to reset the incline to zero, after putting on the emergency
key, by pressing the INCLINE button. If you didn't set the incline to
0%, the treadmill cannot be started.
4.3 Step on and off the treadmill
Please use the handrails for treading on and off the treadmill. During
your exercise, please look in the direction of the computer.
STOP-button and wait
If you would like to stop the exercise, press
the till the treadmill come to a complete stop.
4.4 Tread off in emergency case
In an emergency case follow up the following procedure:
-Pull out the emergency key
-Grab both handles
-Jump onto the side rails and wait till the running belt come to a
complete stop.
-Press the STOP button.
-Spegnere l'apparecchiatura
- Scollegare il cavo principale.
- Rimuovere la chiave di emergenza e metterlo in un
ambiente non accessibile dai bambini.
4. Procedure di Avvio 4. Starting procedure

09
5. Computer 5. Computer
5.1 Pulsanti
Premere questo tasto per confermare i valori impostati.
Aumentare / diminuire la pendenza. Una pressione più lunga di questi
pulsanti attiverà il rilevatore di valori automatici.
Attiva l'opzione del profilo.
Avviare / interrompere l'esercizio. Premendo STOP per una volta, si
attiverà la funzione di pausa per 5 minuti. Significa che tutti i dati verranno
salvati per 5 minuti. Premendo e tenendo premuto il pulsante STOP si
cancellano tutti i valori.
Aumento / diminuzione della velocità. Una pressione più lunga di questi
pulsanti attiverà il rilevatore di valori automatici.
Avvia l'esercizio.
5.1 Computer keys
Pressing of this button, will confirm the set values.
Increase/ decrease of function levels and of the incline. A longer
pressing of these buttons will activate the automatic value finder.
Activates the profile option.
Start/Stop your training. Pressing STOP for once, will activate the break
function for 5 minutes. It means, all data will be saved for 5 minutes.
Pressing and holding again the STOP- button will reset all values.
Increase/ decrease of function levels and of the speed. A longer
pressing of these buttons will activate the automatic value finder.
Start your exercise.

10
5.2 Display 5.2 Display
5.2.1 Explanation of the symbols
User in this age range, goal HRC formula:
Max. heart rate = (220 - age)
Low: 0~64%
Fatburn: 65%~74%
Aerobic: 75%~84%
High: 85% above
Explanation: If user is 30 years old, the max HRC is 190, in HRC training
mode, if user HRC is 120, so 120/190 = 63% and it will show Low.
5.2.1 Spiegazione dei simboli
Utente in questa fascia d'età, formula per l'obiettivo HRC:
Frequenza cardiaca max = (220 - anni)
Basso: 0 ~ 64%
Bruciagrassi: 65% ~ 74%
Aerobica: 75% ~ 84%
Alta: 85% e oltre
Spiegazione: Se l'utente ha 30 anni, il suo HRC massimo è 190 in
modalità di allenamento HRC, se l' HRC dell'utente è 120, quindi
120/190 = 63% e mostrerà Basso Livello.
Body Muscle Instruction
When the treadmill start, body and muscle lines will light, when user adjust
Incline, the corresponding muscle training will flash.
Istruzioni per il display muscoli
Quando il tapis roulant inizia, le linee del corpo e del muscolo si
accenderanno, quando l'utente aggiusta l'inclinazione, la
corrispondente formazione muscolare lampeggerà.
Pulsanti rapidi: premendo i pulsanti rapidi si attiveranno valori predefiniti per
la velocità e l'inclinazione.
Quick buttons: Pressing the Quick buttons will activate pre arranged values
for speed and incline.
TIME
HRC &
ETA'
Allenamento
con battito
cardiaco
Calorie
Inclinazione
Muscoli
Velocità
Testo
Peso/Distanza
Programma

d.
e.
f.
a. Accendere il tapis roulant.
b. Inserire la chiave di sicurezza nella presa della consolle.
Udirete un suono.
c. Premere ENTER per avviare il tapis roulant, con una SPEED iniziale
= 1.0 km / h, e un' INCLINE = 0%.
Durante l'esercizio, premere SPEED per aumentare o diminuire la
velocità oppure premere INCLINE per aumentare o diminuire
l'inclinazione. Si ponnono usareanche i pulsanti Quick.
11
5.3 Funzionamento del computer
5.3.1 Avvio:
Dopo aver avviato il compputer viene emesso un segnale acustico quindi
appare la finestra di impostazione del peso.
Premere il pulsante SPEED per la regolazione del peso, il valore
predefinito è 70KG, l'intervallo è di 23 ~ 130 KG Premere ENTER per
confermare il peso, sullo schermo verrà visualizzato "SELECT
PROGRAM", premere SPEED per selezionare il controllo del programma
o premere QUICK START per avviare direttamente l'allenamento.
Lo scopo della regolazione del peso è quello di fornire agli utenti il
riferimento per le calorie espulse e impostare la formula appropriata per
la modifica. Il peso può essere impostato per ogni riavvio.
5.3.2 Quick Start
5.3.3 Modalità di programmazione
Dopo aver completato la selezione del peso, si può passare in modalità
di programmazione prmendo il tasto MODE. Quindi premendo SPEED è
possibile scorrere i programmi: MANUALE-P1 - P2 - P3 - P4 - P5 - P6 -
RANDOM (casuale) - UTENTE - HRC 1-3 - GRASSO CORPOREO.
Programma manuale
a. Selezionare con il tasto SPEED la funzione manuale.
b. Confermare con ENTER.
c. Ora potete selezionare il tempo di allenamento premendo SPEED e
prmere ENTER per confermare.
d. Quindi, passare a selezionare la Distanza premendo il tasto SPEED e
prmere ENTER per confermare.
5.3 Computer operation
5.3.1 Start/ready status:
After powered on a beeper will have a sound and the window for weight
setting is activated.
Press SPEED for weight setting, preset value is 70KG, range is 23~130
KG Press ENTER to confirm the weight, screen will show "SELECT
PROGRAM", press SPEED to select program controlling or press QUICK
START for starting directly.
The purpose of weight setting is to let user know the calories expending
and set the suitable formula for changing. The weight can be set for every
restart.
5.3.2 Quick Start
a. Turn on the treadmill.
b. Put the safety key in the recess of the console. The beeper will
sound.
c. Press ENTER to start the treadmill and it will start at SPEED = 1.0
km/h, INCLINE = 0%.
During work out, press SPEED to increase or decrease the speed,
or press INCLINE to increase or decrease the incline. You can also
do it with the Quick-buttons.
During work out, press STOP once, the treadmill will stop
running. Time window will display "STOP". At this time, all the
values on the computer will stop counting and the incline will be
reduced to 0%. To continue your exercise press ENTER
If press STOP again , but hold it at the second time for 3 seconds,
the treadmill will reset to the Start/Ready position.
5.3.3 Program Mode
After the weight selection has been finished, you can jump into Program
mode by pressing Mode. By pressing SPEED you can scroll through the
programs: MANUAL-P1 - P2 - P3 - P4 - P5 - P6 - RANDOM - USER -
HRC1-3 - BODY FAT.
Manual Program
a. Select with the SPEED buttons MANUAL.
b. Confirm with ENTER..
c. Now you have the option to select the exercise time by pressing.
SPEED and to confirm the time with ENTER.
d. After that the distance can be selected with SPEED buttons and
confirmed with ENTER.
d.
e.
f.
Durante l'esercizio, premere una volta STOP, il tapis roulant si
arresta. La finestra visualizza "STOP". A questo punto, tutti i valori
sul computer smetteranno di contare e la pendenza verrà ridotta a
0%. Per continuare l'esercizio, premere ENTER.
Se si preme nuovamente STOP, ma tenete premuto una seconda
volta per 3 secondi, il tapis roulant ripristinerà i valori e tornerà nella
posizione Start / Ready.

12
e. Finally the calories can be set by pressing SPEED buttons and confirmed
with ENTER.
f. With START you can start your exercise. Please pay attention, that
you can set only one of Time, Distance or Calories. If you set a second
value, the first set value will be reset.
1) P1 Program
Press ENTER to confirm select P1 and enter fitness intensity level setting:
Press SPEED to set Level, preset value is 1, range is level 1 ~ 10 level
Press ENTER to confirm goal distance, screen will show "Ready Go" and
after 3 seconds the treadmill will start running.
2) P2 Program
Press ENTER to confirm P2 and enter intensity level setting:
Press SPEED to set Level, preset value is 1, range is Level 1 ~ Level 10.
Press ENTER to confirm select Level and enter time setting:
Press SPEED to set time. Preset time is 30:00, range is 20:00-99:00.
Press ENTER to confirm goal time and after three second the treadmill will
start running.
3) P3-P6: Way of setting same as P2
4) PROGRAM RANDOM (speed program that appeared by chance)
Press ENTER to confirm the RANDOM program and enter time setting.
Time can be adjusted by pressing SPEED.
Press ENTER to confirm select Level and enter distance setting. To adjust
the distance use the SPEED buttons and confirm with ENTER.
Finally, you could set the calories value by pressing SPEED.
Press ENTER and you exercise begin. Please pay attention, that you can
set only one of Time, Distance or Calories. If you set a second value, the
first set value will be reset.
e. Infine possono essere impostate le calorie premendo il tasto SPEED e
confermati con ENTER.
f. Per iniziare l'allenamento premere START. Si prega di notare che è
possibile impostare solo un parametro per volta tra Tempo, Distanza o
Calorie. Se si imposta un secondo valore, il primo valore impostato verrà
reimpostato.
1) Programma P1
Premere ENTER per confermare la selezione di P1 e impostare il livello di
intensità fisica:
Premere SPEED per impostare Livello, il valore predefinito è 1, l'intervallo è
1 ~10.
Premere ENTER per confermare la distanza obiettivo, la schermata
mostrerà "Ready Go" e dopo 3 secondi il tapis roulant inizia a funzionare.
2) Programma P2
Premere ENTER per confermare P2 e immettere l'impostazione del livello di
intensità:
Premere SPEED per impostare Livello, il valore predefinito è 1, l'intervallo è
Livello 1 ~ 10.
Premere ENTER per confermare il Livello e passare alll'impostazione della
durata:
Premere SPEED per impostare la durata. Il valore preimpostato è di 30:00,
l'intervallo è 20: 00-99: 00.
Premere ENTER per confermare la durata obiettivo e dopo tre secondi il
tapis roulant inizia a funzionare.
3) P3-P6: seguire le impostazioni come per P2.
4) PROGRAMMA RANDOM (casuale)
Premere ENTER per confermare il programma RANDOM e impostare la
durata. La durata può essere regolata premendo SPEED.
Premere ENTER per confermare il Livello e immettere il valore della
distanza. Per regolare la distanza usare il tasto SPEED, e confermare con
ENTER.
Infine, impostare il valore della caloria premendo SPEED.
Premere ENTER per iniziare l'allenamento. i prega di notare che è possibile
impostare solo un parametro per volta tra Tempo, Distanza o Calorie. Se si
imposta un secondo valore, il primo valore impostato verrà reimpostato.

13
5) PROGRAM USER
Press ENTER to confirm the USER program and enter User selection U1-U4
by pressing SPEED . Four user can be store.
Press ENTER for 3 seconds to confirm the User. The first bar is blinking.
With the SPEED buttons you can set the speed and with the INCLINE
buttons you can set the incline for this bar. If you have finished the setting
confirm with ENTER . After you set the last bar, press ENTER for 3 seconds
and the profile is saved. Press ENTER to activate the User and enter time
setting. With the SPEED buttons, you can set the exercise time. Press
ENTER and set the distance with the SPEED buttons, confirm with ENTER .
Now you could set the calories value by pressing buttons SPEED, confirm
with ENTER.
Press ENTER and your exercise begin. Please pay attention, that you can
set only one of Time, Distance or Calories. If you set a second value, the
first set value will be reset.
6) PROGRAM HRC
This function must use with a chest belt! SPEED and INCLINE will be
adjusted by the computer to reach your heartrate goal. If the speed
increases for 10 times, the incline will increase 1 level. If speed decreases for
10 times, incline decrease 1 level.
Press ENTER to confirm the HRC program and enter the heart rate
selection, 60%, 75% or THR (individual setting) by pressing SPEED.
60% or 75% mode
Press ENTER for its confirmation and enter time setting, range
20:00-99:00. Confirm with ENTER and adjust your age with the SPEED
buttons; Press ENTER to close the age setting. Bpm window will show
calculated heart rate goal. Press ENTER to start your workout. The bpm
window shows the actual heart rate and the THR window is showing the
heart rate goal.
5) PROGRAMMA UTENTE
Premere ENTER per confermare il programma utente, e premendo SPEED
inserire la selezione dell'utente U1-U4 . Si possono registrare fino a quattro
utenti.
Premere ENTER per 3 secondi per confermare l'utente. La prima barra
lampeggia.
Con i tasti SPEED è possibile impostare la velocità e con i pulsanti INCLINE
(inclinazione) è possibile impostare la pendenza della prima barra. Una volta
completata, confermare premendo ENTER. Dopo aver impostato anche
l'ultima barra, premere il tasto ENTER per 3 secondi e il profilo viene
salvato. Premere ENTER per attivare l'utente e immettere impostazione del
tempo. Con il tasto SPEED è possibile impostare la durata dell' allenamento.
Premere ENTER e impostare la distanza con il pulsante SPEED, poi
confermare con ENTER. Impostare poi il valore di calorie premendo i tasti
SPEED, quindi confermare con ENTER.
Premere il tasto ENTER per iniziare l'allenamento. Si prega di prestare
attenzione a impostare solo un valore per volta tra tempo, distanza o calorie.
Se si imposta subito un secondo valore, il primo valore impostato sarà
azzerato.
6) PROGRAMMA HRC
Questa funzione deve usare usata con una fascia toracica! In questo
programma il computer regola la VELOCITA' e l'INCLINAZIONE in funzione
del vostro battito cardiaco obiettivo. Se la velocità aumenta di 10 volte, la
pendenza aumenterà di un livello. Se la velocità diminuisce di 10 volte, la
pendenza diminuisce di 1 livello.
Premere ENTER per confermare il programma HRC e immettere la selezione
della frequenza cardiaca, il 60%, 75% o THR (impostazione individuale)
premendo SPEED.
Modalità 60% o 75%
Premere ENTER per confermare e immettere l'impostazione del tempo, nella
la gamma 20:00 - 99:00. Confermare con ENTER e impostate la vostra età
con i pulsanti SPEED; Premere ENTER per chiudere l'impostazione dell' età.
La finestra Bpm mostrerà il calcolo dell"obiettivo della frequenza cardiaca.
Premere ENTER per iniziare l'allenamento. La finestra bpm mostra la
frequenza cardiaca effettiva mentre la finestra THR mostra la frequenza
cardiaca obiettivo.

14
THR mode
Press ENTER for its confirmation and enter time setting, set the time
with the SPEED buttons, range 20:00-99:00. Confirm with and ENTER
adjust your max target heart rate with the SPED buttons. Press ENTER
to close the heart rate setting.
Press ENTER to start your workout. The bpm window shows the actual
heart rate and the THR window is showing the heart rate goal.
7) PROGRAM Body Fat
Press ENTER to confirm the Body Fat program and enter Age selection
by pressing SPEED. Press ENTER for confirmation and enter the Height
selection. With the SPEED buttons you can set the body. Confirm with
ENTER and set your sex with the SPEED buttons.
Confirm with ENTER and set your weight with pressing te SPEED buttons,
finally confirm your settings with ENTER.
Please hold the hand pulse sensor about 15 seconds and the window
will display the BODYFAT value. After 1 minute press STOP key then
can return to Standby page.
5.4 KGS/LBS switching mode
Pressing ENTER key under the body weight mode for 10 seconds, will
activate the KGS/LBS switching mode, if the LBS, LCD windows will
display "English". If the KGS, then the window display "Metric". By
pressing the SPEED buttons you can switch between KGS and LBS, to
confirm press ENTER .
5.4 Impostazioni dati KG/LBS
Premendo per 10 secondi il tasto ENTER nella la modalità peso
corporeo, si attiverà la modalità di commutazione = KGS / LBS,
se appare LBS, Lo schermo mostra "inglese". Viceversa se é KGS,
allora lo schermo visualizza "Metric". Premendo i tasti SPEED è
possibile passare da KGS a LBS, per confermare premere ENTER.
Modalità THR
Premere ENTER per confermare la selezione e immettere la durata con i tasti
SPEED, scegliendo nell'l'intervallo 20:00 - 99:00. Confermare con ENTER e
regolare la frequenza cardiaca massima desiderata con i tasti SPEED.
Premere ENTER per confermare l'impostazione della frequenza cardiaca.
Premere ENTER per iniziare l'allenamento. La finestra Bpm mostra la
frequenza cardiaca effettiva mentre la finestra THR mostra la frequenza
cardiaca obiettivo.
7) PROGRAMMA Body Fat (Grasso corporeo)
Premere ENTER per confermare il programma di grasso corporeo ed
immettere l'Età premendo SPEED. Premere ENTER per confermare e
immettere l' altezza. Con i tasti SPEED è possibile impostare i dati.
Confermare con ENTER e impostare il sesso con i pulsanti Velocità.
Confermare con ENTER e impostare il vostro peso premendo il pulsante
VELOCITA ', infine, confermare le impostazioni con il tasto ENTER.
Afferrare i sensori palmari per circa 15 secondi e la finestra visualizza il
valore BODYFAT. Dopo 1 minuto premere il tasto STOP, per tornare alla
pagina Standby.
Ottimo
Buono
Medio
Insuff.
Ottimo
Medio
Insuff.
Età
Uomo / Male
Donna / Female

15
6.1 Cura
•Per la pulizia dell nastro scorrevole utilizzare un aspirapolvere. Se il
nastro é veramente sporco, si prega di utilizzare un panno umido.
•Non utilizzare detergenti. Durante la pulizia, utilizzare solo un panno
umido e evitare detergenti troppo aggressivi. Assicurarsi di non bagnare/
inumidire alcuna parte del computer.
•È necessario pulire solo con un panno umido le componenti che entrano
in contatto con il sudore.
6.2 Centrare la cinghia di corsa
Durante l'esercizio, normalmente un piede spinge piu' forte dell'altro
sul nastro scorrevole. per questo motivo, la cinghia si sposta da un
lato e perde la sua centratura. Generalmente il nastro ritorna in posizione
centrale automaticamente, ma durante un esercizio prolungato può
succedere che il nastro resti fuori dal centro. In questo caso si prega di
seguire le istruzioni seguenti.
All'estremità posteriore del pianale di corsa, ci sono 2 viti che servono
appositamente per centrare il nastro. Si raccomanda di non usare abiti larghi
durante la procedura di centraggio.
-Per ogni passo ruotare la vite di allenamento non più di ¼ di giro.
- Stendere un lato e rilasciare l'altro lato.
- la velocità della cintura deve essere di 6 km / h, ma assicurarsi che
nessuno è
Correndo sulla cintura.
Se finisci il centraggio, passeggiate sul tapis roulant per circa 5 minuti, con
La velocità di 6km / h.
Se la cinghia di corsa non è ancora al centro, centrare nuovamente la
cintura. pagare
Attenzione, che non si forza la cintura troppo, una vita più breve sarà
causato.
Se il divario sul lato sinistro è troppo grande, si prega di:
- ruotare la vite di destra di ¼ di giro in senso antiorario (per allentarlo)
- ruotare la vite di sinistra in senso orario di ¼ di rotazione (per serrare)
Se il divario sul lato destro è troppo grande, si prega di:
- ruotare la vite sinistra di ¼ di rotazione in senso antiorario ( per allentarlo),
-quindi ruotare la vite destra di ¼ di rotazione in senso orario (per serrare).
6.1 Care
•For cleaning the running belt use a vacuum cleaner. If the belt is
really dirty, please use a wet cloth. Do not use any cleanser.
•When cleaning, use only a moist cloth and avoid harsh cleaning
agents. Ensure that no moisture comes into the computer.
•Components that come into contact with perspiration, need cleaning
only with a damp cloth.
6.2 Centering the running belt
During the exercise, one foot is pushing the running belt stronger than the
other. According to that, the belt will be moved out of the centre. Normally
the belt will be centred automatically, but during longerexercise, it can be,
that the belt is off the centre. In this case, please follow up the following
instruction. At the rear end of the running deck, there are 2 pcs of allen
screws, which will be used for centering the belt. Don't use any loose
clothes during centering.
-Please turn the allen screw not more than ¼ turn for each step.
-Stretch one side and release the other side.
-the speed of the belt has to be 6km/h, but make sure, that nobody is
running on the belt.
If you finish the centering, walk on the treadmill for about 5 minutes, with
the speed of 6km/h.
If the running belt is still not in centre, please centre the belt again. Pay
attention, that you don't force the belt too much, a shorter life will be
caused.
If the gap on the left side is too big, please:
-turn the left screw a ¼ turn clockwise (tighten it)
-turn the right screw a ¼ turn anticlockwise (loose it)
If the gap on the right side is too big, please:
-turn the left screw a ¼ turn anticlockwise (loose it)
-turn the right screw a ¼ turn clockwise (tighten it)
6. Cura e Manutenzione 6. Care and Maintenance

16
6.3 Tendere il nastro da corsa
Dopo un esercizio prolungato, la tensione della cintura diminuisce. Per
verificare, mettere un piede sul nastro scorrevole e vedere si si
blocca. Per risolvere questo problema, ruotare entrambe le viti (come
da figura qui sopra) in senso orario per ¼ di giro. Si prega di non
avvitare oltre. Se il nastro ha perso la sua centratura, si pregoa di
procedere come descritto al punto 6.2.
6.4 Lubrificare il nastro scorrevole
Per limitare l'usura del tapis roulant é bene preoccuparsi di lubrificare il
pianale almeno ogni 6 mesi per un utilizzo medio di 30 minuti, 3 volte per
settimana.
Per controllare lo stato di lubrificazione, assicuratevi che il tapis roulant sia
spento. Mettere la mano tra la cintura e il pianale. E controlare: se c'é
ancora del silicone (lubrificante) non è necessario lubrificare. Viceveresa se
é asciutto, è necessario lubrificare il nastro.
6.3 Tighten the belt
after longer exercise, the tension of the belt will decrease. It can be
checked if you put one foot on the belt and belt will stop. To solve
this problem, please turn both screws clockwise for ¼ turns. Please
do not turn them more. If the belt is running out of the centre, please
adjust it like described under 6.2.
6.4 Lubricate the running belt
A good lubricate running deck is minimizing the wear out. A lubrication
before the first training is not necessary. The lubrication should be done
every 6 month, if you do your exercise 3 times a week for 30 minutes.
For checking the lubrication, please make sure, that the treadmill is
switched off. Put your hand between the belt and the deck. If you still feel
some silicon, then it is no need for lubrication. If the backside of the belt
feels dry, then it is necessary to lubricate the belt.
Il nastro scorrevole é spostato verso destra
Il nastro scorrevole é spostato verso sinistra
Allargare il nastro
Stringere il nastro
Avvitare in senso anti orario
Avvitare in senso orario

7. Manuale dell'allenamento 7. Training manual
7.1 Frequenza dell' allenamento
Per migliorare la forma fisica e migliorare la condizione a lungo termine, si
consiglia di allenarsi almeno tre volte alla settimana. Questa è la frequenza
media di addestramento per un adulto al fine di ottenere il successo di
condizione a lungo termine o lo smaltimento di grassi in eccesso. Quando il
livello di allenamento inizia a migliorare, ci si puo' allenare anche ogni
giorno. È particolarmente importante allenarsi a intervalli regolari.
7.2 Intensità dell'allenamento
Strutturare con cura il proprio allenamento. L'intensità di allenamento deve
essere incrementata gradualmente, in modo che non si verifichino
fenomeni di affaticamento della muscolatura o del sistema di locomozione.
7.3 Allenamento guidato dalle pulsazioni cardiache
Per la propria zona di pulsazioni personali è consigliabile scegliere una
fascia di allenamento aerobico.
Gli incrementi della prestazione, nell'ambito della resistenza, sono
principalmente raggiunti da unità di allenamento lunghe nella gamma
aerobica.
Potete trovare questa zona nel diagramma delle pulsazioni target, o
orientarvii sul programma di pulsazioni. Dovreste completare l'80% del
vostro allenamento in questa gamma aerobica (fino al 75% del vostro
impulso massimo).
Nel rimanente 20%, è possibile incorporare picchi di carico per spostare la
soglia aerobica verso l'alto. Successivamente, con il conseguente
perfezionamento dell'allenamento, potete produrre prestazioni superiori
con la stessa pulsazione. Questo significa che si é ottenuto un
miglioramento della forma fisica.
Se si possiede già una certa esperienza di allenamento con il controllo
della pulsazione, si puo' abbinare la zona di pulsazione desiderata al
proprio piano speciale di allenamento o al proprio stato di forma fisica.
Training with the treadmill is an ideal movement training for strengthening
important muscle groups and the cardio-circulatory system.
General notes for Training
•Never train immediately after a meal.
•If possible, orientate training to pulse rate.
•Do muscle warm-up before starting training.
•When finishing training, please reduce speed. Never abruptly end
training.
7.1 Training frequency
To improve physical fitness and to enhance condition over the long term,
we recommend training at least three times a week. This is the average
training frequency for an adult in order to obtain long-term condition
success or high fat burning. As your fitness level increases, you can also
train daily. It is particularly important to train at regular intervals.
7.2 Training intensity
Carefully structure your training. Training intensity should be increased
gradually, so that no fatigue phenomena of the musculature or the
locomotion system occurs.
7.3 Heart rate orientated training
For your personal pulse zone it is recommended that an aerobic training
range will be chosen. Performance increases in the endurance range are
principally achieved by long training units in the aerobic range. Find this
zone in the target pulse diagram or orientate yourself on the pulse
programs. You should complete 80% of your training time in this aerobic
range (up to 75% of your maximum pulse).
In the remaining 20% of the time, you can incorporate load peaks, in order
to shift your aerobic threshold upwards. With the resulting training success
you can later produce higher performance at the same pulse; this means
an improvement in your physical shape.
If you already have some experience in pulse-controlled training, you can
match your desired pulse zone to your special training plan or fitness
status.
17
Come procedere:
1) Fermare il nastro, in modo che la cintura del tapepto sia sul lato
superiore.
2) Sollevare un po 'la cintura e mettere un po' di silicone tra il pianale
e il nastro scorrvole nel centro, partendo dalla parte anteriore, fino
alla parte posteriore; ripetere una seconda volta in sneso inverso.
3) Avviare il tapis roulant con una velocità di 1 km / h e camminare sul
tapis roulant da sinistra a destra, in modo che la cinghia possa
assorbire molto bene il silicone.
How to do it:
1) Stop the belt, that the seam is stopped on top side.
2) Lift the belt a little bit and put some silicon between the deck and
the belt in the centre, starting from the front side, ending at the rear
side. Lubricate it again from the other side.
3) Start the treadmill with a speed of 1km/h and walk on the treadmill
from left to right side, so that the belt can absorb the silicon very
well.
L'allenamento con il tapis roulant è un esercizio ideale per il
rafforzamento di importanti gruppi muscolari e il sistema cardio-
circolatorio.
Note generali per l'allenamento
•Mai allenarsi subito dopo un pasto.
•Se possibile, imposatre l'allenamento con frequenza cardiaca.
•Fare risacladamento o esercizi di stretching prima di iniziare
l'allenamento.
•Quando si finisce l'allenamento, si prega di ridurre la velocità.
Mai terminare bruscamente l'allenamento.

Note:
Because there are persons who have „high“ and „low“ pulses, the
individual optimum pulse zones (aerobic zone, anaerobic zone) may differ
from those of the general public (target pulse diagram).
In these cases, training must be configured according to individual
experience. If beginners are confronted with this phenomenon, it
is important that a physician will be consulted before starting training, in
order to check health capacity for training.
7.4 Training control
Both medically and in terms of training physiology, pulse-controlled
training makes most sense and is orientated on the individual maximum
pulse.
This rule applies both to beginners, ambitious recreational athletes and to
pros. Depending on the goal of training and performance status, training is
done at a specific intensity of individual maximum pulse
(expressed in percentage points).
In order to effectively configure cardio circulatory training according to
sport-medical aspects, we recommend a training pulse rate of 70% - 85%
of maximum pulse. Please refer to the following target pulse diagram.
Measure your pulse rate at the following points in time:
1. Before training = resting pulse
2. 10 minutes after starting training = training / working pulse
3. One minute after training = recovery pulse
•During the first weeks, it is recommended that training will
be done at a pulse rate at the lower limit of the training pulse zone
(approximately 70 %) or lower.
•During the next 2 - 4 months, intensify training stepwise
until you reach the upper end of the training pulse zone
(approximately 85 %), but without overexerting yourself.
•If you are in good training condition, disperse easier
units in the lower aerobic range here and there in the training
program so that you regenerate sufficiently. „Good“ training always
means training intelligently, which includes regeneration at the
right time. Otherwise overtraining results and your form
degenerates.
•Every loading training unit in the upper pulse range of individual
performance should always be followed in subsequent training by a
regenerative training unit in the lower pulse range (up to 75 %of
the maximum pulse).
18
Nota:
Poiché ci sono persone che hanno battiti "elevati" e battiti "deboli", le zone
individuali di battiti ottimali (zona aerobica, zona anaerobica) possono differire
da quelle del pubblico generico (diagramma impulso target). In questi
casi, l'allenamento dovrebbe essere impostato in base all' esperienza
individuale. Ma se state iniziando il volstro allenamento per la prima volta, é
necessario effettuare una visita medica prima di iniziare l'allenamento, al
fine di valutare l'idoneità e lo stato di salute per attività sportiva.
7.4 Controllo dell'allenamento
Sia a livello medico, che in termini di allenamento fisico,
l' allenamento controllato dai battiti cardiaci ha molto più senso ed è basato
sulla pulsazione massima personale.
Questa regola vale sia per i principianti, che per gli atleti amatoriali e
professionisti. A seconda dell'obiettivo dell' allenamento e il livello di
prestazioni (espresso in punti percentuali) é bene allenarsi con un'intensità
specifica di pulsazione massima individuale.
Per impstare l'esercizio cardiovascolare in modo efficace dal punto di vista
della medicina dello sport, si consiglia una frequenza cardiaca di
allenamento pari al 70% - 85% della pulsazione massima. Si prega di
riferirsi allo schema fornito di seguito.
Misurare la frequenza cardiaca nei seguenti momenti:
1. Prima dell'allenamento = polso a riposo
2. 10 minuti dopo l'inizio dell'allenamento = polso di allenamento
3. Un minuto dopo l'allenamento = polso di recupero
•Durante le prime settimane è consigliabile allenarsi ad una frequenza
cardiaca al limite inferiore della Zona di allenamento (circa il 70%) o al
di sotto.
•Nel corso dei 2-4 mesi successivi, intensificare l'allenamento
gradualmente fino a raggiungere l'estremità superiore della Zona
(circa 85%), ma senza oltrepassarla.
•Se siete in buone condizioni di allenamento, prevedere periodicamente
unità più semplici di allenamento aerobico, al fine di rigenerarsi a
sufficienza durante l'allenamento. Un
"buon" allenamento prevede di allenarsi sempre in modo intelligente,
con una fase di recupero al momento giusto. In caso contrario, si
rischia un sovrallenamento, e di lavorare in maniera errata con
possibili rischi per la vostra salute.
•Ogni carico di allenamento verso l'intervallo superiore delle prestazioni
individuali, dovrebbe essere seguito sempre, nell'allenamento
successivoda, da un'unità di esercizio di rigenerazione nel campo
delle pulsazioni inferiori (fino al 75%della frequenza cardiaca
massima).

When condition has improved, higher intensity of training is required
for the pulse rate to reach the „training zone“; that means, the
organism is capable of higher performance.
Calculation of the training / working pulse:
220 pulse beats per minute minus age = personal, maximum heart rate
(100 %).
Training pulse
Lower limit:
Upper limit:
(220 - age) x 0.70
(220 - age) x 0.85
7.5 Training duration
Every training unit should ideally consist of a warm-up phase, a training
phase, and a cool-down phase in order to prevent injuries.
Warm-up:
5 to 10 minutes of slow running.
Training:
15 to 40 minutes of intensive or not overtaxing training at the intensity
mentioned above.
Cool-down:
5 to 10 minutes of slow running.
Stop training immediately if you feel unwell or if any signs of overexer-
tion occur.
Alterations of metabolic activity during training:
•In the first 10 minutes of endurance performance our
bodies consume the sugars stored in our muscles
Glycogen.
•After about 10 minutes fat is burned in addition.
•After 30 - 40 minutes fat metabolism is activated, then the
body's fat is the main source of energy.
19
Quando la condizione fisica migliora, è necessaria una maggiore intensità
di allenamento per raggiungere con le pulsazioni la "zona di
allenamento"; Cio' sigifica che l'organismo è in grado di ottenere
prestazioni più elevate.
Calcolo delle pulsazioni di allenamento: 220 battiti al minuto meno età =
frequenza cardiaca personale max
(100%).
Polso di allenamento
Limite inferiore: (220 - età) x 0,70
Limite superiore (220 - età) x 0,85
7.5 Durata dell' allenamento
Al fine di prevenire gli infortunin ogni unità di allenamento dovrebbe
prevedere idealmente una fase di riscaldamento, una fase di lavoro, e
una fase di raffreddamento.
Riscaldamento:
Da 5 a 10 minuti di pedalata lenta con aumento di intensità.
Allenamento:
Da15 a 40 minuti di pedalata intensa senza sovraccaricare, o all'intensità
citata sopra.
Raffreddamento:
Da 5 a 10 minuti di pedalata lenta, seguiti da ginnastica allungamenti,
per sciogliere i muscoli.
Smettere l'allenamento immediatamente se si avvertono dolori, o se si
avvertono segni di sovraffaticamento.
Alterazioni di attività metabolica durante l'allenamento:
•Nei primi 10 minuti di prestazioni di resistenza il corpo consuma gli
zuccheri (il glicogeno) immagazzinati nei nostri muscoli.
•Dopo circa 10 minuti di esercizio viene bruciato il grasso.
•Dopo 30-40 minuti di metabolismo dei grassi, il grasso corporeo è la
fonte principale di energia.
This manual suits for next models
1
Table of contents
Other Finnlo Treadmill manuals

Finnlo
Finnlo TECHNUM User manual

Finnlo
Finnlo Alpine IV User manual

Finnlo
Finnlo ENDURANCE TFT User manual

Finnlo
Finnlo 3513 User manual

Finnlo
Finnlo maximum Series User manual

Finnlo
Finnlo maximum Series User manual

Finnlo
Finnlo TECHNUM II User manual

Finnlo
Finnlo TECHNUM IV User manual

Finnlo
Finnlo TECHNUM V User manual

Finnlo
Finnlo ALPINE III User manual